Table of Contents
Advertisement
Advertisement
Table of Contents

Related Manuals for Sony Vaio PCG-FX501


Summary of Contents for Sony Vaio PCG-FX501
- Page 1 Sony notebook user guide P C G - F X S e r i e s...
-
Page 2: Read This First
Sony Corporation reserves the right to make any modification to this manual or the information contained herein at any time without notice. The software described herein is governed by the terms of a separate user license agreement. Sony, DVgate, i.LINK™ and the i.LINK logo, PictureGear, Memory Stick and the Memory Stick logo, VAIO and the VAIO logo are trademarks of Sony Corporation. - Page 3 Specifications are subject to change without notice. ® NERGY ® ® As an E Partner, Sony has determined that this product meets the E guidelines for energy efficiency. NERGY NERGY TAR ® The International E Office Equipment Program is an international program that promotes energy saving through the use of computers NERGY and their office equipment.
-
Page 4: Safety Information
Safety information Owner's record The model number and serial number are located on the bottom of your Sony notebook. Record the serial number in the space provided here. Refer to the model and serial number if you call VAIO-Link. Serial number: ________________________... - Page 5 Read this first Connectivity Never install modem or telephone wiring during a severe lightning storm. Never install telephone jacks in wet locations unless the jack is specifically designed for wet locations. Be cautious when installing or modifying telephone lines. Use your notebook only with the supplied AC adapter. To disconnect your notebook completely from mains voltage, unplug the AC adapter.
-
Page 6: Regulatory Information
Regulatory information Sony hereby declares that this product is in compliance with the essential requirements and other relevant provisions of European Directive 1999/5/EC This product complies with EN 55022 Class B and EN 55024 for use in following areas: residential, commercial and light-industrial. - Page 7 Read this first Disposing of lithium ion batteries Do not handle damaged or leaking lithium ion batteries. Dispose of promptly and properly. Danger of explosion if battery is incorrectly replaced. Replace only with the same or equivalent type recommended by the manufacturer.
- Page 8 Portability - The rechargeable battery pack provides hours of use without AC power. Sony audio and video quality - A high-resolution LCD screen enables you to take advantage of today’s advanced multimedia applications, games, and entertainment software.
-
Page 9: Documentation Pack
Online documentation The Sony Notebook User Guide: Using Your Sony Notebook shows you how to use the standard components of your system. In this part of the manual you will also find out what you can do with a Memory Stick™. - Page 10 Welcome Refer to your Software Guide for information on the bundled software and the Sony applications. About the Software is a short description of the features of the software pre-installed on your system. Customizing your notebook explains how to set your system and power management.
- Page 11 Welcome Your notebook and its accessories Following hardware items are in the box: main unit product recovery CD-ROMs documentation pack AC adapter floppy disk drive rechargeable battery pack weight saver video cable phone plug (country specific) phone cable power cord...
-
Page 12: Ergonomic Considerations
Welcome Ergonomic considerations You will be using your notebook as a portable device in a variety of environments. Whenever possible, you should attempt to take account of the following ergonomic considerations to both stationary and portable environments: Position of your computer – Place the computer directly in front of you (1). Keep your forearms horizontal (2), with your wrists in a neutral, comfortable position (3) while using the keyboard, touchpad, or external mouse. - Page 13 Welcome Viewing angle of the computer’s display – Use the display’s tilting feature to find the best position. You can reduce eye strain and muscle fatigue by adjusting the tilt of the display to the proper position. Adjust the brightness setting of the display as well. Lighting –...
-
Page 14: Using Your Notebook
Using your notebook Using your notebook This section describes how to start using your computer and how to use your computer’s internal and external devices. Locating controls and connectors Right power button DVD-ROM drive*/CD-RW + DVD-ROM drive** multi-purpose bay * on the PCG-FX501 ** on the PCG-FX502 and PCG-FX505 (page 27) (page 35) -
Page 15: Table Of Contents
Using your notebook Left TV Out connector (page 68) microphone connector (page 71) headphone connector (page 70) i.LINK™ connector (page 75) PC Card slots (page 45) battery bay (page 19) - Page 16 Using your notebook Front LCD screen (page 33) speakers (page 70) keyboard (page 29) touchpad (page 34) left/right buttons (page 34) power indicator (page 32) battery 1 and 2 indicators (page 32) hard disk drive indicator (page 32) Num Lock indicator (page 32) Caps Lock indicator (page 32)
- Page 17 Using your notebook Back phone line jack (page 57) (page 72) serial connector printer connector (page 73) There is a ventilation slot located near the USB connector. Do not cover the ventilation slot when the computer is on. monitor/VGA connector (page 65) Ethernet connector (page 77)
- Page 18 Using your notebook Bottom release lever (page 41) tilt stands (page 11)
-
Page 19: Dc In Connector
Using your notebook Connecting a power source You can use either an AC adapter or a rechargeable battery pack as a power source. Using the AC adapter To use the AC adapter, proceed as follows: Plug the cable attached to the AC adapter (1) into the DC In connector (2) on the computer. Plug one end of the power cord (3) into the AC adapter. -
Page 20: Battery Bay
Using your notebook Using the battery pack You can use one or two batteries as a source of power. You can insert the second battery pack into the multi-purpose bay on the right side of the computer. Additional battery packs are available as a separate option. The battery pack supplied with your computer is not fully charged at the time of purchase. - Page 21 Using your notebook Charging the battery pack To charge the battery pack, proceed as follows: Connect the AC adapter to the computer. Insert the battery pack. The computer automatically charges the battery (1) (the battery indicator (2) light flashes in a double blink pattern as the battery charges).
- Page 22 Using your notebook The battery pack supplied with your computer is a lithium ion battery and can be recharged any time. Charging a partially discharged battery does not affect battery life. The battery indicator light is on while you use the battery pack as a power source. When the battery life is nearly depleted, the battery indicator starts flashing. For some software applications and some peripheral devices, your computer may not enter Hibernate mode when battery life is low.
- Page 23 Using your notebook Removing the battery pack To remove the battery pack, proceed as follows: Turn off the computer. Open the cover of the battery bay. Pull out the battery pack. Close the cover of the battery bay. You may lose data if you remove the battery pack while the computer is on and not connected to the AC adapter or if you remove the battery while the computer is in Standby mode.
- Page 24 Using your notebook Using the second battery pack You can purchase a second rechargeable battery pack. With two battery packs, you can extend the time you use your computer with battery power. When using two battery packs, the battery pack you insert first, charges first. The battery pack you insert second, charges when the first battery pack is 85 percent full.
- Page 25 Using your notebook If you attach two battery packs, you can remove one of them without shutting down the computer. When removing one battery pack, make sure that the other battery pack indicator is on. If the indicator of the battery pack your are going to remove is on, right-click the battery icon in the system tray and click the Switch Discharge Battery option.
- Page 26 Using your notebook Charging the second battery pack To charge the second battery pack, proceed as follows: Keep the battery pack (1-3) in the computer while it is connected to AC power. The battery indicator (2) flashes while the battery is charging. When the battery indicator stops flashing, the battery is fully charged.
- Page 27 Using your notebook Removing the second battery pack To remove the second battery pack, proceed as follows: Slide the eject lever on the bottom of the weight saver, in the direction of arrow 1. Slide the release lever on the bottom of the computer in the direction of arrow 2. Remove the weight saver.
-
Page 28: Starting Your Notebook
Using your notebook Starting your notebook To start your computer, proceed as follows: Slide the LCD lock lever (1) in the direction of the arrow, and lift the cover. Press the power button (2) of the computer until the green power indicator (3) light turns on. If necessary, press <Fn>+<F5>... -
Page 29: Shutting Down Your Notebook
Using your notebook Shutting down your notebook It is important that you shut down your computer properly so you do not lose unsaved data. To shut down your computer, proceed as follows: Click the Start button on the Windows Click Turn Off Computer. The Turn off computer dialog box appears. -
Page 30: Keyboard
Using your notebook Using the keyboard Your keyboard is very similar to a desktop computer’s, but has additional keys that perform specific notebook-related tasks. - Page 31 Using your notebook Keys Escape key (1) Function keys (2) Print Screen key (3) Correction keys (4) Navigation keys (5) Application key (6) Numeric keypad area (7) Operator keys (8-11-12) ® Windows key (9) Fn key (10) Descriptions The <Esc> (Escape) key is used to cancel commands. The twelve function keys along the top of the keyboard are used to perform designated tasks.
-
Page 32: Combinations And Functions With The Windows Key
Using your notebook Combinations and functions with the Windows key Combinations Functions + F1 Displays Windows Help and Support Center. + Tab Switches the selected button on the taskbar. Displays My Computer. Displays the Search Results window to find a file or folder. This is equivalent to selecting Search and then All files or folders from the Start menu. - Page 33 Using your notebook Indicators Indicator Functions Power on: lights green. Power Standby mode: flashes umber. Indicates the status of the battery inserted in the battery bay on the left side of the Battery 1 computer. Indicates the status of the battery inserted in the battery bay on the right side of Battery 2 the computer.
-
Page 34: Combinations And Functions With The Fn Key
Using your notebook Combinations and functions with the Fn key Combinations/ Feature <Fn>+ (ESC): Standby <Fn>+ (F3): speaker switch <Fn> + (F4): speaker volume <Fn> + (F5): brightness control <Fn>+ (F7)*: switch to the external display <Fn> + (F8)* <Fn>+ (F12): Hibernate This function can only be used by the first user to log on. -
Page 35: Touchpad
Using your notebook Using the touchpad The keyboard contains a cursor-pointing device, your touchpad (1). You can point to, select, drag, and scroll objects on the screen using the built-in touchpad. Action Description point Slide one finger on the touchpad to place the pointer (2) on an item or object. click Press the left button (3) once. - Page 36 Using your notebook Using the CD-RW/DVD-ROM drive or DVD-ROM Depending on your model, your computer is equipped with a CD-RW/DVD-ROM drive or a DVD-ROM. To insert a disc, proceed as follows: Turn on the computer. Press the eject button (1) to open the drive. The tray slides out.
- Page 37 Using your notebook When the computer is in Standby or Hibernate mode, you cannot insert or remove a disc. Be sure to seat the disc firmly over the disc drive hub fingers. If you do not seat the disc firmly, you could damage your disc drive and you may not be able to open the tray.
- Page 38 Using your notebook Before writing to a new CD-RW, you must first format the disc. If you do not format the disc, your computer will not recognize it. To make a CD-R’s data readable on a CD-ROM drive, you need to close the session when you eject it. To complete this process, follow the instructions included with your software.
- Page 39 Using your notebook Do not switch power saving modes while playing a DVD video. If the virus checker is active, you need to disable it. Do not use resident disc utilities or resident utilities to speed up the access of discs, because they may cause the system to become unstable.
-
Page 40: Using The Weight Saver
Using your notebook Using the weight saver The weight saver protects the multi-purpose bay when it is empty. To attach the weight saver, proceed as follows: If another device is in the multi-purpose bay, remove the device. Pull out the guide (1) of the weight saver and slide the weight saver in the direction of the arrow (2) until it clicks. - Page 41 Using your notebook To remove the weight saver, proceed as follows: Slide the eject lever of the weight saver in the direction of arrow 1. Slide the release lever on the bottom of the computer in the direction of arrow 2.
-
Page 42: Using The Floppy Disk Drive
Using your notebook Using the floppy disk drive Your computer is supplied with a removable floppy disk drive. When you do not use it, you can replace it with the bundled weight saver. Inserting the floppy disk drive To insert the floppy disk drive, proceed as follows: Turn off the computer. - Page 43 Using your notebook Inserting a diskette To insert a diskette, proceed as follows: Hold the diskette (1) with the label side facing up. Gently push the diskette into the floppy disk drive (2) until it clicks into place.
- Page 44 Using your notebook Removing a diskette To remove a diskette, proceed as follows: Wait until the LED indicator (1) turns off. Press the eject button (2) to remove the diskette. Do not press the Eject button when the LED indicator is turned on. Otherwise, data may be lost.
- Page 45 Using your notebook Removing the floppy disk drive To remove the floppy disk drive, proceed as follows: Turn off the computer. Slide the release lever (1) on the bottom of the computer in the direction of the arrow. Slide the drive (2) out of the multi-purpose bay. Insert the weight saver.
-
Page 46: Pc Card Slots
Using your notebook Using PC Cards This computer has a PC Card slot that supports Type II PC Cards. PC Cards allow you to connect portable external devices. You do not need to shut down your computer when inserting a PC Card. Inserting a PC Card To insert a PC Card, proceed as follows: Insert the PC Card into one of the PC Card slots front label facing up. - Page 47 Using your notebook Some PC Cards may require you to disable idle devices when using the PC Card. Be sure to use the most recent software driver provided by the PC Card manufacturer. If an “!” mark appears in the Device Manager dialog box, remove the software driver and then reinstall it. You do not need to shut down the computer before inserting or removing a PC Card.
-
Page 48: Removing A Pc Card
Using your notebook Removing a PC Card Follow the steps below to remove the PC card while your computer is on. If it is not removed properly, your system may not work properly. If you want to remove a PC Card when your computer is off, skip steps 1 to 6. To remove a PC Card, proceed as follows: Right-click the Safely Remove Hardware icon in the taskbar. -
Page 49: Using Memory Stick
There are currently two different types of Memory Stick™: The generic Memory Stick™, coloured blue. The MagicGate Memory Stick You can purchase Memory Sticks™ from the Sony Style website (http://www.sonystyle-europe.com), or from your local Sony dealer. ™ , coloured white. - Page 50 Using your notebook Why Memory Stick™? Sony's vision is to expand the world of communication, promoting the portability of digital data. The Memory Stick is the resulting medium, through which digital devices can be instantly connected. With it, you can download data from any compatible device, then transfer it to another in a single and instant transfer.
- Page 51 Using your notebook Generic Memory Stick™ The original Memory Stick™, blue in colour, can be used to record image data taken with digital still cameras, etc. or data from the PC. With it, you can record, play back and transfer various kinds of data at any given time. Because it is easy to remove and transport safely, you can use Memory Stick™...
- Page 52 MagicGate is a copyright protection technology that complies with the standards set by SDMI (Secure Digital Music Initiative, an organization working to draw up industry standard specifications in order to protect copyrights of digital music). logo indicates the copyright protection system devised by Sony. It is not meant to guarantee compatibility with other media.
- Page 53 Secure Music Digital Initiative (SDMI) to study technology for protecting copyrights during the electronic distribution of music. Sony offers the MagicGate Memory Stick™ and Memory Stick™ Walkman with a copyright protection function that complies with SDMI standards, thereby providing an environment where individuals can record and enjoy third-party music data without worrying about copyright infringement.
- Page 54 There are nearly 80 Memory Stick™-enabled products on the market or announced for introduction worldwide, ranging from camcorders and portable music players to voice recorders and many other electronic devices. You can currently use Memory Sticks™ with the following Sony products: Visual:...
-
Page 55: Inserting A Memory Stick
Using your notebook Inserting a Memory Stick™ To insert a Memory Stick™, proceed as follows: Once you have stored your data from your digital device, insert the Memory Stick™ (1) into the optional PC Card adapter (2). Push the Release button. The Release button pops out. -
Page 56: Removing A Memory Stick
Using your notebook Removing a Memory Stick™ To remove a Memory Stick™, proceed as follows: Double-click the Safely Remove Hardware icon in the taskbar. The Safely Remove Hardware dialog box appears. Select the hardware device you want to unplug. Click Stop. In the Stop a Hardware device dialog box, select the device that can be safely removed from the system. - Page 57 Using your notebook Write-protecting a Memory Stick™ Memory Sticks™ are designed with an erasure prevention switch to protect valuable data from accidental erasure or overwriting. Move the tab to the right or left to set or release write-protection. When the erasure prevention switch is off, data can be saved on the Memory Stick™.
-
Page 58: Phone Line Jack
Using your notebook Using the modem Your notebook is equipped with an internal modem. You need to connect a phone line to take advantage of online services and the Internet, to register your computer and software online, and to contact VAIO-Link. To connect a phone line, proceed as follows: Plug one end of the phone cable (1) into the phone line jack on the computer. -
Page 59: Power Indicator
Using your notebook Using power saving modes When you use a battery as the source of power for your computer, you can take advantage of power management settings to conserve battery life. In addition to the normal operating mode, which allows you to turn off specific devices, your computer has two distinct power saving modes: Standby and Hibernate. -
Page 60: Using Hibernate Mode
Using your notebook If you press the power button for more than four seconds, the computer will switch off automatically. When the computer is in Standby mode, you cannot insert a disc. Standby requires less time than Hibernate. Standby uses more power than Hibernate. Using Hibernate mode The state of the system is saved on the hard disk and power is turned off. -
Page 61: Connecting Peripheral Devices
Connecting peripheral devices Connecting peripheral devices You can add functionality to your computer by connecting or using any of these peripherals. Before you connect peripherals, turn off the computer and all peripherals. Connect the power cord only after connecting all cables. Turn on the computer only after turning on all peripherals. -
Page 62: Connecting A Port Replicator
Connecting peripheral devices Connecting a port replicator Your notebook supports the use of an optional port replicator. Attaching a port replicator enables you to connect additional peripherals to your computer, such as a printer or an external display. serial connector printer connector monitor/VGA connector network connector... - Page 63 Connecting peripheral devices Attaching your computer to the port replicator To attach your computer to the port replicator, proceed as follows: Turn off the computer and disconnect all peripherals. On the bottom of the computer, lift the port replicator port cover. Attach the bottom of the computer to the port replicator connector until it clicks.
-
Page 64: Turn On The Computer
Connecting peripheral devices Plug the power cord (4) into the AC adapter and an AC outlet. The power indicator light turns green. Turn on the computer. When you use the port replicator for the first time, the installation of the network drivers starts automatically. When attaching your computer to the port replicator, do not attempt to insert or remove the battery pack. -
Page 65: Disconnecting Your Computer From The Port Replicator
Connecting peripheral devices Disconnecting your computer from the port replicator To disconnect your computer from the port replicator, proceed as follows: Turn off the computer and the connected peripherals. Pull the levers on each side of the port replicator (1) to disconnect the computer from the port replicator. Lift the computer away from the port replicator. -
Page 66: Connecting An External Display
Connecting peripheral devices Connecting an external display You can connect an external display to your notebook. For example, you can use your computer with the following devices: Computer display (monitor); Multimedia computer display; Projector. Turn off your computer and the peripherals, unplug the AC adapter and the power cord before connecting the external display. Connect the power cord after connecting all other cables. - Page 67 Connecting peripheral devices Connecting a computer display To connect a computer display, proceed as follows: Plug the display cable (1) in the monitor/VGA connector (2) If necessary, plug one end of the display’s power cord (3) into the display, and the other end into an AC outlet. on the computer.
- Page 68 Connecting peripheral devices Connecting a multimedia computer display You can connect the notebook to a multimedia computer display that includes built-in speakers and a microphone. To connect a multimedia computer display, proceed as follows: Plug the display cable (1) in the monitor connector (2) Plug the speaker cable (3) in the headphone connector (4) Plug the microphone cable (5) in the microphone connector (6) on the computer.
-
Page 69: Tv Out Connector
Connecting peripheral devices Connecting a TV To connect a TV, proceed as follows: Plug one end of the audio/video cable (1) into the TV Out connector (2) (yellow) and the other end into the TV. Plug one end of the sound cable (3) into the headphone connector (4) and the other end into the TV. Plug the power cord of the TV (5) into an AC outlet. -
Page 70: Lcd Screen
Connecting peripheral devices Connecting a projector You can use a projector as an external display, such as the Sony LCD Projector. To connect a projector, proceed as follows: Plug the RGB signal cable (1) into the monitor connector (2) identified by the Plug the audio cable (3) (not supplied) into the earphone connector (4) identified by the Plug the RGB signal cable and the audio cable into the connector of the projector (5). -
Page 71: Speakers
Connecting peripheral devices Connecting external speakers You can enhance the sound quality of your computer by connecting external speakers. To connect external speakers, proceed as follows: Plug the speaker cable (1) into the earphone connector (2). Plug the other end of the speaker cable into the external speaker. Turn down the volume of the speakers before you turn them on. -
Page 72: Microphone Connector
Connecting peripheral devices Connecting an external microphone Your VAIO notebook does not contain an internal microphone. If you need to use a sound input device, for example to chat on the Internet, you need to plug in an external microphone. To connect an external microphone, proceed as follows: Plug the microphone cable (1) into the microphone connector (2) identified by the symbol. -
Page 73: Usb Port
Connecting peripheral devices Connecting a Universal Serial Bus (USB) mouse You can connect a USB device (e.g. mouse, floppy disk drive, keyboard, printer, …) to your computer. Before connecting or disconnecting a USB peripheral, you do not need to shut down the computer. You may need to install software (device drivers) supplied with your USB device before using the USB device. -
Page 74: Connecting A Printer
Connecting peripheral devices Connecting a printer You can connect a Windows-compatible printer to your computer to print documents. Connecting a printer using the USB connector You can connect a USB printer compatible with your version of Windows to your computer. To connect a printer using the USB connector, proceed as follows: Plug an optional USB printer cable (1) into the USB connector (2) identified by the printer. - Page 75 Connecting peripheral devices Connecting a printer using the printer connector To connect a printer using the printer connector, proceed as follows: Plug the printer cable (1) supplied with the printer into the printer connector (2) identified by the Plug the printer power cord (3) into an AC outlet. symbol.
-
Page 76: I.link™ Connector
Connecting peripheral devices Connecting an i.LINK™ device Your computer includes an i.LINK™ (IEEE1394) connector, which you can use to connect to an i.LINK™ device such as a digital video camera recorder or to connect two VAIO notebooks in order to copy, delete or edit files. The i.LINK™... -
Page 77: Connecting A Digital Video Camera Recorder
On Sony digital video cameras, connectors labeled DV Out, DV In/Out or i.LINK™ are i.LINK™-compatible. The Sony digital video camera recorder is an example; your digital video camera recorder may need to be connected differently. If your digital video camera recorder includes a Memory Stick™ slot, you can copy images from it to your computer via a Memory Stick™. To do so, simply copy images on the Memory Stick™, then insert it into the Memory Stick™... -
Page 78: Connecting To A Network (Lan)
Connecting peripheral devices Connecting to a network (LAN) You can connect your computer to 10BASE-T/100BASE-TX-type networks via an Ethernet network cable. For the detailed settings and devices needed to connect to the network, consult your Network Administrator. For more information about connecting your notebook to the network, please consult the Hardware troubleshooting section of the Vaio-Link website: How to troubleshoot network problems Do not plug a phone cable into your computer network jack. -
Page 79: Getting Help
Getting help Getting help This section describes how to get help and support from Sony, as well as troubleshooting tips for your computer. Sony support options Sony provides several support options for your computer. Printed documentation supplied with your notebook A Getting Started brochure, where you find a brief description of the items in your box, some specifications of your notebook, and how to set up your notebook;... -
Page 80: Other Sources Of Information
Getting help Other sources of information The online help files that accompany your pre-installed software contain instructions on using the software. VAIO-Link website: if you have any problem with your computer, you can access the VAIO-Link web site. Go to: http://www.vaio-link.com VAIO-Link Response Centre: Before contacting VAIO-Link Response Centre, try to solve the problem by reading the User Guides and help files for the peripherals or software. -
Page 81: Troubleshooting
Getting help Troubleshooting This section describes how to solve common problems you might encounter when using your notebook. Many problems have simple solutions. Please, try these suggestions before contacting VAIO-Link. About the computer and software My computer does not start Check that the computer is plugged into a power source and that it is turned on. - Page 82 If the floppy disk drive is empty, proceed as follows to initialize the BIOS: Turn off the computer. Remove any peripheral devices connected to the computer. Turn on the computer and press <F2> when the Sony logo appears. The BIOS setup menu screen appears. Set the date (month/day/year).
- Page 83 Getting help My computer does not shut down It is recommended that you shut down your computer using the Turn Off Computer command on the Windows Start menu. Using other methods, including those listed here, may result in loss of unsaved data. If the Turn Off command does not work properly, proceed as follows: Restart the computer by pressing <Ctrl>...
- Page 84 Getting help My software program locks up or crashes Contact the software publisher or designated provider for technical support. My touchpad interprets a single tap as a double-click Open the Mouse icon in the Control Panel and change the button assignments in the Mouse Properties dialog box. One of the buttons is assigned to the double-click action.
- Page 85 Getting help The screen image on my external display is not centered or sized properly Use the controls on your external display to adjust the image. About CDs and diskettes My CD-RW/DVD-ROM drive tray or DVD-ROM drive tray does not open Make sure the computer is turned on.
- Page 86 Getting help If you hear sound but cannot see video, your computer's video resolution may be set too high. For best results, change the resolution in Windows Control Panel - Display - Settings to 800 x 600 using the minimum color settings.
- Page 87 Getting help When I double-click an application icon a message such as You must insert the application CD into your CD-ROM drive appears and the software does not start. Some titles require specific files that are located on the application CD-ROM. Insert the disc and try starting the program again.
-
Page 88: Headphone Connector
Getting help The disc tray ejects even when it has been locked into place Ensure that the disc is placed with the label side facing up. Clean the disc and the CD-ROM drive lens. The disc may be scratched. Place another disc to see if that is the reason. There may be condensation in the drive. - Page 89 Getting help About the modem My internal modem does not work Check that the phone line is plugged into your computer. Check that the phone line is working. You can check the line by plugging in an ordinary phone and listening for a dial tone.
- Page 90 Use manual import/export in DVGate motion if problems occur with third party cameras. You are strongly advised to use only Sony i.LINK™ cables, as using other brands may cause problems with the i.LINK™ devices.
- Page 91 To change the printer port mode, proceed as follows: Restart your computer. When you see the Sony logo, press <F2>. You are in the BIOS. Go to the Advanced menu. Use the minus sign on the numeric keyboard to change the printer port mode.
- Page 92 Getting help About power management The power management setting is not responding Your notebook’s operating system may become unstable if a lower power state, such as Hibernate is initiated, and then changed before the notebook completely enters the lower power state. To restore the notebook to its normal operating stability, proceed as follows: Close all open applications.
- Page 93 Precautions Precautions This section describes safety guidelines and precautions to help you protect your computer from potential damage. Your notebook and memory modules use high precision components and electronic connectors technology. To avoid the invalidation of your guarantee by mishandling, it is recommended that: You contact your dealer to install a new memory module.
- Page 94 Precautions Changing the memory In the future you may want to change memory modules in order to expand the functionality of your computer. You can increase the memory by installing optional memory modules. Be careful when changing memory. Mistakes on installation or removal of the memory module may cause a malfunction.
-
Page 95: Removing A Memory Module
Precautions - Strong magnets or speakers that are not magnetically shielded, - Ambient temperature of more than +35°C or less than +5°C, - High humidity. Removing a memory module To remove a memory module, proceed as follows: Shut down your computer. Disconnect all peripheral devices. - Page 96 Precautions Installing a memory module To install a memory module, proceed as follows: Shut down your computer and disconnect all peripheral devices. Unplug the computer and remove the battery packs. Wait until the computer cools down. Turn your computer upside down. Open the cover on the bottom by unscrewing the screw (turn counter clockwise).
- Page 97 Precautions Close the computer cover. Tighten the screws on the bottom of the computer. Turn on the computer.
-
Page 98: Other Precautions
Precautions Other precautions On handling the hard disk The hard disk has a high storage density and reads or writes data in a short time. On the other hand, it may be easily damaged by mechanical vibration, shock or dust. Although the hard disk has the safety device in itself to prevent losing data due to mechanical vibration, shock or dust, you should be careful when handling your computer. - Page 99 Precautions The LCD is manufactured using high-precision technology. You may, however, see tiny black points and/or bright points (red, blue, or green) that continuously appear on the LCD. This is a normal result of the manufacturing process and does not indicate a malfunction. Avoid rubbing the LCD screen, as this can damage the screen.
- Page 100 Precautions Direct sunlight, Excessive dust, Moisture or rain, Mechanical vibration or shock, Strong magnets or speakers that are not magnetically shielded, Ambient temperature of more than 35ºC or less than 10ºC, High humidity. Do not place electronic equipment near your computer. The electromagnetic field of your computer may cause a malfunction.
- Page 101 Precautions On handling diskettes Do not open the shutter manually and touch the surface of the diskette. Keep diskettes away from magnets. Keep diskettes away from direct sunlight and other heat sources. On handling CDs Do not touch the surface of the disc. Do not drop or bend the disc.
- Page 102 Precautions Do not expose the battery pack to any mechanical shock. If you are not using the computer for an extended period of time, remove the battery pack from the computer to prevent damage to the battery. If, after fully charging the battery pack, the battery power is still low, the battery pack may be reaching the end of its life and should be replaced.
-
Page 103: Specifications
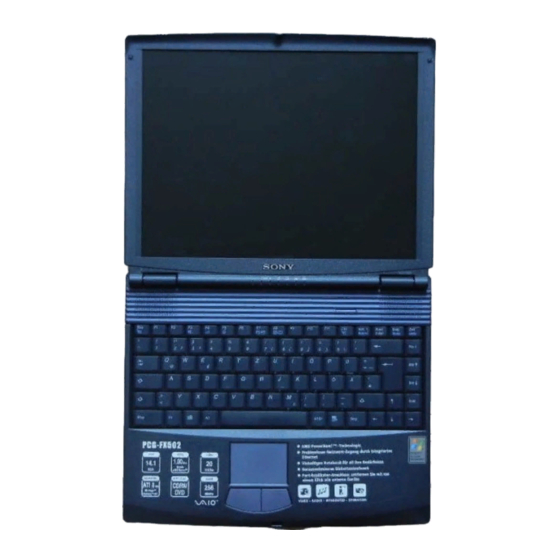
Specifications Specifications Model Number: PCG-FX501 PCG-FX502 ® ® Operating system Microsoft Windows XP Home Edition Processor Mobile AMD Duron™ processor 1.00 GHz featuring PowerNow! Hard disk drive 20 GB Standard RAM 256 MB SDRAM (in slot) Maximum RAM 512 MB LCD screen 14.1"... - Page 104 Specifications Model Number: CD-ROM drive DVD-ROM drive up to 24x max. CD-ROM reading speed CD-RW drive up to 8x max. DVD-ROM reading speed Internal modem Telecommunication capabilities Expansion capabilities Built-in capabilities Connection capabilities port replicator, monitor (VGA output), printer, external speakers or headphone, external microphone, 2 x type II PC Card slots, 1x type III PC Card slot, 2 USB, serial, TV Out, modem, i.LINK™...
- Page 105 Specifications Model Number: Power source Power management Battery Dimensions Width Height Depth Weight with 1 battery and weight saver with 1 battery and floppy disk drive Operating temperature Storage temperature Operating humidity 20% to 80% (not condensed), provided that humidity is less than 65% at +35°C (hygrometer reading of Storage humidity 10% to 90% (not condensed), provided that humidity is less than 20% at +60°C (hygrometer reading of PCG-FX501...
- Page 106 Specifications Model Number: Operating system Microsoft Processor Mobile AMD Athlon™ 4 processor 1.20 GHz Hard disk drive Standard RAM Maximum RAM LCD screen L2 cache memory MPEG MPEG 1 Digital Video Supports full-screen playback Graphics ATI™ 3D RAGE Mobility-M1 with 8 MB Video RAM Display Sound capabilities Floppy disk drive...
- Page 107 Specifications Model Number: CD-ROM drive DVD-ROM drive up to 24x max. CD-ROM reading speed CD-RW drive up to 8x max. DVD-ROM reading speed wave length: DVD 660 nm, CD-RW 785 nm Internal modem built-in modem V.90/K56flex (56kbps) data/fax Telecommunication Ethernet network, PSTN data connectivity capabilities Expansion capabilities two PCMCIA type II or one type III Cards and...
- Page 108 Specifications Model Number: Supplied accessories rechargeable battery, AC adapter, AC power cord, phone cable, phone plug, video cable, weight saver, internal removable floppy disk drive. Service Power source Power management ACPI (Advanced Configuration & Power Interface) Battery Dimensions Width Height Depth Weight with 1 battery and...
- Page 109 Specifications Model Number: Operating humidity 20% to 80% (not condensed), provided that humidity is less than 65% at +35°C (hygrometer Storage humidity 10% to 90% (not condensed), provided that humidity is less than 20% at +60°C (hygrometer ‡ See our special Guarantee extension conditions. Specifications are subject to change without notice.
- Page 110 Glossary Glossary This section refers to terms used in this manual. These terms and definitions have been compiled to provide you with a better understanding of your VAIO computer. Term <F1> key 10BASE-T/100BASE-TX ACPI Application recovery Application recovery CD-ROM BIOS CardBus Definition The <F1>...
- Page 111 Glossary Term CD-ROM CD-RW DC In Docking station Driver DVD-ROM Ethernet Definition Abbreviation for Compact Disc Read-Only Memory. A high-capacity optical disc, usually 650 MB in size, capable of being read from but not written to. Short for Compact Disc-ReWriteable. Compact Disc that can be used to write or rewrite data to it.
- Page 112 The EULA can be found in the Read this first section at the beginning of the software guide or directly on the VAIO desktop. i.LINK™ is Sony’s version of the IEEE 1394 standard for high-speed digital serial interface. The standard is regarded in the audio/video and IT industries as the most suitable interface for connecting computers and digital audio/video devices (such as digital cameras etc.).
- Page 113 Glossary Term MAPI maximum RAM Motherboard MPEG Operating system Partition Definition Short for Messaging Application Program Interface. A Microsoft Windows interface enabling you to send e-mail messages. It allows e-mail access and distribution among applications. MAPI-compatible applications include a Send Mail or Send in the File menu of the application.
- Page 114 Glossary Term PC Card PCMCIA Pixel Port replicator Processor Product recovery CD-ROM PS/2 PSTN Definition A PCMCIA card. The term PC Card is more widely used than PCMCIA. See PCMCIA. PCMCIA (Personal Computer Memory Card International Association) is the name of the group that produced the specification for the credit card-sized plug-in boards for laptop computers.
- Page 115 Glossary Term Resolution RGB signal cable SDRAM Standard RAM System recovery System recovery CD-ROM Definition Short for Random Access Memory, the memory used to run programs and store data in current use. RAM is the fastest kind of memory to read from and write to. Information stored in RAM is lost when you turn off the computer.
- Page 116 You can connect up to 127 devices to a USB port. The USB standard is Hot Plug and Play. Short for Video Audio Integrated Operation. Brand name covering Sony's PC products, peripherals, accessories and software. VAIO-branded items are all designed to make the best use of Sony's Audio-Video (AV) and Information Technology (IT) skills.
Need help?
Do you have a question about the Vaio PCG-FX501 and is the answer not in the manual?
Questions and answers