Advertisement
Available languages
Available languages
Quick Links
STREX
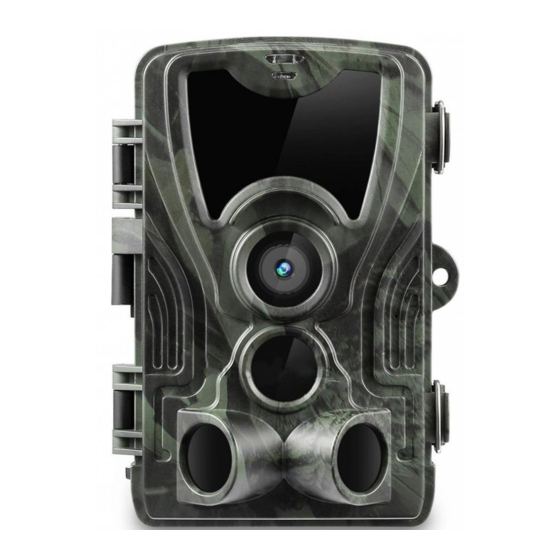
Strex Wildlife Camera
User manual SP48
Thanks for choosing Strex! Read the manual carefully for
correct and safe operation of the product. Always follow these
instructions for safe usage.
If you have any questions about the product or encounter
problems, you can contact us by email: info@strex.nl
English
Nederlands
Advertisement
Chapters

Related Manuals for strex SP48


Summary of Contents for strex SP48
- Page 1 STREX Strex Wildlife Camera User manual SP48 English Thanks for choosing Strex! Read the manual carefully for correct and safe operation of the product. Always follow these instructions for safe usage. Nederlands If you have any questions about the product or encounter...
- Page 2 Getting started The illustrations in this manual have been created with care. However, some parts of the product may differ from the illustration shown in this manual. In that case, Strex is not obliged to adjust the part or the manual.
-
Page 3: Table Of Contents
CONTENT English Structure ..................5 Specifications ................7 Installation guide ................. 8 Review footage ................9 Settings ..................10 Troubleshooting ................. 11 Nederlands Structuur..................14 Specificaties................16 Klaarmaken voor gebruik............17 Beeldmateriaal terugkijken .............18 Instellingen ................19 Probleem oplossingen ............ - Page 4 PRODUCT INTRODUCTION Some tips before you start If a DC power adapter is used to power the camera, please make sure there are NO batteries • in the camera in order to prevent overcharging. This will cause permanent damage to the wildlife camera Do not dip or submerse the wildlife camera underwater.
-
Page 5: Structure
1. Structure HIGH POWER INVISIBLE LED PHOTOSENSOR LATCH 76MM INDICATOR LENS CENTRAL PIR SENSOR 135MM SIDE PIR SENSOR MODE SWITCH 90MM MICRO USB PORT BATTERY COMPARTMENT MICRO SD MOUNTING THREAD EXTERNAL POWER CARD SLOT STREX WILDLIFE CAMERA... - Page 6 1. Structure COLOR DISPLAY SCREEN 8*AA BATTERIES COMPARTMENT MENU BUTTONS MENU BUTTONS MENU Open the settings menu Start replay mode (show saved photos / videos) REPLAY Manually take a photo or video depending on the configured recording SHOT mode. Videos are also stopped by pressing the SHOT button. Confirm / select button ...
-
Page 7: Specifications
2. Specifications 30MP / 24MP / 20MP / 16MP / 12MP Photo Resolution 4K / 2K / 1080P / 720P / 480P (VGA) Video Resolution Detection Angle Up to 120° Detection Distance Up to 20 meters 940nm (Low Glow) IR LED Wavelength IR LED Quantity 36 pcs Trigger Speed... -
Page 8: Installation Guide
3. In s tallation guide Battery installation Open the battery cover and insert 8* AA batteries. Make sure the batteries are correctly placed (pos+ / neg-) Do not insert any batteries when using a DC power adapter. This will cause permanent damage to the camera! Memory card installation Insert the micro SD memory card in the designated slot with the contacts (gold plating) facing away. -
Page 9: Review Footage
4. Review footage Option 1 : On the device Menu shot Slide the mode switch to “TEST”. Then click on the “REPLAY” button to view all images and videos. Use the menu buttons to navigate through all the footage. REPLAY Option 2 : microSD card Shut off the camera and take the microSD card out of the camera. -
Page 10: Settings
5. Settings Setting Description Options Camera, Video Camera & Video Mode Choose the operation mode Time Lapse 4K / 2K / 1080P / Resolution Choose the resolution for the videos 720P / 480P (VGA) Video length 5s / 10s / 30s / 60s / 90s Choose the length of the video Off / On Record audio... -
Page 11: Troubleshooting
6. Troubleshooting Camera doesn’t capture the desired objects ● Check the PIR sensitivity. For warm environments set the “PIR sensitivity” setting to “LOW” and for cold environments set the “PIR sensitivity” setting to “HIGH” ● Try to install the camera in an area where there are no external heat sources in the camera’s field of view. - Page 12 INHOUDSOPGAVE English Structure ..................5 Specifications ................7 Installation guide ................. 8 Review footage ................9 Settings ..................10 Troubleshooting ................. 11 Nederlands Structuur..................14 Specificaties................16 Klaarmaken voor gebruik............17 Beeldmateriaal terugkijken .............18 Instellingen ................19 Probleem oplossingen ............
- Page 13 PRODUCT INTRODUCTIE Enkele tips voordat je begint Als een stroomadapter wordt gebruikt om de camera van stroom te voorzien, zorg er • dan voor dat er GEEN batterijen in de camera zitten om overbelasting te voorkomen. Het gebruik van een stroomadapter en batterijen tegelijk zorgt voor blijvende schade aan de wildcamera.
-
Page 14: Structuur
1. Structuur KRACHTIGE ONTZICHTBARE LEDS FOTOSENSOR HENDEL 76MM INDICATIE LENS CENTALE PIR SENSOR 135MM ZIJ PIR SENSOR MODUS SCHAKELAAR 90MM MICRO USB POORT BATTERIJ COMPARTIMENT MICRO SD STATIEF BEVESTIGING ADAPTER INGANG KAART POORT STREX WILDLIFE CAMERA... - Page 15 1. Structuur KLEUREN SCHERM 8*AA BATTERIJEN COMPARTIMENT MENU KNOPPEN MENU KNOPPEN MENU Open het instellingen menu Start terugkijk modus (bekijk de opgeslagen foto’s/video’s) REPLAY Maak handmatig een foto of video, afhankelijk van de geconfigureerde SHOT opnamemodus. Video’s worden ook gestopt door op de SHOT-knop te drukken.
-
Page 16: Specificaties
2. Specificaties 30MP / 24MP / 20MP / 16MP / 12MP Fotoresolutie 4K / 2K / 1080P / 720P / 480P (VGA) Videoresolutie Detectiehoek Up to 120° Detectie Afstand Up to 20 meters IR LED Golflengte 940nm (Low Glow) IR LED Aantal 36 pcs Triggersnelheid 0.2 seconds... -
Page 17: Klaarmaken Voor Gebruik
3. Klaarmaken voor gebruik Batterij plaatsen Open de batterijklep en plaatst 8* AA batterijen. Zorg ervoor dat de batterijen correct geplaatst zijn. (PLUS+ / MIN-) Let op! Plaats geen batterijen als je gebruik maakt van een stroomadapter. Dit zorgt voor permante schade. Geheugenkaart plaatsen Plaats de microSD geheugenkaart in de juiste sleuf met de contacten (verguld) naar beneden gericht. -
Page 18: Beeldmateriaal Terugkijken
4. Beeldmateriaal terugkijken Optie 1: Op de camera zelf Menu shot Schuif de modus schakelaar naar “TEST”. Druk vervolgens op de knop “REPLAY” om alle afbeeldingen en video’s te bekijken. Gebruik de menuknoppen om door alle REPLAY afbeeldingen te navigeren. Optie 2: MicroSD kaart Schakel de camera uit en haal de microSD kaart uit de camera. -
Page 19: Instellingen
5. In s tellingen Instelling Beschrijving Opties Foto, Video Foto & Video Modus Kies de opnamemodus Time Lapse 4K / 2K / 1080P / Videoresolutie Kies de resolutie voor de video’s 720P / 480P (VGA) Video Lengte 5s / 10s / 30s / 60s / 90s Kies de lengte van de video’s Audio Uit / Aan... -
Page 20: Probleemoplossingen
6. Probleemoplossingen De camera legt de gewenste objecten niet vast ● Controleer de PIR-gevoeligheid. Voor warme omgevingen stel je de instelling “PIR- gevoeligheid” in op “LAAG” en voor koude omgevingen stel je deze in op “HOOG” ● Probeer de camera te installeren in een gebied waar zich geen externe warmtebronnen in het detectieveld van de camera bevinden. - Page 21 For permission requests at the address below. STREX SBD Trading B.V. (Strex Europe) Noorwegenstraat 6-A4 7418BC Deventer The Netherlands info@strex.nl ●...
Need help?
Do you have a question about the SP48 and is the answer not in the manual?
Questions and answers