Advertisement
Quick Links
DRAFTMASTER
INSTRUCTION MANUAL
Thank you for purchasing
the DraftMaster Glycol
Chiller. The DraftMaster can
be used for the following
applications:
•
Use the built-in pump
to cool a trunk line in
a commercial draft
installation.
•
Use the built-in pump to
cool a single glycol-ready
draft tower in a home or
commercial installation.
•
Using CO
, push beer
2
through the 4 stainless
coils submerged in the
glycol bath. This allows you
to store kegs warm yet
serve cold beer.
ATTENTION
We recommend you use a 20%
glycol/80% water solution in your
bath to eliminate freezing.
Assembly Instructions
①
Unpack your unit, then unscrew and remove the top cover.
②
Unpack the accessories box located under the top cover. Install the drain plug
on the red rubber tube sticking out the back of the unit. If you will be using
the optional rolling casters, install them now.
③
Unscrew and remove the 3-piece reservoir cover.
TIP — Take note of which side the slot is located on.
Take note of which side the slot is located on.
④
Fill the reservoir with a 20% propylene
glycol solution – 4 parts RO/distilled/
deionized water to 1 part 99.9%
propylene glycol.
If you choose to use water only – it is
best to use tap water as RO/distilled/
deionized water on its own may
damage the heat exchanger.
TIP — While you work on the next steps plug in
While you work on the next steps plug in
the DraftMaster unit to verify that it cools.
the DraftMaster unit to verify that it cools.
Leave the pump unplugged until it is hooked
Leave the pump unplugged until it is hooked
up to your coolant lines.
up to your coolant lines.
Using The Built-in Submersible Pump
TIP — The pump power cord plugs directly into the DraftMaster unit just above the
The pump power cord plugs directly into the DraftMaster unit just above the
temperature controller. The pump will automatically run every time the compressor
temperature controller. The pump will automatically run every time the compressor
cycles on. With a separate power cord, the pump can be plugged into an external
cycles on. With a separate power cord, the pump can be plugged into an external
power source for constant recirculation.
power source for constant recirculation.
①
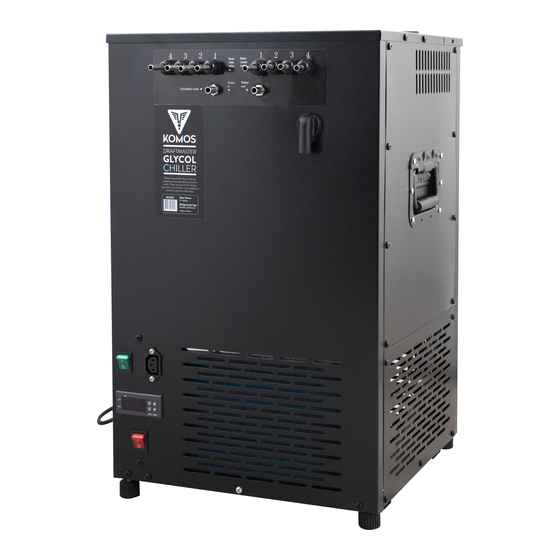
Take a look at the inlet and outlet bulkheads at the front of the unit, noting
the numbered product lines and coolant line located below.
②
Attach & clamp tubing from the coolant out bulkhead to the inlet of your
draft tower or trunk line chilling loop.
③
Attach & clamp tubing from the outlet of your chilling loop to the coolant
inlet bulkhead.
④
Check for leaks:
• Plug in the pump and wait for the compressor to cycle on (or lower the
temp setting to force the cycle).
• Look for leaks where the tubing is connected to the cooling system.
• If necessary, tighten and reattach clamps.
Draft Line Set-Up
①
Attach tubing from the beverage out of your keg to the #1 bulkhead on the
left-hand side.
②
Attach tubing from the #1 bulkhead on the right-hand side to your draft
faucet.
③
Pour a pint to test serving temperature. Lower reservoir temp if needed.
TIP — The beverage cooling capacity depends greatly on the temperature of the
The beverage cooling capacity depends greatly on the temperature of the
ambient environment, the chilling solution, and the beer before it enters the unit.
ambient environment, the chilling solution, and the beer before it enters the unit.
We highly recommend using propylene glycol to lower the reservoir temp as much
We highly recommend using propylene glycol to lower the reservoir temp as much
as possible. If you're using the DraftMaster in environments above 80 ° ° F, you may
as possible. If you're using the DraftMaster in environments above 80
need to pass the beer through the unit twice by daisy chaining the cooling coils.
need to pass the beer through the unit twice by daisy chaining the cooling coils.
Internal view of the DraftMaster.
F, you may
Advertisement

Subscribe to Our Youtube Channel
Related Manuals for Komos DraftMaster


Summary of Contents for Komos DraftMaster
- Page 1 We highly recommend using propylene glycol to lower the reservoir temp as much as possible. If you’re using the DraftMaster in environments above 80 ° ° F, you may as possible. If you’re using the DraftMaster in environments above 80 F, you may need to pass the beer through the unit twice by daisy chaining the cooling coils.
- Page 2 FUNCTION SETTINGS THE DESIRED TEMPERATURE SETTING THE +/- TEMPERATURE RANGE DraftMaster will cycle on/off to keep its temperature within the set range of the set temperature - example: if you set the temperature at 5°C with +/- 0.5 the unit will...
Need help?
Do you have a question about the DraftMaster and is the answer not in the manual?
Questions and answers