Advertisement
Advertisement

Related Manuals for Crosstour CR750


Summary of Contents for Crosstour CR750
- Page 1 Car Recorder...
- Page 2 Thank you for purchasing product from Crosstour. Please read and follow this user manual carefully and keep it in a safe place for future reference. Crosstour consistently attaches great importance to product quality and high customer satisfaction. We sincerely hope you can make a few suggestions during your use to help us improve our products.
-
Page 3: Table Of Contents
Contents Structure diagram Button and interface description Charging / Startup Basic operation instructions for video recording /photographing / playback Instructions for menu setting Product specifications Installation and use of GPS software Frequently asked questions and solutions... -
Page 4: Structure Diagram
Structure diagram ⑳ ⑲ ⑩ ⑰ ⑨ ⑭ ⑱ ⑯ ⑧ ⑬ ⑦ ⑮ ⑫ ⑪ ③ ① ④ ② ⑤ ⑥ 1. Menu /Mode Button 11. MIC 2. Up Button 12. TF card slot 3. Ok Button 13. Power Button 4. -
Page 5: Button And Interface Description
Button and interface description Button name Button function Instructions 1. Power on: Short press Power Button unitl Power indicator lights on Power Button Power on/power off 2. Power off: Long press Power Button unitl Power indicator lights off Short press this Button to restart the Reset Button Reset function machine under abnormal conditions... - Page 6 1. Menu mode: Select downward 2. Playback mode: Select afile Selet downward / downward 3. Photo mode: Zoom out Down Button switch beween front and rear lens display 4. Video mode: Short press to switch between four screen display: front and rear, front, rear, rear and front TF card slot Storage card slot Insert TF card as shown on the machine...
-
Page 7: Charging /Startup
Charging /Startup Charging method Connect the cam to cigarette lighter to charge it via USB cable the cam comes with. Use USB cable to connect to computer for charging The red indicator lights is on during charging. The whole charging time is about 120 minutes. -
Page 8: Basic Operation Instructions For Video Recording /Photographing / Playback
Basic operation instructions for video recording / photographing / playback Video mode: After being powered on, it enters the video mode and automatically starts recording. The video recording icon is displayed in the upper left corner of the screen. The red dot at the top of the screen flashes, indicating that a video is being recorded. -
Page 9: Instructions For Menu Setting
Instructions for menusetup Video recording settings After being powered on, it enters the video mode and automatically starts recording. Short press OK Button to stop recording. Short press M Button again to switch to video recording settings. The screen displays the settings such as: resolution, dual-lens recording, loop recording, time-lapse recording;... - Page 10 Date stamp: on/off, default value: on. G-sensor: off /high / moderation / low, default value: moderation. Parking Monitor: on/off, default value: off. After the car is parked and the engine is off, when the car vibrates under the action of an external force and the vibration is large enough to trigger the moni- toring, it will automatically start video recording.
- Page 11 Screen saver: off /1 minute /three minutes / five minutes. Default value: off. After the function is enabled, the screen automatically off within the set time while it does not affect normalrecording. IR LED: Day mode/ night mode/ auto, default value: auto. Time zone setting: Eastern time zone 1 to 12 / Eastern time zone 0/ Western time zone 1 to 12, default value: UTC/GMT + 8:00 Frequency: 50HZ/60HZ, default value: 50HZ...
- Page 12 Capture mode: single / 2S timer / 5S timer /10S timer, default value: single Resolution: 1.3M 1280x960/VGA 640x480/ / 2MHD (1920x1080 ) /3M (2048x1536) /5M (2592x1944) /8M (3264x2448)/10M(3648x2736)/12M(4032x3024), default value: Burst Photo: on/off, default value: off. Quality: Fine / Normal / Commonly White balance: auto/ daylight / cloudy / tungsten / fluorescent Color: color /black and white/ sepia Exposure: "+2.0","+5/3","+4/3","+1.0","+2/3","+1/3","+0.0","-1/3","-2/3","-1.0",...
-
Page 13: Product Specifications
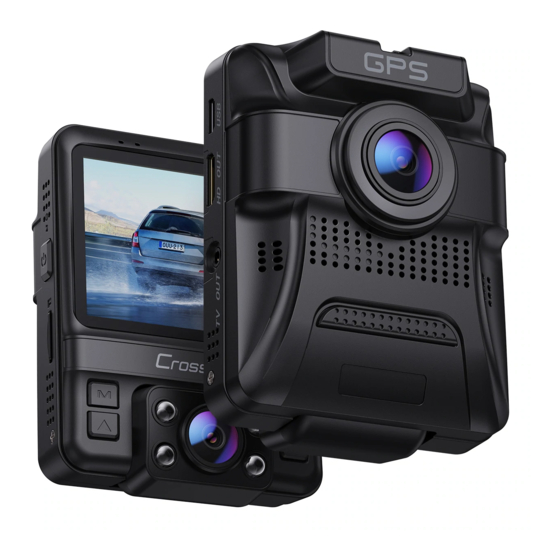
Product specifications Product features Dual video, built-in GPS Built-in (emergent save in case of an accident, G-sensor the file saved will not be covered) Size of LCD 2.4 inch LCD Front: 170 degree A+ HD bugeye lens/ Rear: Lens 130 degree wide-angle lens Pixel of photo VGA/1.3M/2MHD/3M/5M/8M/10M/12M Pixel of video... -
Page 14: Installation And Use Of Gps Software
Installation and use of GPS software (for the machine with GPS) It is necessary to install professional player to view GPS information (please contact our professional after-sales team: support@crosstour.co) Install the designated player: Copy the designated folder to you computer and install it. -
Page 15: Frequently Asked Questions And Solutions
Troubleshooting Please refer to the following to solve the problems occurred during normal opera- tion: Fail to record a photo or video Check whether the space of TF card is enough or whether TF card is locked. Format TF card on the machine. It automatically stops during recording Due to the huge data of HD video, please use high-speed Class10 TF card support- ed by the machine.
Need help?
Do you have a question about the CR750 and is the answer not in the manual?
Questions and answers