Advertisement
Quick Links
Solar Birdbath / Fountain
* Styles may vary but assembly will be consistent with this manual
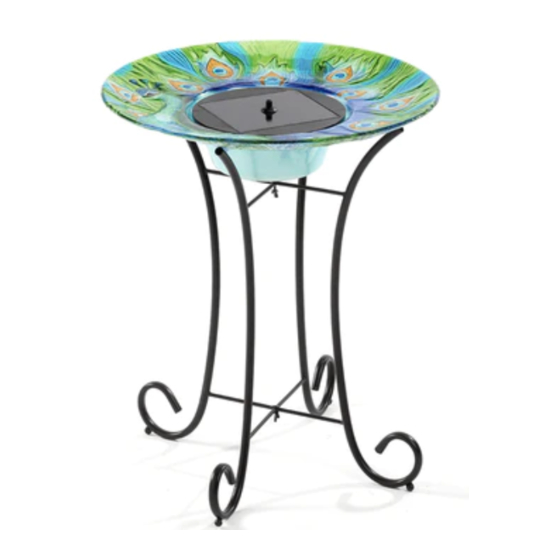
Birdbath & Metal Stand
with Ceramic/Concrete Bowl
The 360˚ fountain head
accessory can be used to
enhance your fountain.
Note: It will only work
effectively in bright sunlight
Water must be regularly topped off. We recommend regularly changing the
water to ensure it remains clean and free from debris.
Important!
0°C/32°F
Frost causes damage, store whole product inside during cold weather.
Birdbath
Fountain Heads
Warnings
Birdbath & Metal Stand
with Glass Bowl
2-Tier
Fountain
The short nozzle can be used to
produce a finer higher
stream of water.
Note: May need to be
removed in bright sunlight to
avoid splashing.
1
Advertisement

Related Manuals for Smart Solar 15390MM1


Summary of Contents for Smart Solar 15390MM1
- Page 1 Solar Birdbath / Fountain * Styles may vary but assembly will be consistent with this manual Birdbath & Metal Stand Birdbath & Metal Stand with Ceramic/Concrete Bowl with Glass Bowl 2-Tier Fountain Birdbath Fountain Heads The 360˚ fountain head The short nozzle can be used to accessory can be used to produce a finer higher enhance your fountain.
-
Page 2: Maintenance
Connections For Birdbath with Glass Bowl Only: Important Ensure connections are water tight. Maintenance Place Bowl on rubber caps. Fill bowl with water. Open frame. Tighten Wingnuts Insert Solar panel/pump. To maintain optimum performance, regularly clean the If the fountain head, nozzle, or tubes become blocked, rinse solar panel using water or glass cleaner in conjunction with through with water. - Page 3 Place the solar If your fountain includes Attach bowl to pedestal. Fill bowl with water. panel/pump assembly Accents, locate the pin Align the marks and turn into the reservoir. on the accent pieces and to lock in place. insert into the holes around the edge of the bowl.
- Page 4 IMPORTANT! IMPORTANT! Important! Important! When reconnecting the pump and panel take care to ensure that the connectors are water tight. Slightly twist the When reconnecting the plugs ensure that the connections connectors when pushing together, ensure the red o-ring are water tight.
- Page 5 Performance Performance This product is designed primarily to operate in summer months but will also work in spring and autumn This product is designed primarily to operate in summer months but will also work in spring and autumn provided there is good sunshine. Performance is directly related to the amount and strength of sunlight received. provided there is good sunshine.
- Page 6 Connections Important Ensure connections are water tight. Push together, sliding threaded cap over the plugs, turn the cap until tight. Maintenance Place Bowl. Affix bolts and Fill bowl with water. Insert Solar panel/pump. wingnuts, and Open frame. attach bowl.
- Page 7 Pump Removal / Assembly 2-Tier Fountain If you need to remove the pump, turn the top tier upside down. Pull the pump to separate the tubes. Disconnect the wire by unplugging it. Unscrew the threaded cap that covers the plugs, slide it up the wire, then you can pull the plugs apart.
- Page 8 Please do not discard any damaged parts until instructed to do so by our customer service department. Smart Solar is a Smart Living Home & Garden brand Telephone: + 1 813 343 5775 Email: customerservice@smartlivinghg.com...
Need help?
Do you have a question about the 15390MM1 and is the answer not in the manual?
Questions and answers