Table of Contents
Advertisement
Quick Links
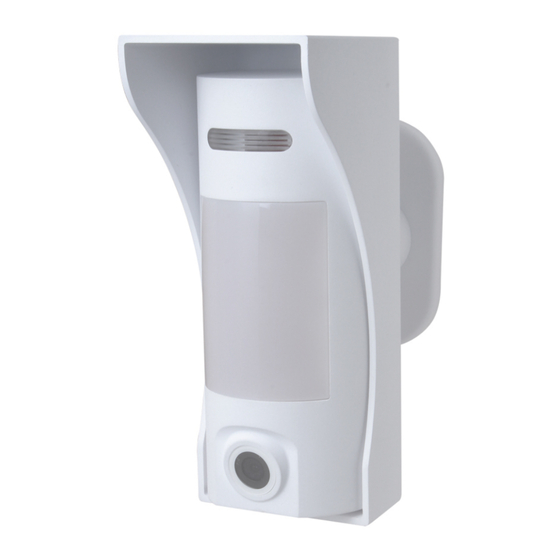
Outdoor PIR Motion Sensor Camera 862EX
862EX is an outdoor passive infrared (PIR) motion sensor camera. It is capable of sending wireless signals and captured
images (picture quality of up to 640 x 480 pixels) to the Control Panel upon movement detection.
Featuring night illumination capability, with UV resistant housing, and waterproof to IP45 standard, 862EX is ideal for backyards,
lawns, gates, outdoor corridors and hallways.
The outdoor PIR Camera is designed to give a typical detection range of 10 meters when mounted at 2 meters above ground. It
provides pet-immunity up to 60 kilos with two selectable sensitivity levels to accommodate different environments.
862EX is also compatible with Climax's Repeater RP-29/Router RMB-29, which can further extend the RF communication
range into hard-to-reach areas.
The 862EX Series includes the following models:
862EX – PIR motion sensor camera with flash LED
862EX-IL – PIR motion sensor camera with Infrared LED
⚫
⚫
I
d
e
n
t
i
f
y
i
n
g
t
h
I
d
e
n
t
i
f
y
i
n
g
t
h
Front View
1. Flash LED / Infrared LED
The Flash LED (For 862EX) or Infrared LED (For 862EX-IL) delivers sufficient light for image capture under low
lighting condition.
2. LED Indicator (Red)
The LED indicator is used to indicate the system status.
3. IR Sensor
The sensor is intended to detect moving objects.
4. PIR Camera Lens
5. Test&Learn Button
-Press and hold the button for 3 seconds to send a learn code, and then release the button when Red LED lights up.
-Press the button once to enter test mode for 10 minutes.
-Press the button once to send a learn code to the repeater/router.
6. Internal Tamper
7. DIP Switch Block
There are 8 DIP Switches for setting the function & detection sensitivity levels.
8. Battery Compartment
9. Mounting Bracket
⚫
⚫
L
E
D
I
n
d
i
c
a
t
o
r
L
E
D
I
n
d
i
c
a
t
o
r
When enabled, the LED Indicator will light up in the following conditions:
When the Tamper Switch is triggered, the LED will flash for 6 times to indicate it is transmitting "Tamper" signal.
⚫
e
P
a
r
t
s
e
P
a
r
t
s
Inside View
1
Advertisement
Table of Contents

Related Manuals for Climax VST-862EX


Summary of Contents for Climax VST-862EX
- Page 1 The outdoor PIR Camera is designed to give a typical detection range of 10 meters when mounted at 2 meters above ground. It provides pet-immunity up to 60 kilos with two selectable sensitivity levels to accommodate different environments. 862EX is also compatible with Climax’s Repeater RP-29/Router RMB-29, which can further extend the RF communication range into hard-to-reach areas.
- Page 2 ⚫ When the PIR Camera is in fault conditions (tamper open or low battery condition persists), each time it transmits a detected movement, the LED will flash for 6 times. ⚫ After the Test button is pressed once to enter Test Mode, the LED will flash for 60 seconds to indicate that the PIR motion sensor camera is warming up.
- Page 3 ⚫ ⚫ ⚫ The PIR Camera uses four AAL91 lithium batteries as its power source. ⚫ The PIR Camera features low battery voltage detection. When low battery is detected, a low battery signal will be sent to the Control Panel along with regular signal transmissions for the Control Panel to display the status accordingly. ⚫...
- Page 4 for corner fixing as shown in the picture. ⚫ To mount 862EX with mounting bracket: 1) Use the mounting bracket as a template to drill holes on the wall for plugs. 2) Push in the plugs and fix the mounting bracket on the wall with the screws. 3) Mount 862EX with the hooks of the mounting bracket latched on the back cover of the 862EX, and then push downwards until you hear a click sound.
- Page 5 Please use the provided screwdriver to tighten/loosen star socket screws. ⚫ To mount 862EX with mounting bracket and rotating holder: 1) Fix the rotating holder to the wall with provided screws. 2) Fix the mounting bracket on the swivel ball with the fixing screw secured through the foolproof design hole. 3) Mount 862EX with the hooks of the mounting bracket latched on the back cover of the 862EX, and then push downwards until you hear a click sound.
- Page 6 ⚫ It is recommended to install the PIR Camera in the following locations: ⚫ 2M (measured from bottom of the camera) above ground level for best performance. ⚫ The operating temperature is -10° to 45°C. ⚫ In a corner for the widest view. ⚫...
- Page 7 ⚫ Do not install the motion sensor camera where objects moved by wind such as trees and laundry, which may block the motion sensor camera’s field of view. ⚫ Clear all light reflecting surfaces from the detection area, as well as water puddles. Avoid looking directly at the path of outdoor unit’s intake or exhaust airflow.
Need help?
Do you have a question about the VST-862EX and is the answer not in the manual?
Questions and answers