
Related Manuals for Bush Baby Night Eye


Summary of Contents for Bush Baby Night Eye
- Page 1 All manuals and user guides at all-guides.com Bush Baby Night Eye Smoke Detector with Wi-Fi Hidden Camera SKU: BBNESmoke Version 1.0...
- Page 2 All manuals and user guides at all-guides.com THANK YOU FOR PURCHASING THE BBNESMOKE Please read this manual before operating the BBNESmoke and keep it handy. Your purchase should include: 1 x BBNESmoke 1 x Manual (this) 1 x 128GB MicroSD Card 1 x MicroSD Card Reader Version 1.0...
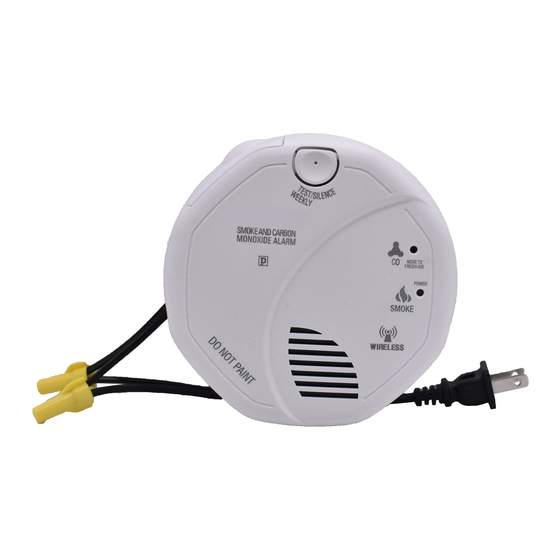
- Page 3 All manuals and user guides at all-guides.com GET FAMILIAR WITH YOUR BBNESMOKE Version 1.0...
- Page 4 All manuals and user guides at all-guides.com OPERATING THE BBNESMOKE BEFORE YOU START 1. First you must download the TinyCam app from the Google Play Store or the iPhone App Store. o Android: https://play.google.com/store/a pps/details?id=com.rtp2p.tinyca o iPhone: https://apps.apple.com/us/app/ tinycam/id1444285114 2. If you ever need to move your device from one network connection to a different one, you will need to reset the device before moving to the new...
- Page 5 All manuals and user guides at all-guides.com 3. This device is meant to be hardwired into your electrical system. We suggest hiring a professional to hardwire it. We only provide technical support for the camera itself, not the installation of the device.
- Page 6 All manuals and user guides at all-guides.com CONNECTING TO YOUR DEVICE DIRECTLY & ADDING IT TO WIFI In order to view your device remotely, you must complete the following two-part sequence of steps. 1. Hardwire the device into your electrical system or use the test plug to power your device.
- Page 7 All manuals and user guides at all-guides.com 3. After connecting to the device’s Wi-Fi signal, it should display as ‘Connected’ Version 1.0...
- Page 8 All manuals and user guides at all-guides.com or the ‘Current Network’ (see picture on page 8) o Some devices may produce a warning that the network has no internet access. If you see this, choose to connect to the network anyway. o For iOS devices, you must wait until the Wi-Fi signal appears next to your Phone Carrier Name...
- Page 9 All manuals and user guides at all-guides.com 4. Now that we are connected to the unit’s Wi-Fi signal, go ahead and open the TinyCam App on your phone. 5. When you open the app, it will automatically detect that you are connected to the unit’s Wi-Fi signal and ask if you would like to add the device to the TinyCam App.
- Page 10 All manuals and user guides at all-guides.com 6. After pressing “OK”, this will add the device to the TinyCam App and take you to the home screen. o We still need to add the camera to a Wi-Fi network where it is staying in order to livestream it! 7.
- Page 11 All manuals and user guides at all-guides.com 8. After tapping the wrench, a new menu will appear with a bunch of different ‘Config’ or ‘Setting’ selections. For now, we want to focus on Wi-Fi Config. Go ahead and select ‘Wi-Fi Config’ and a new menu should open.
- Page 12 All manuals and user guides at all-guides.com 9. After selecting Wi-Fi Config, we are taken to a page where you can choose a network for the unit to connect to, and then type in the password for that wi-fi network. Press ‘Confirm’ when done to pair the unit with the router.
- Page 13 All manuals and user guides at all-guides.com 10. Close the TinyCam App and proceed to step 11. 11. If the unit pairs with your router, it will stop broadcasting its own Wi-Fi signal, and your phone should connect back to the normal network for the area.
- Page 14 All manuals and user guides at all-guides.com 12. Your device is now connected to Wi-Fi and can be remotely viewed/managed! o NOTE: The first time you access the livestream, the unit will request that you change the password. DO NOT FORGET THIS PASSWORD! o The default password is 888888.
- Page 15 All manuals and user guides at all-guides.com 3. After opening the livestream, in the top center of the screen, you should see three different options. a. 1080P – Stream in 1920x1080P b. 720P – Stream in 1280x720 c. 640P – Stream in 1152x640 HOW TO SET UP MOTION DETECTION RECORDING 1.
- Page 16 All manuals and user guides at all-guides.com 3. Navigate to ‘Alarm Config’. 4. Turn Motion detection to any option besides ‘Close’. 5. Hit the back button on your phone so you can see all the other Config/Setting options again. 6. Choose ‘Micro SD Card Setting’. Version 1.0...
- Page 17 All manuals and user guides at all-guides.com 7. Tap the ‘Alarm recording’ box and ensure that it is checked. 8. Your device is now set up for motion detection recording! a. By turning the ‘Alarms’ motion detection levels on, the unit sends an ‘Alarm’ once motion is detected.
- Page 18 All manuals and user guides at all-guides.com Micro SD Card Setting – A Further Look Version 1.0...
- Page 19 All manuals and user guides at all-guides.com a) Micro SD Card Capacity – This displays what size MicroSD card you have inside the unit, and the total space left. Please note, the MicroSD card in this device is purely internal and not accessible by the end user.
- Page 20 All manuals and user guides at all-guides.com e) Full Time Recording – If this box is checked, the unit will record 24/7. f) Recording Length – These are how long the unit’s videos will last. a. If you have full time recording enabled, and set the ‘recording length’...
- Page 21 All manuals and user guides at all-guides.com i) Time-Lapse Video – Enable this to have your unit take elongated video recordings (over 45 minutes) j) Time-Lapse Video Recording – This is how long of an elongated video your unit will record. OTHER CONFIG OPTIONS Version 1.0...
- Page 22 All manuals and user guides at all-guides.com a) Time Set – This allows you to set the time/date for the unit. b) Power Frequency – If you are located in the USA, set this to 60Hz (also known as NTSC). Almost all other countries use 50Hz (also known as PAL).
-
Page 23: Transferring Files To Your Pc
All manuals and user guides at all-guides.com server. Technical Support cannot help you find or fill in this information! You will need to be knowledgeable about servers or contact your server administrator. e) Email Set – These settings will allow the unit to email you notifications regarding motion. - Page 24 All manuals and user guides at all-guides.com 4. Locate “Removable Disk” inside the (My) Computer folder. a. On most Windows PC, AutoPlay will detect the removable storage and ask how you would like to proceed. Choose ‘Open folder to view files’ b.
- Page 25 All manuals and user guides at all-guides.com service (like Google Drive) or your email to send videos from your app to your computer. To save a file, select the file with your mouse, right click your mouse on the file’s name, then choose “Copy”...
-
Page 26: Microsd Card
All manuals and user guides at all-guides.com fill with hidden files, and the device will no longer record new files. REMOTELY VIEWING RECORDINGS ON THE MICROSD CARD 1. Open the TinyCam App. 2. Press the folder icon on the bottom left of your device listing. -
Page 27: Troubleshooting
All manuals and user guides at all-guides.com choose which date you wish to view recordings from. TROUBLESHOOTING THE DEVICE WON’T TURN ON Make sure the test plug is plugged all the way into the wall outlet. Make sure the device has been hardwired correctly. -
Page 28: Other Problems
All manuals and user guides at all-guides.com OTHER PROBLEMS Contact our Technical Support team at 770-694-6921 or support@minigadgets.com SPECIFICATIONS Stream Resolution 1080P Recording Resolution 720P Video Format H.264 Viewing Angle 110° Internal Storage 128GB Video Consumption 1 Min = 50MB Playback Software Loop Recording Operating Systems... - Page 29 All manuals and user guides at all-guides.com Version 1.0...
- Page 30 All manuals and user guides at all-guides.com Version 1.0...
- Page 31 All manuals and user guides at all-guides.com Version 1.0...
- Page 32 All manuals and user guides at all-guides.com QUALITY CONTROL CHECKLIST ☐ Instruction Manual ☐ BBNESmoke ☐ ____GB MicroSD Card ☐ MicroSD Card Reader QC Technician: ______________________________ Date: ___________________________________ Version 1.0...
Need help?
Do you have a question about the Night Eye and is the answer not in the manual?
Questions and answers