Table of Contents
Advertisement
Available languages
Available languages
Quick Links
SEC.
WORK
BRAND
61
LG
FG1405H3W
150
1
최종본 등록
EAGH700352
2
매뉴얼 현실화
EAGH700770
3
4
REV. NO.
REVISION DESCRIPTION
REF. NO.
MODEL
P/NO.
MFL69475561
150
17/07/18
주 연 수
김 현 석
17/07/24
주 연 수
김 현 석
DATE
PREPARED
APPROVED
1
FH4G1JCHK2N.ABWPEVN
1. Material, printing and exterier size are refer to work tables.
2. Printing, text size and line are based on LG design film.
3. Exterier size on the drawing is cutting line.
4. Before product controlled by criteria sample.
should comply with LG standard of LG(63)-A-5501-34
TRIG.
MODELING
DESIGNED
주 연 수
17.07.08
LG Electronics Inc.
PAGE
LANGUAGE
EN+VIET
108
A**PEVN
SCALE N
UNIT
mm
S
MANUAL,OWNER'S
T
REVIEWED
CHECKED APPROVED
I
T
전 종 묵
이 갑 선
김 현 석
L
DRUM-EXPORT 1/1
E
17.07.08
17.07.08
17.07.08
RELATED DWG.
MFL69475561
DWG.
No.
RELEASING THIS DRAWING
WITHOUT PERMISSION LG
Electronics SHOULD BE
ACCUSED ACCORDING TO THE
LAWS AND COMPANY RULES.
REMARK
G+ Good
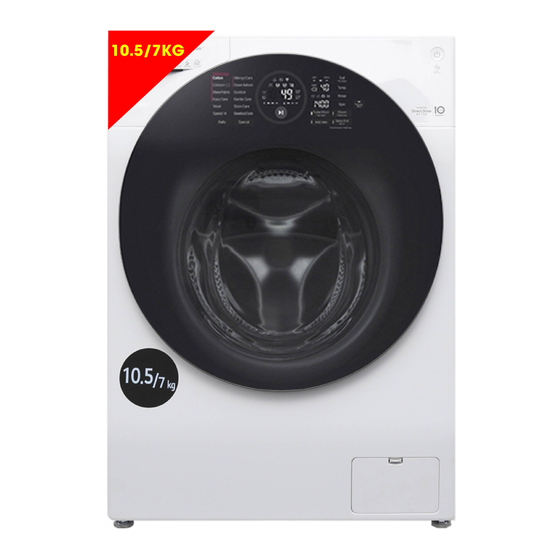
10.5/7kg HYBRID
작업처 : 인쇄물개발파트
양산처 : 국제인쇄
DR COMPLETED
PDF
ILLUSTRATOR
Advertisement
Chapters
Table of Contents

Subscribe to Our Youtube Channel
Related Manuals for LG FG1405H3W


Summary of Contents for LG FG1405H3W
- Page 1 양산처 : 국제인쇄 1. Material, printing and exterier size are refer to work tables. 2. Printing, text size and line are based on LG design film. 3. Exterier size on the drawing is cutting line. 4. Before product controlled by criteria sample.
- Page 2 Before beginning installation, read these instructions carefully. This will simplify installation and ensure that the product is installed correctly and safely. Leave these instructions near the product after installation for future reference. EN ENGLISH FG1405H3W www.lg.com MFL69475561 Copyright © 2017 LG Electronics Inc. All Rights Reserved. Rev.02_072417...
-
Page 3: Table Of Contents
TABLE OF CONTENTS This manual may contain images or content different from the model you purchased. This manual is subject to revision by the manufacturer. SAFETY INSTRUCTIONS ............4 IMPORTANT SAFETY INSTRUCTIONS .............4 INSTALLATION ..............10 Parts ......................10 Accessories ....................10 Specifications .................... - Page 4 SMART FUNCTIONS .............35 Using Smart ThinQ Application ..............35 Using Smart Diagnosis™ ................. 37 MAINTENANCE ..............38 Cleaning Your Washing Machine .............. 38 Cleaning the Water Inlet Filter ..............38 Cleaning the Drain Pump Filter ..............39 Cleaning the Dispenser Drawer ..............40 Tub Clean (Optional) ................
-
Page 5: Safety Instructions
SAFETY INSTRUCTIONS The following safety guidelines are intended to prevent unforeseen risks or damage from unsafe or incorrect operation of the appliance. The guidelines are separated into ‘WARNING’ and ‘CAUTION’ as described below. This symbol is displayed to indicate matters and operations that can cause risk. - Page 6 For use in Europe: This appliance can be used by children aged from 8 years and above and persons with reduced physical, sensory or mental capabilities or lack of experience and knowledge if they have been given supervision or instruction concerning use of the appliance in a safe way and understand the hazards involved.
- Page 7 •This appliance must not be installed behind a lockable door, a sliding door or a door with a hinge on the opposite side to that of the appliance, in such a way that a full opening of the appliance door is restricted. •This appliance must be grounded.
- Page 8 •Never reach into the appliance while it is operating. Wait until the drum has completely stopped. •In case of flood, disconnect the power plug and contact the LG Electronics customer information centre. •Do not push down the door excessively, when the appliance door is open.
- Page 9 •Do not touch the power plug or the appliance controls with wet hands. •Do not bend the power cable excessively or place a heavy object on it. •Do not wash rugs, mats, shoes or pet blankets, or any other items other than clothes or sheets, in this machine.
- Page 10 Maintenance •Securely plug the power plug in the socket outlet after completely removing any moisture and dust. •Disconnect the appliance from the power supply before cleaning the appliance. Setting the controls to the OFF or stand by position does not disconnect this appliance from the power supply. •Do not spray water inside or outside the appliance to clean it.
-
Page 11: Installation
INSTALLATION Parts Transit bolts Power plug Drawer Control panel Drum Door Drain hose Drain plug Drain pump filter Cover cap (Location may vary depending on products) Adjustable feet Power button Accessories Cold supply hose (1 EA) Spanner Caps for covering Anti–slip sheets (2 EA) (Option: Hot (1 EA)) transit bolt holes... -
Page 12: Specifications
Specifications Model FG1405H3W Wash Capacity 10.5 kg (Wash) / 7 kg (Dry) Power Supply 220-240 V~, 50 Hz Size 600 mm (W) x 610 mm (D) x 850 mm (H) Product Weight 85 kg Permissible Water pressure 0.1 - 1.0 MPa (1.0 - 10.0 kgf / cm²) •... -
Page 13: Installation Place Requirements
Installation Place • If it is impossible to avoid positioning the appliance next to a gas cooker or coal burning Requirements stove, an insulation (85x60 cm) covered with aluminum foil on the side facing the cooker Location or stove must be inserted between the two appliances. -
Page 14: Unpacking And Removing Transit Bolts
Unpacking and Removing Install the hole caps. Transit Bolts • Locate the hole caps included in the accessory pack or attached on the back. Lift the appliance off the foam base. • After removing the carton and shipping material, lift the appliance off the foam base. -
Page 15: Using Anti-Slip Sheets (Optional)
• Push or rock the top edges of the appliance gently to make sure that the appliance does not rock. If the appliance rocks, level the appliance again. NOTE • You can obtain anti-slip sheets from the LG Service Centre. -
Page 16: Leveling The Appliance
Leveling the Appliance Connecting the Water Supply Hose If the floor is uneven, turn the adjustable feet as required (Do not insert pieces of wood etc. under • Water pressure must be between 0.1 MPa and the feet). Make sure that all four feet are stable 1.0 MPa (1.0‒10.0 kgf/cm and resting on the floor and then check that the •... - Page 17 Connecting Hose to Water Tap Push the adapter onto the end of the tap so that the rubber seal forms a watertight connection. Tighten the four fixing screws. Connecting Screw-Type Hose to Tap with Thread Screw the hose connector onto the water supply tap.
- Page 18 Connecting Hose to Appliance Push the adapter onto the end of the tap so that the rubber seal forms a watertight Attach the hot water line to the hot water supply connection. Tighten the four fixing screws on the back of the washer. Attach the cold water and the adapter ring plate.
-
Page 19: Installing The Drain Hose
Installing the Drain Hose • The drain hose should not be placed higher than 100 cm above the floor. Water in the appliance may not drain or may drain slowly. • Securing the drain hose correctly will protect the floor from damage due to water leakage. •... -
Page 20: Operation
OPERATION Using the Washing Machine Choose the desired washing cycle. • Press the cycle button repeatedly or turn Before the first wash, select a washing the cycle selector knob until the desired programme, allow the washing machine to wash cycle is selected. without clothing. -
Page 21: Sorting Laundry
Sorting Laundry Caring before loading. • Combine large and small items in a load. Load large items first. Look for a care label on your clothes. • Large items should not be more than half • This will tell you about the fabric content of the total wash load. -
Page 22: Adding Cleaning Products
Adding Cleaning Products NOTE • Do not let the detergent harden. Doing so may Detergent Dosage lead to blockages, poor rinse performance or odour. • Detergent should be used according to the • Full load : According to manufacturer’s instruction of the detergent manufacturer and recommendation. - Page 23 Using Tablet • Do not leave the fabric softener in the detergent drawer for more than 2 days (Fabric Open the door and put tablets into the drum. softener may harden). • Softener will automatically be added during the last rinse cycle. •...
-
Page 24: Control Panel
Control Panel Power Button : The display shows estimate time • remaining. While the size of the load is • Press the Power button to turn the being calculated automatically, blinking washing machine on. or ‘Detecting’ appears. • : The water temperature is displayed when pressing the Temp. -
Page 25: Programme Table
Programme Table Washing Programme Maximum Programme Description Fabric Type Proper Temp. Load Provides better performance by 40 °C Cotton combining various drum (Cold to 95 °C) Coloured fast garments motions. (shirts, nightdresses, pajamas, etc.) and Rating Provides optimised normally soiled cotton washing performance 60 °C load (underwear). - Page 26 Maximum Programme Description Fabric Type Proper Temp. Load Provides fast washing Lightly soiled colour 20 °C Quick 30 time for small loads and 3 kg laundry. (Cold to 40 °C) lightly soiled clothes. For hand and machine washable delicate clothes such as Wool, hand washable 20 °C Gentle Care...
- Page 27 Drying Programme Maximum Programme Description Fabric Type Load For cottons. Select this Cotton or linen fabrics such programme to reduce cycle time as cotton towels, t-shirts, Rating Normal ( and energy usage during the dry and linen laundries. cycle. Cotton or linen fabrics, For easy iron, finish drying in ready to iron at the end of Rating...
- Page 28 Extra Options Steam Steam Delay Programme Rinse+ EcoHybrid Wash Wash Softener Cotton ● ● ● ● ● ● Cotton+ ● ● ● ● ● ● Easy Care ● ● ● ● ● ● Mixed Fabric ● ● ● ● ● ●...
- Page 29 Operating Data Max RPM Programme 1400 Cotton 1400 Cotton+ 1400 Easy Care 1000 Mixed Fabric 1400 Allergy Care 1400 Wool Steam Refresh Outdoor Quick 30 1400 Gentle Care Wash+Dry 1400...
-
Page 30: Option Programme
Option Programme Steam (Optional) Steam Wash features enhanced washing Delay End performance with low energy consumption. Steam Softener sprays steam after a spinning You can set a time delay so that the washing cycle to reduce creases and make the laundry machine will start automatically and finish after a fluffy. - Page 31 CAUTION • When adding laundry, make sure to completely push it into the drum. If laundry gets stuck in Start a cycle from the LG Smart ThinQ the door latch hole, the rubber packing may application on your smart phone.
- Page 32 Pre Wash ( Rinse+ ( If the laundry is heavily soiled, the Pre Wash Add rinse once. programme is recommended. Press the Power button. Press the Power button. Select a washing programme. Select a washing programme. Press and hold the Rinse+ button for 3 Press and hold the Pre Wash button for 3 seconds.
- Page 33 Beep On / Off Child Lock ( Use this option to disable the controls. This Press the Power button. feature can prevent children from changing cycles or operating the appliance Press the Start/Pause button. Locking the Control Panel Press and hold the Soil and Temp. button Press and hold the Child Lock button for simultaneously for 3 seconds to set the Beep three seconds.
-
Page 34: Dry ( )
Woolen Articles Dry ( • Do not tumble dry woolen articles. Pull them to Use the automatic programmes to dry most their original shape and dry them flat. loads. Electronic sensors measure the temperature of the exhaust to increase or Woven and Loopknit Materials decrease drying temperatures for faster reaction time and tighter temperature control. - Page 35 Drying Time Guide • Drying programme can last up to about 7 hours. • These drying times are given as a guide to help you set your washing machine for manual drying. • If the temperature of the drying system is not enough to complete to dry, drying time is modified automatically, and inform it by pop-up window.
-
Page 36: Smart Functions
• To verify the Wi-Fi connection, check that Wi-Fi icon on the control panel is lit. Installing Smart ThinQ • LG Smart ThinQ is not responsible for any network connection problems or any faults, Search for the LG Smart ThinQ application from... - Page 37 Smart Diagnosis™ can not be activated copyright notices are available for download. unless the appliance is connected to power. LG Electronics will also provide open source If the appliance is unable to turn on, then code to you on CD-ROM for a charge covering...
-
Page 38: Using Smart Diagnosis
Use this function if you need an accurate the home phone. diagnosis by an LG Electronics customer • If the Smart Diagnosis™ data transfer is poor information center when the appliance due to poor call quality, you may not receive malfunctions or fails. -
Page 39: Maintenance
MAINTENANCE Cleaning the Interior WARNING • Unplug the washing machine before cleaning • Use a towel or soft cloth to wipe around the to avoid the risk of electric shock. Failure to washing machine door opening and door glass. follow this warning may result in serious injury, •... -
Page 40: Cleaning The Drain Pump Filter
Cleaning the Drain Pump After cleaning, turn the pump filter and insert the drain plug. Filter • The drain filter collects threads and small objects left in the laundry. Check regularly that the filter is clean to ensure smooth running of your washing machine. -
Page 41: Cleaning The Dispenser Drawer
Cleaning the Dispenser Tub Clean (Optional) Drawer Tub Clean is a special programme to clean the inside of the washing machine. Detergent and fabric softener may build up in A higher water level is used in this programme the dispenser drawer. Remove the drawer and at higher spin speed. -
Page 42: Caution On Freezing During Winter
Caution on Freezing During • After closing the tap, disconnect the cold supply hose from the tap, and remove water Winter while keeping the hose facing downwards. • When frozen, the product does not operate normally. Make sure to install the product where it will not freeze during winter. - Page 43 How to Handle Freezing • When water is removed completely from the drum, close the hose plug used for removal of • Make sure to empty the drum, pour warm residual water, choose a washing programme, water of 50–60 °C up to the rubber part inside and press the Start/Pause button.
-
Page 44: Troubleshooting
TROUBLESHOOTING • Your washing machine is equipped with an automatic error-monitoring system to detect and diagnose problems at an early stage. If your washing machine does not function properly or does not function at all, check the following before you call for service: Diagnosing Problems Symptoms Reason... - Page 45 Symptoms Reason Solution Water supply is not adequate • Check another tap in the house. in that location. Water supply tap is not • Fully open tap. completely open. Water does not enter washing machine or it enters slowly Water supply hose(s) are •...
- Page 46 Symptoms Reason Solution • Check if the ‘Door Lock’ icon Once washing machine has is illuminated. You can safely Door does not open started, the door cannot be open the door after the ‘Door opened for safety reasons. Lock’ icon turns off. If an imbalance is detected •...
-
Page 47: Error Messages
Error Messages Symptoms Reason Solution Water supply is not adequate in area. • Check another tap in the house. Water supply taps are not completely • Fully open tap. open. Water supply hose(s) are kinked. • Straighten hose(s). The filter of the supply hose(s) are •... - Page 48 Symptoms Reason Solution Drain hose is kinked or clogged. • Clean and straighten the drain hose. The drain filter is clogged. • Clean the drain filter. Ensure door is not open. • Close the door completely. If is not released, call for service.
-
Page 49: Warranty
• Costs associated with removal of your Product from your home for repairs. • The removal and reinstallation of the Product if it is installed in an inaccessible location or is not installed in accordance with published installation instructions, including LG’s owner’s and installation manuals. - Page 50 Strange vibration or noise Remove the transit bolts caused by not removing & tub support. transit bolts or tub support. Transit Carton bolt support base Leakage caused by dirt (hair, Clean the gasket & door lint) on gasket and door glass.
- Page 51 Leakage caused by improper installation of drain hose or Reinstall the drain hose. Elbow Bracket clogged drain hose. Tie Strap Leakage caused by improper installation of water supply Reinstall the supply hose or using other brand hose. supply hoses. No power problem caused Reconnect the power by loose connection of power cord or change the...
- Page 52 Memo...
- Page 53 Memo...
- Page 54 Memo...
- Page 55 Memo...
- Page 56 đơn giản hoá quá trình lắp đặt và đảm bảo sản phẩm được lắp đặt đúng cách và an toàn. Để hướng dẫn này ở gần sản phẩm sau khi lắp đặt để sau này tham khảo. VI VIETNAMESE FG1405H3W www.lg.com MFL69475561 Copyright © 2017 LG Electronics Inc. All Rights Reserved. Rev.02_072417...
- Page 57 MỤC LỤC Hướng dẫn này có thể có các hình ảnh hoặc nội dung khác với model mà bạn đã mua. Hướng dẫn sử dụng này có thể được thay đổi bởi nhà sản xuất. HƯỚNG DẪN AN TOÀN ............4 HƯỚNG DẪN AN TOÀN QUAN TRỌNG ............4 LẮP ĐẶT ..................
- Page 58 CHỨC NĂNG THÔNG MINH ..........35 Sử dụng Ứng dụng Smart ThinQ ............. 35 Sử dụng Smart Diagnosis™ ..............37 BẢO TRÌ ..................38 Vệ sinh Máy Giặt Của bạn ................ 38 Vệ sinh Bộ lọc Ngõ vào Nước ..............38 Vệ sinh Bộ lọc Bơm Xả ................39 Vệ...
-
Page 59: Hướng Dẫn An Toàn
HƯỚNG DẪN AN TOÀN Các hướng dẫn an toàn sau đây nhằm mục đích ngăn chặn các rủi ro hoặc hư hỏng không thể lường trước từ việc vận hành sản phẩm không an toàn hoặc không đúng cách. Các hướng dẫn được chia thành hai phần ‘CẢNH BÁO’ và ‘THẬN TRỌNG’... - Page 60 Sử dụng ở Châu Âu: Trẻ em từ 8 tuổi trở lên hoặc người có năng lực thể chất, giác quan hoặc tinh thần bị suy giảm, hoặc thiếu kinh nghiệm và kiến thức có thể sử dụng thiết bị này nếu có sự giám sát hoặc hướng dẫn liên quan đến việc sử...
- Page 61 •Không được lắp đặt thiết bị phía sau cửa có khoá, cửa trượt hoặc cửa có bản lề ở phía đối diện cửa của thiết bị, làm hạn chế thao tác mở hẳn cửa của thiết bị. •Thiết bị này phải được nối đất. Trong trường hợp xảy ra trục trặc hoặc hỏng máy, việc nối đất sẽ...
- Page 62 động. Đợi cho đến khi lồng giặt hoàn toàn dừng hẳn. •Trường hợp xảy ra lụt, ngắt dây điện và liên hệ trung tâm dịch vụ khách hàng LG Electronics. •Không đè cửa xuống quá mạnh khi cửa thiết bị hở.
- Page 63 •Không được chạm vào phích cắm hoặc các phần điều khiển thiết bị bằng tay ướt. •Không được gập cong dây điện quá mức hoặc đặt một vật nặng lên dây. •Không giặt mền, đệm, giầy hoặc chăn cho thú cưng hay bất kỳ vật khác ngoại trừ...
- Page 64 Bảo trì •Cắm chặt phích cắm vào ổ cắm sau khi loại bỏ hết hơi ẩm và bụi bẩn. •Ngắt thiết bị ra khỏi nguồn điện trước khi vệ sinh thiết bị. Việc đặt phần điều khiển về vị trí TẮT hoặc chờ không ngắt thiết bị này ra khỏi nguồn điện.
-
Page 65: Lắp Đặt
LẮP ĐẶT Các bộ phận Bu-lông vận chuyển Phích cắm điện Ngăn kéo Bảng điều khiển Lồng giặt Cửa Ống xả Ốc xả nước Bộ lọc bơm xả Nắp đậy (Vị trí có thể thay đổi tùy vào các sản phẩm) Chân có... -
Page 66: Thông Số Kỹ Thuật
Thông số kỹ thuật Model FG1405H3W Khối lượng Giặt 10,5 kg (Giặt) / 7 kg (Sấy) Nguồn Điện 220 - 240 V~, 50 Hz Kích thước 600 mm (W) x 610 mm (D) x 850 mm (H) Trọng lượng Sản phẩm 85 kg Áp lực Nước Cho phép... -
Page 67: Yêu Cầu Không Gian Lắp Đặt
Yêu cầu Không gian Lắp đặt • Nếu không thể tránh bố trí thiết bị kế bên bếp ga hoặc bếp than thì phải đặt một lớp cách nhiệt (85x60 cm) phủ lá nhôm ở bên phía đối Vị trí diện bếp ga hoặc bếp lò... -
Page 68: Tháo Dỡ Bao Bì Đóng Gói Và Tháo Bỏ Bu-Lông Vận Chuyển
Tháo dỡ bao bì đóng gói và Lắp đặt các nắp che lỗ. Tháo bỏ Bu-lông Vận chuyển • Đặt các nắp chụp lỗ kèm theo trong túi đựng phụ kiện hoặc gắn vào phía sau. Nhấc thiết bị khỏi bệ bọt xốp. •... -
Page 69: Sử Dụng Miếng Lót Chống Trượt (Tùy Chọn)
để đảm bảo rằng thiết bị không bị rung chuyển. Nếu thiết bị rung chuyển, chỉnh lại thiết bị một lần nữa cho thăng bằng. LƯU Ý • Bạn có thể mua miếng lót chống trượt ở Trung tâm Dịch vụ LG. -
Page 70: Giữ Thăng Bằng Cho Thiết Bị
Giữ thăng bằng cho Thiết bị Kết nối Ống Cấp Nước Nếu sàn không bằng phẳng, hãy vặn các chân • Áp lực nước phải nằm trong khoảng 0,1 MPa có thể điều chỉnh được nếu cần (Không chèn và 1,0 MPa (1,0‒10,0 kgf/cm các miếng gỗ... - Page 71 Kết nối Ống với Vòi Nước máy Đẩy ống nối lên trên phần đầu của vòi nước máy sao cho gioăng cao su tạo thành kết nối kín nước. Siết chặt bốn vít cố định. Kết Nối Ống Kiểu Vặn vít với Vòi nước máy có...
- Page 72 Kết nối Ống với Thiết bị Đẩy ống nối lên trên phần đầu của vòi nước máy sao cho gioăng cao su tạo thành kết nối Gắn đường nước nóng vào nguồn cấp nước kín nước. Siết chặt bốn vít cố định và vành nóng ở...
-
Page 73: Lắp Đặt Ống Xả Nước
Lắp đặt Ống Xả nước • Ống xả không nên đặt cao hơn 100 cm so với sàn. Nước trong thiết bị không thể xả hoặc xả chậm. • Siết chặt ống xả đúng cách sẽ bảo vệ sàn khỏi hư... -
Page 74: Vận Hành
VẬN HÀNH Sử dụng Máy Giặt Chọn chu trình giặt mong muốn. • Nhấn nút chu trình nhiều lần hoặc vặn núm Trước khi giặt lần đầu, chọn chương trình giặt, chọn chu trình cho đến khi chọn được chu để... -
Page 75: Phân Loại Quần Áo
Thận trọng trước khi bỏ đồ vào máy. • Kết hợp các đồ kích thước lớn và nhỏ trong Phân loại Quần áo một mẻ giặt. Bỏ các đồ kích thước lớn vào máy trước. • Các đồ kích thước lớn không nên nhiều Tìm nhãn sử... -
Page 76: Thêm Các Chất Làm Sạch
Thêm Các chất Làm sạch LƯU Ý • Không để chất tẩy cô đặc lại. Làm như vậy có Liều lượng Chất tẩy thể dẫn đến vón cục, hiệu năng xả kém hoặc có mùi. • Chất tẩy cần được sử dụng theo hướng dẫn •... - Page 77 Sử dụng Viên nén • Không trữ chất làm mềm vải trong ngăn kéo chất tẩy quá 2 ngày (Chất làm mềm vải có thể Mở cửa và đặt các viên nén vào trong lồng cô đặc lại). giặt. • Chất làm mềm sẽ được tự động thêm vào trong chu trình giũ...
-
Page 78: Bảng Điều Khiển
Bảng Điều khiển : Màn hình hiển thị thời gian còn lại • Nút Nguồn ước tính. Trong khi kích thước mẻ giặt đang được tính toán tự động, nhấp • Nhấn nút Nguồn điện để bật máy giặt. nháy hoặc hiển thị ‘Detecting’ (Đang dò). •... -
Page 79: Bảng Chương Trình
Bảng Chương trình Chương trình Giặt Nhiệt độ Phù Tải trọng Chương trình Mô tả Loại Vải hợp Tối đa Cho hiệu năng tốt hơn 40 °C Cotton (Vải bằng cách kết hợp các (Lạnh đến 95 Quần áo không phai màu bông) chuyển động lồng giặt °C) - Page 80 Nhiệt độ Phù Tải trọng Chương trình Mô tả Loại Vải hợp Tối đa Cho phép chọn thời Quick 30 20 °C gian giặt nhanh dành (Giặt nhanh Đồ màu bị bẩn nhẹ. (Lạnh đến 40 3 kg cho các mẻ giặt ít và 30 phút) °C) quần áo hơi bẩn.
- Page 81 Chương trình sấy Tải trọng Chương trình Mô tả Loại Vải Tối đa Dành cho vải bông. Lựa chọn Vải bông hoặc các loại vải Bình thường chương trình này để giảm thời lanh như khăn bông, áo Định mức gian chu trình và...
- Page 82 Tùy chọn Thêm Làm mềm Delay Wash Giặt hơi Rinse+ Chương trình vải bằng End (Hẹn EcoHybrid (Sấy (Giặt nước (Giũ+) hơi nước giờ) Khô) Sơ) Cotton (Vải bông) ● ● ● ● ● ● Cotton+ (Vải ● ● ● ●...
- Page 83 Dữ liệu Hoạt động Tốc độ Tối đa Chương trình 1400 Cotton (Vải bông) 1400 Cotton+ (Vải bông+) 1400 Easy Care (Giặt nhẹ) 1000 Mixed Fabric (Đồ hỗn hợp) 1400 Allergy Care (Giặt ngừa dị ứng) 1400 Wool (Đồ len) Steam Refresh (Làm mới bằng Hơi nước) Outdoor (Đồ...
-
Page 84: Chương Trình Tùy Chọn
Chương trình Tùy chọn Steam (Hơi nước) (tùy chọn) Tính năng Giặt hơi nước tăng cường hiệu quả Delay End (Hẹn giờ) giặt với mức tiêu thụ năng lượng thấp. Chu trình Làm mềm sợi vải bằng hơi nước diễn ra sau chu Bạn có... - Page 85 • Khi thêm đồ giặt, hãy chắc chắn đã đẩy hết đồ vào hẳn trong lồng giặt. Nếu đồ giặt bị mắc vào Bắt đầu một chương trình từ ứng dụng LG lỗ của chốt cửa, gioăng cao su có thể bị hỏng, SmartThinQ trên điện thoại thông minh của...
- Page 86 Pre Wash (Giặt sơ) ( Rinse+ (Giũ+) ( Nếu đồ giặt bị bẩn nhiều, khuyến cáo dùng Giũ thêm một lần nữa. chương trình Giặt Sơ. Nhấn nút Nguồn. Nhấn nút Nguồn. Lựa chọn một chương trình giặt. Lựa chọn một chương trình giặt. Nhấn và...
- Page 87 Beep On / Off (Bật / Tắt Âm báo) Child Lock (Khóa trẻ em) ( Sử dụng tùy chọn này để vô hiệu hóa các phím Nhấn nút Nguồn. điều khiển. Tính năng này có thể ngăn không cho trẻ em thay đổi các chu trình hoặc vận hành Nhấn nút Khởi động/Tạm dừng.
-
Page 88: Dry (Sấy Khô) ( )
Đồ len Dry (Sấy Khô) ( • Đừng sấy khô đồ len. Duỗi chúng ra theo hình Sử dụng các chu trình Tự động để sấy hầu hết dạng ban đầu và trải phẳng ra để làm khô. các đồ. Các cảm biến điện tử đo nhiệt độ khí xả để... - Page 89 Hướng dẫn thời gian sấy • Chương trình sấy có thể kéo dài lên đến khoảng 7 giờ. • Những thời gian sấy này được đưa ra như là hướng dẫn để giúp bạn cài đặt máy giặt để sấy khô. •...
-
Page 90: Chức Năng Thông Minh
Cài đặt Smart ThinQ • LG SmartThinQ không chịu trách nhiệm cho Tìm ứng dụng LG Smart ThinQ trên Google Play bất kỳ vấn đề kết nối mạng hay bất kỳ lỗi, trục Store & Apple App Store trong điện thoại thông trặc, hoặc các lỗi gây ra do kết nối mạng. - Page 91 được thực hiện bởi một trung tâm opensource.lge.com. thông tin khách hàng LG Electronics khi thiết bị Ngoài mã nguồn, tất cả các điều khoản cấp gặp trục trặc hoặc sự cố.
-
Page 92: Sử Dụng Smart Diagnosis
được thực hiện bởi một trung tâm Diagnosis™ kém do chất lượng cuộc gọi kém, thông tin khách hàng LG Electronics khi thiết bị bạn có thể không nhận được dịch vụ Smart gặp trục trặc hoặc sự cố. Sử dụng chức năng Diagnosis™... -
Page 93: Bảo Trì
BẢO TRÌ Vệ sinh Phần bên trong CẢNH BÁO • Rút phích cắm máy giặt trước khi vệ sinh để • Sử dụng khăn lau hoặc vải mềm để lau khô tránh rủi ro điện giật. Không tuân theo cảnh xung quanh ô... -
Page 94: Vệ Sinh Bộ Lọc Bơm Xả
Vệ sinh Bộ lọc Bơm Xả Sau khi vệ sinh, xoay bộ lọc bơm và lắp ốc xả nước. • Bộ lọc xả thu gom chỉ và các vật thể nhỏ trong quần áo. Thường xuyên kiểm tra bộ lọc còn sạch để... -
Page 95: Vệ Sinh Ngăn Kéo Bộ Phân Phối
Vệ sinh Ngăn kéo Bộ phân Tub Clean (Vệ sinh Lồng) (Tùy phối chọn) Chất tẩy và chất làm mềm vải có thể tích tụ Vệ sinh Lồng là một chương trình đặc biệt để vệ trong ngăn kéo bộ phân phối. Tháo rời ngăn kéo sinh phần bên trong máy giặt. -
Page 96: Thận Trọng Trước Hiện Tượng Đóng Băng Trong Mùa Đông
Thận trọng trước hiện tượng • Sau khi khóa vòi nước máy, ngắt kết nối ống cấp nước lạnh với vòi nước máy và xả bỏ Đóng băng Trong Mùa đông nước trong khi vẫn giữ ống hướng xuống dưới. •... - Page 97 Làm cách nào để Xử lý Đóng băng • Khi nước được xả bỏ hoàn toàn khỏi lồng giặt, đóng nút bịt ống dùng cho xả bỏ nước tồn • Đảm bảo lồng giặt trống rỗng, dội nước ấm dư, chọn chương trình giặt, rồi nhấn nút Khởi 50–60 °C lên bộ...
-
Page 98: Xử Lý Sự Cố
XỬ LÝ SỰ CỐ • Máy giặt của bạn được trang bị hệ thống giám sát lỗi tự động để phát hiện và chẩn đoán các sự cố ở giai đoạn sớm. Nếu máy giặt của bạn không hoạt động đúng chức năng hoặc không hoạt động gì cả, hãy kiểm tra như... - Page 99 Triệu chứng Nguyên nhân Giải pháp • Kiểm tra vòi nước máy khác Nguồn nước yếu ở vị trí đó. trong nhà. Vòi cấp nước máy không mở • Mở hết mức vòi nước máy. Nước không chảy vào máy hoàn toàn.
- Page 100 Triệu chứng Nguyên nhân Giải pháp • Kiểm tra xem biểu tượng ‘Khóa Khi máy giặt đã hoạt động, Cửa’ có bật sáng hay không. Bạn Cửa không mở không thể mở cửa vì các lý do có thể mở cửa an toàn sau khi biểu an toàn.
-
Page 101: Thông Báo Lỗi
Thông báo Lỗi Triệu chứng Nguyên nhân Giải pháp Nguồn nước trong khu vực bị yếu. • Kiểm tra vòi nước máy khác trong nhà. Các vòi cấp nước máy không mở hoàn • Mở hết mức vòi nước máy. toàn. - Page 102 Triệu chứng Nguyên nhân Giải pháp Ống xả bị gập hoặc tắc. • Vệ sinh và làm thẳng ống xả. Bộ lọc xả bị tắc. • Vệ sinh bộ lọc xả. Đảm bảo cửa không mở. • Đóng kín cửa. Nếu không tắt, hãy liên hệ...
-
Page 103: Bảo Hành
• Hư hỏng do sử dụng sai, lạm dụng, lắp đặt, sửa chữa hoặc bảo dưỡng không đúng cách. Sửa chữa không đúng cách bao gồm việc sử dụng các bộ phận không được phê chuẩn hoặc chỉ định bởi LG. - Page 104 Rung hoặc tiếng ồn lạ gây ra do không tháo bỏ các bu- Tháo bỏ các bu-lông vận lông vận chuyển hoặc goòng chuyển & goòng chống. Bu-lông chống. Goòng Đế vận chuyển chống bìa cứng Rò rỉ gây ra do dơ bẩn (tóc, Vệ...
- Page 105 Rò rỉ gây ra do lắp đặt ống xả không đúng cách hoặc ống Lắp đặt lại ống xả. xả bị tắc. Công-xôn Khuỷu Dây rút Rò rỉ gây ra do lắp đặt ống cấp nước không đúng cách Lắp đặt lại ống cấp. hoặc sử...
- Page 106 Ghi nhớ...
- Page 107 Ghi nhớ...
- Page 108 Ghi nhớ...
Need help?
Do you have a question about the FG1405H3W and is the answer not in the manual?
Questions and answers