
Related Manuals for Whirlpool K Series


Summary of Contents for Whirlpool K Series
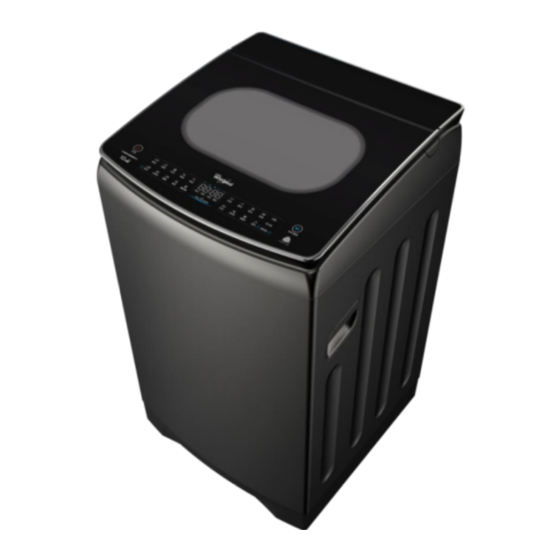
- Page 1 I n v e r t e r T O P L O A D W a s h e r WVMD1208 BHG K-MAX WVTD1050 BHG K-TOUCH SRP 27, 998 SRP 45, 998...
- Page 2 F e a t u r e s : KEY FEATURE: SENSE TECHNOLOGY*...
- Page 3 F e a t u r e s : ZENTechnology: Built to provide an exceptionally quiet yet high performance wash, you can enjoy now enjoy the convenience of doing the laundry any time without fear of disturbing or distrupting the still of the night.
- Page 4 F e a t u r e s : TUB CLEAN SUPER SOAK 0-40 minutes GENTLE HANDWASH VARIABLE WAVE...
- Page 5 W V M D 1 2 0 8 B H G •Washing Capacity : 12kg •Product Dimension mm (wxdxh): 601 x 632 x 999 •Soft Closing Black Tempered Glass •Child lock •Start delay up to 24 hours •Extra Rinse Selection (0-4 times) •Water Level Selection (10 levels) SRP 45, 9988...
- Page 6 W V M D 1 2 0 8 B H G INTUITIVE WOOL WASH TOUCH LED CONTROL CIRCULATION WARM WASH TUB LIGHT SPRAY UP TO 45 Stainless Steel Tub Automatic add & pulsator detergent Luxury & Antibacterial Add 30days'...
- Page 7 WVMD1208 BHG...
- Page 8 T e c h n i c a l S p e c i f i c a t i o n s Model Number WVMD1208BHG Load Capacity 9.0 -10.0 kg Tub Capacity 12.0 kg Spin Speed 650 rpm Max Wattage 1600W Motor Output 140W...
- Page 9 A c c e s s o r i e s :...
- Page 10 Model and Serial Number Location: Model Serial Number Number...
- Page 11 Pre-Installation Requirements Placement of the Washing Machine...
-
Page 12: Pre-Installation Requirements
Pre-Installation Requirements Faucet Selection... -
Page 13: Installation Procedure
Installation Procedure Universal Inlet Hose Adaptor Installation... - Page 14 Installation Procedure Inlet Hose Installation...
- Page 15 Installation Procedure Changing The Position Of The Drain Hose...
- Page 16 Installation Procedure Extension Of Drain Hose...
- Page 17 Installation Procedure When installing the Washing Machine, please be sure to remove the Pedestal and Bracket for transportation at the bottom of the Washing Machine. Otherwise it cannot be used. REMOVE THE SHIPPING BRACKET...
-
Page 18: Basic Operation
W V M D 1 2 0 8 B H G USAGE AND BASIC OPERATION... -
Page 19: Control Panel Operation
Control Panel Operation 1 – Power Button 7 – Softener Selection Button 2 – Start/Pause Button 8 – Preset Time Button 3 – Program Selection Area 9 – Special Functions Button 4 – 6 Sense Smart Slider 10 – Procedure Button 5 –... - Page 20 Control Panel Operation 1 – Power Button Press this to turn ON/OFF the unit. If no button is pressed within 10 minutes, the power will cut off automatically. After the program stops running, power cut off automatically (10 minutes if the draining function is enabled)
- Page 21 1 – Power Button...
- Page 22 Control Panel Operation 2 – Start / Pause Button This button is to use to start a program. This button can also be used to temporarily stop the operation of the unit.
- Page 23 2 – Start / Pause Button...
- Page 24 Control Panel Operation 3 – Program Selection Area Choose desired program. Press icon to select on the following: Mix Wash, Cotton Wash, Wool Dash, Down Wash, Home Textiles Quick Wash, Warm Wash, Rinse + Spin, Spin Dry, Tub Clean...
- Page 25 3 – Program Selection Area...
- Page 27 Control Panel Operation 4.1 – 6 Sense Slider Slide the slide to adjust the parameters of a certain procedure.
- Page 28 4.1 – 6 Sense Slider...
- Page 29 Control Panel Operation 4.2 – 6 Sense One Key Smart Select Program After the machine is plugged ON, press the central part of this Smart Slider for 3 seconds to start the 6 Sense One Key Smart Select Program. The Sensor will automatically detect the clothing amount. The appropriate water level, water flow and other operating programs will be selected automatically.
- Page 30 Control Panel Operation This button is used to select the water level 5 – Water Level Button appropriate for the laundry to be washed. Washing and rinsing can be done at different levels Textile Program: Level 6 – 10 Wool Program: Level 3 –...
- Page 31 5 – Water Level Button...
- Page 32 Control Panel Operation 6 – Detergent Selection Button 7 – Softener Selection Button Depending on the soil level of the laundry, you can Use this button to choose the option use this button to select amount of detergent to be of adding or excluding softener.
- Page 33 6 – Detergent Selection Button 7 – Softener Selection Button...
- Page 34 Detergent and Softener Auto Dosing Detergent Volume Water Level Level Detergent Softener Level 1 25 ml 20 ml Level 1 Level 2 25 ml 20 ml Level 3 30 ml 20 ml Level 1 35 ml 35 ml Level 5 Level 2 45 ml 40 ml...
- Page 35 Control Panel Operation 8 – Preset Time Button Use to set the time from the start of the program to the end of the program. Note: This function is unavailable for 6 Sense One Key Smart Select Program...
- Page 36 8 – Preset Time Button...
- Page 37 Control Panel Operation 9 – Special Function Button Includes Function Button, Variable Wave Button, Super Soak Button.
- Page 38 Control Panel Operation 9a – Function Select Button Can use this between Specialized Programs: Spray, Ex-Rinse, Hand (Wash), Retain (Water) WVMD1208BHG...
- Page 39 9a – Function Select Button...
- Page 40 Control Panel Operation 9b – Variable Wave Button - Used to adjust the washing and rinsing strength according to the soil level of the laundry - Users may choose between 4 levels of water flow: H1 , H2, H3 and H4 WVMD1208BHG...
- Page 41 9b – Variable Wave Button...
- Page 42 Control Panel Operation 9c – Super Soak Button - Users may choose from different soaking times - This button also doubles as a “Child Lock” button when pressed and held for 3 sec. WVMD1208BHG...
- Page 43 9c – Super Soak Button...
- Page 44 ACTIVATING CHILD LOCK FUNCTION...
- Page 45 Control Panel Operation 10 – Procedure Button Use to set Wash Time, Rinse Times, Spin Time and Spin Speed...
- Page 46 Control Panel Operation Displays the remaining time during operation. For 11 – Display Functions example: Remaining time is 20 minutes….. Displays when will the scheduled program end during Preset Time Setting. For example: Ends in 2 hours….. Schedule indicator blinks. Displays the Fault Code when abnormity occurs.
- Page 47 Control Panel Operation 11 – Display Functions Displays whether some functions are enable where the constantly lit Function Indicators show the functions that are enabled. SOFTENER INDICATOR DETERGENT INDICATOR Constantly lit to Indicates that Constantly lit to Indicates that the Automatic Softener Addition the Automatic Detergent Function is enable Addition Function is enable...
- Page 48 W V M D 1 2 0 8 B H G COMPONENT ACCES...
- Page 49 Basic Parts...
- Page 50 Basic Parts Liquid Detergent CHEMICAL DISPENSER Compartment WVMD1208BHG...
- Page 51 Basic Parts Fabric Softener CHEMICAL DISPENSER Compartment WVMD1208BHG...
- Page 52 Basic Parts Powder Detergent CHEMICAL DISPENSER Compartment WVMD1208BHG...
- Page 53 Basic Parts Auto Dosing Mechanism of Chemical Dispenser WVMD1208BHG...
- Page 54 Basic Parts LINT FILTER WVMD1208BHG...
-
Page 55: Functional Parts
Functional Parts Reference No.: 116 Part No.: 70C04097 Part Description: Control Circuit Board Complete Function: Contains the program for all the functions of the washing machine WVMD1208BHG... - Page 56 Bubble Water Generato Circulato To Door Lock Water Heater Softener Door Latch Inlet Pump Valve Deterge Drain Motor nt Pump To UI Board Temp. Imbalance Sensor Water Level Switch Softene Magneti Sensor LED Light Inverter Detergen Latch Board Sensor t Sensor Switch (NO)
- Page 57 Functional Parts Reference No.: 136 Part No.: 70CO1219 (From Actual unit) Part Description: WB1208188ZRA Driver Board Function: Controls the movement of the drive motor WVMD1208BHG...
- Page 58 Functional Parts Reference No.: 7 Part No.: 70C04099 Part Description: Display Circuit Board Complete Function: Enables the user to communicate with the washing machine WVMD1208BHG...
- Page 59 Functional Parts Reference No.: 88 Part No.: 301B421000014 Part Description: Gearcase and Motor Assembly Function: Enables the machine to switch from wash mode to spin mode WVMD1208BHG...
- Page 60 Functional Parts Reference No.: 97 Part No.: 301426S18140 Part Description: Torque Motor Function: Opens the drain valve to let the waste water out of the washing machine WVTD1050BHG...
- Page 61 Functional Parts Reference No.: 37 Part No.: 3014291S09140 Part Description: Response Switch(Water Level Sensor) Function: Determines the amount of water that’s inside the tub WVMD1208BHG...
- Page 62 Functional Parts Reference No.: Not in Parts Diagram Part No.: 3014294S12140 Part Description: Inlet Valve Assembly(Water Valve) Function: Controls the water coming in to the washing machine WVMD1208BHG...
-
Page 63: Troubleshooting Guide
W V M D 1 2 0 8 B H G DIAGNOSTICS AND TROUBLESHOOTING GUIDE... - Page 64 D i a g n o s t i c R o u t i n e LOAD TEST: 1. Press the Power ON/OFF button 2. Hold the Mix button and press the Start/Pause button for 3 times at the same time...
- Page 65 D i a g n o s t i c R o u t i n e Mix light ON Mix & Cotton light ON Mix & Wool light ON Mix & Down light ON LOAD TEST Keep pressing MIX button to proceed to other load testing BUTTON DISPLAY LOAD ACTION...
- Page 66 D i a g n o s t i c R o u t i n e Mix & Home Textiles light Mix & Quick light ON Mix & Warml light ON Mix & Rinse+Spin light ON LOAD TEST Keep pressing MIX button to proceed to other load testing BUTTON DISPLAY LOAD ACTION...
- Page 67 D i a g n o s t i c R o u t i n e Mix & Spin Only light ON Mix & Tub Clean light Mix & Wash ON Mix & Rinse light ON LOAD TEST Keep pressing MIX button to proceed to other load testing BUTTON DISPLAY LOAD ACTION...
- Page 68 D i a g n o s t i c R o u t i n e Open the washer lid, the light of the Preset Time will be turn off. To exit, press the POWER button to turn off.
- Page 69 D i a g n o s t i c R o u t i n e DISPLAY AND BUTTON CHECK: 1. Press the Power ON/OFF button 2. Hold the Water Level button and then at the same time press the Start/Pause button 3 times...
- Page 70 D i a g n o s t i c R o u t i n e DISPLAY AND BUTTON TEST • Press the START/PAUSE button, all led will be turned on/off...
- Page 71 D i a g n o s t i c R o u t i n e DISPLAY AND BUTTON TEST • Press the 6 button, the digital area and slider will be turned on/off.
- Page 72 D i a g n o s t i c R o u t i n e DISPLAY AND BUTTON TEST • Press the other button, corresponding led will be turned on/off. • Hold and Preset Time button for about 1 second, all led will be turned ON one by one.
- Page 73 D i a g n o s t i c R o u t i n e AUTO DOSING SYSTEM CHECK: 1. Press the POWER button to turn the power on. 2. Select the Detergent and Softener button. Make sure that detergent and softener led turns on.
- Page 74 D i a g n o s t i c R o u t i n e AUTO DOSING SYSTEM CHECK: Wait for 3 seconds: • If the detergent led flashes with a beep, check the detergent feedback circuit, it may be damaged. •...
- Page 75 D i a g n o s t i c R o u t i n e SPIN TEST: 1. Press the Power ON/OFF button 2. Hold the SPIN button and then at the same time press the Start/Pause button 3 times...
- Page 76 D i a g n o s t i c R o u t i n e SPIN TEST: The washing machine will run a spin program which is 2 minute During the spin process, open the washer lid, the digital will display E4 and the motor will stop running ...
- Page 77 Initial Issues Encountered...
- Page 78 Warranty Information Asian Washing Machines and Spin Dryers One (1) year parts and service...
Need help?
Do you have a question about the K Series and is the answer not in the manual?
Questions and answers