Table of Contents
Advertisement
Quick Links
Advertisement
Table of Contents

Related Manuals for Franklin Fueling Systems TS-LS500


Summary of Contents for Franklin Fueling Systems TS-LS500
- Page 1 TS-LS500 AUTO-LEARN ® LINE LEAK DETECTION INSTALLATION GUIDE...
- Page 2 Copyright © 2021 Franklin Fueling Systems, LLC, Madison, WI 53718. All world rights reserved. No part of this publication may be stored in a retrieval system, transmitted, or reproduced in any way, including, but not limited to, photocopy, photograph, magnetic, or other record, without the prior written permission of Franklin Fueling Systems.
-
Page 3: Table Of Contents
Maximum and minimum line volume for rigid and flexible pipe..........2 TS-LSU500 dimensions ........................3 Transducer Installation ........................3 Intrinsically Safe Installation ......................4 Explosion Proof TS-LS500E Installation ....................6 TS-LS500 Setup (Console Programming) ..................8 AC Input Module .........................8 4-20mA Input Module ........................10 Relay Module ..........................10 Turbine Pump Interface (TPI) Applications ..................12 Fuel Management Systems (FMS) Line Application Set-Up ............13... - Page 4 TS-LS500 Functional Testing ......................30 Enabling/Disabling Lines ........................32 Enabling Lines ..........................32 Disabling Line Channels .........................32 Control Drawing 1 ..........................33 Control Drawing 2 ..........................34...
-
Page 5: Introduction
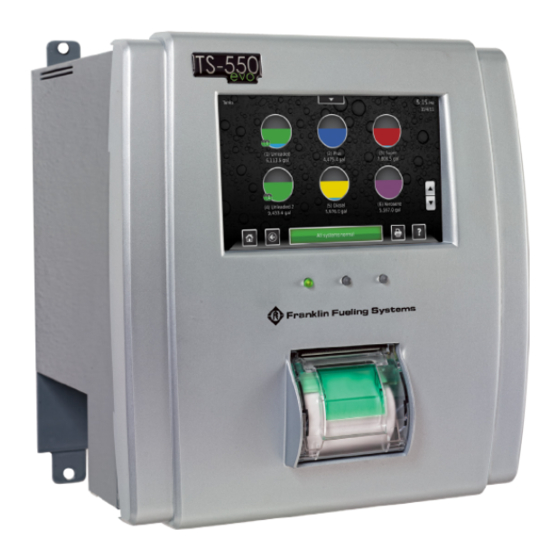
Introduction The LS500 is an electronic line leak detection system that continually monitors the line pressure of primary product piping in underground systems. The LS500 is designed to work with TS-550, TS-5000, EVO™ 550, EVO™ 5000, and EVO™ 600 automatic tank gauges. The LS500 Line leak application requires the following: •... -
Page 6: Applications
Submersible Pumps do not have an adjustable functional element as an option. ® These submersible pumps have a check valve that meets the TS-LS500 pressure requirements. NOTE: The TS-LSU500 is a pressure sensing device that can be installed anywhere in the product pipeline where accurate line pressure can be monitored. -
Page 7: Ts-Lsu500 Dimensions
2 3/8” open-end wrench to install it in the Leak Detector Port of the STP housing (see Figure 1). When using TS-LS500 line leak detection in a manifolded line application, you only need NOTE: to use one transducer to monitor the entire line. This transducer should be located in the master STP. -
Page 8: Intrinsically Safe Installation
CAUTION: Do not use explosion-proof transducers (TS-LSU500E) with intrinsically safe TS- LS500. TS-LS500 must be installed in accordance with the national electrical code, ANSI/NFPA 70, NOTE: CEC or other applicable national or local codes. 1. Pull the wiring through the intrinsically safe conduits that will be used for the TS-LSU500 transducers. - Page 9 4-20mA Input Module Non-Hazardous Hazardous Location Location Class I, Division 1, Group (Blue) D, Group IIA, Zone 0 – – – – – Black LS-500 TS-LSU500 – - (BLK) Black – + (RED) Junction Black Black – - (BLK) + (RED) Tank Pressure Sensor Intrinsically Safe Conduit 4-20 mA Input Module Wiring...
-
Page 10: Explosion Proof Ts-Ls500E Installation
Explosion Proof TS-LS500E Installation NOTE: The Explosion Proof 4-20mA Input Module has a RED face. WARNING: Lockout and tag circuit breakers, and disconnect console power wiring before installing or servicing any system wiring. WARNING: DO NOT make transducer wiring connections with power connected to the console or any module. - Page 11 + (RED) + (RED) Explosion-Proof Conduit Explosion-Proof Conduit Explosion-Proof Conduit Explosion-Proof Conduit 4-20 mA Input Module Wiring NOTE: This diagram shows a typical installation of the TS-LS500 equipment inside an STP sump. Wire Splices FE Petro Submersible Pump TS-LSU500 Black...
-
Page 12: Ts-Ls500 Setup (Console Programming)
Submersible Turbine Pump (STP) on using either a relay (from the relay board or from the power supply board) or the turbine pump interface (TPI). The TS-LS500 is constantly monitoring the pressure on the line, and testing accordingly. To perform tests properly, the... - Page 13 Parameter Parameter value Channels Select the number of inputs (channels) to be used. Name Text box, name each channel to easily identify in the mapping. Enabled Select YES. This will allow the channel to be mapped to another module. Other modules need this signal to trigger events. Active State Select HIGH.
-
Page 14: 4-20Ma Input Module
Text box, name each channel to easily identify in the mapping. Name Service Type Select Line Leak Detection. This indicates that the type of device connected to the channel to indicate that the device is a TS-LS500 transducer. Example: 4-20mA Input Module TS-LS500 Setup Group Name Parameter Name... - Page 15 Example: Relay Module Setup for STP Control Group Name Parameter Name Parameter Value Relay Modules Module 1 Channels 1 Channel 1 Name Unleaded STP Enabled Yes Type Submersible Pump Polarity Normal Logic OR Logic Physically Wired As Normally Open Number of inputs 4 Input 1 Type 4-20mA Input Module Channel Unleaded Transducer...
-
Page 16: Turbine Pump Interface (Tpi) Applications
Turbine Pump Interface (TPI) Applications In systems where TPI is used, the relays are not needed for line leak or STP operation. Communication with the FFS smart controllers is done exclusively by the RS-485 connection. Refer to the Programming Manual for full TPI instructions. Example: TPI Setup Group Name Parameter Name... -
Page 17: Fuel Management Systems (Fms) Line Application Set-Up
Enables Catch Pressure test and sudden pressure loss alarms - No disables. Catch pressure test and sudden pressure loss alarm notification. Gross / Monthly / Annual Tests Select Yes. This allows the TS-LS500 to run the tests. Enable Wait Period Between Tests Default setting is 0 days. - Page 18 Example: TS-LS500 Application Setup Group Name Parameter Name Parameter Value Lines Number of lines Line 1 Name Unleaded Line Submersible Pump Module Relay Module Submersible Pump Channel Unleaded STP Unleaded Transducer Transducer Enable SLLD Product Unleaded Enabled Pressure Up Test Wait Time...
-
Page 19: Line Status And Control Screens
Control screens. To get to the Line Status or Control screens, go to FMS > Status > Lines or FMS > Control > Lines. TS-LS500 Status Screen The status of each line can be viewed at any time by navigating to the line status or control screens on a T5 Series tank gauge. - Page 20 Green, if running test. Gray, if not running test Waiting out Thermal Green, if waiting out thermal, Gray, if not Transducer Failure Red, if the TS-LS500 is not communicating with the transducer Pump On Green, if the STP is on Pump Request The TS-LS500 is attempting to turn the STP on When viewing the Line Status Summary screen, remember to enable Auto Refresh.
-
Page 21: Ts-Ls500 Control Screen
TS-LS500 Control Screen Control Section Indicator Description Enable/Disable Manually enable or disable the line Reset Alarm Manually reset an alarm on the line Reset Line Manually reset line Force Gross Leak Test Manually start a gross leak test Force Monthly Leak Test... -
Page 22: Pre-Operational Ts-Ls500 Testing
NOTE: The lines must be able to reach 20 PSI (138 kPa). If the lines cannot reach 20 PSI (138 kPa), the issue needs to be resolved or the TS-LS500 will not work in that STP. Required Equipment •... -
Page 23: Purging The Line
NOTE: If purging is required after the lines have been learned, the same process is required to disable testing in setup parameters to allow a pump to run for purging purposes. Zero Offset • TS-LS500 AUTO-LEARN ELLD requires that the line reach 0 PSI prior to starting the learn ®... -
Page 24: Line Stability Test
Line Stability Test Perform the following steps for each line: 1. Install the needle valve kit, pressure gauge and leak generator into the STP manifold. Pressurize the line by lifting the dispenser handle without dispensing fuel. 2. Once the line is pressurized, turn the STP off and monitor the pressure on the pressure gauge. -
Page 25: Learn Process
• After repairs or modifications that effect the operating or holding pressure of the line • After 4-20mA Input Module replacement • After certain 4-20mA Input Module firmware upgrades (consult FFS Technical Services Department) • If moving the TS-LS500 to another 4-20mA channel... -
Page 26: Procedure
Procedure To test: After testing is completed: IMPORTANT: When the procedure is complete, you MUST remove the needle valve. 1. The needle valve kit (TS-ALNIP) and 3.0 GPH (11.4 L/h) Leak Generator (TS-ALCAL) should be installed in the STP manifold. The line must be purged of all air prior to learning the line. 2. -
Page 27: Learn Messages
NOTE: Each line is different, but if the pump takes an excessively long time to bleed down to 0 PSI, then there may be air in the system. Re-purge the line and if air remains, look for pathways that air could have been introduced. NOTE: If any errors are encountered at any time during the Learn Process, the screen will display the applicable error message and the Not Learned indicator will remain active. -
Page 28: Ts-Ls500 Reports
6000 Programming Guide (p/n 228180061), or the EVO 600 and EVO 6000 Operator's Guide (p/n 10000002562). TS-LS500 Line Leak Reports TS-LS500 Line Leak Reports include any line tests completed within the date range chosen by the user. An example of an TS-LS500 report can be found below. -
Page 29: Alarms
Alarms When a T5, EVO 600, or EVO 6000 console is in alarm, the Alarm LED on the front of the console will flash. If the line has been programmed to shut down the pump on failed test (in the FMS Setup), the pump will be unavailable for all system tests and dispensing until the line with the active alarm is manually reset. -
Page 30: Ts-Ls500 Alarms And Warnings
TS-LS500 Alarms and Warnings Alarms During the Learn Process Alarm Symptom Possible Cause Resolution Failed to pressure up STP is not turning on Verify that the 4-20 mA transducer Check the is a relay / TPI input programming Is the pump controller powered on? Check the controller... - Page 31 STP is turning on, but the Is the 4-20 mA transducer in alarm? Check alarms TS-LS500 doesn’t see the pressure change Is the wrong transducer mapped? Check programming Catastrophic leak Investigate for leaks Is the clamp valve down? Look at the pressure...
- Page 32 Marginal Pass of Gross Passing result of gross test, Line is not thermally stable Force a gross leak test Leak Test but marginally Pump Request Ignored STP did not turn on when Controller not functioning requested System is busy TPI problem Check RS485 communication STP is disabled by another...
-
Page 33: Clearing Alarms
STP Shutdown 3 consecutive catch High line pressure Investigate, adjust or (cont.) pressure tests that replace check valve or over 50 PSI (345 kPa) functional element Catch pressure test Pressure was less that 12 PSI (83 kPa) Investigate, force a manual failure after programmed delay when STP test and observe pressure... -
Page 34: Ts-Ls500 Functional Testing
TS-LS500 Functional Testing To confirm the LS500 AUTO-LEARN® can properly catch a 3 GPH test technicians can perform a functionality test by using one of two methods. 1. Functionality test using a dispense to initiate test (Third Party Testing) a. Turn off and lock-out-tag-out (LOTO) STP Circuit Breaker b. - Page 35 d. Navigate to line control screen on EVO™ touch screen or laptop and initiate a gross leak test by clicking or touching force gross leak button. The lines touch Screen will show a gradual loss in pressure and indicate “Gross Test In Progress (Failing)”...
-
Page 36: Enabling/Disabling Lines
Enabling/Disabling Lines After learning the line(s), each line will need to be enabled to allow monitoring. The Line Status reflects the current status. Enabling Lines At the T5 Series, EVO 600, or EVO 6000 console (LCD or by the web page), navigate to the FMS Control screen. -
Page 37: Control Drawing 1
Control Drawing 1... -
Page 38: Control Drawing 2
Control Drawing 2... - Page 39 Intentionally Blank...
- Page 40 000-2145 r11...
Need help?
Do you have a question about the TS-LS500 and is the answer not in the manual?
Questions and answers