Celestron 8 Quick Start Manual
Hide thumbs
Also See for 8:
- Instruction manual (61 pages) ,
- User manual (241 pages) ,
- Operating manual (16 pages)
Advertisement
Quick Links
2021/10/09 17:28
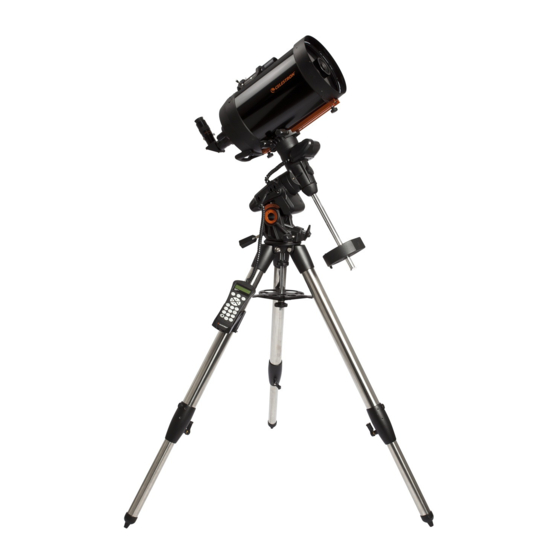
C8 & Celestron Advanced GT
The Celestron 8 (C8) is our smallest Schmidt Cassegrain telescope not accounting for binoculars or
finderscopes. The telescope is usually attached to a Celestron Advanced GT mount, which can be can
be set up by a single person because of its compact construction.
Assembly
In the following the setup of this telescope and the mount will be explained step by step:
Description
One needs to
carefully choose
the place where
the telescope
should be placed.
For example, the
relevant part of
the sky needs to
be visible (the
dome covers a
certain part of
the sky when the
telescope is
setup on the
roof) and the
1
cables of the
power supply or
the cameras
should not
become tripping
hazards. The
example setup
was performed in
the laboratory-
course room
directly behind
the door →
directly in the
way, hidden, and
no sky → Bad
choice!
OST Wiki - https://polaris.astro.physik.uni-potsdam.de/wiki/
1/9
Used parts
C8 & Celestron Advanced GT
Telescope after the corresponding step
Advertisement


Need help?
Do you have a question about the 8 and is the answer not in the manual?
Questions and answers