Table of Contents
Advertisement
Quick Links
Advertisement
Table of Contents

Related Manuals for Zline RTBBR30


Summary of Contents for Zline RTBBR30
- Page 1 angetops Installation Guide and Users Manual...
- Page 2 ZLINE is fueled by a passion for innovation; A relentless pursuit of bringing the highest end luxury designs and professional features into everyone's homes. Because we continually strive to improve our products, we may change specifications and designs without prior notice.
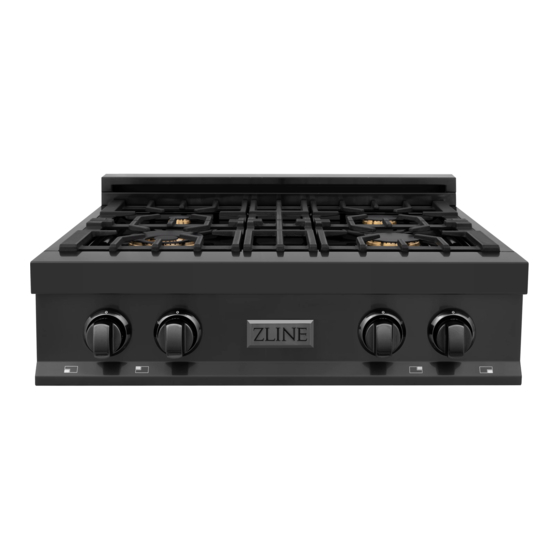
- Page 3 Enjoy the versatility and high performance cooking power of ZLINE’s rangetops. No matter your kitchen needs, this collection offers four to seven burners in various finishes, sizes, and BTUs. Enjoy precise heat control through imported Italian burners combined with durable cast iron grills, both known for their even heat distribution and longevity.
- Page 4 COVERAGE ZLINE Kitchen and Bath range products will be warrantied for one year from the original purchase date for the original purchaser of the product. This warranty covers all parts and labor for necessary repairs if any part of the product proves to be defective in materials or workmanship.
- Page 5 WHAT IS NOT COVERED Installation or start-up, damages or problems caused by improper installation or use. 2. Improper liquid propane conversion or damage related to improper liquid propane conversion. 3. Cook top burner flame adjustments or related complaints. 4. Service by an unauthorized service providers or damage related to unauthorized service or unauthorized parts.
-
Page 6: Table Of Contents
CONTENTS Installation Guide IMPORTANT SAFETY INSTRUCTIONS WARRANTY AND SERVICE PRODUCT DIMENSIONS BEFORE INSTALLATION INSTALLATION REQUIREMENTS POWER RATING & ELECTRICAL CONNECTION WIRING SCHEMATICS GAS CONNECTION GAS CONVERSION PROCEDURE INSTALLATION CHECKLIST FINAL PREPARATION... - Page 7 CONTENTS Users Manual ROOM VENTILATION COOKTOP COOKING MAINTAINING YOUR RANGE TROUBLESHOOTING...
- Page 8 Our distributors and our service partners are ready to answer any questions you may have regarding installation of your ZLINE product. This manual will help you learn to use the product in the safest, most efficient manner, and care for it so that it may give you the highest satisfaction for years to come.
- Page 9 Location of Appliance Tags The rating tag shows the model and serial number of your range. The tag is located near the power cord. Important Appliance Information Dealer Model Date Installed Installer...
-
Page 10: Important Safety Instructions
Important Safety Instructions An air curtain or other overhead range/cooktop hood which operates by blowing downward airflow onto the range, shall not be WARNING used/installed in conjunction with this gas range. The manufacturer will not be responsible for any damage to property or to persons caused by incorrect installation, improper use of the appliance, or failure to heed the warnings listed. - Page 11 Important Safety Instructions Please ensure that the altitude of your home is conducive for the use of gas cooking products. If the product is installed at higher altitudes above sea level, you may experience issues with gas pressure that will affect product performance. Please consult your local gas company for recommendations before purchasing or installing.
-
Page 12: Warranty And Service
1-614-777-5004. The ZLINE customer service team is ready to work with you on resolving your issues and assessing if further service is needed. Service should only be conducted by an industry professional with PRIOR approval from the ZLINE customer service team. - Page 13 Product Dimensions Cut outs: 27 ” 27"7/16(695) 23 ” 23"15/16(608) 15 / 47 ” 47"7/8 (1215) 2 ” 2"3/4 (70) 1 ” 1"5/16 (33.5) 7 ” 1"3/8 (35) 1 ” 5 ” "3/8 (137 2” 1"15/15 (48.5) (608) 47 ” 47"7/8 (1215) ”...
-
Page 14: Before Installation
Before Installation This appliance shall only be installed by an authorized professional. The appliance shall be installed in accordance with the standards of the country where it will be installed. The installation of this appliance must conform to local codes and ordinances. In the absence of local codes installation must conform to American National Standards, National fuel Gas code ANSI Z223.1-Latest edition/ NFPA 54 or B 149.1. - Page 15 Before Installation Room Ventilation An exhaust fan may be used with the appliance; in each case it shall be installed in conformity with the appropriate national and local standards. Exhaust hood operation may affect other vented appliances; in each case it shall be installed in conformity with the appropriate national and local standards.
-
Page 16: Installation Requirements
Installation Requirements Installing the range top Place the range top in the appropriate-sized cabinet base. Review cutout sizes on page 4. The range top can sit in the cabinet with or without glue. An agency-approved, properly-sized manual shut-off valve should be installed no higher than 3”... -
Page 17: Power Rating & Electrical Connection
Power Rating & Electrical Connection A properly grounded and horizontally-mounted electrical receptacle type NEMA 14- 50R should be installed no higher than 3” above the floor, no less than 2” and not more than 8” from the left side (facing product); refer to electrical connection section. The appliance shall be connected to a single phase electric line rated at 1 10-120Vac and 60Hz frequency. -
Page 18: Wiring Schematics
Wiring Schematics T4NN400NCN Model: RT/RTS-30 110~120V- 60Hz WIRE CONNECTOR IGNITION ALLUMAGE GROUND WIRE T6NN600NCN Model: RT/RTB/RTS-36 110~120V- 60Hz WIRE CONNECTOR IGNITION ALLUMAGE GROUND WIRE... - Page 19 Wiring Schematics Model: RT/RTB/RTS-48 T7NN700NCN 110~120V- 60Hz WIRE CONNECTOR IGNITION ALLUMAGE GROUND WIRE...
- Page 20 GAS CONNECTION All gas connections must comply with national and local codes. The gas supply line (service) must be the same size or greater than the inlet line of the appliance. This range uses a ½˝ NPT inlet. Use appropriate sealant on all pipe joints that are resistant to gas.
-
Page 21: Gas Connection
Gas Connection Manual Shut-Off Valve This valve is not shipped with the appliance and must be provided by the installer. The manual shut-off valve must be installed in the gas service line between the gas hook-up on the wall and the appliance inlet, in position where it can be reached quickly in the event of an emergency. - Page 22 Gas Connection Pressure Regulator Since service pressure may fluctuate with local demand, every gas cooking appliance must be equipped with a pressure regulator on the incoming service line for safe and efficient operation. Pressure Regulator The pressure regulator shipped with the appliance has two female threads 34”NPT. The regulator shall be installed properly in order to be accessible when the appliance is installed in its final position.
- Page 23 Gas Connection The gas conversion procedure for this range includes: 1. Pressure Regulator 2. Surface Burners 3. Flame Adjustment The conversion is not finished if all steps are not completed. Before performing the gas conversion, locate the package containing the replacement nozzles, which has a number indicating its flow diameter printed on the body.
-
Page 24: Gas Conversion Procedure
Gas Conversion Procedure Step 1: Pressure Regulator The pressure regulator supplied with the appliance is a convertible type pressure regulator for use with Natural Gas at a nominal outlet pressure of 4˝ w.c. or LP gas at a nominal outlet pressure of 1 1” w.c. and it is pre-assembled from the factory to operate with one of these gas pressure as indicated in the labels affixed on the appliance, package and instruction booklet. - Page 25 Gas Conversion Procedure Step 2: Surface Burners To replace the nozzles of the surface burners, lift up the burners and unscrew the nozzles shipped with the range using a 7 mm (socket wrench). Replace nozzles using the conversion set supplied with the range. Each nozzle has a number indicating its flow diameter printed on the body.
- Page 26 Gas Conversion Procedure Step 3: 1. Light one burner at a time and set it to the MINIMUM position (small flame). 2. Remove the knob. 3. The range is equipped with a safety valve. Using a small-size flathead screwdriver, locate the choke screw (see diagram below) and turn to the right or left until the burner flame is adjusted to desired minimum.
-
Page 27: Installation Checklist
Installation Checklist 1. Is the back guard securely connected? 2. Is the electricity properly grounded? 3. Is the gas service line connected following the directions of the manufacturer? 4. Have all the proper valves, stoppers, and gaskets been installed between the range and the service line? 5. -
Page 28: Users Manual
Users Manual... -
Page 29: Room Ventilation
Room Ventilation The use of a gas cooking appliance generates heat and humidity in the room where it is installed. Proper ventilation in the room is needed. Make sure the kitchen is equipped with a range hood of appropriate power (400 CFM minimum). Activate the exhaust fan/range hood when possible. - Page 30 COOKTOP COOKING Surface Burner Operation - Electric Ignition To activate the electric ignition, simply push the knob in to activate the spark. While still pushing the knob in, turn the control knob counter-clockwise to release the gas. The spark will be released at the metal tip of the white ceramic pin located on the side of the burner.
- Page 31 COOKTOP COOKING Be sure to set all worktop/oven/broiler burner controls to the OFF position after each use of the appliance. Maximum Flame Height Minimum Flame Height Maximum temperature setting/recommended control knob position for burner ignition. The regulating knobs should be turned in anti-clockwise direction until the small flame symbol, vice- versa for the larger flame symbol.
-
Page 32: Maintaining Your Range
Maintaining Your Range Cleaning Your Range During cleaning operation never move the appliance from its original installation position. Never use abrasive cleaners! Scratches on the WARNING stainless steel surfaces are permanent. Do NOT clean the range when hot! Cleaning after Installation: Use a stainless steel cleaning product or wipe to eliminate the glue residues of the protection film after removal. -
Page 33: Troubleshooting
Troubleshooting Problem Possible Cause and/or Remedy Igniters are not sparking Rangetop is not connected to electrical power. Check power circuit breaker, wiring, and fuses. If all electrical components are properly installed, call customer support. Burner does not ignite Gas supply valve is in the “OFF” position or gas supply is interrupted. - Page 34 Three Locations: 350 Parr Circle Reno, NV 89512 916 Delaware Avenue Marysville, OH 43040 427 Rowland Mill Road Bruceton, TN 38317 www.zlinekitchen.com 1-614-777-5004 1.0.3...
Need help?
Do you have a question about the RTBBR30 and is the answer not in the manual?
Questions and answers