Table of Contents
Advertisement
Available languages
Available languages
Quick Links
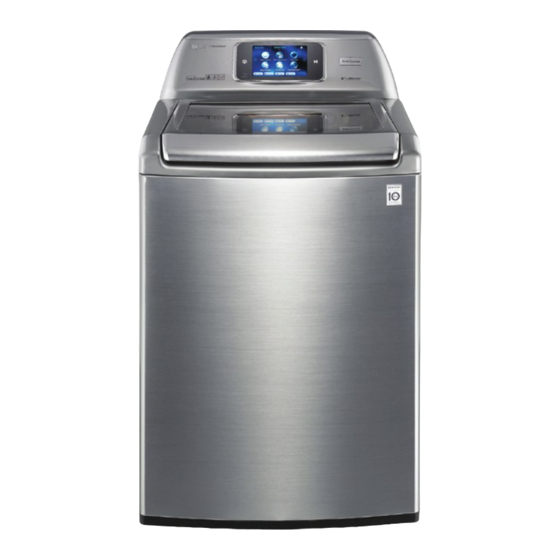
OWNER'S MANUAL
WASHING MACHINE
Before beginning installation, read these instructions carefully. This will simplify
installation and ensure that the washer is installed correctly and safely.
Leave these instructions near the washer after installation for future reference.
WT6001H*
P/No.: MFL67221307
www.lg.com
Advertisement
Table of Contents

Subscribe to Our Youtube Channel
Related Manuals for LG WT6001H Series


Summary of Contents for LG WT6001H Series
- Page 1 OWNER’S MANUAL WASHING MACHINE Before beginning installation, read these instructions carefully. This will simplify installation and ensure that the washer is installed correctly and safely. Leave these instructions near the washer after installation for future reference. WT6001H* www.lg.com P/No.: MFL67221307...
- Page 2 TABLE OF CONTENTS TABLE OF CONTENTS - Sports or exercise items, SPORTS WEAR IMPORTANT SAFETY INSTRUCTIONS - Lightly soiled items, PURE COLOR™ BASIC SAFETY PRECAUTIONS - Quick wash, SPEED WASH GROUNDING INSTRUCTIONS - Items labeled wool or hand-washable, WOOL SAFETY INSTRUCTIONS FOR INSTALLATION - Sheer items, DELICATES SAFETY INSTRUCTIONS FOR USE, CARE, - Rinse + Spin...
-
Page 3: Your Safety And The Safety Of Others Are Very Important
IMPORTANT SAFETY INSTRUCTIONS IMPORTANT SAFETY INSTRUCTIONS READ ALL INSTRUCTIONS BEFORE USE WARNING For your safety, the information in this manual must be followed to minimize the risk of fire or explosion, electric shock, or to prevent property damage, injury to persons, or death. Your Safety and the safety of others are very important. -
Page 4: Important Safety Instructions
IMPORTANT SAFETY INSTRUCTIONS IMPORTANT SAFETY INSTRUCTIONS READ ALL INSTRUCTIONS BEFORE USE WARNING For your safety, the information in this manual must be followed to minimize the risk of fire or explosion, electric shock, or to prevent property damage, injury to persons, or death. GROUNDING INSTRUCTIONS This appliance must be grounded. -
Page 5: Safety Instructions For Installation
IMPORTANT SAFETY INSTRUCTIONS IMPORTANT SAFETY INSTRUCTIONS READ ALL INSTRUCTIONS BEFORE USE WARNING For your safety, the information in this manual must be followed to minimize the risk of fire or explosion, electric shock, or to prevent property damage, injury to persons, or death. SAFETY INSTRUCTIONS FOR INSTALLATION WARNING To reduce the risk of fire, electric shock, or injury to persons when using this appliance, follow basic precautions, including the... -
Page 6: Safety Instructions For Use, Care, Cleaning, And Disposal
IMPORTANT SAFETY INSTRUCTIONS IMPORTANT SAFETY INSTRUCTIONS READ ALL INSTRUCTIONS BEFORE USE WARNING For your safety, the information in this manual must be followed to minimize the risk of fire or explosion, electric shock, or to prevent property damage, injury to persons, or death. SAFETY INSTRUCTIONS FOR USE, CARE, CLEANING, AND DISPOSAL WARNING To reduce the risk of fire, electric shock, or injury to persons when using this appliance, follow basic precautions, including the... -
Page 7: Product Features
PRODUCT FEATURES PRODUCT FEATURES INVERTER DIRECT-DRIVE MOTOR The inverter motor, which is directly connected to the tub, minimizes energy loss and produces little noise and vibration. Smart ThinQ SMART DIAGNOSIS™ - Should you experience technical difficulty, your appliance has the capability of transmitting data by phone to the Customer Information Center to diagnosis the problem. -
Page 8: Introducing Your Washing Machine
2 seals per hose, 1 at each end) NOTE y Contact LG Customer Service at 1-800-243-0000 (1-888-542-2623 in Canada) if any accessories are missing or to purchase accessories. y Always purchase good quality hoses. Leaking caused by poor quality hoses or by improper installation is not covered by the manufacturer’s warranty. -
Page 9: Control Panel Features
INTRODUCING YOUR WASHING MACHINE Control panel features CYCLES Status Icons Power Start/ (ON/OFF) Pause Button Button Menu Option Buttons Swipe Operation Button Description y POWER (ON/OFF) BUTTON - Touch to turn the washer ON or OFF. Touching the POWER button during a cycle will cancel that cycle and any wash settings will be lost. - Page 10 INTRODUCING YOUR WASHING MACHINE Display Back Button Selected Cycle Cycle Settings Est. Time Remaining Cycle Delay Options Wash Save Cycle Button Description y SELECTED CYCLE - The icon and name of the selected cycle. y EST. TIME REMAINING - Displays the estimated time remaining in the cycle, including any Delay Wash time. This time will change if settings are modified or if options are added y DELAY WASH - Touch the plus (+) or minus (-) buttons to either add or decrease time from the Delay Wash...
-
Page 11: Installation Instructions
INSTALLATION INSTRUCTIONS INSTALLATION INSTRUCTIONS Installation Overview Checking and choosing the Unpacking the washer Connecting the water line proper location Connecting the drain line Leveling the washing Plugging in the power cord machine and grounding Test run WARNING y Washer is heavy! Two or more people are required when moving and unpacking the washer. Failure to do so can result in back or other injury. -
Page 12: Checking And Choosing The Proper Location
INSTALLATION INSTRUCTIONS Checking and choosing the proper location Install the washing machine on a solid floor that is strong and rigid enough to support the weight of the washing machine, even when fully loaded, without flexing or bouncing. If the floor has too much flex, you may need to reinforce it to make it more rigid. -
Page 13: Unpacking The Washer
INSTALLATION INSTRUCTIONS Unpacking the washer Unfasten the power cord from the back of the washer. After the washer is in the home, remove the carton and Styrofoam® shipping base from the washer. TOOLS YOU WILL NEED • Adjustable Pliers When removing the washer from the carton base, be sure to remove the tub support in the middle of the carton base. -
Page 14: Connecting The Water Lines
INSTALLATION INSTRUCTIONS Connecting the water lines Connect the hoses to the water inlets tightly by hand and then tighten another 2/3 turn with pliers. - Connect the blue hose to the cold water inlet and the Check the rubber seals on both sides of the hose. red hose to the hot water inlet. -
Page 15: Connecting The Drain Line
INSTALLATION INSTRUCTIONS Using a laundry tub Connecting the drain line Clip the end of the hose into the elbow bracket. Secure the drain hose in place to prevent moving and leaking. - Connect the elbow bracket within 4 inches (10 cm) from the end of the drain hose. -
Page 16: Leveling The Washing Machine
INSTALLATION INSTRUCTIONS Leveling the Washing machine side to side The washer spins at very high speeds, up to 1,100 RPM. NOTE y Adjust the leveling feet only as far as necessary to level the washer. Extending the leveling feet more than necessary can cause the washer to vibrate. -
Page 17: Plugging In The Power Cord And Grounding
INSTALLATION INSTRUCTIONS Plugging in the power cord and Test run grounding Check if the washing machine is properly installed and run a test cycle. Make sure to ground the washing machine to prevent a short circuit or an electric shock when plugging in. Load the washing machine with 6 pounds of laundry. -
Page 18: Sorting Wash Loads
PREPARATION PREPARATION Sorting wash loads Precautions for fabric care before wash cycle Read and observe the following to prevent shrinkage or damage to clothes. CAUTION Fabric care labels y Do not wash or spin any item labeled or known to be Most articles of clothing feature fabric care labels that include water-proof or water-resistant, even if the product care instructions for proper care. -
Page 19: Using Detergent/Fabric Softener
PREPARATION Using detergent/fabric softener Loading the dispenser The detergent dispenser drawer of the washing machine has Recommended detergent a dispenser compartment for each detergent type. Add the appropriate detergents into its respective compartments. Make sure to use HE (High-Efficiency) detergent for Top loading washing machines. - Page 20 PREPARATION Main Wash Detergent Compartment Liquid Bleach Compartment This compartment holds laundry detergent for the main wash This compartment holds liquid chlorine bleach, which will be cycle, which is added to the load at the beginning of the dispensed automatically at the proper time during the wash cycle.
-
Page 21: Using Your Washing Machine
Detergent TURN ON THE WASHER Touch the POWER button to turn ON the washer. The LG startup screen will display, followed by the cycle screen. NOTE: Approximately one minute after the power is shut off, the control enters standby mode. It takes approximately four seconds for the control to power on from standby mode. -
Page 22: Cycle Guide
USING YOUR WASHING MACHINE Cycle guide Available Settings The Cycle Guide below shows the default settings, available changes and options, and the = Available Option recommended fabric types for each cycle. To protect your garments, not all settings or options are ... - Page 23 USING YOUR WASHING MACHINE Cycle guide Available Settings The Cycle Guide below shows the default settings, available changes and options, and the = Available Option recommended fabric types for each cycle. To protect your garments, not all settings or options are ...
-
Page 24: Pure Color
USING YOUR WASHING MACHINE Main cycle SPORTS WEAR Sports or exercise items, Use this cycle for garments that are specially designed and You can wash laundry items more thoroughly by selecting treated for sport. the wash cycle that best suits the type of items to be washed. -
Page 25: Cycle Setting Buttons
USING YOUR WASHING MACHINE CYCLE SETTING BUTTONS NOTE When a cycle is selected, the default settings and available options for that cycle are displayed. Adjust the settings or y To protect your garments, not every water temperature, add options as desired for your particular needs. Use the spin speed, soil level, or option is available with every up and down arrows to adjust the setting to the desired cycle. -
Page 26: Extra Rinse
USING YOUR WASHING MACHINE WATER PLUS OPTIONS Select this option to add extra water to the wash and rinse Your washing machine features several additional cycle cycles. This option is especially useful for extra large or options that customize cycles to meet your individual needs. bulky items. -
Page 27: Delay Wash
USING YOUR WASHING MACHINE To use a Custom Cycle: 1. Touch the POWER button to turn on the washer. 2. Navigate to the custom cycles screen. (The Custom Cycle screen can be set as the home screen. Refer to the Settings Screen section). - Page 28 USING YOUR WASHING MACHINE TIME & STATUS SCREEN NOTE The TIME & STATUS screen is displayed any time the y To protect your garments, not every water temperature, washer is running a cycle. This screen displays the selected spin speed, soil level, or option is available with every cycle name, icon and the estimated time remaining in the cycle.
-
Page 29: Settings Screen
MENU OPTIONS BUTTONS & SCREENS To use the connectivity features of your appliance, you must first create a user ID and password at the LG Smart ThinQ website (http://us.smartthinq.com). Once that is completed, use the Product Registration screen to register your appliance... -
Page 30: Smart Diagnosis
SMART THINQ SCREEN Use the cycle guide to find out detailed information on each of the LG cycles. Scroll through the cycles at the bottom of the screen by touching the left and right arrow buttons. Touch the cycle that you would like a description for. -
Page 31: Smart Appliance Connectivity
• Close the cover. When the modems are fully seated, the cover will close completely (3). NOTE y LG Electronics is not responsible for any network connection problems or any faults, malfunctions, or errors caused by network connection. y Network connection may not work properly depending odn Internet service provider. -
Page 32: Connectivity Overview
In order to use the connectivity features of your appliance, characters, and you should make note of it for later use. you must first create a user ID and password at the LG 6. Enter the security characters into the box to the right. -
Page 33: Connectivity Setup
The LGE Smart Grid system is only available if your home is equipped with a Smart Meter, ZIGBEE modem, and an LG appliance with a Smart Grid system. The Smart Grid system functions when your utility company is able to provide you with information regarding the features and capabilities of the system. -
Page 34: Smart Thinq
5. Select the desired cycle for download, and follow the instructions to save it to the LG USB drive on your computer 1. Plug the LG USB drive into an available USB port on your in the LG_Washer folder. Only one cycle can be in the folder computer. -
Page 35: Software Update
SMART PHONES NOTE Smart Access y The LG SMART APPLIANCE application is not available Monitor your cycle operation so you know how much time is left for all smart phones. Available smart phone minimum in the cycle. You can even shut the machine off if you need to. -
Page 36: Maintenance
If the filters cannot be cleaned or are damaged, washing machine and faucets. do NOT operate the washer without the inlet filters. Contact LG Customer Service or a qualified LG servicer. Turn on the faucets. Touch the power button. -
Page 37: Clean The Drum
MAINTENANCE Cleaning Cleaning the detergent box Leaving detergent in the detergent for an extended period of Periodically clean the washing machine to maintain its time or using the washing machine for a long period of time performance and to prevent malfunction. may cause the build-up of scales in the detergent. -
Page 38: Troubleshooting
TROUBLESHOOTING TROUBLESHOOTING Checking error messages If the following message appears on the display, check the following and take the appropriate corrective action. Message Possible Causes Solutions Water in the washer y Drain hose is bent, pinched, or clogged. y Make sure the drain hose is free of clogs, kinks, etc., drains slowly or not and is not pinched behind or under the washer. - Page 39 TROUBLESHOOTING Checking error messages (cont.) Message Possible Causes Solutions The display shows: y The washer has detected an out of balance y If the washer detects a load that is too far out of The washer is adding load. balance to spin, it will display this code while it is water to redistribute attempting to rebalance the load.
-
Page 40: Normal Sounds You May Hear
TROUBLESHOOTING Normal sounds you may hear The following sounds may be heard while the washer is operating. They are normal. Clicking: • Lid lock relay when the lid locks and unlocks. • The washer will make a series of clicking noises as it changes the cleaning mode. High pitched noise: The wash basket spins faster to remove moisture from the load. - Page 41 TROUBLESHOOTING Problem Possible Causes Solutions Washer won’t y Control panel is asleep y This is normal. Press POWER. operate y Washer is unplugged y Make sure cord is plugged securely into a working outlet. y Water supply is turned off y Turn both hot and cold faucets fully on.
- Page 42 TROUBLESHOOTING Problem Possible Causes Solutions Incomplete or no dispensing y Detergent compartments clogged y Make sure that detergent and additives are put in to the of detergent from incorrect filling correct dispenser compartments. If liquid detergent is used, make sure that the liquid detergent cup and insert are in the detergent compartment.
-
Page 43: Specifications
Should you experience any problems with your washing machine, it has the capability of transmitting data to your Smart Phone using the LG Smart Laundry Application or via your telephone to the LG call center. SMART DIAGNOSIS™ cannot be activated unless your washing machine is turned on by touching the POWER button. If your washing machine is unable to turn on, then troubleshooting must be done without using SMART DIAGNOSIS™. -
Page 44: Open Source Software Notice
3. Touch the Smart Diagnosis button. 4. Touch the Wi-Fi Diagnosis button. 5. Touch the Start button, and then call the LG call center at: (LG U.S.) 1-800-243-0000 (LG Canada) 1-888-542-2623. 6. The call center agent will be able to further assist you with the diagnosis. - Page 45 LG Electronics U.S.A., Inc. (“LG”) warrants your LG Washing Machine (“product”) against defect in materials or workmanship under normal household use, during the warranty period set forth below, LG will, at its option, repair or replace the product. This limited warranty is valid only to the original retail purchaser of the product, is not assignable or transferrable to any subsequent purchaser or user, and applies only when the product is purchased through an LG authorized dealer or distributor and used within the United States (“U.S.”) including U.S.
- Page 46 Should your LG Washer (“Product”) fail due to a defect in material or workmanship under normal home use during the warranty period set forth below, LG Canada will at its option repair or replace the Product upon receipt of proof of original retail purchase. This warranty is valid only to the original retail purchaser of the product and applies only to a Product distributed in Canada by LG Canada or an authorized Canadian distributor thereof.
- Page 47 Antes de comenzar la instalación, lea atentamente estas instrucciones. Esto simplifi cará la instalación y asegurará que la lavadora está instalada en forma correcta y segura. Conserve estas instrucciones cerca de la lavadora luego de la instalación para futuras consultas. WT6001H* www.lg.com P/NO : MFL67221307...
- Page 48 ÍNDICE ÍNDICE - Cargas mixtas, Toallas INSTRUCCIONES IMPORTANTES DE - Ropa de deporte Variada, Ropa deportiva SEGURIDAD - Ropa de ligeramente sucia, Pure Color™ PRECAUCIONES BÁSICAS DE SEGURIDAD - Lavar rápido, Lavar rápido INSTRUCCIONES PARA LA CONEXIÓN A TIERRA - Prendas de lana, Lana INSTRUCCIONES DE SEGURIDAD PARA LA IN- - Prendas delicadas, Delicada STALACIÓN...
-
Page 49: Lea Todas Las Instrucciones Antes De Usar
INSTRUCCIONES IMPORTANTES DE SEGURIDAD INSTRUCCIONES IMPORTANTES DE SEGURIDAD LEA TODAS LAS INSTRUCCIONES ANTES DE USAR ADVERTENCIA Por su seguridad, debe seguir la informacion indicada en este manual para minimizar el riesgo de incendio o explosion, descarga electrica, o para prevenir danos a la propiedad, lesiones personales o muerte. Su seguridad y la de otros es muy importante. -
Page 50: Instrucciones Importantes De Seguridad
INSTRUCCIONES IMPORTANTES DE SEGURIDAD INSTRUCCIONES IMPORTANTES DE SEGURIDAD LEA TODAS LAS INSTRUCCIONES ANTES DE USAR ADVERTENCIA Por su seguridad, se debe seguir la informacion indicada en este manual para minimizar el riesgo de incendio o explosion, descarga electrica, o para prevenir danos a la propiedad, lesiones personales, o muerte. INSTRUCCIONES PARA LA CONEXIÓN A TIERRA Este aparato debe ser conectado a tierra. -
Page 51: Instrucciones De Seguridad Para La Instalación
INSTRUCCIONES IMPORTANTES DE SEGURIDAD INSTRUCCIONES IMPORTANTES DE SEGURIDAD LEA TODAS LAS INSTRUCCIONES ANTES DE USAR ADVERTENCIA Por su seguridad, se debe seguir la informacion indicada en este manual para minimizar el riesgo de incendio o explosion, descarga electrica, o para prevenir danos a la propiedad, lesiones personales o muerte. INSTRUCCIONES DE SEGURIDAD PARA LA INSTALACIÓN ADVERTENCIA Para minimizar el riesgo de incendio o explosion, descarga electrica, o para prevenir lesiones personales cuando use... -
Page 52: Instrucciones De Seguridad Para La Utilización, Cuidado Y Limpieza, Y La Eliminación
INSTRUCCIONES IMPORTANTES DE SEGURIDAD INSTRUCCIONES IMPORTANTES DE SEGURIDAD LEA TODAS LAS INSTRUCCIONES ANTES DE USAR ADVERTENCIA Por su seguridad, se debe seguir la informacion indicada en este manual para minimizar el riesgo de incendio o explosion, descarga electrica, o para prevenir danos a la propiedad, lesiones personales o muerte. INSTRUCCIONES DE SEGURIDAD PARA LA UTILIZACIÓN, CUIDADO Y LIMPIEZA, Y LA ELIMINACIÓN ADVERTENCIA Para minimizar el riesgo de incendio o explosion, descarga electrica, o para prevenir lesiones personales cuando use... -
Page 53: Características Del Producto
CARACTERÍSTICAS DEL PRODUCTO CARACTERÍSTICAS DEL PRODUCTO MOTOR DE IMPULSO DIRECTO DEL INVERSOR El motor del inversor, que está directamente conectado a la cuba, minimiza la pérdida de energía y produce poco ruido y vibración. Smart ThinQ SMART DIAGNOSIS™ - Si experimenta algún problema técnico, su electrodoméstico tiene la capacidad de transmitir datos por teléfono al Centro de Información al Cliente para diagnosticar el problema. - Page 54 NOTA y Póngase en contacto con el Departamento de atención al cliente de LG, en el número 1-800-243-0000 (1-888-542-2623 en Canadá) si falta alguno de los accesorios. y Compre mangueras de buena calidad. Las fugas causadas por mangueras de baja calidad o una instalación incorrecta no es están cubiertas por la garantía del fabricante.
-
Page 55: Características Del Panel De Control
INTRODUCCIÓN A LA LAVADORA Características del panel de control Ciclos Iconos de estado Botón Power Botón ON/OFF START/PAUSE (encendido/ (inicio/pausa) apagado) Botones de opciones de menú Swipe Funcionamiento Botón Descripción y BOTÓN POWER ON / OFF (encendido / apagado) Tóquelo para encender o apagar la lavadora. Tocar el botón POWER (encendido) durante un ciclo cancelará... - Page 56 INTRODUCCIÓN A LA LAVADORA Pantalla Botón retroceder (back) Ciclo Configura- seleccionado ciones de ciclos Tiempo restante estimado Opciones de Retrasar ciclos lavado (Delay Wash) Guardar ciclo (Save Cycle) Botón Descripción y CICLO SELECCIONADO - Muestra el icono y el nombre del ciclo seleccionado. y TIEMPO RESTANTE ESTIMADO - Muestra el tiempo estimado restante del ciclo, incluyendo cualquier tiempo de Retrasar Lavado.
-
Page 57: Instrucciones De Instalación
INSTRUCCIONES DE INSTALACIÓN INSTRUCCIONES DE INSTALACIÓN Perspectiva general de instalación Comprobación y elección de Desembalaje de la lavadora Conexión de los tubos de la ubicación adecuada agua Mas bajo Mas alto Conexión del tubo de Nivelación de la lavadora Conexión del enchufe y la toma desagüe de tierra Prueba de funcionamiento... -
Page 58: Comprobación Y Elección De La Ubicación Adecuada
INSTRUCCIONES DE INSTALACIÓN Comprobación y elección de la ubicación adecuada Instale la lavadora sobre un suelo con la resistencia y rigidez suficiente para soportar el peso de la máquina, incluso con la carga completa, sin que se flexione o rebote. Si el suelo tiene una flexibilidad excesiva, quizás deba reforzarse para hacerla más rígida. -
Page 59: Desembalaje De La Lavadora
INSTRUCCIONES DE INSTALACIÓN Desembalaje de la lavadora Afloje el cable de alimentación de la parte trasera de la lavadora. Cuando reciba la lavadora en su casa, retire la base de cartón y poliestireno utilizada para el envío del electrodoméstico. HERRAMIENTAS A UTILIZAR •... -
Page 60: Conexión De Las Tuberías De Agua
INSTRUCCIONES DE INSTALACIÓN Conexión de las tuberías de agua Conecte las mangueras a las entradas de agua con la mano a continuación, utilice unos alicates para apretarlas otro 2/3 de vuelta. Revise las juntas herméticas de goma de ambos - Conecte la manguera azul a la entrada de agua fría y la extremos de la manguera. -
Page 61: Conexión Del Tubo De Desagüe
INSTRUCCIONES DE INSTALACIÓN Conexión del tubo de desagüe Utilización de una tina de lavado Fije el extremo de la manguera en el soporte de codo. Fije el tubo de desagüe para evitar que se mueva y que se produzcan fugas. - Conecte el codo a una distancia no superior a 4 pulgadas (10 cm) del extremo de la manguera de desagüe. -
Page 62: Nivelado De La Lavadora
INSTRUCCIONES DE INSTALACIÓN Nivelado de la lavadora • Para comprobar si está nivelada de un lado a otro, cerrar la tapa y coloque un nivel en la parte trasera de la tapa. La lavadora centrifuga a velocidades muy elevadas, de hasta •... -
Page 63: Conexión Del Enchufe Y La Toma De Tierra
INSTRUCCIONES DE INSTALACIÓN Conexión del enchufe y la toma de tierra Prueba de funcionamiento Conecte a tierra la lavadora para evitar un cortocircuito o Compruebe si la lavadora ha sido instalado correctamente y descargas eléctricas durante la conexión. realice una prueba de funcionamiento. Utilización de una toma de 3 clavijas Cargue la lavadora con 6 libras (3 kg) de ropa. -
Page 64: Clasificación De Las Cargas De Lavado
PREPARACIÓN PREPARACIÓN Clasificación de las cargas de lavado Precauciones para el cuidado de los tejidos antes del ciclo de lavado Lea y cumpla con las siguientes instrucciones para evitar que la ropa se encoja o se dañe. PRECAUCIÓN Etiquetas de cuidado de las telas y No lave o seque por centrifugado ningún artículo La mayoria de las prendas de vestir tienen etiquetas de etiquetado o que se sabe que es a prueba de agua o... -
Page 65: Detergente Recomendado
PREPARACIÓN Utilización de detergente/suavizante Cargando el dispensador El cajón dispensador de detergente de la lavadora tiene un Detergente recomendado compartimiento dispensador para cada tipo de detergente. Añada los detergentes adecuados en sus compartimentos Asegúrese de utilizar detergentes de alta eficiencia (HE) para respectivos máquinas de carga frontal. - Page 66 PREPARACIÓN Compartimiento de detergente para el lavado principal Compartimiento de blanqueador líquido Este compartimiento alberga el detergente para el ciclo de Este compartimiento alberga blanqueador liquido, que se lavado principal, el cual se agrega a la carga al principio del dispensará...
-
Page 67: Funcionamiento Básico
Detergent ENCIENDA LA LAVADORA Toque el botón POWER para ENCENDER la lavadora. Se mostrará la pantalla inicio de LG, seguida de la pantalla ciclo. NOTA: Si la lavadora está en modo de espera, que durará aproximadamente cuatro segundos para encender el aparato. -
Page 68: Guía De Ciclos
UTILIZACIÓN DE LA LAVADORA Guía de ciclos Configuraciones disponibles La Guía de Ciclo siguiente muestra la configuración predeterminada, los cambios y opciones disponibles, y los tipos de tela recomendados para cada ciclo. Para proteger sus prendas, no todos los = Opción disponible ... - Page 69 UTILIZACIÓN DE LA LAVADORA Guía de ciclos Configuraciones disponibles La Guía de Ciclo siguiente muestra la configuración predeterminada, los cambios y opciones disponibles, y los tipos de tela recomendados para cada ciclo. Para proteger sus prendas, no todos los = Opción disponible ...
- Page 70 UTILIZACIÓN DE LA LAVADORA Ciclo principal Ropa deportiva Ropa de deporte Variada, Puede lavar la ropa de forma más intensiva seleccionando el Utilice este ciclo para prendas especialmente diseñadas y ciclo de lavado más adecuado para el tipo de prendas que se tratadas para deportes.
- Page 71 UTILIZACIÓN DE LA LAVADORA BOTONES DE MODIFICACIÓN DE CICLOS NOTE y Para proteger sus prendas, no todas las temperaturas del Cuando se selecciona un ciclo, se mostrarán los ajustes agua, velocidades de rotación, nivel de suciedad, u opciones por defecto y las opciones disponibles para el ciclo. Ajuste se encuentran disponibles en todos los ciclos.
- Page 72 UTILIZACIÓN DE LA LAVADORA WATER PLUS (AGUA EXTRA) OPCIONES Seleccione esta opción para agregar más agua en los ciclos de La lavadora cuenta con varias opciones adicionales para los lavado y de enjuague. Esta opción es especialmente útil en el ciclos que permiten personalizar los ciclos para satisfacer sus lavado de artículos sumamente grandes o voluminosos.
- Page 73 UTILIZACIÓN DE LA LAVADORA Para utilizar un Ciclo Personalizado: 1. Toque el botón POWER para encender la lavadora. 2. Navegue hasta la pantalla ciclos personalizados. puede ser configurada como pantalla inicio. Consulte la sección de Configuración de pantalla). 3. Seleccione el ciclo deseado desde la pantalla ciclo personalizado.
- Page 74 UTILIZACIÓN DE LA LAVADORA PANTALLA TIEMPO Y ESTADO NOTA La pantalla TIEMPO Y ESTADO se muestra siempre que y La pantalla TIEMPO Y ESTADO se oscurecerá luego la lavadora se encuentre ejecutando un ciclo. Esta pantalla de cuatro minutos de inactividad. Toque la pantalla muestra el nombre del ciclo seleccionado, el icono y el nuevamente para aclararla.
- Page 75 DE MENÚ crear primero un nombre de usuario y una contraseña en la página web SMARTTHINQ de LG (http://us.smartthinq.com). Una vez completado el registro, utilice la pantalla registro del producto para registrar su equipo en su cuenta en línea y obtener actualizaciones automáticas y acceso a ciclos especiales que pueden ser descargados.
-
Page 76: Smart Diagnosis
Si tuviera algún problema con su lavadora, la misma posee la capacidad de CUSTOM CYCLE (CICLO PERSONALIZADO) transmitir datos a través de su teléfono a un especialista de LG, o desde el equipo Utilice la pantalla CICLO PERSONALIZADO para obtener información directamente a su teléfono inteligente con la aplicación LG Smart Laundry. -
Page 77: Conectividad A Equipos Inteligentes
(3). NOTA y LG Electronics no se hace responsable de problemas, fallos, mal funcioamiento o errors causados por la conexión de la red. y Según el proveedor de Internet, la conexión a la red puede que no funcione correctamente. - Page 78 Puede comprobar también el progreso de un ciclo con la 3. En la página siguiente, usted debe aceptar las condiciones de uso aplicación LG Smart Laundry para su teléfono inteligente. Esta misma y la declaración de privacidad. Haga clic en "Confirmar".
-
Page 79: Configuración De Conectividad
ZigBee, y un dispositivo LG configuración del módem ZigBee y de las características de equipado con un sistema Smart Grid. Dicho sistema red inteligente. - Page 80 1. Enchufe la unidad USB de LG en un puerto USB disponible 6. Quite la unidad USB de forma segura de la computadora e de su computadora. La unidad USB debe tener una carpeta insértela en el puerto de módem Wi-Fi Smart Link™...
-
Page 81: Actualización De Software
APLICACIÓN LG SMART APPLIANCE PARA TELÉFONOS INTELIGENTES NOTA Smart Access y La aplicación LG SMART APPLIANCE no está disponible Supervise el funcionamiento del ciclo para saber cuánto tiempo para todos los teléfonos inteligentes. Especificaciones del ciclo queda. Incluso puede apagar la máquina si necesita mínimas disponibles en el teléfono inteligente: Android... -
Page 82: Mantenimiento
Vierta agua caliente sobre los grifos congelados para Contacte con el servicio al cliente de LG o un prestador descongelar las tuberías de agua y sáquelos. de servicios cualificado. -
Page 83: Limpieza Del Tambor
MANTENIMIENTO Limpieza Cuidado y limpieza de la lavadora Si deja detergente en el cajón dispensador durante un Limpie la lavadora periódicamente para mantenerla en período prolongado de tiempo o utiliza la lavadora durante perfecto estado y evitar fallos de funcionamiento. mucho tiempo, puede acumularse cal en el cajón. -
Page 84: Solución De Problemas
SOLUCIÓN DE PROBLEMAS SOLUCIÓN DE PROBLEMAS Comprobación de los mensajes de error Si aparece el siguiente mensaje en la pantalla, compruebe lo siguiente y tome la acción correctiva apropiada. Problema Causas posibles Solución El agua de la lavadora y La manguera de desagüe está curvada, y Asegúrese de que la manguera de desagüe no sale lentamente, no sale pinzada u obstruida. - Page 85 SOLUCIÓN DE PROBLEMAS Comprobación de los mensajes de error (cont.) Problema Causas posibles Solución En la pantalla se lee: y La lavadora ha detectado una carga y Si la lavadora detecta una carga demasiado La lavadora está desbalanceada. desbalanceada como para poder girar, mostrará este agregando agua código mientras intenta rebalancear la carga.
-
Page 86: Ruidos Normales Que Puede Escuchar
SOLUCIÓN DE PROBLEMAS Ruidos normales que puede escuchar Los siguientes sonidos se pueden escuchar mientras que la lavadora está en funcionamiento. Son normales. Chasquidos: • La cerradura de la puerta cuando el relé de la cerradura de la puerta se abre. •... - Page 87 SOLUCIÓN DE PROBLEMAS Problema Causas posibles Solución La lavadora no funciona y Panel de control está dormido y Esto es normal. Pulse ENCENDIDO. y La lavadora está desenchufado y Asegúrese que la cuerda está bien tapada en una salida en funcionamiento. y El suministro de agua está...
- Page 88 SOLUCIÓN DE PROBLEMAS Problema Causas posibles Solución Fugas de agua y Uso excesivo de detergente y El uso excesivo puede crear fugas, que pueden ser causadas por el tipo y la cantidad de detergente utilizado. Se recomienda detergente de alta eficiencia.
-
Page 89: Especificaciones
Si tuviera algún problema con su lavadora, la misma posee la capacidad de transmitir datos a un teléfono inteligente utilizando la aplicación Smart Laundry de LG o mediante el teléfono al Centro de atención telefónica de LG. La aplicación SMART DIAGNOSIS™, no puede activarse a menos que su lavadora sea encendida al tocar el botón Encendido. Si la lavadora no se pudiera encender, entonces la solución de problemas debe realizarse sin utilizar la aplicación SMART DIAGNOSIS™. -
Page 90: Notificación De Software De Fuente Abierta
Por lo tanto, LG no garantiza que SmartDiagnosis resuelva con precisión cualquier cuestión dada. - Page 91 LG Electronics U.S.A., Inc. (“LG”) garantiza su lavadora LG (“producto”) contra cualquier defecto en materiales o mano de obra bajo un uso doméstico normal, durante el periodo de garantía indicado más adelante, y LG podrá reparar o sustituir el producto, bajo su exclusivo criterio. Esta garantía limitada tiene validez sólo para el comprador minorista original del producto, no puede cederse o transferirse a cualquier comprador o usuario posterior, y se aplica sólo cuando el producto se haya adquirido a través de...
- Page 92 LG Customer Information Center 1-800-243-0000 1-888-542-2623 CANADA This product qualifies for ENERGY STAR in the “factory default (Home Use)” setting. Register your product Online! Changing the factory default settings or enabling other features may increase power consumption that could www.lg.com...
Need help?
Do you have a question about the WT6001H Series and is the answer not in the manual?
Questions and answers