Prentke Romich Company ACCENT 800 User Manual
Hide thumbs
Also See for ACCENT 800:
- Hardware manual (40 pages) ,
- Getting started (28 pages) ,
- Hardware manual (47 pages)

Related Manuals for Prentke Romich Company ACCENT 800


Summary of Contents for Prentke Romich Company ACCENT 800
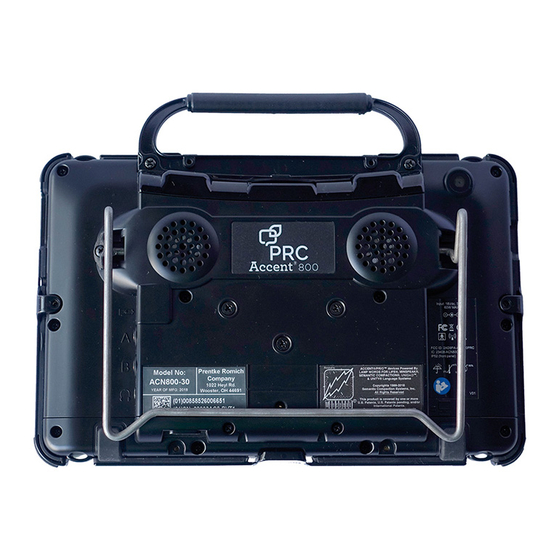
- Page 1 User’s Guide Model ACN800-30 Accent 800 Integrated and Dedicated ® Devices with Empower Software ™ Applies to Accent 800 Models with Serial Numbers 10000AC8 and Higher 18741 Version 2.06...
- Page 2 Web: www.liberator.co.uk/ Web: www.liberator.net.au/ Technical Support To report unexpected operation of the device or an unexpected event related to the device, please contact PRC technical support by phone at 1-800-262-1990 or by email at service@prentrom.com. Accent 800 User’s Guide-Empower...
- Page 3 To view or download the latest version of this user’s guide, please visit https://www.prentrom.com/support/devices/accent-with-empower. For information on using an Accent 800 device with NuVoice software, view or download the Accent 800 User’s Guide for NuVoice from https://www.prentrom.com/support/accent. End User Licensing Agreement You have acquired a PRC device which includes software licensed by PRC-Saltillo from Microsoft Licensing Inc.
-
Page 4: Table Of Contents
Attaching a Strap Handle ................42 Attaching a QRM Mounting Plate ..............44 Mounting a NuPoint Module ................. 45 Getting Started with the Empower Software ..........47 Creating a User and Selecting a Vocabulary ..........47 Using Basic Features ..................50 Accent 800 User’s Guide-Empower... - Page 5 Turning Message Window Features On or Off ........... 95 Using a Shortcut to Turn Speech On and Off ..........97 Changing the Appearance of the Multi-bar ............ 99 Working with Users ..................100 Signing in...................... 100 Switching between Users ................100 Accent 800 User’s Guide-Empower...
- Page 6 Copying a Word List ..................130 Deleting a Word List ..................130 Merging Two or More Word Lists ..............131 Temporarily Enlarging a Button ..............132 Turning Vocabulary Builder on from the Toolbox ........134 Using Word Finder ..................135 Accent 800 User’s Guide-Empower...
- Page 7 Editing an Empty Button ................181 Swapping, Resizing, Copying, and Moving Buttons ........182 Swapping Buttons..................182 Resizing a Button ..................183 Copying and Moving Buttons ..............184 Resetting a Button to Its Factory Defaults ........... 185 Accent 800 User’s Guide-Empower...
- Page 8 Exporting a Customized Vocabulary File or Keyboard ......... 222 Exporting Vocabulary Pages ................ 223 Importing and Restoring Files ..............225 Importing Users, Vocabularies, Keyboards, and Pages........ 226 Importing Message Banking Messages............227 Setting the Date and Time ................228 Accent 800 User’s Guide-Empower...
- Page 9 Using IR Remote Controls ................257 Deleting an IR Remote ................. 257 Editing an IR Remote Page ................257 Appendix D: Creating a List-O-Matic Button Action ......... 259 Appendix E: Compliance Information ............263 Index ......................269 Accent 800 User’s Guide-Empower...
-
Page 10: Safety Information
Do not try to force a connector into a port. Be sure you are inserting the connector into the correct port and that you have the connector turned so that it matches the orientation of the port. Accent 800 User’s Guide-Empower... - Page 11 Do not spray or splash liquid directly on the device and use extreme caution when using it around water. As with most electronic devices, you should never use the device when you are actually in the water (for example, a pool or bath). Accent 800 User’s Guide-Empower...
- Page 12 • Should read and follow the directions from the manufacturer of the implantable medical device. If you have any questions about using your wireless mobile device with an implantable medical device, consult your health care provider. Accent 800 User’s Guide-Empower...
-
Page 13: A Quick Look At Device Features
A Quick Look at Device Features Front View 10 11 3 4 5 Handle Volume button Microphone Microphone Front camera Battery/charging LED Light sensor Power LED Camera indicator Display screen Power button Tools button Carry strap holders Accent 800 User’s Guide-Empower... - Page 14 A and B. To use a joystick, you will need a Y-adapter. If you have a joystick plugged in and it does not respond normally, reverse the way it is plugged in (plug switch A into jack B, switch B into jack A). Accent 800 User’s Guide-Empower...
- Page 15 A and B. To use a joystick, you will need a Y-adapter. If you have a joystick plugged in and it does not respond normally, reverse the way it is plugged in (plug switch A into jack B, switch B into jack A). Accent 800 User’s Guide-Empower...
-
Page 16: Turning On The Device
The screen also reacts to raindrops and extremes in temperature (condensation). To dust the touchscreen, use a soft, lint-free cloth. For heavier cleaning, use a slightly dampened, lint-free cloth and then dry the screen with another soft, lint-free cloth. Accent 800 User’s Guide-Empower... -
Page 17: Charging The Battery
Plug in your battery charger every night when you go to bed and any time you see the low battery warning and/or see the low battery LED come on. If you cannot plug in the charger overnight, it is best to power off the device to conserve battery charge. Accent 800 User’s Guide-Empower... - Page 18 Device Disposal: Please dispose of your device in accordance with your local, state, and/or federal electronic recycling laws. Battery Disposal: If the batteries in your device need to be replaced, dispose of the old batteries in accordance with your local, state, and/or country regulations. Accent 800 User’s Guide-Empower...
-
Page 19: Cleaning And Disinfecting The Device
Dry them thoroughly before putting them back on the device. The best practice for regular cleaning is to dry accessories by hand, lay them on a dry towel, and let them air dry for about 5 minutes before placing them back on the device. Accent 800 User’s Guide-Empower... - Page 20 Try using the device. If it does not work, call the PRC Service Department and tell them what happened. They may ask you to send in your device for servicing. Accent 800 User’s Guide-Empower...
-
Page 21: Disinfecting A Device And Accessories For Multiple Users
Final Step: Wipe the touchscreen 1. When the device and accessories are dry, wipe down the viewing area (device touchscreen, TouchGuide, keyguard, etc.) with glass cleaner, so the screen doesn’t discolor. 2. Allow the equipment to dry. Accent 800 User’s Guide-Empower... -
Page 22: Positioning Or Removing The Stand
2. Rotate the stand away from the back of the device. 3. Allow the stand to latch in the fully extended position. Stand latched against Stand latched in the the back of the device fully extended position Accent 800 User’s Guide-Empower... -
Page 23: Removing The Stand
5. Pull the stand free and put it in a safe place in case you need to use it later. Important! If you reattach the stand, be sure to secure the legs with the holders to prevent someone from pulling it loose accidentally. Accent 800 User’s Guide-Empower... -
Page 24: Removing Or Reattaching The Handle
“Attaching the Top Port Cover” on page 25. To reattach the handle: Remove the port cover or NuPoint module, line up the holes in the handle with the holes on the back of the device, and insert the two screws. Accent 800 User’s Guide-Empower... -
Page 25: Attaching The Top Port Cover
Remove the two screws that hold the port cover in place. Use the screws to mount a NuPoint module or to reattach the handle. Note: Store the port cover where you can find it if you need to use it again. Accent 800 User’s Guide-Empower... -
Page 26: Mounting The Ir Reflector On An Integrated Device
Remove these two screws, if present NuPoint Module: If a NuPoint module is attached to your device, remove the two inside screws from the module. Remove these two Accent 800 User’s Guide-Empower... - Page 27 Important! Make sure the reflective shield is aimed downward toward the back of the device, as shown in step 3. 3. Insert the appropriate screws in the holes, as shown. Handle or Port Cover Insert Reflector side short screw pointing downward Insert short screw Accent 800 User’s Guide-Empower...
- Page 28 NuPoint Module Reflector side pointing downward Insert long screw Insert long screw 4. Tighten the screws. Accent 800 User’s Guide-Empower...
-
Page 29: Applying A Screen Protector
8. Wipe the protector with a lint-free cloth to remove any fingerprints. Hint: Regularly wipe off the protector with a damp lint-free cloth to remove fingerprints, smudges, etc. If the protector becomes too dirty, peel it off and replace it with a new protector. Accent 800 User’s Guide-Empower... -
Page 30: Removing Or Replacing The Device Frame
If you are not replacing the frame, store the screws in a safe location in case you later decide to reattach the frame. Loose screws could be a choking hazard. Accent 800 User’s Guide-Empower... - Page 31 5. Pull the tabs on the top of the frame out of the slots on the device. 6. Pull the tab on the bottom of the frame out of the slot on the device. 7. Proceed to the next section, “Attaching the New Frame”. Accent 800 User’s Guide-Empower...
-
Page 32: Attaching The New Frame
TouchGuide over the screen. 1. Press one side of the frame onto the edge of the device. 2. Pull the other side into place. Note: The top tabs may snap into place as you pull on the side. Accent 800 User’s Guide-Empower... - Page 33 If necessary, lift up the inside edge slightly and press until the rubber backing fits smoothly between the frame and device. 6. To secure the frame to the device with screws, proceed to the next section, “Attaching the Frame More Securely”. Accent 800 User’s Guide-Empower...
-
Page 34: Attaching The Frame More Securely
When the device frame is attached securely: After you attach the frame securely to the device, you can attach a Keyguard or TouchGuide to the frame. See “Attaching the Keyguard” on page 35 or “Attaching the TouchGuide” on page 38. Accent 800 User’s Guide-Empower... -
Page 35: Attaching, Raising, And Removing A Keyguard
The tabs must be able to lie flat against the screen, allowing the Keyguard to snap into place. 2. Insert one of the Keyguard pins into the opening near the top of the device frame. Accent 800 User’s Guide-Empower... -
Page 36: Raising The Keyguard
3. Leaving the pins inserted in the top of the device frame, simply lift the bottom of the Keyguard to uncover the screen. The Keyguard will remain the upright position, giving you easy access to the screen. Accent 800 User’s Guide-Empower... -
Page 37: Removing The Keyguard
3. Lift upward with your fingers to bend the top-middle portion of the Keyguard upward slightly. Bottom tabs already pulled loose from the device. 4. Pull the pins out of the openings at the top of the device frame. Accent 800 User’s Guide-Empower... -
Page 38: Attaching Or Removing A Touchguide
2. With the bottom tabs in place, lift upward with your fingers to bend the top right corner of the TouchGuide slightly and insert the tab into the top right slot of the frame. Note: The TouchGuide plastic is stiff and may require some effort to bend. Accent 800 User’s Guide-Empower... -
Page 39: Removing The Touchguide
TouchGuide corners also helps to nestle the TouchGuide into the rubber. Removing the TouchGuide 1. Grasp the plastic above the first row of keyholes. 2. Pull out and down on the TouchGuide until the upper tabs pop out. Accent 800 User’s Guide-Empower... -
Page 40: Attaching A Carry Strap
2. Detach the loop connector from the strap by pressing in on the sides of the quick-release connector. 3. Thread the loop through a strap holder on the device. A small straight object like a needle may be helpful to pull the loop through the holder. Accent 800 User’s Guide-Empower... - Page 41 5. Pull the connector through until it is tied securely to the device. 6. Insert the loop connector into the strap connector until they click and hold together. 7. Repeat these steps to connect the other end of the strap to the device. Accent 800 User’s Guide-Empower...
-
Page 42: Attaching A Strap Handle
Strap handle attached to strap holder on the device Strap handle attached to strap holder on the device Accent 800 User’s Guide-Empower... - Page 43 For one-handed carrying and/or operation, slide your hand between the strap handle and the back of the device. If you use the strap handle across the back of the device, use extreme caution and make sure you have a firm grip on the device. Accent 800 User’s Guide-Empower...
-
Page 44: Attaching A Qrm Mounting Plate
2. Leave the screws held in place by the washers. 3. Store the plate (with the screws held in place) in a safe location in case you need to mount it later. Accent 800 User’s Guide-Empower... -
Page 45: Mounting A Nupoint Module
4. Tighten the two screws you removed in step 1 to secure the module to the device. The NuPoint module is ready to set up for use. For detailed instructions on customizing settings, refer to the NuPoint User’s Guide. Accent 800 User’s Guide-Empower... - Page 46 You can use a strap handle to carry your device when a NuPoint module is mounted on the device. Attach the strap handle to the strap holders either across the top or diagonally across the back. See “Attaching a Strap Handle” on page 24. Accent 800 User’s Guide-Empower...
-
Page 47: Getting Started With The Empower Software
Options & Support > System Options and turn the option Permission for Anonymous Data Sharing on or off. 3. You will be prompted to Continue with either Empower software or NuVoice software. Select Empower. 4. You will be prompted to create a new user. Accent 800 User’s Guide-Empower... - Page 48 Finished. The name you enter will appear in the Username box. 6. Select Next. You will be prompted to select a vocabulary for the user. 7. Select a vocabulary tile to display a list of available vocabularies. For example: Accent 800 User’s Guide-Empower...
- Page 49 “Working with Users” on page 100. To learn how to back up information for a user, see “Exporting a User’s Vocabularies and Settings” on page 221. 9. Proceed to the next section, “Using Basic Features”. Accent 800 User’s Guide-Empower...
-
Page 50: Using Basic Features
Quick Menu contains links to the Editor, Vocabulary Builder, and the Toolbox. Multi-bar When you open the Editor or select the Vocabulary Builder from the Quick Menu, the multi-bar displays buttons to access the functionality of those features. Accent 800 User’s Guide-Empower... - Page 51 Note: Only certain vocabularies (Unity 60 and 84) have an activity window. Core vocabulary Words that are most commonly used—they are used regardless of situation, communication partner, or age/disability of the communicator. Core vocabulary lets individuals get their message across. Accent 800 User’s Guide-Empower...
- Page 52 Device Volume is set to 1 or higher. The number of blue bars to the right of the speaker icon indicates how high the Volume option is set. For example: = 10, and =20. The Device Volume mute speakers button in Volume Settings is selected. Accent 800 User’s Guide-Empower...
- Page 53 Icon Description Vocabulary Builder is turned on. Battery charge level. This icon turns red when the battery charge is critically low; it turns green when the battery is charging. Data logging is turned on. Accent 800 User’s Guide-Empower...
-
Page 54: Empower: Using The Menu Button And Quick Menu
Go To Home Takes you back to your home page in the current vocabulary. Volume Allows you to adjust device and headphones volume. See “Adjusting Device and Headphones Volume using the Volume Shortcut” on page 211. Accent 800 User’s Guide-Empower... - Page 55 Displays the Editor buttons for customizing vocabularies. See “Using the Editor” on page 148. Modify Shortcuts Allows you to add, remove, and rearrange Quick Menu shortcuts. See “Adding, Removing, and Rearranging Quick Menu Shortcuts” on page 65. Accent 800 User’s Guide-Empower...
-
Page 56: Apps: Using The Menu Button And Quick Menu Access Bar
To return to the last page you were on in the app, select Exit • Menu. • To return to the Toolbox in the Empower software, select Toolbox. To return to the last page you were on in your vocabulary, • select Go To Vocabulary. Accent 800 User’s Guide-Empower... -
Page 57: Turning Access To The Menu Buttons On Or Off
(the square button at the bottom edge of the screen) to access the Quick Menu. To turn the setting on or off: 1. Select Menu > Toolbox > User Settings > Restrictions. 2. Turn the Menu Button setting on or off. 3. Select Finished. Accent 800 User’s Guide-Empower... -
Page 58: Using The Toolbox
The Toolbox provides access to user settings, vocabulary settings, system settings, and applications. To access the Toolbox, select Menu and then Toolbox. The Toolbox opens to the User Settings tab. User Settings allows you to customize settings for the current user. Accent 800 User’s Guide-Empower... -
Page 59: Identifying Toolbox Features
Applications Access additional apps such as Engage™ Videos and Web Browser. Accent 800 User’s Guide-Empower... -
Page 60: Changing The Toolbox Language
Toolbox Language window shows the language currently selected for the Toolbox. 2. Select the Current Language Change button. The available languages are displayed. 3. Select the Choose button for the language you want. 4. Select Close. The Toolbox language will change immediately. Accent 800 User’s Guide-Empower... -
Page 61: Changing Settings
Feature/option Feature/option turned on/selected turned off/deselected When you select , the toggle changes to and feature will be turned off. When you select , the toggle changes to and feature will be turned on. Accent 800 User’s Guide-Empower... - Page 62 If Text Field Keyboard in Edit Mode is turned off in the head tracking or eye tracking settings, select the keyboard icon to open the keyboard and enter your information. Accent 800 User’s Guide-Empower...
- Page 63 When you finish entering and modify text, select Finished. The text you entered will appear in the text entry field. Note: If you select Cancel, the keyboard will close and any text you entered will not appear in the text entry field. Accent 800 User’s Guide-Empower...
- Page 64 Yes, save my changes the current screen: you don’t want to save your No, don’t save changes at the current screen: you want remain at the current Cancel, and continue working screen to make additional changes: Accent 800 User’s Guide-Empower...
-
Page 65: Adding, Removing, And Rearranging Quick Menu Shortcuts
When you select Menu, the Quick Menu displays shortcuts to commonly used features. To add, remove, and rearrange shortcuts, select Modify Shortcuts. The top section of the page displays current shortcuts. The lower section displays available shortcuts and non-selectable used shortcuts. Accent 800 User’s Guide-Empower... -
Page 66: Adding A Shortcut
Select Cancel instead of Save. The page will close and the • current vocabulary page will be displayed. When you select Menu, the new shortcut will be not be available. Select the shortcut, select the delete icon, and try again. • See “Removing a Shortcut”. Accent 800 User’s Guide-Empower... -
Page 67: Removing A Shortcut
1. Select the shortcut you want to remove. The shortcut changes color and a delete icon appears. 2. Select the delete icon . The selected shortcut moves to the lower section of the page. 3. Select Save. Accent 800 User’s Guide-Empower... -
Page 68: Rearranging Shortcuts
4. Repeat step 3 for each shortcut you want to move. 5. If you are satisfied with the new arrangement, select Save. If you need to make additional changes, repeat steps 1, 2, and 3 as necessary and then select Save. Accent 800 User’s Guide-Empower... -
Page 69: Using Shortcuts
When you select the message window, the entire message is spoken. When speech is turned off, words are not spoken as you select them. When you select the message window, the entire message is spoken. Accent 800 User’s Guide-Empower... - Page 70 Builder” on page 124. Volume The Volume shortcut allows you to adjusting device and headphones volume. For details on adding and using this shortcut, see “Adjusting Device and Headphones Volume using the Volume Shortcut” on page 211. Accent 800 User’s Guide-Empower...
-
Page 71: Configuring User Settings
Voice allows you to change the speaking voice and/or prompt voice, adjust how fast or slow you want to speak, and adjust the treble and bass level of the selected voice. The current voice is displayed. Accent 800 User’s Guide-Empower... - Page 72 Restrictions Restrictions allows you to lock or unlock the Menu button and related settings. Toolbox Language Toolbox Language allows you to change the language for the Toolbox. Accent 800 User’s Guide-Empower...
-
Page 73: Choosing An Access Method
Select Touch, Head Tracking & USB Input, Eye Tracking, or Scanning. The method currently selected displays a colored border. Note: Eye Tracking appears as a selection only if you have an eye tracking module connected to your device. Accent 800 User’s Guide-Empower... -
Page 74: Setting Up Touch Access
0.0 to 10.0. For example, if you set selection time for 0.0, a button is selected as soon as you release it. If you set selection time for 1.1, a button is selected 1.1 seconds after you release it. Accent 800 User’s Guide-Empower... - Page 75 Repeat Rate Set the speed at which a button press repeats after the repeat delay has been met. Available times range from 0.0 to 10.0. This setting is only available when the When Pressed tab is selected. Accent 800 User’s Guide-Empower...
-
Page 76: Finding Informing On Head Tracking
Eye Tracking appears as a selection in the Empower software only if you have an eye tracking module connected to your device. If your device includes an eye tracking module, the Look User’s Guide came with the module. The user’s guide is also available from https://www.prentrom.com/support/devices/look- empower/manuals/download-look-users-guide-accent-devices- empower-software Accent 800 User’s Guide-Empower... -
Page 77: Setting Up Scanning
Scanning window opens to the Configure tab. After making your selections, select Finished. To close the Scanning window without saving your changes, select Cancel. To return to the Access Methods window without saving your changes, select the return arrow Accent 800 User’s Guide-Empower... - Page 78 When the scan reaches the column that contains the button you want, activate your switch. The scan then begins to highlight each button in that row. When the button you want is highlighted, activate your switch. Accent 800 User’s Guide-Empower...
-
Page 79: Adjusting Scan Timing
0.5, you must hold the switch for one-half second to make a selection. Next Button Selection Delay Adjust how long you must wait after releasing the switch before making your next selection. Selection delay ranges from 0 to 10 seconds. Accent 800 User’s Guide-Empower... -
Page 80: Setting Up Automatic Scan Restarts And Rescans
Select the Auto scan type and then select Settings. Note: If you select the Step scan type, these setting are not available. Automatically Restart Scan Box Turn this setting on if you want scans to restart automatically after a selection. Accent 800 User’s Guide-Empower... -
Page 81: Creating A Customized Scan Pattern
Create Blocks again before selecting Save, the blocks you created will be lost and you’ll need to create them again. 4. Select the button to include in the upper left corner of your first scan block. A red border will appear around the button. Accent 800 User’s Guide-Empower... - Page 82 7. Select the button to include in the lower right corner of your second scan block. A block of buttons will be highlighted, and the number 2 will appear in the middle of the block. 8. Continue to create scan blocks. Accent 800 User’s Guide-Empower...
- Page 83 Clear Blocks and select Okay at the confirmation prompt. If you applied the scan pattern If you applied to scan pattern to one page only: to all pages: 12. When you complete the scan pattern, select Save. “Successfully saved” will be displayed. Accent 800 User’s Guide-Empower...
-
Page 84: Adding Or Modifying Prompts For A Customized Scan Pattern
Sound. Turn the Prompts setting on. 1. Go to the vocabulary page to which you applied the scan pattern. 2. Select Menu > Editor > Set Scan Blocks. 3. Select Edit Prompts. The Block Prompts window will open. Example: Accent 800 User’s Guide-Empower... -
Page 85: Setting The Scan Order For A Customized Scan Pattern
4. To change the order in which items are scanned, use the arrow buttons to the right of each item to move it up or down in the window. 5. When you finish setting the scan order, select Finished. Accent 800 User’s Guide-Empower... -
Page 86: Configuring A Voice
Although you can choose the same voice for speaking messages and prompts, you may find it best to choose a different voice for prompts. 1. Select Menu > Toolbox > User Settings > Voice. Then select Main Voice or Prompt Voice. Accent 800 User’s Guide-Empower... - Page 87 6. To test the voice after making changes, select Try Voice. 7. Continue to change settings and test the results. 8. When you are satisfied with the voice, the speech rate, and the treble and bass levels, select Finished. Accent 800 User’s Guide-Empower...
-
Page 88: Changing The Pronunciation Of Words
6. Repeat steps 3, 4, and 5 for each pronunciation you want to add. Note: If you need to remove a pronunciation, select 7. When you finish adding pronunciations, select Close to close the Pronunciation window. 8. Select Finished to close the Voice window. Accent 800 User’s Guide-Empower... -
Page 89: Changing Message Window Settings
Select Menu > Toolbox > User Settings > Message Window & Multi-bar. Select Message Window. The text preview shows how the selections you make will look. Text preview Text/Highlight/Background Select a tab to change the color of the text, highlight, or background of the message window. Accent 800 User’s Guide-Empower... - Page 90 Cancel Close the message window settings without saving your changes. Finished When the text preview shows how you want the message window to appear, select Finished to save your changes and close the message window settings. Accent 800 User’s Guide-Empower...
-
Page 91: Changing Message Window Basic Colors
5. When you finish making changes on the Text, Highlight, and Background tabs, select Finished. Hint: To create your own colors, select the Custom Color button and follow the instructions under “Customizing Message Window Colors” on the next page. Accent 800 User’s Guide-Empower... -
Page 92: Customizing Message Window Colors
Finished. The RGB and slider values will change accordingly. Move the color gradient slider or move the cursor in the color • gradient box. 6. The custom color will appear in the New Color/Current Color box. Accent 800 User’s Guide-Empower... -
Page 93: Changing The Message Window Font
Window. 2. Select Text Styles on the left and Font at the top of the window. 3. To change the text style, select a different font. The text preview will show the change. 4. Select Finished. Accent 800 User’s Guide-Empower... -
Page 94: Changing Text Size In The Message Window
M (medium) by default. 3. Change the text size as needed. Available sizes are XS (extra small), S (small), M (medium), L (large), and XL (extra large). The text preview will show the change. 4. Select Finished. Accent 800 User’s Guide-Empower... -
Page 95: Turning Message Window Features On Or Off
Clear Message Window When Clear Message Window is turned on, the contents of the message window will be cleared after the message is spoken once. Accent 800 User’s Guide-Empower... - Page 96 To turn the setting off, select Keyguard Mode and select Finished. Play Recorded Messages When Play Recorded Messages is turned on, the message window will play an audio file that you recorded. 4. When you finish making changes, select Finished. Accent 800 User’s Guide-Empower...
-
Page 97: Using A Shortcut To Turn Speech On And Off
4. Select the Speech shortcut. The shortcut will appear in the selected space. 5. Select Save. The Speech shortcut will be available from the Quick Menu any time you select the Menu button. Accent 800 User’s Guide-Empower... - Page 98 Note: To speak messages, Speak Message Window must be turned on in the Message Window Settings. 1. Select User Settings > Message Window & Multi-bar > Message Window. 2. Select the Settings tab. 3. Turn Speak Message Window ON. Accent 800 User’s Guide-Empower...
-
Page 99: Changing The Appearance Of The Multi-Bar
Symbol Buffer Turn Symbol Buffer on or off. When Symbol Buffer is turned on, the symbol buffer appears in the multi-bar. Accent 800 User’s Guide-Empower... -
Page 100: Working With Users
3. When necessary, use the arrows to move between pages of users. Select the user who will use the device next. 4. The application opens to the default vocabulary page and the settings you configured for that user are active. Accent 800 User’s Guide-Empower... -
Page 101: Creating A New User
5. Select Next. You will be prompted to select a vocabulary for the user. 6. Select a vocabulary language to display a list of available vocabularies. 7. Select a vocabulary and select Finished. The new user appears in the Sign In window. Accent 800 User’s Guide-Empower... -
Page 102: Deleting Users
1. Select Menu > Toolbox > User Settings > Users. 2. Select Sign Out. The Sign In page opens. 3. Select Exit Software. Note: On a dedicated device, Exit Software closes the application and shuts down the device. Accent 800 User’s Guide-Empower... -
Page 103: Configuring Cursor, Dwell, And Selection Feedback
Use the dwell feedback settings to adjust what you see when you dwell on, scan, or touch a button. Selection Feedback Use the selection feedback settings to adjust how the system indicates that you have selected a button. You can set visual and audio feedback. Accent 800 User’s Guide-Empower... -
Page 104: Configuring The Cursor
When the cursor is turned on, select the arrow pointer or hand pointer. Cursor Size When the cursor is turned on, adjust the size of the cursor. Available sizes are S (small), M (medium), and L (large). Accent 800 User’s Guide-Empower... -
Page 105: Changing The Cursor's Basic Color
3. Select a basic color or custom color for the cursor. 4. Select Finished. Hint: To create your own colors, select the Custom Color button and follow the instructions under “Customizing the Cursor’s Color” on the next page. Accent 800 User’s Guide-Empower... -
Page 106: Customizing The Cursor's Color
Move the color gradient slider or move the cursor in the color • gradient box. 5. The custom color will appear in the New Color/Current Color box. 6. If you are not satisfied with the color, continue making adjustments until you create the color you want. Accent 800 User’s Guide-Empower... - Page 107 7. Select Save Color. The New Color/Current Color box will show your custom color. 8. When you finish changing colors, select Finished. Note: Your new color(s) also appear under Custom Colors in the basic colors window to select for future use. Accent 800 User’s Guide-Empower...
-
Page 108: Configuring Dwell Feedback Settings
A small square will be visible when you dwell on an item. Pointer Size will be available, allowing you to set the size of the dwell pointer. The Colors tab will also be available, allowing you to set the color of the square. Accent 800 User’s Guide-Empower... -
Page 109: Adjusting The Dwell Feedback Pointer Size
A border will be added to a button when you dwell on it. Select the Colors tab to change the border color. Fill A button’s background will be filled with a color when you dwell on it. Select the Colors tab to change the fill color. Accent 800 User’s Guide-Empower... -
Page 110: Changing Dwell Feedback Basic Colors
You can apply the same color to both or different colors to each. 4. Select Finished. Hint: To create your own colors, select the Custom Color button and follow the instructions under “Customizing Dwell Feedback Colors” on the next page. Accent 800 User’s Guide-Empower... -
Page 111: Customizing Dwell Feedback Colors
Feedback Type tab. In this example, Pointer and Border tabs are available because Pointer and the Border dwell feedback type were selected. 3. Select a tab and then select the Custom Color button. Accent 800 User’s Guide-Empower... - Page 112 New Color/Current Color box will show your custom color. 8. When you finish changing colors, select Finished. Note: Your new color(s) also appear under Custom Colors in the basic colors window to select for future use. Accent 800 User’s Guide-Empower...
-
Page 113: Selecting Dwell Feedback Sound
+ and – buttons to increase or decrease the number one increment at a time. The number on the slider button will show the current setting. Settings range from 1 to 10. Accent 800 User’s Guide-Empower... -
Page 114: Configuring Selection Feedback Settings
Fill: A button’s background will be filled with a color when you select it. Select the Colors tab to change the fill color. Beep When Beep is turned on, you will hear a beep when you select a button. Accent 800 User’s Guide-Empower... -
Page 115: Changing Selection Feedback Basic Colors
4. Select Finished. Hint: To create your own colors, select the Custom Color button and follow the instructions under “Customizing Selection Feedback Colors” on the next page. Accent 800 User’s Guide-Empower... -
Page 116: Customizing Selection Feedback Colors
1. Select Menu > Toolbox > User Settings > Cursor, Dwell & Selection Feedback > Selection Feedback. If you selected Border or Fill as the feedback type, the Colors tab is available. 2. Select the Colors tab. 3. Select the Custom Color button. Accent 800 User’s Guide-Empower... - Page 117 New Color/Current Color box will show your custom color. 8. When you finish changing colors, select Finished. Note: Your new color(s) also appear under Custom Colors in the basic colors window to select for future use. Accent 800 User’s Guide-Empower...
-
Page 118: Restricting Access To The Toolbox
A file on a USB flash drive is required to lock or unlock the Toolbox. See “Creating a File on a USB Flash Drive”. Note: If you didn’t create a USB file previously, you will be prompted to create one when you select USB. Accent 800 User’s Guide-Empower... -
Page 119: Creating A File On A Usb Flash Drive
Recommendation: Try to make all your changes in the Toolbox at the same time. When you exit the Toolbox, you will need to enter your password again to unlock it even if you don’t close the application. Accent 800 User’s Guide-Empower... -
Page 120: Working With Vocabularies
• • customize vocabulary set up word prediction and add or exclude predicted words • collect data to measure how an individual uses vocabulary • To display the Vocabulary screen, select Menu > Toolbox > Vocabulary. Accent 800 User’s Guide-Empower... -
Page 121: Selecting A Vocabulary
If you select My Vocabularies, all customized vocabularies that have been saved are listed. The current vocabulary is followed by a checkmark. The other vocabularies are followed by Choose buttons. Accent 800 User’s Guide-Empower... -
Page 122: Creating A New Vocabulary
1. Select Menu > Toolbox > Vocabulary > Select Vocabulary > My Vocabularies. 2. Select Create New. 3. Select the Name your Vocabulary box to display a keyboard. Enter a name for your vocabulary and select Finished. Accent 800 User’s Guide-Empower... - Page 123 Editor, see “Using the Editor” on page 148. 8. When you finish adding content or need to save your work in- progress to come back to later, select Save. Your new vocabulary will be listed in the My Vocabularies window. Accent 800 User’s Guide-Empower...
-
Page 124: Using Vocabulary Builder
As the user is ready to learn more vocabulary, gradually add more words to your list so they are visible. Note: Vocabulary Builder works with Unity vocabularies and LAMP Words for Life vocabularies only. Accent 800 User’s Guide-Empower... -
Page 125: Turning Vocabulary Builder On From The Quick Menu
Hide all the buttons and links on the page. Show All Show all the buttons and links on the page. Button Boost Temporarily enlarge a button when teaching how to use it. Return to your home screen. Accent 800 User’s Guide-Empower... -
Page 126: Creating A Word List By Selecting Words To Show
If you select a button by mistake, select it again to hide it. • 4. When you finish selecting buttons, select Exit Menu. Your word list will be saved. Only the buttons you selected will be visible. For example: Accent 800 User’s Guide-Empower... - Page 127 Important! Select Okay only if you want to clear all words from the current word list. The next time you select this list, all buttons will be shown and you will need to select buttons to hide. Accent 800 User’s Guide-Empower...
-
Page 128: Creating A Word List By Entering Words
6. When you finish adding and arranging words in the list, select Finished and select Exit Menu. Your word list will be saved. Only the words in the active list will be selectable in the current vocabulary. Accent 800 User’s Guide-Empower... -
Page 129: Managing Word Lists
The active list (cannot be deleted) Edit the list Copy the list Delete the list When the Manage Lists window includes more than one page, use the paging arrows at the bottom of the window to view additional lists. Accent 800 User’s Guide-Empower... -
Page 130: Making A Word List Active
Note: You cannot delete the active word list. If you want to delete the active word list, make another list active, then delete the list you want to remove. From the Vocabulary Builder window, select the Delete button and select Yes at the confirmation prompt. Accent 800 User’s Guide-Empower... -
Page 131: Merging Two Or More Word Lists
6. Select Done. The merged list will appear in the Manage Lists window. 7. If you no longer need the lists that you merged, select the Delete button for each list you want to delete. 8. When you finish making changes, select Finished. Accent 800 User’s Guide-Empower... -
Page 132: Temporarily Enlarging A Button
The second time you select the button, it decreases to two times its original size. The third time you select the button, it decreases to one-and-a • half times its original size. The fourth time you select the button, it returns to its original size. • Accent 800 User’s Guide-Empower... - Page 133 When you export a vocabulary, enlarged buttons will be • exported with the Vocabulary Builder list. When re-imported, they will remain enlarged. If you turn your device off and back on, enlarged buttons will • remain enlarged. Accent 800 User’s Guide-Empower...
-
Page 134: Turning Vocabulary Builder On From The Toolbox
Clear List Delete all the words from the current list. Select a different word list, create a new word list, or Manage Lists merge two or more word lists to create a new list. Accent 800 User’s Guide-Empower... -
Page 135: Using Word Finder
Words for Life vocabulary, use Word Finder to search for the word. 1. From your vocabulary, select the keyboard button to open the keyboard. 2. Select Word Finder. “Find this word” appears at the top of the keyboard. Accent 800 User’s Guide-Empower... - Page 136 When you select that key, the next key is highlighted, and so forth until reaching the end of the sequence. 5. Learn the sequence and then select Finished to return to your home page. Accent 800 User’s Guide-Empower...
-
Page 137: Customizing Settings For A Vocabulary
If you select White, buttons that do not contain any content will appear white with borders. If you select Transparent, buttons that do not contain any content will appear gray with borders. If you select Empty, buttons that do not contain any content will appear without borders. Accent 800 User’s Guide-Empower... - Page 138 If you select Middle, the default symbol(s) in the middle of a button path will be replaced. If you select End, the symbol at the end of a button path will be replaced. If you select All, all symbols in a button path will be replaced. Accent 800 User’s Guide-Empower...
- Page 139 At 40% padding You may need to change the padding percentage several times until you get the empty space and button sizes the way you want them. Finished When you finish changing these settings, select Finished. Accent 800 User’s Guide-Empower...
-
Page 140: Changing The Font And Font Size
4. To change the font size, move the slider or use the + and – buttons to select the size you want. Available sizes are S (small), M (medium), L (large), and XL (extra large). 5. Select Finished. Accent 800 User’s Guide-Empower... -
Page 141: Changing Background Basic Colors
Hint: To create your own colors, select the Custom Color button and follow the instructions under “Customizing Background Colors” on the next page. 5. Select Finished. Accent 800 User’s Guide-Empower... -
Page 142: Customizing Background Colors
8. Select Save Color. The New Color/Current Color box will show your custom color. 9. When you finish changing colors, select Finished. Note: Your new color(s) also appear under Custom Colors in the basic colors window to select for future use. Accent 800 User’s Guide-Empower... -
Page 143: Renaming A Vocabulary
2. Select the Settings tab. 3. Select the Vocabulary Name field and use the keyboard to enter a new name. 4. Select the keyboard Finished button. The new name will appear in the Vocabulary Name field. 5. Select Finished. Accent 800 User’s Guide-Empower... -
Page 144: Changing Your Home Page
3. Select the Home Page Change button. A list of available pages in the current vocabulary opens. 4. Use the arrows to scroll through the pages. 5. Select Choose for the page you want. 6. Select Finished. Accent 800 User’s Guide-Empower... -
Page 145: Changing The Language Used With Vocabularies
“Changing the Toolbox Language” on page 60. 1. Select Menu > Toolbox > Vocabulary > Vocabulary Settings. 2. Select the Settings tab. 3. Select the Current Language Change button. 4. Select Choose for the language you want. 5. Select Finished. Accent 800 User’s Guide-Empower... -
Page 146: Expanding Vocabulary Buttons To Fill The Entire Screen
Vocabulary pages will be displayed with the message window and multi-bar. Vocabulary pages will be displayed in full-screen mode. 4. Select Finished. To temporarily reduce full-screen mode, select the button at the top of the page. Accent 800 User’s Guide-Empower... -
Page 147: Choosing The More Button Location In The Activity Window
1. Select Menu > Toolbox > Vocabulary > Vocabulary Settings. 2. Select the Settings tab. 3. Select the More Button Location Left or Right button. 4. Select Finished. Accent 800 User’s Guide-Empower... -
Page 148: Using The Editor
To open the Editor quickly, select Menu to open the Quick Menu. An Editor button is displayed. Select Editor to display the Editor buttons. To navigate to the Editor: To navigate to the Editor, select Menu > Toolbox > Vocabulary > Editor. The Editor buttons are displayed. Accent 800 User’s Guide-Empower... -
Page 149: Using The Editor Buttons
Move a button by removing it from its current location to paste in a different location. Paste Paste a cut or copied button to a location. Return to the previous page. Undo Undo your most recent change. Accent 800 User’s Guide-Empower... -
Page 150: Saving Changes
Select No, don’t save to discard all changes you made since the • last time you selected Save. Select Cancel, and continue working to continue working • without saving or discarding your changes at this time. Accent 800 User’s Guide-Empower... -
Page 151: Editing A Button
Select the button you want to modify. 2. Using either method, the Edit Button window opens. Note: Do not select Clear Button unless you intend to remove the message, label, symbol, actions, colors, and navigation from the button. Accent 800 User’s Guide-Empower... - Page 152 4. When you finish making changes, select Finished and then select Save. Hint: If you select Finished before you make all the changes you want, simply select the button again and continue making changes. Accent 800 User’s Guide-Empower...
-
Page 153: Changing A Button's Message, Label, And Symbol
Select the Label field to open a keyboard. Enter a label for the button and select the keyboard Finished button. Button preview To replace the button’s symbol with a suggested symbol: Select the symbol you want from the Suggested Symbols. It will appear in the button preview. Accent 800 User’s Guide-Empower... - Page 154 3. When you’re satisfied with the picture, select Finished. The photo will appear on the button. Note: You can also take a photo from the Symbol tab. When you finish making changes to the button: Select Save. Accent 800 User’s Guide-Empower...
-
Page 155: Finding A Different Symbol For A Button
Hint: When multiple pages of images are available, use the arrows to page through the symbols. 3. Select the symbol you want. It will be displayed in the button preview. Enter symbol name Button preview or description 4. Select Finished and then select Save. Accent 800 User’s Guide-Empower... - Page 156 Up One Level button to return to the previous level and select a different category or subcategory. 3. Select the symbol you want. It will be displayed in the button preview. 4. Select Finished and then select Save. Accent 800 User’s Guide-Empower...
- Page 157 3. Select a symbol to open a preview image that you can rotate. If necessary, select the preview image one or more times to rotate it. 4. Select Accept. The symbol appears in the Edit Button window’s button preview. 5. Select Finished and then select Save. Accent 800 User’s Guide-Empower...
-
Page 158: Taking A Picture To Use On A Button
Hint: If you realize you’re not satisfied with the photo after all, select Cancel instead of Save. Then select No, don’t save at the confirmation prompt. The button will display the original symbol instead of the photo. Accent 800 User’s Guide-Empower... -
Page 159: Changing A Button's Basic Colors
Hint: To create your own colors, select the Custom Color button and follow the instructions under “Customizing a Button’s Colors” on the next page. 6. When you finish changing colors, select Finished and then select Save. Accent 800 User’s Guide-Empower... -
Page 160: Customizing A Button's Colors
Symbol: Add a colored background to the button’s symbol Background: Add a colored background to the button 5. Select the Custom Color button. Note: If you decide to apply a basic color instead of a custom color, select the Back button. Accent 800 User’s Guide-Empower... - Page 161 9. Select Save Color. The button preview will show the change, and the New Color/Current Color box will show your custom color. 10. To change additional colors for the button, repeat steps 4 through 9. 11. When you finish changing colors, select Finished. Accent 800 User’s Guide-Empower...
-
Page 162: Changing The Page A Button Navigates To
Search for the page you want or scroll through all pages using the arrows. Select Choose to the right of the page name. Hint: You can also select Add New and create your own page. 5. Select Finished and Save. Accent 800 User’s Guide-Empower... -
Page 163: Changing The Location A Button Navigates To
Or add a new page. Then select Finished and Save. • If you select Go To App, a window will list apps available from the Menu > Toolbox > Applications. Select the location you want. Select Finished and Save. Accent 800 User’s Guide-Empower... -
Page 164: Setting Up A Button To Navigate To A Website
4. Select Go To App. Engage: Allows you to link the Engage app to the button. Browser: Allows you to link a browser and URL to the button. Windows Application: Allows you to link a Windows application to the button. Accent 800 User’s Guide-Empower... - Page 165 8. Select the keyboard Finished button. The URL you entered will appear below Go To URL in the Edit Button window. 9. Select Finished and then select Save. When you press the button, the website will open in the Web Browser app. Accent 800 User’s Guide-Empower...
-
Page 166: Setting Up A Button To Navigate To A Windows Application
4. Select Go To App. Engage: Allows you to link the Engage app to the button. Browser: Allows you to link a browser and URL to the button. Windows Application: Allows you to link a Windows application to the button. Accent 800 User’s Guide-Empower... - Page 167 Windows desktop are displayed. 7. Navigate to the application you want to link to the button. 8. Select Finished and then select Save. When you press the button, the website will open in the Web Browser app. Accent 800 User’s Guide-Empower...
-
Page 168: Removing A Button's Navigation
3. Select the Navigation tab on the left. The navigation options are displayed. 4. Select the Remove Navigation Remove button. A list of navigation locations opens. 5. Select Finished and Save without selecting a new navigation location. Accent 800 User’s Guide-Empower... -
Page 169: Changing Or Removing An Activity Window Button's Navigation
Make Persistent on. 6. To set the page to be displayed in the activity window, turn Show in Activity Window on. 7. To change or remove the navigation, select Remove. A list of Navigation locations will open. Accent 800 User’s Guide-Empower... -
Page 170: Adding An Action To A Button
3. Select the Actions tab on the left. 4. Select Add Action. Action categories are listed. 5. Select the category you want. 6. Select Choose for the action you want. The Action List shows the action you selected. Accent 800 User’s Guide-Empower... - Page 171 Action List to see which actions you already selected, select Back. 8. When you finish adding actions, select Finished and then select Save. For information on creating a List-O-Matic button action, see “Appendix D: Creating a List-O-Matic Button Action” on page 259. Accent 800 User’s Guide-Empower...
-
Page 172: Changing Button Message, Label, And Prompt Settings
= the text will not be spoken. Always Show Button Label Choose whether or not the label will be always be displayed. Select the on/off toggle: = the label will always be displayed; the label will not always be displayed. Accent 800 User’s Guide-Empower... -
Page 173: Changing The Button Type
4. Select Finished and select Save to save the prompt. Changing the Button Type 1. Select Menu > Editor. 2. Select Edit and choose the button you want to modify. 3. Select the Settings tab on the left. 4. Select the Button Types tab. Accent 800 User’s Guide-Empower... - Page 174 If you select Word Prediction or Morphological Prediction, the Message, Symbol, Navigation, and Actions tabs and the content button settings cannot be selected. The Message, Symbol, Navigation, and Actions tabs display lock icons when you select Word Prediction or Morphological Prediction. Accent 800 User’s Guide-Empower...
-
Page 175: Saving A Message To A Button
1. Select Menu and then select Modify Shortcuts from the Quick Menu. 2. Select the space where you want the Save Message shortcut to appear. 3. Select the Save Message shortcut from the lower section of the menu. 4. Select Save. Accent 800 User’s Guide-Empower... -
Page 176: Saving The Current Message To A Button
3. Select a button or empty button location. “Message Window Text: Successfully Saved” will appear. Important! If you select an existing button, the message will replace the current button label and message. 4. When you select the button, your message will be spoken. Accent 800 User’s Guide-Empower... -
Page 177: Recording A Message To A Button
Note: The time limit for recording a message is five minutes. If you exceed five minutes, the software will stop recording and the play button will appear. 9. Adjust the Microphone Volume slider if necessary. Accent 800 User’s Guide-Empower... - Page 178 When you finish recording messages or making changes to the button, select Finished. 13. Select Save to save all the messages to the button. 14. When you select that button, all messages you recorded for the button will be played. Accent 800 User’s Guide-Empower...
- Page 179 Delete the message from the Action List. Clear Button Select Clear Button only if you want to remove all messages, the label, symbol, actions, and settings for the button. Finished When you finish making changes, select Finished. Accent 800 User’s Guide-Empower...
- Page 180 If you would like the message to appear in the Message Window, but not be spoken by the speech synthesizer: 1. Add a message in the Message tab. 2. In the Settings tab, turn the Speech off for this button. Accent 800 User’s Guide-Empower...
-
Page 181: Editing An Empty Button
Editor - Empty button window opens. Select Edit this button to open the Edit Button window and add • content and make other changes. Select Create a new link to link the button to another page. • Accent 800 User’s Guide-Empower... -
Page 182: Swapping, Resizing, Copying, And Moving Buttons
5. To swap additional buttons, repeat steps 3 and 4. If you want to make additional changes, select Swap again to deactivate it or select another Editor button. 6. Select Save. A message will confirm that your changes have been saved. Accent 800 User’s Guide-Empower... -
Page 183: Resizing A Button
Note: If you select a button that is linked to other buttons, a message will warn you. Select OK to continue defining the button’s size and delete the other buttons. Or select Cancel to stop resizing the button. Accent 800 User’s Guide-Empower... -
Page 184: Copying And Moving Buttons
1. Select Menu > Toolbox > Vocabulary > Editor. 2. Select Cut. 3. Select the button you want to move. 4. Select Paste. 5. Select the location to which you want to move the button. 6. Select Save. Accent 800 User’s Guide-Empower... -
Page 185: Resetting A Button To Its Factory Defaults
To reset a button to its factory defaults, select Menu > Editor. Select Edit and choose the button you want to reset. For example: The Edit Button window opens. Select the Settings tab. Accent 800 User’s Guide-Empower... - Page 186 This indicates that the button you selected is already at its default settings. Select Reset Button. A confirmation message appears. Select Okay and then select Save. “Successfully saved” will appear, and the button will be restored to its factory defaults. Accent 800 User’s Guide-Empower...
-
Page 187: Creating, Copying, Modifying, And Deleting Pages
Manager. The Page Manager window opens to the All Pages tab. To display only customized pages, select the My Pages tab. To display only default pages, select the Default Pages tab. Procedures for working with pages are the same on all three tabs. Accent 800 User’s Guide-Empower... -
Page 188: Creating A New Page
6. When you finish adding content or need to save your work in progress to come back to later, select Finished and then select Save. Note: Your new page is not linked to a button yet. Accent 800 User’s Guide-Empower... -
Page 189: Copying A Page
5. Select the Name Your Page field and enter a name for the new page. 6. Select Create. The copied page opens in the Editor. The new page name appears in “Now Editing … page”. Accent 800 User’s Guide-Empower... -
Page 190: Modifying A Page
For details on using the Editor, see “Using the Editor” on page 148. 5. When you finish making changes or need to save your work in- progress to come back to later, select Finished and then select Save. Accent 800 User’s Guide-Empower... -
Page 191: Deleting A Page
4. If you are sure you want to delete the page, select OK. The page will no longer appear on the list of available pages. 5. If you decide not to delete the page, select Cancel. The page will remain on the list. Accent 800 User’s Guide-Empower... -
Page 192: Working With Keyboards
If you don’t want to use the existing keyboard, switch to a different keyboard 1. Select Menu > Toolbox > Vocabulary > Keyboards & Word Prediction. 2. Choose Select a Keyboard to list the spelling and editing keyboards with Change buttons. Accent 800 User’s Guide-Empower... - Page 193 Select the Search for keyboard field and enter a partial • keyboard page name 5. When you find the keyboard you want, choose Select. A checkmark will replace the Select button. 6. Select Close. The keyboard you selected is now the default. Accent 800 User’s Guide-Empower...
-
Page 194: Copying And Editing A Keyboard
1. Select Menu > Toolbox > Vocabulary > Keyboards & Word Prediction. 2. Choose Select a Keyboard to list the spelling and editing keyboards with Change buttons. Accent 800 User’s Guide-Empower... - Page 195 5. When you find the keyboard you want to copy, select the duplicate button for that keyboard. 6. In the Duplicate Keyboard window, enter a name for your new keyboard. 7. Select Create & Edit Keyboard. “Copying” will appear briefly and then the new keyboard will open. Accent 800 User’s Guide-Empower...
-
Page 196: Creating A New Keyboard
3. Select the type of keyboard to create. For example, select the Spelling Keyboard Change button. 4. From either the Default Keyboards tab or the My Keyboards tab, select Add New. Enter a new keyboard name and select Finished. Accent 800 User’s Guide-Empower... -
Page 197: Changing How A Keyboard Speaks
Changing How a Keyboard Speaks You can change how your device speaks when you enter letters and words on a spelling keyboard. 1. Select Menu > Toolbox > Vocabulary > Keyboards & Word Prediction. Accent 800 User’s Guide-Empower... - Page 198 Each word will speak when you finish entering it Letters & Each letter will speak as you enter it, and Words each the word will speak when you finish entering it. None No letters or words will speak 4. Select Finished. Accent 800 User’s Guide-Empower...
-
Page 199: Using Your Vocabulary To Enter Text In Apps
2. Choose Keyboard Settings. The Keyboard Settings window opens. 3. Select the Write with My Vocabulary in Apps on/off toggle to turn the setting on. 4. Select Finished. You can now use buttons to enter text in apps. Accent 800 User’s Guide-Empower... -
Page 200: Using Word Prediction
Next Word Prediction When Next Word Prediction is turned on, suggested next words will appear as you type. This may eliminate the need to start typing another word. Accent 800 User’s Guide-Empower... -
Page 201: Adding Words That You Want Predicted
3. Select the Enter a Word field, use the keyboard to enter a word that you want predicted, and select Finished. 4. Select Add. A message will confirm that the word was added, and the word will appear on your prediction list. Accent 800 User’s Guide-Empower... -
Page 202: Specifying Words That You Don't Want Predicted
Prediction > Word Prediction. The Word Prediction window opens to the Settings tab. Select the Excluded Words tab. 2. Select the Enter a Word field, use the keyboard to enter a word that you don’t want predicted, and select Finished. Accent 800 User’s Guide-Empower... - Page 203 Note: To delete a word from your exclusion list, select the delete button . A message will conform that the word was deleted. 4. Add words to your exclusion list as needed. When you finish, select Close. Accent 800 User’s Guide-Empower...
-
Page 204: Analyzing Language Development
To view or download the Realize Language Starter’s Guide, go to https://realizelanguage.com/info/support For Customer Support: If you have a problem with the Realize Language website, email support@realizelanguage.com If you have a problem with your device, call PRC technical support at 1- 800-262-1990 or email service@prentrom.com. Accent 800 User’s Guide-Empower... -
Page 205: Turning Data Logging On
Data Logging allows your device to collect data on what was said and when. Select Menu > Toolbox > Vocabulary > Data Logging to open the Data Logging window Select the on/off toggle to turn data logging on. Accent 800 User’s Guide-Empower... -
Page 206: Exporting And Uploading Collected Data
4. Select the folder in which to want to save the file (your USB flash drive). 5. Select Save. A message will confirm that the file exported successfully. 6. Upload the file to the Realize Language website. Accent 800 User’s Guide-Empower... -
Page 207: Clearing Usage Data
Select OK to clear the data. If you want to start a new data log, leave Data Logging turned on. If you don’t want to start a new log at this time, turn Data Logging off. Select Close. Accent 800 User’s Guide-Empower... -
Page 208: Changing System Settings
NuVoice software, upgrade the Empower software using a USB ® flash drive, restore the device software to factory settings, and view hardware version information To access the system settings, select Menu > Toolbox > System Settings. Accent 800 User’s Guide-Empower... -
Page 209: Adjusting Sound And Volume
Select the Device Volume Button on/off toggle. You can adjust volume using the device volume button and software volume controls. You can adjust volume using software volume controls only. Accent 800 User’s Guide-Empower... - Page 210 Select an icon to hear the prompt voice through the device speakers or headphones. When you select the icon, it turns blue. Hear the prompt voice through the device speakers. Hear the prompt voice through the headphones. Accent 800 User’s Guide-Empower...
-
Page 211: Adjusting Device And Headphones Volume Using The Volume Shortcut
Settings range from 0 to 20. To mute the headphones, select the mute button. The button turns blue when selected. In this example, the button is gray, indicating that the headphones are not muted. Accent 800 User’s Guide-Empower... -
Page 212: Setting Up A Wi-Fi Connection
4. Select Connect, enter the network password, and select Next. 5. When the connection is made, select Close to close the Devices & Connection window. 6. To return to Empower, select the PRC logo that appears in the taskbar at the top. Accent 800 User’s Guide-Empower... -
Page 213: Setting Up A Bluetooth Audio Connection
When the device is disconnected, a Connect button is displayed. Select Connect when you want to reconnect the device. To disconnect and unpair the device: Select the delete icon only if you want to disconnect and unpair the device. Accent 800 User’s Guide-Empower... -
Page 214: Connecting Your Device To A Switch
To disconnect (unpair) all switches: If you want to disconnect (unpair) all switches from Empower on your device, select Disconnect all. Important! If multiple switches are connected, you cannot disconnect only one. Selecting Disconnect all disconnects all previously connected switches. Accent 800 User’s Guide-Empower... -
Page 215: Updating The Device Software Using A Wi-Fi Connection
1. Select Menu > Toolbox > System Settings > Updates. The updates window allows you to choose how to update your device. 2. Select Check for Updates to the right of Update Using Wi-Fi. When an update is available, the Update Available window opens. Accent 800 User’s Guide-Empower... - Page 216 “Download completed. Would you like to install updates now?”. 5. Select Install. When the update finishes, the application will close and reopen. 6. Sign in and continue using the application as you normally do. Accent 800 User’s Guide-Empower...
-
Page 217: Updating The Device Software Using A Usb Flash Drive
8. Turn on your device and plug in the battery charger. 9. Remove the USB flash drive from your computer and insert it into your device. Step 2: Plug in your device’s battery charger Accent 800 User’s Guide-Empower... - Page 218 2. Select Menu > Toolbox > System Settings > Updates. The updates window allows you to choose how to update your device. 3. Select Check for Updates to the right of Update Using a USB Flash Drive. When an update is available, the Update Available window appears. Accent 800 User’s Guide-Empower...
- Page 219 “Download completed. Would you like to install updates now?”. 6. Select Install. When the update finishes, the application will close and reopen. 7. Sign in and continue using the application as you normally do. Accent 800 User’s Guide-Empower...
-
Page 220: Backing Up And Exporting Files
Export a Vocabulary Export a vocabulary file or a keyboard as a or Keyboard backup or to transfer to another device. Export Pages Export vocabulary pages as a backup or to transfer to another device. Accent 800 User’s Guide-Empower... -
Page 221: Exporting A User's Vocabularies And Settings
• “Export Succeeded” will be displayed and the file will be saved to the USB flash drive with the name you entered. You can keep this file as a backup or transfer it to another device. Accent 800 User’s Guide-Empower... -
Page 222: Exporting A Customized Vocabulary File Or Keyboard
8. Select Save. If a File Exists window appears, do one of the following: To save the new file and keep the old file, select No and enter a • different file name. To overwrite the old file, select Yes. • Accent 800 User’s Guide-Empower... -
Page 223: Exporting Vocabulary Pages
Selected button in the lower left corner shows the number of pages you have selected. Note: If select a page by mistake, select the checkbox again to remove the checkmark. To deselect all pages you chose, select Clear Selections. Accent 800 User’s Guide-Empower... - Page 224 10. Select Save. “Export Succeeded” will be displayed and the page(s) will be saved to the USB flash drive with the name you entered. You can keep this file as a backup or transfer it to another device. Accent 800 User’s Guide-Empower...
-
Page 225: Importing And Restoring Files
My Pages tab in Page Manager. Import Message Import recorded messages from the PRC- Banking Zip File Saltillo message banking website or myMessageBanking.com. The messages will appear automatically on pages in your Essence 60 or Essence 84 vocabulary. Accent 800 User’s Guide-Empower... -
Page 226: Importing Users, Vocabularies, Keyboards, And Pages
Keep Both. The imported page will be added with a number added to the page name. For example, if the original page name was “My Favorite Animals”, the imported page name would be “My Favorite Animals 1”. You can rename the page. Accent 800 User’s Guide-Empower... -
Page 227: Importing Message Banking Messages
4. Select the folder that contains the .zip file you created from the Message Banking website. 5. Select the file. “Import Succeeded” will be displayed. 6. Select Close. The imported messages will appear automatically on pages in your Essence 60 or Essence 84 vocabularies under the Banked button. Accent 800 User’s Guide-Empower... -
Page 228: Setting The Date And Time
Windows Date and Time window opens. 2. Select Change date and time, make the necessary changes, and select OK to close the Date and Time Settings window. 3. Select OK to close the Date and Time window. Accent 800 User’s Guide-Empower... -
Page 229: Configuring Device Power Settings
The power settings allow you to restart or shut down the device and configure settings to save battery power. Select Menu > Toolbox > System Settings > Power Settings. The Power Settings window opens to the Shut Down and Restart tab. Accent 800 User’s Guide-Empower... - Page 230 To turn the device off and back on, select Restart Device. A confirmation prompt will appear. Select Yes, restart device. To shut down the device: To shut the device off, select Shut Down Device. A confirmation prompt will appear. Select Yes, shut down. Accent 800 User’s Guide-Empower...
-
Page 231: Configuring The Device Power Button Using The Power Settings
The device will enter sleep mode when you press the device power button. Shut Down The device will shut down when you press the device power button. No Action Nothing will happen when you press the device power button. Accent 800 User’s Guide-Empower... -
Page 232: Saving Battery Power
Adjust the brightness of the device screen by moving the slider button until the number you want is displayed or by selecting the + and – buttons to change the number one digit at a time. Settings range from 1 to 100. Accent 800 User’s Guide-Empower... -
Page 233: Using The Power Shortcut
You will be prompted to confirm that you want to shut down the device. Select Yes, shut down. Restart You will be prompted to confirm that you want to restart the device. Select Yes, restart device. Accent 800 User’s Guide-Empower... -
Page 234: Using The System Options
To access Windows and other external processes, select the Integrated Device Mode on/off toggle: = the device is in Integrated Device Mode = the device is in Dedicated Device Mode and cannot access Windows and other external processes Accent 800 User’s Guide-Empower... - Page 235 Customer Support. Viewing the License Key Your device’s license key is displayed in the lower left corner of the System Options & Support window. You may need this information if you contact Customer Support. Accent 800 User’s Guide-Empower...
-
Page 236: Using The Support Options
Important! If you perform a system restore, you will lose all your user settings and data. To restore your Empower and Windows software to their factory settings, select Restore Now. You will be prompted to confirm that you want to proceed. Select Yes, restart now. Accent 800 User’s Guide-Empower... - Page 237 Customer Support. Viewing the License Key Your device’s license key is displayed in the lower left corner of the System Options & Support window. You may need this information if you contact Customer Support. Accent 800 User’s Guide-Empower...
-
Page 238: Opening Additional Apps On Your Device
Each app allows you to return to where you were before opening the app. Select Exit App at the top right corner of the screen, below the Menu button. You will return to the Empower software screen you came from. Accent 800 User’s Guide-Empower... -
Page 239: Finding Additional Information
More specific information on using access methods and vocabularies is available in the manuals and instructions included with your PRC communication device and accessories. For information on using an Accent 800 device with NuVoice software, view or download the Accent 800 User’s Guide for NuVoice from https://www.prentrom.com/support/accent. -
Page 240: Troubleshooting
Recommendation: Try to make all your changes in the Toolbox at the same time. When you exit the Toolbox, you will need to enter your password again to unlock it even if you don’t close the application. Accent 800 User’s Guide-Empower... - Page 241 1. Select Menu > Toolbox > System Settings > Volume Settings. 2. Make sure “Device Volume: isn’t set to 0. If it is, adjust it to a volume level comfortable for the user. 3. Select Close. Accent 800 User’s Guide-Empower...
- Page 242 Note: You only need press the button for 3 to 5 seconds. 2. Leave the device turned off for about 15 seconds. 3. Power up the device as you do normally. Option #2: Contact PRC technical support by phone at 1-800-262-1990 or by email at service@prentrom.com. Accent 800 User’s Guide-Empower...
-
Page 243: Appendix A: Using The Empower Accessible Web Browser
(IFP). An IFP provides access to Timocco™ and the Web Browser. For more information on purchasing an IFP: For Medicare purchases, contact Funding at (800) 268-5224 or funding@prentrom.com For all other purchases, contact Sales at (800) 262-1933 or sales@prentrom.com Accent 800 User’s Guide-Empower... -
Page 244: The Home Screen
The buttons across the top will display any cursor or dwell feedback you have set in the Cursor, Dwell, and Selection Feedback options in the User Settings tab of the Toolbox. The Web Browser window will only display a cursor, whether you have it turned on or off. Accent 800 User’s Guide-Empower... -
Page 245: Using The Web Browser Buttons
Back tabs through a website. A blue box will outline the active link. Select Link Selects the active link you have tabbed to on the webpage. Tab Right Forward tabs through a website. A blue box will outline the active link. Accent 800 User’s Guide-Empower... - Page 246 For example, when reading a news website, first have Read Mode on to get a feel for what articles are on the homepage. Turn read mode off when you are ready to click on a link to an article. Accent 800 User’s Guide-Empower...
-
Page 247: Using The Menu Button And Quick Menu Access Bar
You may want to turn off access to the Menu button and Quick Menu Access Bar so that the user does not accidentally select them or get distracted by them. See “Turning Access to the Menu Buttons On or Off” on page 57. Accent 800 User’s Guide-Empower... -
Page 248: Storing Favorite Websites
Note: When you import a user, the favorites for that user will be imported as well. To delete a favorite website: 1. Select Delete Favorite. 2. Select the favorite button you want to delete. 3. All remaining buttons with favorite websites will shift one space to the left. Accent 800 User’s Guide-Empower... -
Page 249: Creating A Shortcut To The Web Browser In Your Vocabulary
3. Select the My Predictions tab. 4. Select the text field and type your email address. Select Finished. 5. Select Add and Close. 6. Your email address will now appear in your Word Prediction buttons on a keyboard. Accent 800 User’s Guide-Empower... - Page 250 However, we are dedicated to continually improving the web browsing experience. Currently we know the following popular websites and functions are not supported: Uploading and downloading attachments • Printing • • Some streaming services Accent 800 User’s Guide-Empower...
-
Page 251: Returning To The Empower Software From The Web Browser
The Web Browser app allows you to return to where you were before opening the app. Select Exit App at the top right corner of the screen, below the Menu button. You will return to the Empower software screen you came from. Accent 800 User’s Guide-Empower... -
Page 252: Appendix B: Setting Up And Using Empower Text Messaging
Bluetooth is enabled and your phone is discoverable. If you have not done so, you will see the following at the top of the AeroText app. Note: Authentication is not required to pair your phone to your Accent device. Accent 800 User’s Guide-Empower... -
Page 253: Pairing Your Phone To Your Accent Device With Empower
Messages within a conversation will appear to the right. Select a conversation to read and respond to messages in that conversation. Note: Give the messages time to populate. If a conversation has thousands of messages, you will need to wait longer. Accent 800 User’s Guide-Empower... - Page 254 5. Compose your message and then select Finished. 6. Select Send. Receiving New Messages You will see the following icon in the multi-bar of your vocabulary when you receive a new message. In addition, the Conversation will be in bold. Accent 800 User’s Guide-Empower...
-
Page 255: Appendix C: Setting Up And Using Ir Remote Controls
Integrated Feature Pack (IFP). An IFP provides access to Timocco™, the Web Browser, and IR Remote Controls app. For more information on purchasing an IFP: For Medicare purchases, contact Funding at (800) 268-5224 or funding@prentrom.com For all other purchases, contact Sales at (800) 262-1933 or sales@prentrom.com Accent 800 User’s Guide-Empower... -
Page 256: Gathering What You Need
Pioneer. Choose your manufacturer. If you do not find your manufacturer, try again or select Finish to continue without a manufacturer. If you continue without a manufacturer, you will need to manually teach the device each IR signal on your remote control page using Edit. Accent 800 User’s Guide-Empower... -
Page 257: Using Ir Remote Controls
You can add, edit, swap, resize, cut, copy, and paste buttons. To learn more about the Editor please see the appropriate User’s Guide at https://www.prentrom.com/support/devices/accent-with- empower/downloads Select Cancel or Save to cancel or apply your changes. Accent 800 User’s Guide-Empower... - Page 258 Editor to change the label or add a symbol such as Nick Jr. or ESPN. Note: Your customized IR Remote Controls will be exported/imported when you export/import a User in the System Settings tab of the Toolbox. Accent 800 User’s Guide-Empower...
-
Page 259: Appendix D: Creating A List-O-Matic Button Action
3. In the Edit Button window, select the Actions tab and select Add Action. A list of action categories will be displayed. 4. Select Fun Things. The Add an Action window will open Accent 800 User’s Guide-Empower... - Page 260 7. In the “Enter an item” box, select the keyboard icon and enter an item name. 8. When you select Finished on the keyboard, the item will be added to the list. Accent 800 User’s Guide-Empower...
- Page 261 List-O-Matic tool in the button action list. In addition, the button action will show the first two items plus three dots (...) to help you identify what is on the list. Accent 800 User’s Guide-Empower...
- Page 262 When you select the button in your vocabulary, it will play the list of items in the order you specified or in a random order. Each time you select the button, the next item will play. Accent 800 User’s Guide-Empower...
-
Page 263: Appendix E: Compliance Information
Wireless communications equipment such as wireless home network devices, mobile phones, cordless telephones and their base stations, and walkie-talkies can affect this device and should be kept a least six (6) inches away from the device. Accent 800 User’s Guide-Empower... - Page 264 (computer) to protect against its loss. Device Intended Purpose The Accent 800 is a speech generating device that augments communication for an individual with speech/language impairment. This device and its language programs give the user the ability to initiate conversation, seek information, state opinions, and share feelings.
- Page 265 This means that access to some of the extended features is limited. To use all extended features, the device needs to be unlocked by purchasing an Integrated Feature Pack (IFP). For more information on purchasing an IFP, contact Sales at (800) 262-1933 or sales@prentrom.com. Accent 800 User’s Guide-Empower...
- Page 266 Explanation of Symbols This section explains the symbols that appear on Accent 800 devices, accessories, or packaging. Symbol Explanation The device is Federal Communications Commission (FCC)-compliant. Recycle electronic equipment. Do not throw the device in the trash. The device conforms to European Union health, safety, and environmental standards.
- Page 267 Accessories Carry case, standard and deluxe carry straps, screen protectors, external power pack, QRM mounting plate, device mounting brackets, keyguards, TouchGuides, replacement frame, an extra rugged Xtreme™ case, Look™ eye tracking module, NuPoint® head tracking module Accent 800 User’s Guide-Empower...
- Page 268 While the device is charging, touching the surface of the device with broken skin may aggravate a wound. While the device is charging, infants or high-risk groups should not touch the surface of the device if there is a chance of burning the skin. Accent 800 User’s Guide-Empower...
-
Page 269: Index
Adding dwell pointer animation, Auto scan Selecting the scan type, 78 Appearance Auto-formatting Changing the appearance of the Turning message window auto- multi-bar, 99 formatting on or off, 95 Changing the message window font, Automatic scan Configuring, 80 Accent 800 User’s Guide-Empower... - Page 270 Resetting a button to factory Browser app, 243 defaults, 185 Using your vocabulary to enter text Resizing, 183 in apps, 199 Saving a message to a button, 176 Button paths Searching for symbols, 155 Selected when released, 74 Accent 800 User’s Guide-Empower...
- Page 271 Charging the battery, 17 color, 141 Cleaning Customizing the basic background Cleaning and disinfecting the color, 142 device, 19 Core vocabulary Closing the application, 102 Description, 51 Color Cursor Changing a button’s basic colors, Changing the cursor’s basic color, Accent 800 User’s Guide-Empower...
- Page 272 Customizing colors, 111 Deleting Selecting a pointer, 108 Deleting users, 102 Selecting colors, 113 Deleting vocabularies, 122 Selecting the dwell or scan feedback Device type, 109 Adjusting device and headphones Settings, 108 volume from a shortcut, 211 Accent 800 User’s Guide-Empower...
- Page 273 Turning access to the Menu buttons selection feedback, 103 on or off, 57 Configuring the cursor, 104 Updating via USB flash drive, 217 Customizing dwell feedback colors, Updating via Wi-Fi, 215 Upgrading via USB flash drive, 235 Accent 800 User’s Guide-Empower...
- Page 274 Changing the message window font, heard through device speakers or headphones, 210 Changing the message window font Home page size, 94 Changing, 144 Frame Attaching a new device frame, 32 Attaching a new device frame more securely, 34 Icons Accent 800 User’s Guide-Empower...
- Page 275 Setting up eye tracking, 76 in apps, 199 Keyboards Exporting a customized vocabulary file or keyboard, 222 Main voice Importing users, vocabularies, Changing pronunciations, 88 keyboards, and pages, 226 Changing the voice, 86 Keyguard Attaching a keyguard, 35 Accent 800 User’s Guide-Empower...
- Page 276 75 Turning on keyguard mode for Configuring scan timing, 79 touch access, 96 NuPoint Messaging Mounting a NuPoint module, 45 Setting up and Using Empower text messaging, 252 Setting up head tracking, 76 NuVoice Accent 800 User’s Guide-Empower...
- Page 277 84 Photos Changing pronunciations, 88 Taking a picture to use on a button, Changing text spoken, 172 153, 158 Changing the voice, 86 Pointer Prompt voice settings, 86 Changing dwell feedback basic Pronunciation colors, 110 Accent 800 User’s Guide-Empower...
- Page 278 Turning access to the Menu buttons Turning the device off and back on, on or off, 57 Using the Menu button and Quick Restarts Menu Access Bar in apps, 56 Setting up automatic scanning restarts, 80 Accent 800 User’s Guide-Empower...
- Page 279 Setting number of switches, scan Restoring Empower and Windows type, and scan pattern, 77 software to factory settings, 236 Setting the scan order for a Restricting access to the Toolbox, customized scan pattern, 85 Setting up, 77 Shortcuts Accent 800 User’s Guide-Empower...
- Page 280 Putting the device to sleep from the Step scanning, 78 software, 232 Strap Software Attaching a carry strap, 40 Restoring factory settings, 236 Strap handle Signing out, 102 Attaching a strap handle, 42 Switching to NuVoice, 235 Support Accent 800 User’s Guide-Empower...
- Page 281 Viewing in Support & System Timing Options window, 235, 237 Configuring scan speed, selection System options time, delay, automatic reset, and reset time, 79 Turning on integrated device mode, switching to NuVoice, and Toggling settings on and off, 61 Toolbox Accent 800 User’s Guide-Empower...
- Page 282 221 Editing keyboard, 62 Importing users, vocabularies, keyboards, and pages, 226 Managing users, 100 Unlocking Signing a user in, 100 Restricting access to the Toolbox, Signing a user out, 100, 102 Switching between users, 100 Updating Accent 800 User’s Guide-Empower...
- Page 283 Managing word lists, 129 Word prediction, 200 Merging word lists, 131 Voice Temporarily enlarging a button, 132 Changing the voice, 86 Turning on Vocabulary Builder from Main voice, 86, 88 the Toolbox, 134 Prompt voice, 86, 88 Using, 124 Accent 800 User’s Guide-Empower...
- Page 284 Menu Access Bar in the Web Using, 200 Browser, 247 Using your vocabulary to enter text in apps, 199 Zip files Websites Importing a message banking .zip Setting up a button to navigate to a file, 227 website, 164 Accent 800 User’s Guide-Empower...
Need help?
Do you have a question about the ACCENT 800 and is the answer not in the manual?
Questions and answers