Table of Contents
Advertisement
Available languages
Available languages
Quick Links
Portfolio® is a registered trademark
of LF, LLC. All Rights Reserved.
ATTACH YOUR RECEIPT HERE
Serial Number
Questions, problems, missing parts? Before returning to your retailer, call our
customer service department at 1-800-643-0067, 8 a.m. - 6 p.m., EST, Monday - Thursday,
8 a.m. - 5 p.m., EST, Friday.
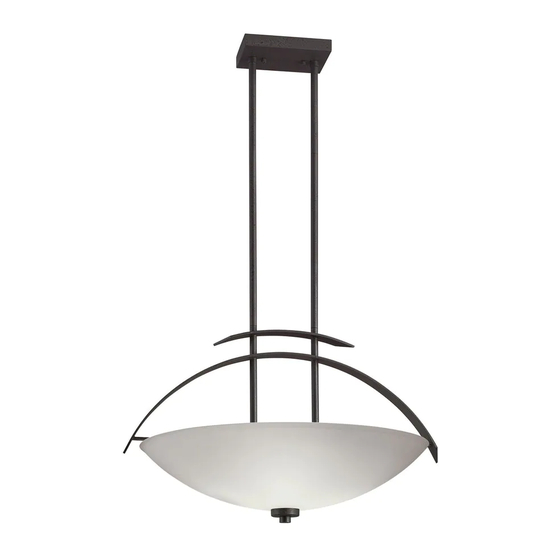
4-LIGHT INVERTED PENDANT
Purchase Date
1
ITEM #0394153
MODEL #34623
Français p. 9
Español p. 17
Advertisement
Table of Contents

Related Manuals for Portfolio 34623


Summary of Contents for Portfolio 34623
- Page 1 ITEM #0394153 4-LIGHT INVERTED PENDANT Portfolio® is a registered trademark of LF, LLC. All Rights Reserved. MODEL #34623 Français p. 9 Español p. 17 ATTACH YOUR RECEIPT HERE Serial Number Purchase Date Questions, problems, missing parts? Before returning to your retailer, call our customer service department at 1-800-643-0067, 8 a.m.
-
Page 2: Package Contents
PACKAGE CONTENTS PART DESCRIPTION QUANTITY Canopy Canopy Coupling (Preassembled to 6 in. Threaded Tube (C)) 6 in. Threaded Tube Threaded Post (Preassembled to Socket Assembly (G)) Shade 12 in. Threaded Tube Socket Assembly Socket Coupling (Preassembled to Socket Assembly (G)) Threaded Pipe Metal Washer (Preassembled to Threaded Pipe (I)) Nylon Washer(Preassembled to Threaded Pipe (I)) -
Page 3: Safety Information
HARDWARE CONTENTS (shown actual size) Ground Screw (Not shown Threaded to size) Knob Hex Nut Short Wire Qty: 1 Qty: 2 Qty: 3 Machine Connector Long Screw Mounting Machine Qty: 3 Bracket Qty: 2 Screw (Not shown to size) Qty: 2 Qty: 1 SAFETY INFORMATION Please read and understand this entire manual before attempting to assemble, operate or install the... - Page 4 ASSEMBLY INSTRUCTIONS 1. Screw 12 in. threaded pipes (F) onto threaded posts (D). 2. Screw 6 in. threaded pipes (C) onto 12 in. threaded pipes (F). Pass threaded pipes through canopy coupling (B) and secure to canopy (A) with hex nuts (GG). Hardware Used Hex Nut 3.
- Page 5 ASSEMBLY INSTRUCTIONS 4. Ground wire connection guide: • For installation in the United States: Wrap ground wire from outlet box around ground screw (FF) on mounting bracket (EE), no less than 2 in. from wire end. Tighten ground screw (FF). If fixture is supplied with a ground wire, connect to outlet ground wire with a wire connector (AA).
- Page 6 ASSEMBLY INSTRUCTIONS 6. Pass the canopy (A) over the long machine screws (DD) protruding from the mounting bracket (EE) and secure in place with threaded knobs (CC). Hardware Used Threaded Knob Long Machine Screw 7. Screw three 100-watt max. medium-base bulbs (not included) into socket assembly (G).
-
Page 7: Care And Maintenance
ASSEMBLY INSTRUCTIONS 9. Remove nylon washers (K), metal washers (J), decorative cap (L) and final (M) from threaded pipe (I). Pass nylon washers (K), metal washers (J), shade (E), and decorative cap (L) over threaded pipe (I) and secure with finial (M). CARE AND MAINTENANCE •... -
Page 8: Replacement Parts List
6 in. Threaded Tube PIPEX6-AI Shade G34623 12 in. Threaded Tube PIPEX12-AI Threaded Pipe TP34623 Metal Washer MW34623 Nylon Washer NW34623 Decorative Cap CAP-34623 Finial FIN34623 Wire Connector WC001 Short Machine Screw SCR832X050 Threaded Knob TK1X832-AI Long Machine Screw SCR832X100 Mounting Bracket XBAR05... - Page 9 ARTICLE #0394153 LUMINAIRE SUSPENDU Portfolio® est une marque de commerce INVERSÉ À QUATRE LUMIÈRES déposée de LF, LLC. Tous droits réservés. MODÈLE #34623 JOIGNEZ VOTRE REÇU ICI Numéro de série Date d’achat Des questions, des problèmes, des pièces manquantes? Avant de retourner l’article au détaillant, appelez notre service à...
-
Page 10: Contenu De L'emballage
CONTENU DE L’EMBALLAGE PIÈCE DESCRIPTION QUANTITÉ Couvercle Raccord de couvercle (préassemblé au tube fileté de 15,24 cm [C]) Tube fileté de 15,24 cm Montant fileté (préassemblé à l'ensemble de douille [G]) Abat-jour Tube fileté de 30,48 cm Ensemble de douille Raccord de douille (préassemblé... -
Page 11: Consignes De Sécurité
QUINCAILLERIE INCLUSE (grandeur réelle) Vis de mise à la terre (grandeur Bouton non réelle) fileté Écrou Vis à hexagonal Qté : 1 Qté : 2 métaux courte Capuchon Qté : 3 de connexion Qté : 2 Vis à Traverse métaux longue Qté... -
Page 12: Instructions Pour L'assemblage
INSTRUCTIONS POUR L'ASSEMBLAGE 1. Vissez les tuyaux filetés de 30,48 cm (F) aux montants filetés (D). 2. Vissez les tuyaux filetés de 15,24 cm (C) aux tuyaux filetés de 30,48 cm (F). Glissez les tuyaux filetés à travers le raccord de couvercle (B) et fixez-les au couvercle (A) à... - Page 13 INSTRUCTIONS POUR L'ASSEMBLAGE 4. Guide de connexion des fils de mise à la terre : • Installation aux États-Unis : Enroulez le fil de mise à la terre de la boîte de sortie autour de la vis de mise à la terre (FF) de la traverse (EE), à au moins 5 cm de l'extrémité...
- Page 14 INSTRUCTIONS POUR L'ASSEMBLAGE 6. Glissez le couvercle (A) sur les vis à métaux longues (DD) qui sortent du support de fixation (EE) et fixez-le à l’aide des boutons filetés (CC). Quincaillerie utilisée Bouton fileté Vis à métaux longue 7. Insérez trois ampoules à culot moyen d’un maximum de 100 W (non incluses) dans l’ensemble de douille (G).
-
Page 15: Entretien
INSTRUCTIONS POUR L'ASSEMBLAGE 9. Retirez les rondelles en nylon (K), les rondelles en métal (J), le capuchon décoratif (L) et l’embout (M) du tuyau fileté (I). Glissez les rondelles en nylon (L), les rondelles en métal (J), l’abat-jour (E) et le capuchon décoratif (L) sur le tuyau fileté... -
Page 16: Liste Des Pièces De Rechange
G34623 Tube fileté de 30,48 cm PIPEX12-AI Tuyau fileté TP34623 Rondelle en métal MW34623 Rondelle en nylon NW34623 Capuchon décoratif CAP-34623 Embout FIN34623 WC001 Capuchon de connexion Vis à métaux courte SCR832X050 Bouton fileté TK1X832-AI Vis à métaux longue SCR832X100... - Page 17 ARTÍCULO No. 0394153 LÁMPARA COLGANTE Portfolio® es una marca registrada de LF, INVERTIDA DE 4 LUCES LLC. Todos los derechos reservados. MODELO No. 34623 ADJUNTE SU RECIBO AQUÍ Número de serie Fecha de compra ¿Preguntas, problemas, piezas faltantes? Antes de volver a la tienda, llame a nuestro Departamento de Servicio al Cliente al 1-800-643-0067, de lunes a jueves de 8 a.m.
-
Page 18: Contenido Del Paquete
CONTENIDO DEL PAQUETE PIEZA DESCRIPCIÓN CANTIDAD Base Acoplador de la base (preensamblado en un tubo roscado de 15,24 cm (C)) Tubo roscado de 15,24 cm Poste roscado (preensamblado en el ensamble del portalámpara (G)) Pantalla Tubo roscado de 30,48 cm Ensamble del portalámpara Acoplador del portalámpara (preensamblado en el ensamble del portalámpara (G)) Tubo roscado... -
Page 19: Información De Seguridad
ADITAMENTOS (tamaño real) Tornillo de puesta a tierra (no es el Perilla Tuerca tamaño real)) roscada hexagonal Cant.: 1 Tornillo para Cant.: 2 Conectores Cant.: 3 metal corto de cables Tornillo para Soporte metal largo Cant.: 2 Cant.: 3 de montaje (no es el Cant.: 2 tamaño real)) -
Page 20: Instrucciones De Ensamblaje
INSTRUCCIONES DE ENSAMBLAJE 1. Enrosque los tubos roscados de 30,48 cm (F) en los postes roscados (D). 2. Enrosque los tubos roscados de 15,24 cm (C) en los tubos roscados de 30,48 cm (F). Pase los tubos roscados por el acoplador de la base (B) y fíjelos a la base (A) con las tuercas hexagonales (GG). - Page 21 INSTRUCCIONES DE ENSAMBLAJE 4. Guía para la conexión de los conductores de puesta a tierra : • Para la instalación en los Estados Unidos: Coloque el conductor de puesta a tierra de la caja de salida alrededor del tornillo de puesta a tierra (FF) en la soporte de montaje (EE), a no menos de 5,08 cm del extremo del conductor.
- Page 22 INSTRUCCIONES DE ENSAMBLAJE 6. Pase la cubierta (A) sobre los tornillos para metales largos (DD) que sobresalen del soporte de montaje (EE) y fíjela en su lugar con las perillas roscadas (CC). Aditamentos utilizados Perilla roscada Tornillo para metal largo 7.
-
Page 23: Solución De Problemas
INSTRUCCIONES DE ENSAMBLAJE 9. Retire las arandelas de nailon (K), las arandelas de metal (J), la tapa decorativa (L) y el remate (M) del tubo roscado (I). Pase las arandelas de nailon (K), arandelas de metal (J), la pantalla (E) y la tapa decorativa (L) por encima del tubo roscado (I) y fíjelos con el remate (M). -
Page 24: Lista De Piezas De Repuesto
G34623 PIPEX12-AI Tubo roscado de 30,48 cm Tubo roscado TP34623 Arandela de metal MW34623 Arandela de nailon NW34623 Tapa decorativa CAP-34623 Remate FIN34623 Conector de cables WC001 Tornillo para metal corto SCR832X050 Perilla roscada TK1X832-AI SCR832X100 Tornillo para metal largo...
Need help?
Do you have a question about the 34623 and is the answer not in the manual?
Questions and answers