Table of Contents
Advertisement
Quick Links
Advertisement
Table of Contents

Related Manuals for Edimax TRENDnet TEW-832MDR


Summary of Contents for Edimax TRENDnet TEW-832MDR
- Page 1 TEW-832MDR TEW-832MDR2K TEW-832MDR3K 09-2019 / v Quick Installation Guide...
-
Page 2: Table Of Contents
Contents Product Information ........4 I-1. Package Content ..............5 I-2. System Requirements ............. 5 I-3. Hardware Interface ..............6 I-4. LED Status ................7 Installation ..........8 II-1. Hardware Installation ............8 II-2. Smart App Installation ............9 II-3. Connect to TEW-832MDR ............ 10 II-4. - Page 3 III-7. Signal Status ............... 22 III-8. Logout ................22 IV. System .............23 IV-1. Firmware Update ............... 24 IV-2. LED Eco Mode ..............25 IV-3. Nickname & Login Password ..........25 IV-4. Date & Time ............... 26 IV-5. Languages ................27 IV-6.
-
Page 4: Product Information
You can find all supporting documents from the link below or via QR Code: (Once you’ve visited the Edimax official website, please enter the model no. “TEW-832MDR” into the search box to search for your product.) -
Page 5: I-1. Package Content
I-1. Package Content 3 x Nodes(12Vdc,1A) Ethernet Cable Quick Installation Guide (1 Master, 2 Slaves) Power Adapter (12Vdc,1A) I-2. System Requirements - Cable or xDSL Internet connection (RJ-45 cable modem or RJ-45 ADSL modem). - iOS 9.0 and above or Android 4.x and above for EdiMESH App. -
Page 6: I-3. Hardware Interface
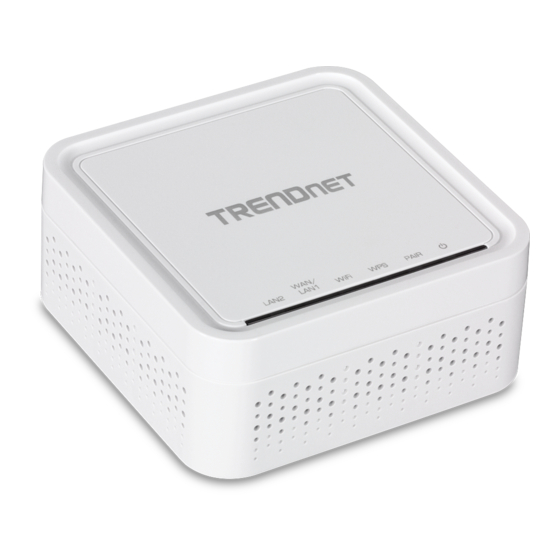
I-3. Hardware Interface Description LED Status (LAN2, LAN1, WLAN, WPS, PAIR, Power) Power Jack (12V/1A) WPS / Reset LAN1 LAN2... -
Page 7: I-4. Led Status
I-4. LED Status Color Status Description Power on. Power Green Power off. Slave signal detected. Pair (Master) Green No Slave signal detected. Excellent slave location. Signal strength: 80 – 100% Good slave location. Slow Flashing Signal strength: 40 – 80% Pair (Slave) Green Poor slave location. -
Page 8: Ii. Installation
II. Installation This section will guide you through the steps to connect your TEW-832MDR to the EdiMESH App. II-1. Hardware Installation Please follow the steps below: 1. Connect a power supply to each node. 2. Connect the master to the router using Ethernet cables. One of the nodes has a Master sticker while the other two have Slave stickers, indicating their relationships. -
Page 9: Ii-2. Smart App Installation
II-2. Smart App Installation Search and download "EdiMESH" in Apple App Store or Google Play Store. Launch the "EdiMESH" in your smart mobile device. For Internet connection procedure, please follow the instructions below according to your mobile device. -
Page 10: Ii-3. Connect To Tew-832Mdr
II-3. Connect to TEW-832MDR Please connect TEW-832MDR with your smart phone. 1. Wi-Fi Connection Connect your device through mobile to the Wi-Fi SSID of your TEW-832MDR (EDIMAX_**). Please find the unique SSID of your TEW-832MDR on the product label. The last 2 digits ** of the SSID “EDIMAX_** "is the Mac last two digits of the Master’s label and Password: 12345678. -
Page 11: Ii-4. App Setup
II-4. App Setup Please follow the steps below, 1. Download and install “EdiMESH” app via Google Play or Apple App Store. 2. Open EdiMESH. 3. Click “Choose Mesh System”. - Page 12 4. Create a nickname for your Mesh System and click “Next”. 5. Enter the login password (for default login password “12345678”, see the label of the product) and click “Next”.
- Page 13 Once you register your nickname and login password successfully, a welcome page is displayed. Congrats! You can now remotely control TEW-832MDR using the EdiMESH App.
-
Page 14: Ii-5. Manually Add Node To Edimesh
II-5. Manually Add Node To EdiMESH Please note that the products are already paired. If the node does not connect to EdiMESH App successfully, or if you are trying to add a new node to EdiMESH, you can simply use the EdiMESH App or WPS button. Please follow the steps below if you want to add an additional node, 1. -
Page 15: Ii-6. Adding Nodes With The Wps Button
II-6. Adding nodes with the WPS Button Please note that the 3 X nodes (Master/Slave) are already paired. If the slave node is failing to connect to the master node then you can use the WPS button to connect the Master/Slave node. Please follow the steps below, 1. -
Page 16: Iii. Menu
III. Menu Please click the Menu icon on the top left corner of the Home Page and follow the instructions below for more details:... -
Page 17: Iii-1. Home
III-1. Home Going back to the homepage. III-2. Internet You can check the current connected internet information, Use the bridge mode if you are trying to use the device by connecting to an existing router or modem. If set up as a bridge mode, the same network as the connected router or modem is used. -
Page 18: Iii-3. Wi-Fi
III-3. Wi-Fi You can change the SSID name and password, change Security Type, enable/disable Hide SSID, enable/disable Guest Network. -
Page 19: Iii-4. Qos
III-4. QoS You can enable QoS operation to achieve maximum bandwidth. QoS also involves controlling and managing network resources. -
Page 20: Iii-5. Parental Control
III-5. Parental Control When you turn on Parental Control, you can set schedule and restrict what websites can be accessed. -
Page 21: Iii-6 Advanced
III-6. Advanced Features such as DMZ, UPnP and IPv6 are supported. We recommend that you use the default settings. -
Page 22: Iii-7. Signal Status
III-7. Signal Status You can check how many devices are connecting to your TEW-832MDR. III-8. Logout You can log off the account by clicking “logout”. -
Page 23: System
System Please click the System icon on the top right corner of homepage. And follow the instructions below for more details:... -
Page 24: Iv-1. Firmware Update
IV-1. Firmware Update Please click “UPDATE” if the latest firmware is available. -
Page 25: Iv-2. Led Eco Mode
IV-2. LED Eco Mode If the “LED Eco Mode” is enabled, all LEDs except the power LED will be turned off. IV-3. Nickname & Login Password You can change the nickname and login password in this section. -
Page 26: Iv-4. Date & Time
IV-4. Date & Time You can set up the date and time in the EdiMESH. Note: Not all countries have the DST, so you need to set the DST according to your local time. -
Page 27: Iv-5. Languages
IV-5. Languages You can change the language in the EdiMESH App. It supports English, Traditional Chinese Simplified Chinese, Deutsch, Français, Nederlands, Italiano, Español, Português, dansk, Norsk, Svenska, Polski, Română, Čeština, Українська and Русский. -
Page 28: Iv-6. Factory Reset
IV-6. Factory Reset If you experience problems with your TEW-832MDR, you can reset the devices back to their factory settings. Note: A factory reset erases all your data from your RE-7478MK1. Hardware Reset 1. Press and hold the reset button on the TEW-832MDR for at least 10 seconds then release the button. - Page 29 Software Reset 1. Click “FACTORY RESET” button. NOTE: Please wait for the TEW-832MDR to restart. It will take a few minutes to completely erase your data and finish the setting. The TEW-832MDR is ready for setup when the PWR is Green.
-
Page 30: Iv-7. About
IV-7. About You can find the information of App Version, Privacy Policy and Terms and Conditions in this section. - Page 31 COPYRIGHT Copyright Edimax Technology Co., Ltd. all rights reserved. No part of this publication may be reproduced, transmitted, transcribed, stored in a retrieval system, or translated into any language or computer language, in any form or by any means, electronic, mechanical, magnetic, optical, chemical, manual or otherwise, without the prior written permission from Edimax Technology Co., Ltd.
- Page 32 22.76 A simplified DoC shall be provided as follows: Article 10(9) Hereby, Edimax Technology Co., Ltd. declares that the radio equipment type AC1200 Wireless LAN Dual-Band Concurrent Repeater is in compliance with Directive 2014/53/EU The full text of the EU declaration of conformity is available at the following internet address: http://www.edimax.com/edimax/global/...
- Page 33 Safety This equipment is designed with the utmost care for the safety of those who install and use it. However, special attention must be paid to the dangers of electric shock and static electricity when working with electrical equipment. All guidelines of this and of the computer manufacture must therefore be allowed at all times to ensure the safe use of the equipment.
- Page 34 EU Declaration of Conformity English: This equipment is in compliance with the essential requirements and other relevant provisions of Directive 2014/53/EU, 2014/35/EU. Français: Cet équipement est conforme aux exigences essentielles et autres dispositions de la directive 2014/53/EU, 2014/35/EU. Čeština: Toto zařízení je v souladu se základními požadavky a ostatními příslušnými ustanoveními směrnic 2014/53/EU, 2014/35/EU.