Table of Contents
Advertisement
Quick Links
Advertisement
Table of Contents

Related Manuals for Ronix 8922

Summary of Contents for Ronix 8922
- Page 1 CORDLESS LEAF BLOWER 8922...
-
Page 2: Specification
Net. Weight 2.20kg max blowing speed 45m/s running time 12~15 minutes THIS PRODUCT DOES NOT INCLUDE BATTERIES OR CHARGER USABLE BATTERIES FOR 8922 Ronix Model No. Product 8990 20V battery pack, 2.0Ah Li-ion battery 8991 20V battery pack, 4.0Ah Li-ion battery USABLE CHARGERS FOR 8922 Ronix Model No. -
Page 3: Part List
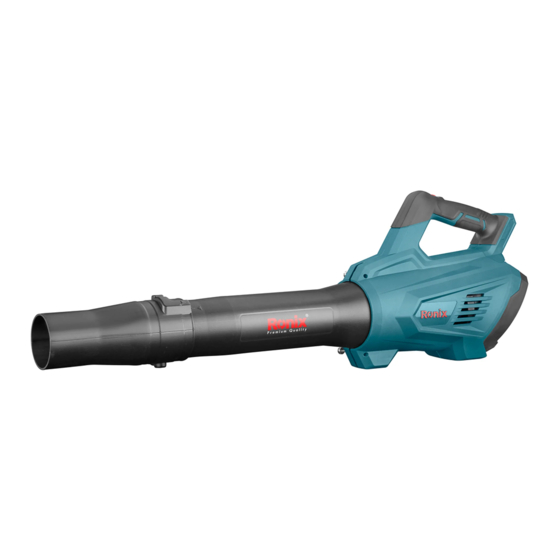
WARNING! Read this manual and general safety Instructions carefully before using the appliance, for your own safety. Your power tool should only be passed on together with these instructions. PART LIST On/Off - Switch Lock Button Blowing Pipe Blower Outlet GENERAL POWER TOOL SAFETY WARNINGS Read all safety warnings and all instructions. -
Page 4: Electrical Safety
- Keep children and bystanders away while operating a power tool. Distractions can cause you to lose control. ELECTRICAL SAFETY - Power tool plugs must match the outlet. Never modify the plug in any way. Do not use any adapter plugs with earthed (grounded) power tools. Unmodified plugs and matching outlets will reduce risk of electric shock. - Page 5 plugging in. - Carrying power tools with your finger on the switch or plugging in power tools that have the switch on invites accidents. - Remove any adjusting key or wrench before turning the power tool on. A wrench or a key left attached to a rotating part of the power tool may result in personal injury.
-
Page 6: Safety Warnings
- Use the power tool, accessories and tool bits etc., in accordance with these instructions and in the manner intended for the particular type of power tool, taking into account the working conditions and the work to be performed. Use of the power tool for operations different from intended could lead to a hazardous situation. -
Page 7: Operation
inlet. Keep long hair away from the air inlets. 3. Always wear protective goggles to protect your eyes from injury when using power tools. The goggles must comply with ANSI Z87.1 in the USA, EN 166 in Europe, or AS/NZS 1336 in Australia/New Zealand. In Australia/New Zealand, it is legally required to wear a face shield to protect your face, too. - Page 8 Before clearing blockages. Before checking, cleaning or working on the blower. If the blower starts to vibrate abnormally. 2. Operate the blower only in daylight or in good artificial light. 3. Do not overreach and keep proper balance and footing at all times. 4.
-
Page 9: Maintenance And Storage
blower that has the switch on invites accidents. 18. Never blow dangerous materials, such as nails, fragments of glass, or blades. 19. Do not operate the blower near flammable materials. Avoid operating the blower for a long time in low temperature environment. MAINTENANCE AND STORAGE 1. - Page 10 avoid contact. If contact accidentally occurs, flush with water. If liquid contacts eyes, additionally seek medical help. Liquid ejected from the battery may cause irritation or burns. 5. Do not use a battery pack or tool that is damaged or modified. Damaged or modified batteries may exhibit unpredictable behavior resulting in fire, explosion or risk of injury.
- Page 11 1. Before using battery cartridge, read all instructions and cautionary markings on (1) battery charger, (2) battery, and (3) product using battery. 2. Do not disassemble battery cartridge. 3. If operating time has become excessively shorter, stop operating immediately. It may result in a risk of overheating, possible burns and even an explosion.
- Page 12 the batteries to non-compliant products may result in a excessive heat, explosion, or leak of electrolyte. 13. If the tool is not used for a long period of time, the battery must be removed from the tool. ASSEMBLY INSTALLING THE FRONT NOZZLE 1.
-
Page 13: Optional Accessory
3. Tighten the screws with the hex wrench. 1. Screw OPTIONAL ACCESSORY 1. Attach the adapter pipe to the front nozzle, and then turn it clockwise to lock it into place. Adapter pipe 2. Front nozzle 2. Attach the flat nozzle or extension nozzle to the adapter pipe, and then turn it to lock it into place. -
Page 14: Functional Description
1. Flat nozzle 2. Extension nozzle 3. Adapter pipe FUNCTIONAL DESCRIPTION 1. Button 2. Battery cartridge To remove the battery cartridge, slide it from the tool while sliding the button on the front of the cartridge. To install the battery cartridge, align the tongue on the battery cartridge with the groove in the housing and sli it into place. - Page 15 OPERATION Turn the switch backward to decrease the speed and stop working. “0” = OFF “I” = Low speed “II” = High speed STORAGE The hook hole on the bottom of the machine is convenient for hanging the machine from a nail or screw on the wall. Store the machine in a place out of the reach of children and not exposed to moisture or rain.
Need help?
Do you have a question about the 8922 and is the answer not in the manual?
Questions and answers