Advertisement
Table of Contents
- 1 Reference Guide
- 2 General Remarks
- 3 Technical Characteristics
- 4 Heating Element
- 5 Preliminary Remarks
- 6 Cleaning and Maintenance of the Oven
- 7 Cooking Advice
- 8 Display Icons
- 9 Manual Operation
- 10 Programmed Operation
- 11 Automatic Preheating
- 12 Signals and Alarms
- 13 Hidden Menu
- Download this manual
Advertisement
Table of Contents

Related Manuals for Garbin G STARTER PICCOLO


Summary of Contents for Garbin G STARTER PICCOLO
- Page 1 ELECTRIC CONVECTION OVENS G STARTER INSTRUCTIONS FOR THE INSTALLATION, USE AND MAINTENANCE PICCOLO BRAVO DELIZIOSO SUPERIORE Carefully read the following instructions before installing and starting the equipment.
- Page 3 1 - INDEX 1 - Introduction 4.2 Manual operation 4.2.1 Setting temperature values 1.1 Reference guide 4.2.2 Setting cooking time values 1.2 General remarks 4.2.3 Manual humidification during cooking 1.3 Technical characteristics 4.2.4 Execution of a cooking cycle in manual mode 1.4 Handling, transportation and unloading 4.3 Programmed operation 1.5 Compliance with the standards and directives...
-
Page 4: Reference Guide
1 - INTRODUCTION 1.1 Reference guide We thank you for the trust you granted us when you purchased our product and advise you to carefully read this guide before using the ovens. Also please pay attention to the text in bold, with LARGER or under- lined fonts, because they refer to particularly important information This document contains all the information you need for the correct or operations. - Page 5 1 - INTRODUCTION • The installation and/or all repairs or calibration that might become ne- • Ask the installer for instructions for the correct use of water softener/ cessary must be performed with maximum diligence and attention by decalcifier. qualified personnel. (Warning: a flawed procedure of regeneration of the resins may For this reason we advise you to always contact the Dealer who sold cause corrosion of the equipment).
-
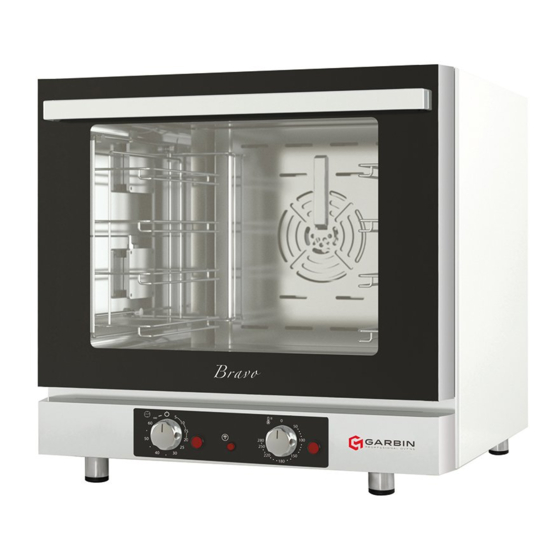
Page 6: Technical Characteristics
1 - INTRODUCTION 1.3 Technical characteristics The material that is shipped is accurate- ly controlled before being delivered to the shipping agent. Upon reception of Oven model PICCOLO BRAVO DELIZIOSO SUPERIORE the oven, make sure that it hasn’t been Dimensions HxWxL 550 x 600 x 640 mm 640 x 600 x 640 mm 540 x 720 x 780 mm 650 x 720 x 780 mm damaged during transport or that the Electric power... - Page 7 2 - INSTRUCTIONS FOR INSTALLATION AND MAINTENANCE 2.1 Place of installation and placement 2.2 Power and water supply connection Connection to power grid CAUTION The installation and ordinary or extraordinary maintenance of The connection to the power supply grid must be performed in accor- the oven must be performed exclusively by authorized techni- dance with the international, national and local regulations in force.
- Page 8 2 - INSTRUCTIONS FOR INSTALLATION AND MAINTENANCE Connection to water supply grid This switch must be installed in the permanent electrical system of the room where the oven is installed and in close proximity to the oven itself so that operators have easy access to it. Connect the water supply tube to the 3/4’’...
- Page 9 2 - INSTRUCTIONS FOR INSTALLATION AND MAINTENANCE 2.4 - Diagnosis of certain faults Type of fault Possible causes • Incorrect temperature setting. • Intervention, if present, of the safety thermostat (F1) Fig. 4 • Control thermostat is faulty. The heating of the cooking •...
-
Page 10: Heating Element
2 - INSTRUCTIONS FOR INSTALLATION AND MAINTENANCE 2.5 Substitution of certain components Oven fan Once the back panel of the oven is removed, from inside the oven, remove CAUTION! the pan support and the fan protection. Unscrew the central nut, if needed The substitution and regulation of components are operations also unscrew the lateral screws fixing it on the crank shaft, which sets the fan of extraordinary maintenance and therefore they must be per-... -
Page 11: Preliminary Remarks
3 - INSTRUCTIONS FOR USE 3.1 Preliminary remarks Be cautious and possibly use protection gloves. • The machine is intended for professional use and must be used by trained personnel. Fig. 8 • The oven must be used exclusively to cook food; any other use is to be considered improper. -
Page 12: Cleaning And Maintenance Of The Oven
3 - INSTRUCTIONS FOR USE Adjusting the cooking temperature surfaces with wire wool, brushes or scrapers. • do not let food stagnate (above all acidic food such as salt, vinegar, le- The (M2) knob allows you to set the desired cooking temperature. mon ...) on the STAINLESS STEEL parts because they might deteriorate;... -
Page 13: Cooking Advice
3 - INSTRUCTIONS FOR USE 3.4 - Cooking Advice The following table contains the most important indications for cooking some of the main dishes. The cooking times recommended in this table are approximate. Preparation °C minutes Weight (Kg) Preparation °C minutes Weight (Kg) Starters... - Page 14 4 - DIGITAL OVEN PROGRAMMING 4.1 - User Interface 4.1.1 - Keys function °C °F START STOP 1) ON/OFF key 6) STEAM key In program mode, you can set level of direct steam. A single touch allows turning the oven ON or OFF. In manual mode, direct steam is activated for as long as the STEAM key (6) is pressed.
-
Page 15: Display Icons
4 - DIGITAL OVEN PROGRAMMING 4.1.2 - Display icons 13) HUMIDITY key - When pressing the HUMIDIFICATION key in MANUAL mode, the icon is permanently red lit until key is released. - In PROGRAM mode, when selecting STEAM value (20, 40, etc) the inter- mittent red icon is lit when solenoid valve is off (0.5 on, 0.5 off ). - Page 16 4 - DIGITAL OVEN PROGRAMMING 4.1.3 Display 18) TIME / HUMIDITY display When the TIME icon is lit, it displays the programmed time value and the remaining time during cooking. °C When the HUMIDITY icon is lit, it displays the HUMIDITY value set for °F cooking.
-
Page 17: Manual Operation
4 - DIGITAL OVEN PROGRAMMING 4.2 Manual operation Once the value is confirmed, the visualization of the display values is permanent. Pressing the ON/OFF key turns the card OFF and the new settings are When the oven is OFF, OFF is visualized on the CHAMBER display, eve- not saved. - Page 18 4 - DIGITAL OVEN PROGRAMMING 4.2.3 Manual humidification during cooking During cooking: The CHAMBER display shows for 4 seconds the set temperature (TEM- During cooking in MANUAL mode, by continuously pressing the HU- PERATURE icon led is permanently lit) and for 4 seconds the current MIDITY key you activate the manual humidification for as long as the temperature value inside the cooking chamber (the value detected key is pressed.
-
Page 19: Programmed Operation
4 - DIGITAL OVEN PROGRAMMING the temperature parameters of the cooking cycle that has just ended, If decreased under the P01 value, MAN is displayed (5 seconds timeout otherwise, by pressing the START/STOP key the buzzer is silenced and exits the recipes and takes us to manual mode). By continuously pressing the display turns back to normal visualization: the CHAMBER display the decrease key, the value decreases rapidly, all the inferior programs will indicates the current temperature value inside the cooking chamber... - Page 20 4 - DIGITAL OVEN PROGRAMMING 4.3.4 Setting of STEAM WARNING! - By pressing once the RECIPES key the oven exits the program- - In PROGRAM mode, if you press the STEAM key you can set the level ming mode and goes back to MANUAL cooking mode. The of the steam/humidification inside cooking chamber for each cooking CHAMBER display indicates the temperature of the cooking phase (OFF - 20% -40% -60% - 80% - 100%).
- Page 21 4 - DIGITAL OVEN PROGRAMMING During the cooking, keep pressing the HUMIDITY key and the DECRE- - Press once the RECIPES key to access the programming mode. The ASE key simultaneously in order to activate the manual humidification CHAMBER/PROGRAMS display (PROGRAMS LIBABRY icon green-lit) for as long as the two keys are pressed.
-
Page 22: Automatic Preheating
4 - DIGITAL OVEN PROGRAMMING 4.4 Automatic preheating 4.5 Other functions 4.5.1 Opening and closing the oven door The automatic pre-heating is activated only when one of the stored programs is started. It consists in heating the oven to a temperature 30 °C more than the temperature set in the program step. -
Page 23: Signals And Alarms
4.6 Signals and alarms 4.7 Absence of voltage The alarm signals appear on the TIME/HUMIDITY display while all the If during the execution of a cooking cycle there is a power outage, rest is turned off. when power is restored the oven turns OFF. The buzzer rings to signal the anomaly. - Page 28 Gienne Trading Company Srl Via Fontanelle, 6 - 36050 Monteviale (VI) Italy Ph: +39 0444 552221 - 950278 Fax: +39 0444 952619 garbin@garbinovens.eu www.garbinovens.com G-STA - EN - rev2 © 2014 Gienne Trading Company Srl . Printed in Italy Gienne Trading Company Srl 13/02/2015 reserves the right to modify any of its products without notice.
Need help?
Do you have a question about the G STARTER PICCOLO and is the answer not in the manual?
Questions and answers