Table of Contents
Advertisement
Quick Links
MS70 USER MANUAL
1 PRODUCT PROFILE
This device is a new Android-based vehicle trouble diagnostic device developed for Internet
applications. It inherits from OBDSTAR advanced diagnosing technology and it is characterized
by covering wide range of vehicles, featuring powerful function, and providing precise result.
Through motorcycle diagnostic OBD connector and variant mobile intelligent terminals, it
achieves motorcycle trouble diagnosis for full car model and full system vehicle.
Meanwhile, taking advantage of mobile Internet, this device integrates all product resources and
service of OBDSTAR.
2 FEATURES
1. Diagnostic function:
● Diagnose the electronic control system of prevailing vehicle models covering Asian, European,
American and Chinese. Diagnosis functions include: Read DTCS, Clear DTCS, Read data stream,
Special functions etc.
● Specially designed for Android platform with clear and user-friendly interface;
2. Support Center: equipped with powerful database. Large number of videos help users to
operate device easily.
3. Personal center:
User information and the device's configuration information.
4. Upgrade: built-in WIFI mode can realize application downloading and diagnostic function by
one key upgrade.
5. System setting: set VCI formation, language, unit, Workshop information, About and Network
test etc.
6. Remote assistance: achieve remote assistance by this function.
3 KNOWLEDGE OF THIS DEVICE
3.1 The whole set
This device is composed of the tablet computer, main test cable and kinds of cables.
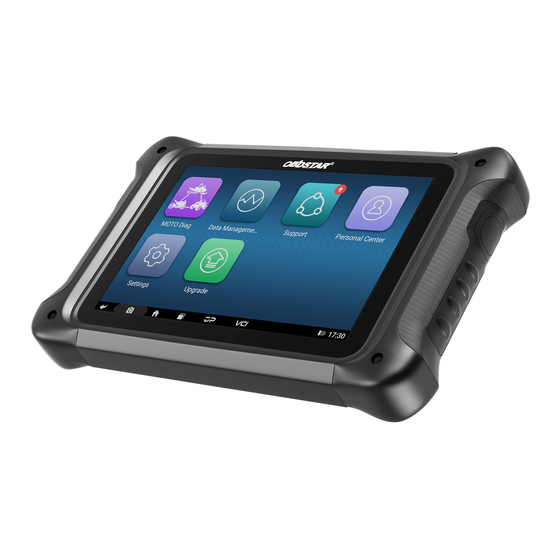
3.2 The tablet computer
front view
1
Advertisement
Table of Contents

Related Manuals for Obdstar MS70


Summary of Contents for Obdstar MS70
- Page 1 1 PRODUCT PROFILE This device is a new Android-based vehicle trouble diagnostic device developed for Internet applications. It inherits from OBDSTAR advanced diagnosing technology and it is characterized by covering wide range of vehicles, featuring powerful function, and providing precise result.
-
Page 2: Technical Parameters
reverse view 4 TECHNICAL PARAMETERS ● Operation system: Android 5.1.1 ● CPU: RK3128 Quad-Core,ARM Cortex A7@1.2Ghz ● Battery: 2600mA, rechargeable polymer lithium battery ● Extension memory card: 32G Micro SD (TF) card supported ● Memory capacity: 16GB... - Page 3 ● LCD: 7.0 inches ● LCD resolution: 1024*600 ● Touch screen: Capacitive touch screen ● Wi-Fi: supported ● Working temperature: -20℃~55℃(14℉~131℉) ● Storage temperature: -20℃~70℃(-4℉~158℉) ● Weight: about 1.3kg ● Dimension: 243mm*148*mm*36mm 5 ACCESSORIES(Standard Configuration) 5.1 Main test cable 5.2 Other Connectors Other connectors are used to connect the diagnosis socket of non OBD II vehicles.
-
Page 4: Using Battery
5.3 Others accessories DC Power Adapter (Output DC 12V/2A) To power up the tablet via connecting with outside power Supply. 6 CHARGE THIS DEVICE 1. Connect the included USB cable with charger. 2. Plug the charger into AC outlet. 3. When it connects to charger, battery logo indicates , it indicates that the battery is in charging. -
Page 5: About Desktop
8 POWER ON/POWER OFF THIS DEVICE 8.1 Power on Press and hold Power button for three seconds to turn on this device. Note:Set date, time and time zone. 8.2 Power off Press and hold Power button for three seconds to turn off this device. 9 ABOUT DESKTOP The screen is shown as blow: A. -
Page 6: On Using Touch Screen
3. When the item and icon turn red and then release it. 10.4 Change your wallpaper 1. Hold and press a blank area on the desktop, a pop-up wallpaper will be shown on the screen. 2. Choose desired wallpaper. 3. Click upper left corner “√ to set wallpaper”. 10.5 Create a folder on the desktop 1. -
Page 7: Input Method
14 INPUT METHOD Set input method: Enter main menu and then select “Settings”-> “Language and keyboard” to choose desired input method. The default input method, Sogou input can support powerful word stock engine, Intelligent Sogou input and multiple keyboard mode. Android keyboard and Google input method and make input easier. -
Page 8: Personal Center
3 PERSONAL CENTER Used to set up and manage account details, and you can view the dealer information. 3.1 User registration Enter the Personal Center interface, display the login interface, click the “Register” button in the lower right corner to enter the user registration interface. As shown:... - Page 9 Fill in the information in each field. After that, the registration is successful, click “Login now!” If you have registered to be a member, click “User login” to enter user login page, as following picture shown:...
- Page 10 3.2 User login After the registration is completed, fill in the account number and password and click login: Display personal basic information and modify information and password.
- Page 11 3.2.1 Modify information 3.2.2 Change password...
- Page 12 3.2.3 View distributor information Click "View Distributor Information" to view the Distributor Contact Information. 3.2.4 Recover password Click on the forgotten password in the login interface to enter the password recover interface, fill in the relevant information to recover the password.
- Page 13 3.3 Recharge and expense 3.3.1 Recharge CREDIT Click "Recharge CREDIT" to recharge through 2 contact methods. 3.3.2 Upgrade configuration Click "Upgrade configuration" to upgrade the software configuration, you need to consume CREDIT. Click“View Configuration Contrast Information” to view the configuration table.
- Page 14 3.3.3 Renewal fee Click "Renewal fee" to upgrade the software service years, you need to consume CREDIT. 3.3.3 Order history Click "Order history" to view the Order history.
- Page 15 4 Diagnostic Software Main Interface Introduction The main interface is divided into two pages, including the following functions: Moto Diag: Enter the motorcycle diagnostic programming function. Motorboat Diag: Enter the motorboat diagnostic programming function. Moto IMMO: Enter the Moto IMMO programming function for programming. Personal Center: new user registration, login;...
-
Page 16: Start Diagnosing
Upgrade: To download diagnostic software or upgrade diagnostic software to the latest version. Support Center: Provides abundant automotive technology, video data, handbook and repair case for your reference, and also including relevant information of this product. 5 START DIAGNOSING Tap on the main menu screen, and then choose “Moto Diag” to enter the function selection and vehicle selection page. - Page 17 If you want to delete favorite vehicles from Favorites, click the minus sign and remove the ticked. You can see all the downloaded software of the machine configuration. The OBD II software is in each area by default and in the first position: Hereinafter, take OBDII for example, to introduce how to start diagnosing.
- Page 18 To select software version, as following photo shown: To enter diagnostic function menu, as following photo shown:...
- Page 19 To select AUTO SCAN, as following photo shown: 5.1 Read vehicle information Tap “Read vehicle information”, as following photo shown:...
- Page 20 5.2 Read Stored Codes Tap “Read Stored Codes”, as following photo shown:...
- Page 21 5.3 Clear trouble codes 5.4 Read data stream...
-
Page 22: Support Center
6 SUPPORT CENTER We have powerful maintenance database and detailed product introduction information. 6.1 VIDEO CENTER Connect the diagnosis function operation videos of the actual vehicles; 6.2 Product Description Introduce the instruction manual of this product, and exhibit the basic information of the equipment, diagnosis instructions, upgrades, other applications and additional explanations of... -
Page 23: System Settings
the company's products in the device. 6.3 FAQ Summarize some common problems encountered in the use of the product; 7 SYSTEM SETTINGS It includes VCI information, language, unit, Workshop information, user information and about etc. 7.1 VCI information... - Page 24 7.2 Language 7.3 Unit...
- Page 25 7.4 Workshop information 7.5 About Display software version updates and product announcements. 7.6 Network test The network test function is convenient for network connection failure and other phenomena during the use process. The test logs are submitted and engineers can analyze the network status of the machine through the test logs.
- Page 26 7.7 DC Calibrate Voltage calibration is performed when the voltage is abnormal: Enter the PinCode to access:...
-
Page 27: Remote Assistance
Enter the correct voltage for calibration. When it is completed, display the correct voltage value in the upper right corner of the diagnostic programming interface. 8 REMOTE ASSISTANCE This application can realize remote hosting operation via the Third Party’s software: Quick Support. - Page 28 1 Detection System Upgrade The system APK automatically detects the version. If there is a version update, a red dot is in the upper right corner of the upgrade button. Click on the upgrade button to prompt “Whether to upgrade software?”:...
- Page 29 If not, click “Esc”, you will directly return to the main interface. However you cannot enter the upgrade diagnosis application interface. Click on the APK upgrade and it prompts to install: Click on the installation and perform the program installation, automatically close the program and install.
- Page 30 Re-enter the main interface and prompt statement. (Notes: Ensure Internet connection is normal when updating.) 2. Diagnostic Function Upgrade Download and upgrade software by “Bulk Update” Tap main screen “Bulk update”, start downloading and upgrading...
- Page 31 If a software needs to be canceled, just tap the corresponding Check Box. You can search for the updated model required in the search box (Fuzzy Search function). As following photo shown: After the upgrade is completed, you can enter the diagnostic programming to view the upgrade version description and the version number, and you can perform related diagnostic operations and functions.
- Page 32 You can use any APP based on browser website and network. 2.1 Open the browser Enter main menu screen, tap to OBDSTAR the browser. You can choose the desired homepage or input the website address to browse. 1. Tap to input or edit the web link 2.2 Browser webpage...
- Page 33 2.5 Open multiple pages The browser allows you to open multiple web pages and you can toggle between these pages. 1. While browsing a webpage, tap the Fold Button at the top right and open new window. 2. Another web page will be displayed in the new window. 2.6 Customize Internet settings While browsing a webpage, choose “Settings”...
- Page 34 2. Tap to add alarms. 3. Set the detailed information of the alarm. 4. Tap to pack up the alarm to store the setting. 7.2 Delete an alarm 1. Enter main menu, and tap “Alarm”. 2. Tap the desired alarm. 3.
-
Page 35: Language And Input Method
8 ES FILE VIEWER Open ES file viewer, and enter main menu. You can manage SD card, browse by category and browse all music, picture, video, document application, package, favorites, installation package, management recommended through catalogue. 9 BRIGHTNESS 1. Enter main menu screen, tap “Settings” > “Display”. 2. -
Page 36: Set Date And Time
OBDSTAR (hereinafter referred to as OBDSTAR). The information contained herein is designed only for the use of the unit. OBDSTAR is not responsible for any consequences arising from its use in guiding the operation of other... - Page 37 This manual and all examples contained herein are subject to change without prior notice. Neither OBDSTAR nor its affiliates shall be liable to the purchaser of this unit or third parties for damages, losses, costs, or expenses, incurred by purchaser or third parties as a result of: accident, misuse, or abuse of this unit or unauthorized modifications, repairs, or alternations to this unit, failure to strictly comply with OBDSTAR operating and maintenance instructions.
- Page 38 stored on the devices. 10. Do not use this device in high temperature and other environment with flammable gas, such as gas station. 11. Store this device out of the reach of children and do not allow children to use it in unsupervised state.
- Page 39 Traffic safety 1. Do not hold this device while driving and comply with the regulations in your area or country. 2. The wireless device may interfere with the aircraft's flight system, please comply with the relevant provisions of the airline, in the ban on the use of wireless equipment, please turn off this device.
- Page 40 The warranty is only applicable to users and distributors who purchase OBDSTAR products through normal procedures. Within one year from the date of delivery, OBDSTAR electronic products due to material or process defects caused by warranty, due to abuse, unauthorized changes, for non-product design purposes, not in accordance with the provisions of the manual Operation, etc., resulting in...
- Page 41 0086-755-86707161. When the device needs repair, please send it to OBDSTAR Technology Co., Ltd., together with the purchase invoice and problem description. If the device is within the scope of the warranty, OBDSTAR will provide free maintenance; if the device is not in the warranty, OBDSTAR will charge maintenance and return freight.
Need help?
Do you have a question about the MS70 and is the answer not in the manual?
Questions and answers