LG WDES9428F Owner's Manual
Hide thumbs
Also See for WDES9428F:
- Installation manual (40 pages) ,
- Owner's manual (64 pages) ,
- Installation manual (36 pages)
Table of Contents
Advertisement
Available languages
Available languages
Quick Links
Advertisement
Table of Contents

Related Manuals for LG WDES9428F


Summary of Contents for LG WDES9428F
- Page 1 OWNER'S MANUAL WALL OVEN Read this owner's manual thoroughly before operating the appliance and keep it handy for reference at all times. ENGLISH WDES9428F www.lg.com MFL51224542 Rev.00_072321 Copyright © 2021 LG Electronics Inc. All Rights Reserved.
-
Page 2: Table Of Contents
14 Preheat Alarm Light 43 Open Source Software Notice Information 15 Temperature Adjustment Smart Diagnosis Feature 15 Temperature Units 43 Using LG ThinQ to Diagnose Issues 15 Smart Diagnosis™ 43 Using Audible Diagnosis to Diagnose 15 Program Update Issues 15 Demo Mode... - Page 3 44 MAINTENANCE Cleaning 44 General Cleaning Tips 44 Exterior 45 EasyClean 47 Self Clean 49 Cleaning the Steam Feeder Tank 50 Cleaning Scale on Oven Bottom 50 Drying the Oven Interior 50 Using Evaporation Function Periodic Maintenance 51 Changing the Oven Light 52 TROUBLESHOOTING FAQs 52 Frequently Asked Questions...
-
Page 4: Important Safety Instructions
IMPORTANT SAFETY INSTRUCTIONS IMPORTANT SAFETY INSTRUCTIONS READ ALL INSTRUCTIONS BEFORE USE Safety Messages Your safety and the safety of others are very important. We have provided many important safety messages in this manual and on your appliance. Always read and follow all safety messages. -
Page 5: Operation
IMPORTANT SAFETY INSTRUCTIONS Operation • DO NOT TOUCH HEATING ELEMENTS OR INTERIOR SURFACES OF OVEN. Heating elements may be hot even though they are dark in color. Interior surfaces of an oven become hot enough to cause burns. During and after use, do not touch or let clothing or other flammable materials contact heating elements or interior surfaces of oven until they have had sufficient time to cool. -
Page 6: Risk Of Fire And Flammable Materials
IMPORTANT SAFETY INSTRUCTIONS • Never pour cold water over a hot oven for cleaning purposes. • Do not clean with metal scouring pads. Pieces can burn off the pad and touch electrical parts causing a risk of electric shock. • Do not store any materials, other than manufacturer’s recommended accessories, in this oven when not in use. -
Page 7: Maintenance
IMPORTANT SAFETY INSTRUCTIONS • To protect against food-borne illnesses, cook meat and poultry thoroughly. The USDA has indicated the following as safe minimum internal temperatures for consumption: - Ground beef: 160 °F (71 - Poultry: 165 °F (74 - Beef, veal, pork, or lamb: 145 °F (68 - Fish/seafood: 145 °F (68 •... -
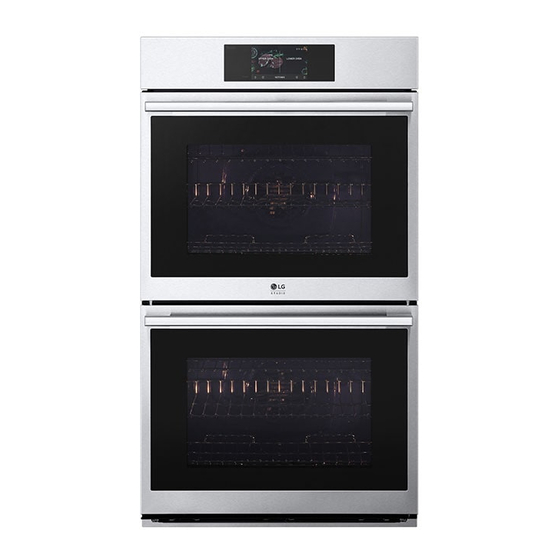
Page 8: Product Overview
PRODUCT OVERVIEW PRODUCT OVERVIEW Product Features The appearance and specifications listed in this manual may vary due to constant product improvements. Exterior / Interior Oven controller Rating label, model and serial number plate Spacer (2ea) Broiler pan and grid Upper oven door Standard racks (2 per oven) Lower oven door Gliding racks (1 per oven) - Page 9 Air Fry tray Owner’s manual Accessories for Installation Installation manual NOTE • Contact LG Customer Service at 1-800-243-0000 (1-888-542-2623 in Canada) if any accessories are missing. • For your safety and for extended product life, only use authorized components. • The manufacturer is not responsible for product...
-
Page 10: Operation
10 OPERATION OPERATION Operating Control Panel Control Panel Features LCD Display On/Off LCD Touchscreen for Oven Display Icons Icons appear in display when activated. 1:23 Lamp Icon (Upper Oven) Touch to turn light on/off Timer Icon (Upper Oven) Touch to set a timer Timer Icon (Lower Oven) Touch to set a timer Lamp Icon (Lower Oven) -
Page 11: Energy Saving Tips
OPERATION Wi-Fi Icon • Appears when oven is connected to Wi-Fi • Appears when oven is disconnected from Wi-Fi or is not registered Remote Start Icon Appears when Remote Start is active Lock Icon Appears when Lockout is on Energy Saving Tips Set the correct time of day and choose between a 12-hour or 24-hour time format. -
Page 12: Lockout
12 OPERATION Setting Date 1:26 Touch Settings at the center bottom of the Main screen. Then touch Date & Time on the Settings screen. Touch Date, and scroll to set the correct date. Touch OK. Location of Settings Setting Time of Day •... -
Page 13: Wi-Fi
OPERATION Setting Up Wi-Fi On double wall ovens, either oven or both ovens can be put in Sabbath mode. Touch Settings at the center bottom of the Main screen, and touch Wi-Fi in the first NOTE Settings screen. • If the oven light is turned ON and the SABBATH mode is active, the oven light will stay ON. -
Page 14: Display
14 OPERATION Touch OK. When Convection Auto Conversion is ON, the icon appears at the top of the display. Convection auto conversion icon NOTE • If Convection Auto Conversion is ON, the icon Display flashes in the display while cooking in a Set the length of time before the display sleeps. -
Page 15: Temperature Adjustment
OPERATION Temperature Units Setting the Preheat Alarm Set the oven temperature display to show either Touch Settings at the center bottom of the Fahrenheit or Celsius units. Main screen, swipe to the second Settings The oven defaults to Fahrenheit unless changed by screen, and touch Preheat Alarm Light. -
Page 16: Factory Data Reset
16 OPERATION Oven Cooling Touch Settings at the center bottom of the Main screen, swipe to the third Settings The oven cooling icon appears in the display if the screen, and touch Demo Mode. temperature inside the oven is high during or after operation. -
Page 17: Operating The Oven
OPERATION Adjusting or Cancelling the Timer WARNING Touch the remaining time next to the clock • Do not block the vent opening at the bottom of icon in the display. the oven. To cancel the timer, touch the Reset icon in the popup. -
Page 18: Instaview
18 OPERATION Instaview Installing Gliding Racks Knock twice on the center of the glass panel to Start with the rack in the closed position. Hold reveal the contents of the oven without opening the rack with one hand at the center front and the door. - Page 19 OPERATION The oven can be programmed to bake at any • Touch Stop in the display to cancel Convection temperature from 170 ) to 550 (285 Bake and Convection Roast at any time. The default temperature is 350 (175 • When preparing meats for roasting, use the broiler pan and grid.
-
Page 20: Bake Mode
20 OPERATION Tips for Convection Roasting If the cook time is set, the remaining time appears in the display. If a delayed start time Use a broiler pan and grid when preparing meats is set, the start time appears in the display. for convection roasting. -
Page 21: Recommended Baking Guide
OPERATION Baking Rack Guide bottom from excessive spillovers by placing a cookie sheet on the rack below the rack you are cooking on. This is particularly important when Rack Type of Food baking a fruit pie or other foods with a high acid Position content. -
Page 22: Broil Mode
22 OPERATION A chime sounds at the end of the set cook CAUTION time and a notification appears in the display. Open the oven door and remove the food. • Do not use a broiler pan without a grid. Oil can cause a grease fire. -
Page 23: Recommended Broiling Guide
OPERATION Touch Stop to cancel at any time or when are experiencing more smoke than you are cooking is complete. comfortable with, use the following tips to reduce the amount of smoke in your oven. NOTE • Always use a broiler pan. Do not use saute pans or regular baking sheets for safety reasons. - Page 24 24 OPERATION First Second Quantity and/or Rack Side Side Food Comments Thickness Position Time Time (min.) (min.) Space evenly. Up to 9 1 lb (9 patties) Ground Beef patties may be broiled 1/2 to 3/4" thick at once. Rare 1" thick Medium Steaks less than 1"...
-
Page 25: Warm Mode
OPERATION First Second Quantity and/or Rack Side Side Food Comments Thickness Position Time Time (min.) (min.) 2 (1" thick) Medium about 10 to 12 Well done Lamb Chops Slash fat. Medium 2 (1 " thick) about 1lb Well done 9-11 2 (1"... -
Page 26: Proof Mode
26 OPERATION Setting the Warm Mode Touch Start. The remaining proofing time appears in the display. Touch UPPER OVEN or LOWER OVEN and select Warm in the cooking mode screen. NOTE • If the proofing time is not set, the oven automatically turns off after 12 hours. - Page 27 • Use either the optional air fry tray available from is set, the start time appears in the display. LG or a dark baking tray with no sides or short sides that does not cover the entire rack. This Changing the Cook Settings allows for better air circulation.
-
Page 28: Recommended Air Frying Guide
28 OPERATION • Keep the oven free from grease buildup. Wipe CAUTION down the interior of the oven before and after air frying (once the oven has cooled). • Never cover slots, holes, or passages in the oven bottom or cover entire racks with materials such •... -
Page 29: Probe Mode
OPERATION Quantity Rack Recommended Items Temp. (°F) Time Guide (oz) Position Frozen Chicken Strips 25-35 Frozen Hot Wings, Bone- 25-35 CHICKEN-Fresh, Skin on 25-35 Brush or lightly spray with † Fresh Chicken Wings 1 tbsp. of oil. Add salt and Fresh Chicken 30-40 pepper to taste. -
Page 30: Recommended Probe Guide
30 OPERATION Using the Meat Probe Feature right side of the display to see the additional settings. CAUTION • Always use an oven mitt to remove the Touch Start. If a delayed start time has been temperature probe. Do NOT touch the broil set, the start time appears in the display. - Page 31 OPERATION Category Examples of Food Probe Placement Whole Chicken or Turkey Insert in the thickest part of thigh, Poultry Breasts or Roasts avoiding bone Poultry Duck, Goose, Pheasant Insert in the thickest part of the Stuffing (Alone or in Bird) dish Fresh Pork Insert in the thickest part, away...
-
Page 32: Favorite Mode
32 OPERATION Favorite Mode • Proofing doesn't operate when the oven is above For frequently used cooking menus, you can • If using Proof after cooking, wait for the oven to combine up to three different temperatures and cool first. cooking modes into one hot key. - Page 33 OPERATION Setting Auto Cook Mode Select the UPPER OVEN or LOWER OVEN and touch Auto Cook in the Cooking Modes screen. Touch a category to filter the options. Scroll through or tap the letters to find and select an item. Follow the recommendations in the display regarding accessories and rack position.
-
Page 34: Auto Cook Guide
34 OPERATION Auto Cook Guide • Preheat oven first for most items. • Preheat for 5 minutes when broiling. • If using probe, insert after preheating. NOTE • When cooking thin cuts of meat, insert the probe into the thickest part of the meat. If the probe is inserted incorrectly, the oven could turn off too soon. - Page 35 OPERATION Accessories/ Shelf Cooking Menu Cookware Position time in min. Pork Butt Casserole dish 60~90 Pork Chops 30~50 Pork Pork Loin 50~80 Pork Tenderloin 20~40 Rack 10~30 Lamb Bone-in Leg of Lamb 20~40 Grid on broiler pan Veal Top Sirloin 80~100 Veal Chops 4~15 + 3~10...
- Page 36 36 OPERATION Accessories/ Shelf Cooking Menu Cookware Position time in min. Directly on rack 10~20 Frozen Thin Crust On pizza pan 10~20 On pizza stone 10~20 Directly on rack 10~20 Pizza Frozen Rising Crust On pizza pan 10~20 On pizza stone 10~20 Directly on rack 10~20...
-
Page 37: Steam Function (Upper Oven Only)
OPERATION Accessories/ Shelf Cooking Menu Cookware Position time in min. Bread (Steam) White Bread Homemade Loaf pan 20~50 Frozen 20~50 Par Baked 20~50 Baguette Homemade Perforated 15~35 baguette pan Frozen 15~35 Par Baked 15~35 Cinnamon Raisin Bread Loaf pan 20~40 Walnut Bread Loaf pan or 40~50... -
Page 38: Steam Bake Mode (Upper Oven Only)
38 OPERATION Steam Bake Mode (Upper Oven Only) The Steam Bake mode heats food gradually, using both the oven heating elements and moist steam heat. The oven can be programmed to cook at any temperature from 210 (100 ) to 550 (285 Preset temperature options start at 350 (175... -
Page 39: Sous Vide (Upper Oven Only)
OPERATION Adjust the settings as desired. Place the standard rack in position place the sealed food bag on it. Touch Start. Touch UPPER OVEN and Steam Cook in the Cooking Modes screen. To Stop Steam Cooking Touch Stop in the display, and select Yes. Touch Sous vide in the display. -
Page 40: Remote Start Mode
• A faulty Wi-Fi connection could delay the Remote network, the preheating function of the oven can Start function. be started or stopped using the LG ThinQ smartphone app. • Disconnect the probe if attached. Preparing the Oven for a Remote Start Open the oven door to make sure the oven is empty and ready for preheating. -
Page 41: Smart Functions
Internet service provider or refer to your wireless router manual. • Firmware Update • LG ThinQ is not responsible for any network - Keep the appliance updated. connection problems or any faults, malfunctions, or errors caused by network connection. -
Page 42: Installing The Lg Thinq Application
Connecting to Wi-Fi This device complies with part 15 of the FCC Rules. Operation is subject to the following two The Wi-Fi button, when used with the LG ThinQ conditions: application, allows the appliance to connect to a (1) This device may not cause harmful interference home Wi-Fi network. -
Page 43: Open Source Software Notice Information
If you experience a problem with your Wi-Fi equipped appliance, it can transmit troubleshooting data to a smartphone using the LG ThinQ application. • Launch the LG ThinQ application and select the Smart Diagnosis feature in the menu. Follow the instructions provided in the LG ThinQ application. -
Page 44: Maintenance
44 MAINTENANCE MAINTENANCE Cleaning Oven Cavity DO NOT use oven cleaners. General Cleaning Tips NEVER wipe a warm or hot porcelain surface with a damp sponge; it may cause chipping or crazing • A plastic spatula can be used as a scraper to (tiny hairlike cracks). -
Page 45: Easyclean
Compared to the down. more intense Self Clean process, your LG oven gives you the option of cleaning with LESS HEAT, LESS TIME, and virtually NO SMOKE OR FUMES. - Page 46 46 MAINTENANCE Spray or pour the remaining water (8 oz or NOTE 240 ml) onto the bottom center of the oven cavity. The indentation on the oven bottom • The oven should be level to ensure that the should be fully covered to submerge all soils. bottom surface of the oven cavity is entirely Add water if necessary.
-
Page 47: Self Clean
MAINTENANCE Before Starting Self Clean • Clean only parts listed in manual. Remove the water tank, oven racks, broiler pan, broiler grid, all cookware, aluminum foil or any other material from the oven. NOTE - If oven racks are left in the oven cavity during the Self Clean cycle, they will discolor and •... - Page 48 48 MAINTENANCE racks and rack supports with a small amount of CAUTION vegetable oil to make them glide more easily. • It is normal for parts of the oven to become hot • After a Self Clean cycle, fine lines may appear in during a Self Clean cycle.
-
Page 49: Cleaning The Steam Feeder Tank
MAINTENANCE • It may become necessary to cancel or interrupt a NOTE Self Clean cycle due to excessive smoke or fire in the oven. To cancel the Self Clean function, • The Self Clean cycle can be used for soil that has touch Stop in the display. -
Page 50: Cleaning Scale On Oven Bottom
50 MAINTENANCE After 1 hour 43 minutes of descaling, a popup NOTE will appear in the display. Following the instructions, drain the tank and fill it with • If the steam feeder tank does not slide in as clean water. smoothly as it should, clean the bottom of the tank. -
Page 51: Periodic Maintenance
MAINTENANCE Touch Steam Maintenanceand Evaporation in that order. Touch Start to begin Evaporation. The remaining time appears in the display. Periodic Maintenance Remove the bulb from the socket. Changing the Oven Light The oven light is a standard 25-watt halogen bulb Replace the bulb, and reassemble the light for ovens. -
Page 52: Troubleshooting
52 TROUBLESHOOTING TROUBLESHOOTING FAQs Frequently Asked Questions My new oven doesn’t cook like my old one. Is there something wrong with the temperature settings? No. Your oven has been factory tested and calibrated. For the first few uses, follow your recipe times and temperatures carefully. - Page 53 TROUBLESHOOTING Make sure that the appliance is not in Lock Out mode. The lock will show in the display if Lock Out is activated. To deactivate Lock Out, refer to the Lockout Feature section. The unlock melody sounds appears in the display until the controls are unlocked. My appliance is still dirty after running the EasyClean cycle.
- Page 54 54 TROUBLESHOOTING A spray bottle filled with 1¼ cups (10 oz or 300 ml) of water, a plastic scraper, a non-scratch scrubbing pad and a towel. You should not use abrasive scrubbers such as heavy-duty scouring pads or steel wool. Except for a towel, all of the materials you need are included in a special cleaning kit with your new appliance.
-
Page 55: Before Calling For Service
TROUBLESHOOTING Before Calling for Service Review this section before calling for service; doing so will save you both time and money. Cooking Problem Possible Cause & Solution Oven will not work Plug on appliance is not completely inserted in the electrical outlet. •... - Page 56 56 TROUBLESHOOTING Problem Possible Cause & Solution Food does not broil Oven controls improperly set. properly • Make sure you select the Broil mode properly. Improper rack position being used. • See the Broiling Guide. Cookware not suited for broiling. •...
-
Page 57: Parts & Features
TROUBLESHOOTING Parts & Features Problem Possible Cause & Solution Oven control beeps Electronic control has detected a fault condition. and displays any F • Turn off the oven function you are using to clear the display and stop beeping. Reprogram code error. -
Page 58: Noises
During Wi-Fi setup, the app is requesting a password to connect to the product (on certain phones). • Locate the network name which starts with "LG" under Settings > Networks. Note the last part of the network name. - If the network name looks like LGE_Appliance_XX-XX-XX, enter lge12345. -
Page 59: Limited Warranty
Should your LG Electric Electric Oven ("Product") fail due to a defect in materials or workmanship under normal and proper use, during the warranty period set forth below, LG Electronics (“LG”) will, at its option, repair or replace the Product. This limited warranty is valid only to the original retail purchaser of the Product and applies only when purchased and used within the United States including U.S. -
Page 60: Procedure For Resolving Disputes
Notice of Dispute. In the event you intend to commence an arbitration proceeding, you must first notify LG in writing at least 30 days in advance of initiating the arbitration by sending a letter to LG at LG Electronics, USA, Inc. Attn: Legal Department- Arbitration 111 Sylvan Avenue, Englewood Cliffs, NJ 07632 USA. - Page 61 AAA in the manner described in the AAA Rules. You must also send a copy of your written demand to LG at LG Electronics, USA, Inc.
- Page 62 62 Memo...
- Page 63 Memo...
- Page 64 64 Memo...
- Page 65 MANUAL DEL PROPIETARIO HORNO DE PARED Lea el manual del propietario detenidamente previo a operar el electrodoméstico y mantengalo al alcance para futuras referencias. ESPAÑOL WDES9428F www.lg.com Copyright © 2021 LG Electronics Inc. Todos los derechos reservados...
- Page 66 Aplicación LG ThinQ 15 Brillo 47 Funciones de la aplicación LG ThinQ 15 Pantalla 47 Antes de usar la aplicación LG ThinQ 15 Conversión automática a convección 48 Instalación de la aplicación LG ThinQ 15 Selección de idioma 48 Conexión a Wi-Fi 16 Volumen 48 Especificaciones del módulo LAN...
- Page 67 Función Smart Diagnosis 49 Uso de LG ThinQ para diagnosticar problemas 49 Uso del diagnóstico audible para diagnosticar problemas 50 MANTENIMIENTO Limpieza 50 Consejos Generales de Limpieza 50 Exterior 51 EasyClean 53 Self Clean (Autolimpieza) 56 Limpieza del tanque del alimentador de...
- Page 68 INSTRUCCIONES IMPORTANTES DE SEGURIDAD INSTRUCCIONES IMPORTANTES DE SEGURIDAD LEA TODAS LAS INSTRUCCIONES ANTES DE UTILIZAR Mensajes de Seguridad Su seguridad y la de los demás son muy importantes. Tanto en este manual como en el equipo, hemos proporcionado muchos mensajes de seguridad importantes.
- Page 69 INSTRUCCIONES IMPORTANTES DE SEGURIDAD • La conexión incorrecta del cableado doméstico de aluminio a los cables de cobre puede provocar descargas eléctricas o un incendio. Utilice únicamente conectores diseñados para unir cobre con aluminio y siga al pie de la letra el procedimiento recomendado por el fabricante. Funcionamiento •...
- Page 70 INSTRUCCIONES IMPORTANTES DE SEGURIDAD • No coloque la mano debajo del controlador o entre la puerta y el reborde de metal inferior (ventilación) cuando el horno esté en funcionamiento. La parte exterior del horno puede volverse muy caliente al tacto. Mantenimiento •...
- Page 71 INSTRUCCIONES IMPORTANTES DE SEGURIDAD PRECAUCIÓN PRECAUCIÓN • Para reducir el riesgo de lesiones leves a personas, mal funcionamiento o daño al producto o a la propiedad al usar este producto, siga las precauciones básicas, incluidas las siguientes: Funcionamiento • Siempre caliente la grasa lentamente y vigile mientras aumenta la temperatura. •...
- Page 72 INSTRUCCIONES IMPORTANTES DE SEGURIDAD • El horno debe limpiarse con regularidad y debe retirarse cualquier resto de comida. Si no se mantiene en condiciones de limpieza, la superficie puede deteriorarse, y esto podría afectar negativamente la vida útil del electrodoméstico y ocasionar situaciones de peligro. GUARDE ESTAS INSTRUCCIONES...
- Page 73 DESCRIPCIÓN GENERAL DEL PRODUCTO DESCRIPCIÓN GENERAL DEL PRODUCTO Características del Producto La apariencia y las especificaciones detalladas en este manual podrían variar debido a mejoras constantes en el producto. Interior/exterior Controlador del horno Etiqueta de clasificación, placa con el número de serie y el modelo Espaciador (2 c/u) Asadera y rejilla...
- Page 74 Manual de instalación Accesorios para la instalación NOTA • Comuníquese con el Servicio de atención al cliente de LG al 1-800-243-0000 (1-888-542-2623 en Canadá) si le falta algún accesorio. • Para su seguridad y una mayor duración del producto, utilice únicamente componentes autorizados.
- Page 75 FUNCIONAMIENTO FUNCIONAMIENTO Funcionamiento del panel de control Funciones del panel de control LCD Display On/Off (Encendido/Apagado de LCD Touchscreen for Oven (Pantalla táctil LCD pantalla LCD) para el horno) Íconos de pantalla Los íconos aparecen en la pantalla cuando están activos. 1:23 Lamp Icon (Upper Oven) (Icono de lámpara [Horno superior]) Pulse para encender o apagar la luz...
- Page 76 12 FUNCIONAMIENTO Auto Conversion Icon (Icono de conversión automática) Aparece cuando se enciende la Conversión automática a convección Wi-Fi Icon (Icono de Wi-Fi) • Aparece cuando el horno está conectado a la red Wi-Fi • Aparece cuando el horno está desconectado de la red Wi-Fi o no está registrado Icono de Inicio remoto Aparece cuando se activa Remote Start (Inicio remoto) Lock Icon (Icono de bloqueo)
- Page 77 FUNCIONAMIENTO El icono de bloqueo desaparece de la parte superior de la pantalla. 1:26 Fecha y hora La fecha y hora se muestran en la pantalla LCD cuando los hornos no están en uso. Fecha de configuración Pulse Configuración en la parte inferior Ubicación de configuración central de la pantalla principal.
- Page 78 14 FUNCIONAMIENTO Modo Sabbath • Si no se configura un tiempo de cocción, el horno no se apagará automáticamente. El modo Sabbath es utilizado en el Sabbat y las • Después de un corte de energía, la pantalla se festividades judías. volverá...
- Page 79 FUNCIONAMIENTO Brillo programada cuando se selecciona un modo de cocción a convección. La temperatura convertida Ajuste el brillo de la pantalla LCD de 20 % a 100 % aparece en la pantalla una vez que finaliza el en incrementos de 20 %. precalentamiento.
- Page 80 16 FUNCIONAMIENTO Volumen medidora. Por ejemplo, si el ajuste fue excesivo, suba o baje el termostato 10 °F (5 °C). Si el ajuste Ajuste el volumen de los controles del horno. no fue suficiente, suba o baje el termostato 20 °F (12 °C).
- Page 81 FUNCIONAMIENTO Smart Diagnosis™ NOTA Smart Diagnosis se puede ejecutar a través de • Cuando el Modo Demo está activado, el una aplicación de teléfono inteligente o solicitando electrodoméstico no se calentará. soporte. Coloque el auricular de su teléfono • Si el Modo Demo está activado aparecerá en la inteligente cerca de la esquina superior izquierda pantalla el icono correspondiente.
- Page 82 18 FUNCIONAMIENTO Temporizador Para cancelar el temporizador, pulse el icono Reiniciar en la pantalla emergente. Luego, Los temporizadores no afectan el funcionamiento pulse OK. del horno ni el tiempo de cocción. Utilícelos como temporizadores de cocina adicionales. Una vez Icono Reiniciar que el tiempo se agota, el horno emite una alarma y aparece "Temporizador 1 o 2 finalizado"...
- Page 83 FUNCIONAMIENTO Uso de los estantes estándar del Instalación de los estantes deslizantes horno Comience con el estante en la posición Los estantes tienen un borde posterior hacia cerrada. Sostenga el estante con una mano en arriba que evita que salgan de la cavidad del la parte central del frente y la otra mano en la horno.
- Page 84 20 FUNCIONAMIENTO InstaView permite una cocción uniforme y excelentes resultados mientras se cocina con un solo estante Golpee suavemente dos veces el centro del panel o con varios. de vidrio para revelar el contenido del horno sin Es posible programar el horno para hornear a abrir la puerta.
- Page 85 FUNCIONAMIENTO Cuando termina el tiempo de cocción • Si utiliza el horneado por convección en un solo configurado suena una alarma y aparece una estante, coloque el estante del horno en la notificación en la pantalla. Abra la puerta del posición .
- Page 86 22 FUNCIONAMIENTO Cómo cambiar la Configuración de Es posible programar el horno para hornear a cualquier temperatura entre 170 °F (80 °C) y 550 °F cocción (285 °C). La temperatura predeterminada es 350 °F (175 °C). Pulse Edit (Editar) en la pantalla para que aparezca la pantalla Cook Settings Configuración de la función Bake (Configuración de cocción).
- Page 87 FUNCIONAMIENTO superficie de esmalte de porcelana, y deben Posición limpiarse de inmediato. Tipo de alimento estante Guía de recomendaciones para asar Bizcocho o pastel en savarín Panecitos, muffins, brownies, Colocación de estantes y bandejas galletas, pastelitos, pasteles en capas, tartas Los resultados del horneado serán mejores si las bandejas para hornear están centradas en el Guisados...
- Page 88 24 FUNCIONAMIENTO Modo Broil (Asar) se configuró un tiempo de inicio retrasado, aparece el tiempo de inicio en la pantalla. Configuración del horno para asar Una vez que el precalentamiento haya La función de asar utiliza un calor intenso y finalizado, suena una alarma.
- Page 89 FUNCIONAMIENTO vuelve a encender automáticamente una vez Pulse Start (Iniciar). cerrada la puerta. Cómo detener el asado Pulse Stop (Detener) en la pantalla y seleccione Coloque la comida sobre la rejilla de la Yes (Sí). asadera. Consejos para reducir el humo Pulse UPPER OVEN (Horno superior) o Debido al intenso calor asociado con el asado, es LOWER OVEN (Horno inferior) y seleccione...
- Page 90 26 FUNCIONAMIENTO Guía de recomendaciones para asar Guía de recomendaciones para asar El tamaño, el peso, el espesor, la temperatura inicial y su preferencia de cocción afectarán el tiempo de asado. Esta guía se basa en carnes a temperatura de refrigerador. Para obtener mejores resultados al asar, use una bandeja especial para asar.
- Page 91 FUNCIONAMIENTO Tiempo Tiempo Posición en el en el Comida Cantidad y/o espesor primer segundo Comentarios estante lado lado (min) (min) 1 entero, de 2 a 2 Ase primero con el cortado a lo largo Pollo lado de la piel hacia abajo.
- Page 92 28 FUNCIONAMIENTO NOTA • El USDA ha indicado que las siguientes constituyen temperaturas internas mínimas de seguridad para el consumo: - Carne molida de vaca: 160 °F (71,1 °C) - Aves: 165 °F (73,9 °C) - Carne de vaca, ternera, cerdo o cordero: 145 °F (62,8 °C) - Pescado/mariscos: 145 °F (62,8 °C) Consejos para asar Carne de res...
- Page 93 FUNCIONAMIENTO Cómo cambiar la configuración de la NOTA función Warm (Calentar) • Si no se configura un tiempo de leudado, el horno se apagará automáticamente después de Pulse Edit (Editar) en la pantalla para que 12 horas. aparezca la pantalla Cook Settings (Configuración de cocción).
- Page 94 • Use la bandeja para freír con aire opcional Ajuste la configuración con el teclado disponible de LG o una bandeja para hornear numérico o la función de deslizamiento. oscura sin lados o con lados bajos que no cubra todo el estante.
- Page 95 FUNCIONAMIENTO • Controle los alimentos con frecuencia y agítelos materiales como papel de aluminio. Si lo hace, o gírelos para obtener resultados más bloqueará el flujo de aire a través del horno y crujientes. puede provocar una intoxicación por monóxido de carbono.
- Page 96 32 FUNCIONAMIENTO Cantidad Posición del Puntos recomendados Temp. (°F) Hora Guía (onzas) estante Papas fritas congeladas 18-28 (Corte ondulado, 10 x 10 mm) Batatas fritas congeladas 15-25 Tater Tots congeladas 18-28 Hash Browns congeladas 18-28 PAPAS frescas/caseras Papas fritas caseras 20-30 Corte las papas y (10 x 10 mm)
- Page 97 FUNCIONAMIENTO Cantidad Posición del Puntos recomendados Temp. (°F) Hora Guía (onzas) estante Ostiones frescos en su 15-25 Derrita 4 cucharadas de media concha (35,3 manteca y pinte los onzas) ostiones. Mezcle 1/2 taza de pan rallado, 1 cucharada de ajo picado, 1/4 de tasa de queso parmesano rallado y condimente a gusto.
- Page 98 34 FUNCIONAMIENTO Pulse Start (Iniciar). Si se ha configurado un Ajuste la configuración como lo desee. tiempo de inicio retrasado, aparece el tiempo de inicio en la pantalla. Pulse Start (Iniciar). Cuando se alcanza la temperatura Para detener la cocción configurada para la sonda, el horno se apaga Pulse Stop (Detener) en la pantalla y seleccione de forma automática.
- Page 99 FUNCIONAMIENTO Categoría Ejemplos de alimento Ubicación de la sonda Pescado entero Insértela en la parte más gruesa Mariscos Filete de pescado (corte lateral) del pescado. Rodajas o porciones Cuadro de temperatura de sonda recomendada Temperatura Categoría Ejemplos de alimento Cocción deseada interna objetivo Pastel de carne americano 160 °F (71 °C)
- Page 100 36 FUNCIONAMIENTO Seleccione un modo de cocción enumerado puede modificar la temperatura del horno, la en la pantalla y configure la temperatura de temperatura de la sonda y el tiempo de cocción. cocción deseada. Seleccione UPPER OVEN (Horno superior) o LOWER OVEN (Horno inferior) y pulse Pulse Set Cook Time (Configurar tiempo de Favorite (Favorito) en la pantalla del modo de...
- Page 101 FUNCIONAMIENTO Cook (Cocción automática) en la pantalla de modos de cocción. Pulse una categoría para filtrar las opciones. Deslícese o presione las letras para encontrar y seleccionar un elemento. Siga las recomendaciones en la pantalla en relación con los accesorios y la posición del estante.
- Page 102 38 FUNCIONAMIENTO Guía de Auto Cook (Cocción automática) • Primero precaliente el horno para la mayoría de los elementos. • Precaliente durante 5 minutos durante el asado. • Si utiliza una sonda, inserte después de precalentar. NOTA • Si cocina cortes de carne finos, inserte la sonda en la parte más gruesa de la carne. Si la sonda no se inserta de manera correcta, el horno podría apagarse antes de lo debido.
- Page 103 FUNCIONAMIENTO Accesorios/ Tiempo de Posición del Menú Utensilios de cocción en estante cocina minutos. Poco cocidos 30~60 Medio cocido 35~65 Lomo de carne Rostizar en la Término medio 40~70 de res asadera Término medio, 45~75 bien cocido Bien cocidos 50~80 Cacerola para Asar a la cacerola 50~80...
- Page 104 40 FUNCIONAMIENTO Accesorios/ Tiempo de Posición del Menú Utensilios de cocción en estante cocina minutos. Paleta de cerdo Cacerola 60~90 Chuletas de cerdo 30~50 Cerdo Lomo de cerdo 50~80 Solomillo de cerdo 20~40 Estante 10~30 Cordero Pata de cordero con hueso 20~40 Rostizar en la asadera...
- Page 105 FUNCIONAMIENTO Accesorios/ Tiempo de Posición del Menú Utensilios de cocción en estante cocina minutos. Directamente 10~20 sobre el estante Sobre asadera para Masa fina congelada 10~20 pizza Sobre piedra para 10~20 pizza Directamente 10~20 sobre el estante Sobre asadera para Pizza Masa leudada congelada 10~20...
- Page 106 42 FUNCIONAMIENTO Accesorios/ Tiempo de Posición del Menú Utensilios de cocción en estante cocina minutos. Bol para horno con Proof (Leudar) 30~40 tapa Secado/Deshidratación (frutas o Bandejas para Varios 120~480 vegetales) hornear Rostizar en la Rostizado lento 120~240 asadera Pan (vapor) Pan blanco Casero Molde para pan...
- Page 107 FUNCIONAMIENTO Cómo usar el tanque del alimentador PRECAUCIÓN de vapor • Asegúrese de que la cubierta del tanque y la El tanque del alimentador de vapor se ubica sobre tapa de llenado estén cerradas antes de colocar la cavidad del horno superior. el tanque en el horno.
- Page 108 44 FUNCIONAMIENTO Cocción al vacío (Solo horno Pulse Steam Bake (Hornear a vapor) en la pantalla. superior) La función Sous vide (Cocción al vacío) utiliza vapor Seleccione la temperatura deseada y el nivel para cocinar alimentos de modo "lento y suave". de vapor: Baja, Media, Alta.
- Page 109 Abra la puerta del horno para asegurarse de del horno puede iniciarse o detenerse a través de que esté vacío y listo para el la aplicación para teléfonos inteligentes LG ThinQ. precalentamiento. No coloque alimentos en su interior. Cierre la puerta del horno. El Inicio remoto solo se puede configurar cuando la puerta del horno está...
- Page 110 (Encender). Siga las instrucciones del mensaje emergente que aparece en la pantalla. Siga las instrucciones que se detallan en la aplicación de teléfonos inteligentes LG ThinQ para utilizar la función de inicio remoto. NOTA • La función Inicio remoto se encuentra desconectada en las siguientes situaciones: - Inicio remoto nunca está...
- Page 111 • Actualización de Firmware de su red. - Mantiene el electrodoméstico actualizado. • LG ThinQ no es responsable por ningún problema de conexión de red, falla, mal NOTA funcionamiento o error causado por la conexión de red.
- Page 112 Conexión a Wi-Fi receptor. El botón Wi-Fi, al ser usado con la aplicación LG • Consultar al vendedor o a un técnico de radio/TV ThinQ, permite al electrodoméstico conectarse a con experiencia para solicitar ayuda.
- Page 113 ThinQ. El equipo se debe instalar y operar con una • Inicie la aplicación LG ThinQ y seleccione la distancia mínima de 20 cm (7.8 pulg.) entre la función Smart Diagnosis en el menú. Siga las antena y su cuerpo. Los usuarios deben seguir las instrucciones provistas en la aplicación LG...
- Page 114 50 MANTENIMIENTO MANTENIMIENTO Limpieza • Los limpiadores o pulidores para electrodomésticos de acero inoxidable pueden comprarse por Internet o en la mayoría de los Consejos Generales de Limpieza comercios minoristas de electrodomésticos o artículos para el hogar. • Se puede usar una espátula plástica como raspador para quitar los restos o residuos antes de la limpieza del horno o durante el proceso.
- Page 115 En comparación con el • Retire la rejilla de la asadera. Vierta la grasa de la proceso más intenso de Self Clean, el horno LG le asadera en un recipiente adecuado con cuidado. brinda la opción de limpiar con MENOS CALOR, en •...
- Page 116 52 MANTENIMIENTO - Alimentos comunes que pueden ensuciar el Use por lo menos 1/5 (2 oz o 60 ml) del agua horno: pizza de la botella para saturar completamente la suciedad en las paredes y las esquinas del horno. Caso 2 - Forma de la suciedad: salpicadura leve - Tipos de suciedad: grasa/aceite - Alimentos comunes que pueden ensuciar el...
- Page 117 MANTENIMIENTO limpieza) en la pantalla para finalizar el modo NOTA EasyClean y el tono. • La junta de la cavidad puede quedar mojada cuando termine el ciclo EasyClean. Esto es Después del ciclo de limpieza y durante la normal. No limpie la junta. limpieza manual, debe quedar suficiente agua •...
- Page 118 54 MANTENIMIENTO puerta para dejar que salgan el aire y el vapor ADVERTENCIA calientes. El horno todavía puede estar MUY CALIENTE. • Si el horno está muy sucio con aceite, realice una autolimpieza del horno antes de volver a utilizarlo. El aceite puede provocar un incendio. NOTA •...
- Page 119 MANTENIMIENTO • Luego de que se apague el horno, el ventilador Nivel de suciedad Ajuste del ciclo de convección seguirá funcionando hasta que el horno se haya enfriado. Cavidad del horno muy 5 horas sucia Cuándo usar Self Clean Quite todos los estantes y los accesorios del horno.
- Page 120 56 MANTENIMIENTO Durante la autolimpieza • Si el tanque del alimentador de vapor no se desliza normalmente hacia adentro, limpie la • El ciclo Self Clean usa temperaturas sumamente parte inferior del tanque. altas para limpiar la cavidad del horno. Mientras se ejecuta el ciclo Self Clean es posible que perciba humo u olor.
- Page 121 MANTENIMIENTO superior y empújelo hasta que quede Seleccione UPPER OVEN (Horno superior) o correctamente ubicado en su lugar. LOWER OVEN (Horno inferior) y pulse Clean (Limpiar) en la pantalla de Modos de cocción. Seleccione UPPER OVEN (Horno superior) o LOWER OVEN (Horno inferior) y pulse Clean Pulse Start (Iniciar) para iniciar el secado.
- Page 122 58 MANTENIMIENTO Extraiga los estantes del horno. Deslice un destornillador plano entre la carcasa y la tapa de vidrio de la luz Sostenga la tapa de vidrio de la luz con dos dedos para evitar que la tapa caiga en la parte inferior del horno.
- Page 123 SOLUCIÓN DE PROBLEMAS SOLUCIÓN DE PROBLEMAS Preguntas Frecuentes Preguntas frecuentes Mi nuevo horno no cocina como el que tenía antes. ¿Hay algún problema con los ajustes de temperatura? No, su horno se probó y calibró en la fábrica. Durante los primeros usos, siga cuidadosamente los tiempos y las temperaturas de su receta.
- Page 124 60 SOLUCIÓN DE PROBLEMAS ¿Por qué no se pueden operar los botones de función? Asegúrese de que el electrodoméstico no esté en modo Lock Out (Bloqueo). El ícono del candado aparecerá en la pantalla si el modo Lock Out está activado. Para desactivar el modo Lock Out, consulte la sección Función de Bloqueo.
- Page 125 SOLUCIÓN DE PROBLEMAS ¿Con qué frecuencia debo usar EasyClean? EasyClean se puede usar las veces que desee. EasyClean funciona mejor cuando el horno está LEVEMENTE sucio, por ejemplo, con salpicaduras de grasa LEVES y gotitas de queso. Consulte la sección EasyClean del manual del propietario para obtener más información. ¿Qué...
- Page 126 62 SOLUCIÓN DE PROBLEMAS Antes de llamar al servicio técnico Revise esta sección antes de llamar para servicio; hacerlo le ahorrará tiempo y dinero. Cocción Problemas Causas posibles y solución El horno no funciona El enchufe del electrodoméstico no está introducido completamente en el tomacorriente.
- Page 127 SOLUCIÓN DE PROBLEMAS Problemas Causas posibles y solución Los alimentos no se Los controles del horno no se configuraron correctamente. hornean o rostizan • Consulte la sección "Funcionamiento del horno" en el capítulo Funcionamiento. correctamente La posición del estante es incorrecta o está mal nivelado. •...
- Page 128 64 SOLUCIÓN DE PROBLEMAS Problemas Causas posibles y solución El agua se acumula Durante la cocción de vapor, el agua se transfiere del tanque de agua a la base del en la base del horno horno. durante o después • Es normal que la base del horno se llene de agua durante el modo Steam (vapor) o una vez de la cocción al que finaliza la cocción al vapor.
- Page 129 SOLUCIÓN DE PROBLEMAS Problemas Causas posibles y solución La puerta del horno El horno está demasiado caliente. no se abre después • Deje enfriar el horno por debajo de la temperatura de bloqueo. de un ciclo Self Clean El control y la puerta pueden estar bloqueados. •...
- Page 130 Durante la configuración de Wi-Fi, la aplicación requiere una contraseña para conectar el producto (en determinados teléfonos). • Ubique el nombre de la red que comienza con "LG" en Configuración > Redes. Tenga en cuenta la última parte del nombre de la red.
- Page 131 FAVOR, VEA A CONTINUACIÓN LA SECCIÓN “PROCEDIMIENTO PARA RESOLVER CONFLICTOS”. En caso de que su Horno eléctrico LG ("Producto") presente alguna falla por defectos de materiales o de fabricación bajo uso apropiado y normal durante el período de garantía establecido más abajo, el mismo será...
- Page 132 Aviso de disputa. En caso de que usted desee iniciar un procedimiento de arbitraje, primero debe notificar a LG por escrito al menos 30 días antes de iniciar el arbitraje enviando una carta a LG a LG Electronics, USA, Inc. Atención: Legal Department- Arbitration 111 Sylvan Avenue, Englewood Cliffs, NJ...
- Page 133 LG pueden solicitar al otro que participe en un procedimiento de arbitraje. Para excluirse usted debe enviar una notificación a LG, en un lapso de hasta 30 días continuos, contados a partir de la fecha de la primera compra del consumidor del producto, ya sea por: (i) el envío de un correo electrónico a...
- Page 134 (c) el nombre o el número del modelo del producto; y (d) el número del serial (el número del serial puede ser hallado (i) en el producto, o (ii) en la dirección de https:// www.lg.com/us/support/repair-service/schedule-repair-continued al hacer clic en “Find My Model & Serial Number”).
- Page 135 Memorándum...
- Page 136 72 Memorándum...
- Page 137 Memorándum...
- Page 138 74 Memorándum...
- Page 139 Memorándum...
- Page 140 LG Customer Information Center For inquiries or comments, visit www.lg.com or call: 1-800-243-0000 U.S.A. 1-888-542-2623 CANADA Register your product Online! www.lg.com...
Need help?
Do you have a question about the WDES9428F and is the answer not in the manual?
Questions and answers