
Related Manuals for Salamander Stoves 1701 eco


Summary of Contents for Salamander Stoves 1701 eco
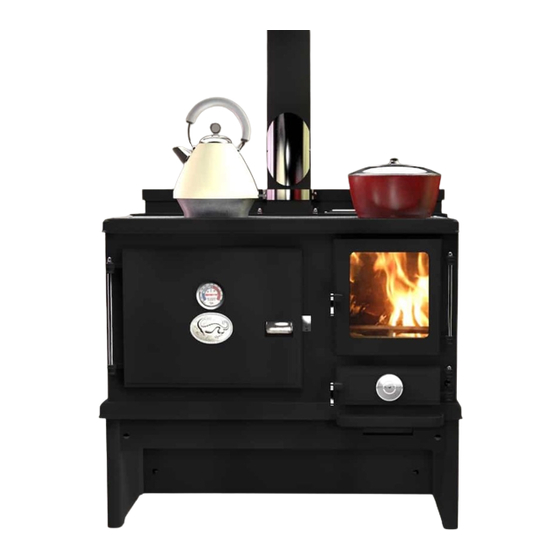
- Page 1 Installation and Operating Instructions Salamander Range Model 1701 eco Doc 1701 eco - rev02 06.01.21...
-
Page 2: Table Of Contents
Installation and operating instructions for the Salamander Range Model 1701 Eco (Ref 1701 Eco Jan 2021) Contents Section Important information about installing and using the Salamander Range Unpacking the Salamander Range Assembly of the Salamander Range Components of the Salamander Range... -
Page 3: Important Information About Installing And Using The Salamander Range
1 - Important information about installing and using the Salamander Range All national and local regulations, including those referring to national and • European standards need to be complied with when installing the Range. The Range must be installed by a registered installer or approved by your local •... -
Page 4: Unpacking The Salamander Range
Remember the Range is made of cast iron and is very heavy. Carefully open the firebox door and remove the packing. Inside the Range will be the following items: Packing list for the Salamander Range 1701 Eco Grate and grate centre installed. Left Air Brick... -
Page 5: Components Of The Salamander Range
4 – Components of the Salamander Range... -
Page 6: Installation Of The Salamander Range
PLEASE READ THESE INSTRUCTIONS CAREFULLY For your safety it is very important that your Range is correctly installed. Salamander Stoves cannot accept any responsibility for any fault arising through incorrect installation or use. Regulations All national and local regulations, including those referring to national and European standards need to be complied with when installing the Range. -
Page 7: Operating Instructions
6 – Operating Instructions Fuel Wood Use only seasoned timber with a moisture content of less than 20%. Typically, this means wood which has been cut and stored in an open dry shelter for between one and two years. The maximum log size is 200mm x 100mm x 100mm (8” x 4” x 4”). DO NOT BURN wet or unseasoned wood, construction timber, painted or treated wood, driftwood or manufactured board products. -
Page 8: Air Controls
Air Controls The Salamander Eco is fitted with three air controls. (See additional information section for the controls on the Salamander SE Eco Range which is exempt under the clean air act for use in smoke control areas) PRIMARY AIR CONTROL Located on the front of the ashpan door, the primary air control directs air into the base of the fire. -
Page 9: Refuelling A Wood Fire
After 2 to 5 minutes the chimney should be warm enough to create a good draw and the Ÿ door can be closed. Once the kindling has formed a good bed of glowing embers, the Range can be refuelled Ÿ Do not be tempted to overfill the firebox and risk fuel falling with 2 or 3 pieces of wood. -
Page 10: Lighting A Solid Fuel Fire
Lighting a solid fuel fire When burning manufactured smokeless solid fuel: Ÿ Fully open the Primary air control (Turn wheel on ashpan door fully anticlockwise) Half open the Airwash control (Right hand control below the ashpan door central position) Fully close the Tertiary air control (Left hand control below the ashpan door fully to the left) Ÿ... -
Page 11: Cooking On The Range
To remove the ash pan use the rounded end of the tool as shown. WARNING Take great care when removing and emptying the ash pan. It may be very hot and still contain burning or smouldering embers and is a fire risk. Cooking on the Range Once the firebox section of the Range is up to working temperature it is possible to cook on Ÿ... -
Page 12: Maintaining The Correct Flue Temperature
As a helpful guide to showing the temperature range of the oven the temperature gauge Ÿ has been colour coded from blue to red. Each colour represents the following approximate temperature range. Maintaining the correct flue temperature for efficient, economical and safe operation It is very important that the flue temperature is maintained above Ÿ... -
Page 13: Guidance On Safe Operation
7 – Guidance on safe operation Fire can be very dangerous During operation, the Range and all the fittings (door handles and controls) get very hot. Do not overfire the Range It is possible to fire the Range to such an extent that damage may occur. Look out for parts of the Range or flue glowing red hot. -
Page 14: Maintenance
8 - Maintenance Maintenance should only be carried out when the Range is cool. Before use Between burns in the Range it is good practice to keep ash and debris to a minimum, especially the ash pan and ash pan section. Remember that if only burning wood, it is recommended to keep a bed of ash about 1cm thick on the grate. -
Page 15: Fault Finding
9 – Fault Finding Fire will not burn The fuel is too wet and not suitable Air inlets to the Range are blocked The flue is blocked or restricted Inadequate air supply into the room Soot build up on glass Fuel is too wet Fuel pieces are too large and are “smouldering”... -
Page 16: Salamander Range Eco Performance Results
11 - Salamander Range Eco performance results Output and Efficiency All efficiencies in table are Net values Wood Logs Results, 0.80 hour refuels Parameter A20/181 A20/181 A20/181 Mean Test duration 0.87 0.83 0.83 0.84 Total efficiency 86.0 86.0 85.1 85.7 Nominal heat output Mean CO emission (at 13 % 0.06... - Page 17 Copy of the CE plate attached to the stove...
Need help?
Do you have a question about the 1701 eco and is the answer not in the manual?
Questions and answers