Table of Contents
Advertisement
Quick Links
Introduction
RISCO Groupʹs 2‐Way Wireless I/O & X10 Module is an extension module enabling wired
devices to be connected to the Agility Wireless system.
The Wireless I/O Module supports 4 hardwired zones, 4 outputs and controls up to 16 X10
devices.
Each output or X10 device can be operated in a response to a wide variety of system events.
For detailed information regarding the programming options of the Wireless I/O Module
refer to the installation manuals of the Agility.
Main Features
Bi‐directional wireless communication
2 Relay Outputs (3Amp)
2 Transistor Outputs (500 mA)
4 Inputs (NO, NC, EOL)
Fully supervised
Dual tamper protection (Box & Wall)
X10 adapter, up to 16 X10 devices
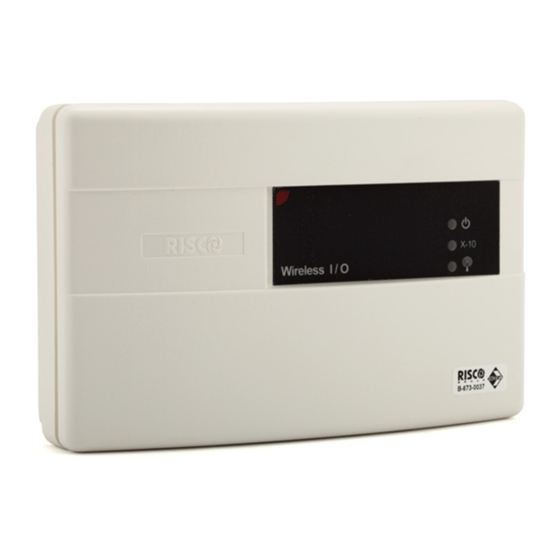
Wireless I/O Module - Main Components
1. RF Module
2. Input Terminals
3. Relay Output Terminals
4. Transistor Output terminals
5. AC Power terminals
(parallel connection to J2)
6. Back/Wall tamper (not visible)
7. J2 Power socket
8. 3 LED indication
9. RJ11 connector (X10 connection)
10. Box tamper switch
11. Battery holders
1
Z33 COM Z34 Z35 COM Z36 NO U01 NC
RF Module
7
11
Figure 1: Wireless I/O Module Main Components
Page 1
2
3
NO U02 NC U03 COM U04
C
C
6
10
4
5
AC
8
9
X10
Advertisement
Table of Contents

Related Manuals for Risco Agility Wireless I/O & X10 Module

Summary of Contents for Risco Agility Wireless I/O & X10 Module
- Page 1 Introduction RISCO Groupʹs 2‐Way Wireless I/O & X10 Module is an extension module enabling wired devices to be connected to the Agility Wireless system. The Wireless I/O Module supports 4 hardwired zones, 4 outputs and controls up to 16 X10 devices. Each output or X10 device can be operated in a response to a wide variety of system events. For detailed information regarding the programming options of the Wireless I/O Module refer to the installation manuals of the Agility. Main Features Bi‐directional wireless communication 2 Relay Outputs (3Amp) 2 Transistor Outputs (500 mA) 4 Inputs (NO, NC, EOL) Fully supervised Dual tamper protection (Box & Wall) X10 adapter, up to 16 X10 devices Wireless I/O Module - Main Components 1. RF Module 2. Input Terminals 3. Relay Output Terminals Z33 COM Z34 Z35 COM Z36 NO U01 NC NO U02 NC U03 COM U04 4.
- Page 2 LED Indications LED State Description On AC and batteries OK Power Flashing AC trouble or Low battery (below 3.1 VDC) (Red) Off Power not present On X10 Connected to the Wireless I/O Module X10 (Yellow) Off X10 Disconnected On The I/O expander is communicating with the Agility Communication (Green) Off No communication is taking place Mounting the Wireless I/O Module Select a mounting location near an AC power supply in proximity to the Agility main panel Open the cover by twisting a screwdriver in the slots on the bottom or top of the case (Figure 2). Figure 2: Opening the Cover Remove the circuit board ( ) and open knockouts for the entry of the power wires Figure 3 (1, Figure 4) and for the back tamper (2, Figure 4). Page 2 ...
- Page 3 Mount the receiver on the wall using the installation holes (3, Figure 4) and reinstall the circuit board. Make sure that that you hear a ʺclickʺ when attaching the tamper spring to the wall. Z33 COM Z34 Z35 COM Z36 NO NC UO3 COM UO4 Figure 3: Circuit Board Removal Figure 4: Knockouts and Installation Holes Connect the power source wire plug to the J2 power jack on the PCB or to the AC terminals on the PCB. The polarity is not important. Do Not plug the transformer into the wall outlet at this point. Plug in the three rechargeable batteries (size AA NiMH 2300 ) into the battery holders. Pay attention to the correct polarity (+) (‐). NOTE: Rechargeable batteries should be charged for at least 24 hours. IMPORTANT: When replacing the batteries be sure to use the same type. Failure to comply with this ...
- Page 4 Wiring the Wireless I/O module Inputs wiring The Agility supports 4 hardwire zones (defined in the Agility system as zones 33‐36) that can be defined as Normally Open, Normally Closed or End of Line Zones. The following diagram illustrates the various zone connections: NORMALLY CLOSED NORMALLY OPEN ZONE END OF LINE ZONE END OF LINE ZONE ZONE CONFIGURATION CONFIGURATION (N.C CONTACT) (N.O CONTACT) 2.2 K ALARM ALARM ALARM ALARM DEVICE DEVICE DEVICE DEVICE ...
- Page 5 To wire Transistor Outputs (UO3‐UO4) Connect the device between the positive connection of the external power and the UO3 or UO4 (+). Connect the negative connection of the external power to the COM (‐) terminal. X10 Connection The wireless I/O expander enables the Agility to control X10 devices. The I/O expander converts the information sent from the programmable utility output into the X10 protocol. Up to sixteen X10 devices can be activated. These are recognized in the system as outputs 5 to 20. To connect the X10 Connect the X10 controller cable to the RJ11 connector located on the Wireless I/O module PCB. Transmitter/Receiver Communication Setup To set up the communication with the receiver, the I/O expander should identify itself to the systemʹs receiver in the same way as setting communication to a wireless zone. IMPORTANT: Before proceeding with the steps below, plug the AC transformer into the wall outlet. Set the security panel to Learn mode. Send a WRITE message within 15 seconds after I/O expander power up, by pressing the Wall and Cover tampers switches simultaneously for at least 3 seconds (when the PCB IS installed ONLY the cover tamper has to be pressed). Verify that the I/O expander has been identified by the security panel. Install the Wireless I/O Module front cover back in its place. Lock screw located at the top of the unit. Programming Changing Default Settings Via the Agility panel you can define the Inputs, Outputs and X10 parameters settings ...
- Page 6 9VAC/1.5A (Preferred) Current Consumption 0.35A maximum Backup Batteries 3 x size AA NiMH cylindrical cell 1.2V 2300 mAH Relay Outputs 2 x 3 Amps 24 VDC programmable Transistor Outputs 2 x 500mA transistors (Open Collector) Operating Temperature ‐10°C to 40°C (32°F to 131°F) ‐20°C to 60°C (‐4°F to 140°F) Storage Temperature Physical Characteristics Dimension 14.5 cm x 9.0 cm x 4.0 cm (5.7 x 3.54 x 1.57 inch) Weight (with batteries) 0.24 Kg (0.52lb) Wireless Characteristics According to EN 50130‐4 RF immunity Frequency 433.92 MHz Compliance EN50131‐1, EN50131‐3 Grade 2 EN50130‐5 Environmental class II EN50131‐6 Type A Ordering Information Model Description RW132IO40AUH RISCO Agility Wireless I/O Module CAUTION: Risk of explosion if battery is replaced by an incorrect type. Dispose of used batteries according to local regulations. Page 6 ...
- Page 7 Reorient or relocate the receiving antenna. b) Increase the separation between the equipment and receiver. c) Connect the equipment to an outlet on a circuit different from that to which the Receiver is connected. d) Consult the dealer or an experienced radio/TV technician. FCC ID: JE4AGILITY IC: 6564A‐AGILITY FCC Warning The manufacturer is not responsible for any radio or TV interference caused by unauthorized modifications to this equipment. Such modifications could void the userʹs authority to operate the equipment. RISCO Group Limited Warranty RISCO Group and its subsidiaries and affiliates (ʺSellerʺ) warrants its products to be free from defects in materials and workmanship under normal use for 24 months from the date of production. Because Seller does not install or connect the product and because the product may be used in conjunction with products not manufactured by the Seller, Seller can not guarantee the performance of the security system which uses this product. Sellersʹ obligation and liability under this warranty is expressly limited to repairing and replacing, at Sellers option, within a reasonable time after the date of delivery, any product not meeting the specifications. Seller makes no other warranty, expressed or implied, and makes no warranty of merchantability or of fitness for any particular purpose. In no case shall seller be liable for any consequential or incidental damages for breach of this or any other warranty, expressed or implied, or upon any other basis of liability whatsoever. Sellers obligation under this warranty shall not include any transportation charges or costs of installation or any liability for direct, indirect, or not be compromised or circumvented; that the product will prevent any persona; injury or property loss by intruder, robbery, fire or otherwise; or that the product will in all cases provide ...
- Page 8 RTTE Compliance Statement Hereby, RISCO Group declares that this equipment is in compliance with the essential requirements and other relevant provisions of Directive 1999/5/EC. For the CE Declaration of Conformity please refer to our website: www.riscogroup.com. Contacting RISCO Group RISCO Group is committed to customer service and product support. You can contact us through our website www.riscogroup.com or as follows: United Kingdom USA Tel:+44‐161‐655‐5500 Tel: +1‐631‐719‐4400 technical@riscogroup.co.uk support‐usa@riscogroup.com Italy Brazil Tel: +39‐02‐66590054 Tel: +1‐866‐969‐5111 support@riscogroup.it support‐br@riscogroup.com Spain China Tel:+34‐91‐490‐2133 Tel: +86‐21‐52390066 support‐es@riscogroup.com support‐cn@riscogroup.com France Poland Tel: +33‐164‐73‐28‐50 Tel: +48‐22‐500‐28‐40 support‐fr@riscogroup.com support‐pl@riscogroup.com Belgium Israel Tel: +32‐2522 7622 Tel: +972‐(0)3‐963‐7777 ...
Need help?
Do you have a question about the Agility Wireless I/O & X10 Module and is the answer not in the manual?
Questions and answers