Pliant MICROCOM 900XR Quick Start Manual
Hide thumbs
Also See for MICROCOM 900XR:
- Operating manual (25 pages) ,
- Quick start manual (2 pages) ,
- Operating manual (20 pages)
Advertisement
CUSTOMER SUPPORT
Pliant Technologies offers technical support via phone and
email from 07:00 to 19:00 Central Time (UTC−06:00), Monday
through Friday.
+1.844.475.4268 or +1.334.321.1160
customer.support@plianttechnologies.com
You may also visit our website (www.plianttechnologies.com)
for live chat help. (Live chat available 08:00 to 17:00 Central
Time (UTC−06:00), Monday through Friday.)
Additional Documentation
This is a quick start guide. For additional
information, visit our support website. (Scan
this QR code with your mobile device to
navigate there quickly.)
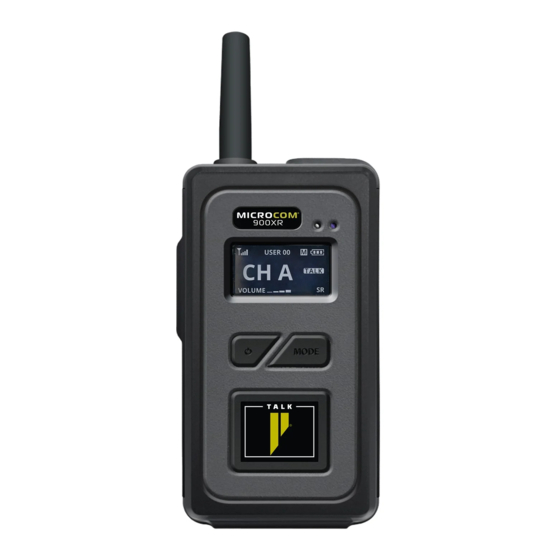
IN THIS BOX
WHAT'S INCLUDED WITH MICROCOM 900XR
RECEIVER?
• Receiver
• ADPT-2.5-3.5: 2.5 mm Male to 3.5 mm Female Adapter
Cable
• USB-C Charging Cable
• Quick Start Guide
• Lanyard
ACCESSORIES
OP T I O N A L ACCES S O RI ES
• PBT-RECCHG-10: 10-Bay Drop-In Pack Charger
• PAC-USB5-CHG: 5-Port USB Charger
• PHS-IE-REC: Listen-only Eartube
• PHS-OE-REC: Over the Ear Listen-Only Earpiece
COPYRIGHT © 2021 Pliant Technologies, LLC. All rights reserved. The
Pliant® word mark, the Pliant "P" logo, and MicroCom® are registered
trademarks of Pliant Technologies, LLC. Any and all other trademark
references within this document are property of their respective owners.
Document Reference: D0000620_C
Q U I C K S T A R T G U I D E
RECEIV ER
For more information visit
www.plianttechnologies.com
Advertisement
Table of Contents

Related Manuals for Pliant MICROCOM 900XR


Summary of Contents for Pliant MICROCOM 900XR
- Page 1 • PHS-OE-REC: Over the Ear Listen-Only Earpiece COPYRIGHT © 2021 Pliant Technologies, LLC. All rights reserved. The Pliant® word mark, the Pliant “P” logo, and MicroCom® are registered trademarks of Pliant Technologies, LLC. Any and all other trademark references within this document are property of their respective owners.
- Page 2 SETUP OPERATION Menu Options 1. Connect a headset to the receiver or use the internal • Lock - To toggle between Lock and Unlock, hold the Lock speaker. button for 4 seconds. A lock icon appears on the LCD when The following settings are adjustable from the receiver menu.
Need help?
Do you have a question about the MICROCOM 900XR and is the answer not in the manual?
Questions and answers