Table of Contents
Advertisement
Advertisement
Table of Contents
Troubleshooting

Related Manuals for Zeiss Axio Imager


Summary of Contents for Zeiss Axio Imager
- Page 2 All names of companies and products mentioned in this manual may be trademarks or registered trademarks. Quoting of product names is for information only and does not represent any trademark misuse. Carl Zeiss AG is not liable for the performance or the use of these products. Issued by: Carl Zeiss MicroImaging GmbH P.O.B.
-
Page 3: Table Of Contents
Introduction........................7 Notes on instrument safety ....................7 Warning stickers .........................10 Notes on warranty ......................12 Overall view of Axio Imager - manual ..................13 Overall view of Axio Imager - motorized ................14 Instrument Decription......................15 Name and intended use ......................15 Instrument description and main features................15 Equipment and compatibility table ..................17... - Page 4 Carl Zeiss Contents Axio Imager 3.19 Installing and removing P&C reflector modules..............46 3.19.1 Installing a module......................46 3.19.2 Removing a module ......................46 3.20 Changing the filter set in the reflector module FL P&C ............46 3.21 Changing the beam splitter in the reflector module FL P&C..........48 3.22...
- Page 5 Carl Zeiss Operation..........................74 Coded Axio Imager operation and function controls............74 Axio Imager operation and function controls (motorized version).........82 Switching microscope and HAL 100 illuminator on/off............86 Switching the HBO 100 on/off ....................87 Binocular phototube 30°/25 mot. with two camera ports (2TV tube mot.) ......87 Mechanical Stage 75x50 mot.
- Page 6 Carl Zeiss Contents Axio Imager Care, Maintenance, Troubleshooting and SERVICE ............. 180 Instrument care......................... 180 Instrument maintenance ....................181 5.2.1 Performing checks......................181 5.2.2 Changing fuses on the manual stand ................181 5.2.3 Changing fuses on the VP232-2 CAN power supply ............182 Troubleshooting........................
-
Page 7: Introduction
Carl Zeiss INTRODUCTION Notes on instrument safety The Axio Imager microscopes have been designed, produced and tested in compliance with DIN EN 61010-1 (IEC 61010-1) and IEC 61010-2-101 safety requirements for electrical measuring, control and laboratory instruments. The instruments meet the requirements of EC Directive IVDD 98/79/EC (In Vitro Diagnostic); they are marked with the mark. - Page 8 The manual microscopes (Axio Imager.A2, .A2 LED, .A2m, .D2 and .D2m) are equipped with a power supply integrated in the stand allowing line voltages to be used in the ranges 100 to 127 V and 200 to 240 V AC ±10 %, 50/60 Hz, without the voltage setting on the instrument...
- Page 9 The instruments may only be operated by trained personnel who must be aware of the possible dangers involved with microscopy and the particular application concerned. The Axio Imager microscopes are high-precision instruments that can be impaired in their performance or destroyed when handled improperly.
-
Page 10: Warning Stickers
INTRODUCTION Carl Zeiss Warning stickers Axio Imager Bei Verwendung eines Scanningtisches (ca. 4 kg Gewicht) muss zum Schutz des Fokussiertriebs der Hochleistungsfokus aktiviert werden (siehe Seite 49). Probengewichte bis maximal 5 kg können bei aktiviertem Hochleistungsfokus auf den Tisch aufgelegt werden. - Page 11 INTRODUCTION Axio Imager Warning stickers Carl Zeiss Fig. 1-3 Warning stickers on the underside of the LED illuminator Fig. 1-4 Warning stickers on the attachment lamp VIS-LED M70-2-0020 e 06/2009 430000-7344-001...
-
Page 12: Notes On Warranty
This forfeits all warranty claims. With the exception of the work specified in this manual, no maintenance or repair of the Axio Imager may be undertaken. Repairs may only be performed by Zeiss service staff or specially authorized personnel. -
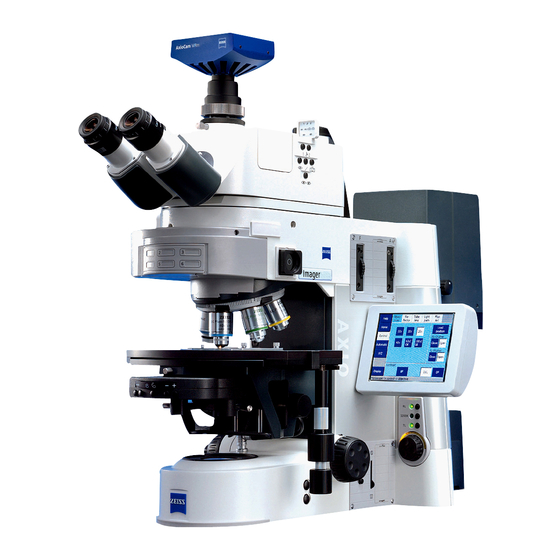
Page 13: Overall View Of Axio Imager - Manual
INTRODUCTION Axio Imager Overall view of Axio Imager - manual Carl Zeiss Overall view of Axio Imager - manual Eyepieces Binocular tube Reflected-light illuminator (HBO 100) Microscope stand, manual Transmitted-light illuminator (HAL 100) Mechanical stage Nosepiece Condenser Reflector turret M70-2-0020 e 06/2009... -
Page 14: Overall View Of Axio Imager - Motorized
INTRODUCTION Carl Zeiss Overall view of Axio Imager - motorized Axio Imager Overall view of Axio Imager - motorized Eyepieces Binocular phototube Reflected-light illuminator (HBO 100) Microscope stand, motorized Transmitted-light illuminator (HAL 100) TFT display Mechanical stage Nosepiece Condenser Reflector turret... -
Page 15: Instrument Decription
Axio Imager.Z2m Axio Imager.Z2 The Axio Imager / Axio Imager MAT microscopes have been designed as universal microscopes for applications in biology and medicine for the examination of blood and/or tissue specimens from the human body, as well as for materials examinations. - Page 16 Instrument description and main features Axio Imager The Axio Imager Microscope is available in ten stand versions. However, the scope of the equipment of these stands is variable and can be customized to the user's requirements within the range of optionally available microscope components.
-
Page 17: Equipment And Compatibility Table
INSTRUMENT DECRIPTION Axio Imager Equipment and compatibility table Carl Zeiss Equipment and compatibility table Type of Stand Component Option Manual Stand Motorized Coding PC readable Coded Tube lens turret Motorized 6 positions, coded 6 positions, motorized Reflector turret 6 positions, motorized ACR... - Page 18 For fluorescence applications, it may be optionally replaced by a high-speed shutter. **** = USB/CAN converter 432909 is required for use on Axio Imager A2 LED, A2, A2m, D2 and D2m. ***** = Motorized only if used with an objective nosepiece.
-
Page 19: System Overview Of Axio Imager
INSTRUMENT DECRIPTION Axio Imager System overview of Axio Imager Carl Zeiss System overview of Axio Imager M70-2-0020 e 06/2009 430000-7344-001... - Page 20 INSTRUMENT DECRIPTION Carl Zeiss System overview of Axio Imager Axio Imager 430000-7344-001 M70-2-0020 e 06/2009...
- Page 21 INSTRUMENT DECRIPTION Axio Imager System overview of Axio Imager Carl Zeiss M70-2-0020 e 06/2009 430000-7344-001...
- Page 22 INSTRUMENT DECRIPTION Carl Zeiss System overview of Axio Imager Axio Imager 430000-7344-001 M70-2-0020 e 06/2009...
- Page 23 INSTRUMENT DECRIPTION Axio Imager System overview of Axio Imager Carl Zeiss M70-2-0020 e 06/2009 430000-7344-001...
- Page 24 INSTRUMENT DECRIPTION Carl Zeiss System overview of Axio Imager Axio Imager 430000-7344-001 M70-2-0020 e 06/2009...
- Page 25 INSTRUMENT DECRIPTION Axio Imager System overview of Axio Imager Carl Zeiss M70-2-0020 e 06/2009 430000-7344-001...
-
Page 26: Objectives
(Zeiss color code) 0.25 : Numerical aperture ∞ : Infinite image distance: These objectives can only be used with ICS microscopes from Carl Zeiss. 0.17 : Can only be used with cover slip thickness D = 0.17 mm. Fig. 2-1 Objective −... -
Page 27: Eyepieces
INSTRUMENT DECRIPTION Axio Imager Eyepieces Carl Zeiss When immersion objectives are used, the air between the cover slip and the objective is replaced by a ® liquid, which in most cases is immersion oil. The plastic oiler containing 20 ml of Immersol 581 F immersion oil (n = 1.518) is particularly suitable for this purpose. - Page 28 INSTRUMENT DECRIPTION Carl Zeiss Stage micrometers and eyepiece reticles Axio Imager Illustration Designation, technical data Cat. No. Eyepiece reticle /d = 26 mm 474064-0000-000 For the alignment of the reticle by means of alignment specimen. Crossline micrometer 10:100/d = 26 mm...
-
Page 29: Technical Data
Dimensions (width x depth x height) Axio Imager stand, manual with HBO 100 ........approx. 300 mm x 721 mm x 505 mm Axio Imager stand, motorized with HBO 100 and TFT display..approx. 390 mm x 721 mm x 505 mm Weight Axio Imager, manual/motorized (dependent on equipment)........ - Page 30 Fuses in accordance with IEC 127 Axio Imager microscope stand, manual............T 5.0 A/H / 250V, 5x20 mm Power supply VP232-2 for Axio Imager, mot............T 4.0 A / 250V, 5x20 mm Transformer HBO 100....................T 2.0 A/H, 5x20 mm Light sources Halogen lamp........................
- Page 31 Technical data Carl Zeiss Axio Imager, motorized Stand with motorized stage focusing: Mean step size of stepper motor .............. 25 nm (Axio Imager.M2) ......................10 nm ±10 (Axio Imager.Z2) Quick lowering/lifting of stage....................10 mm Lifting range..........................25 mm Height stop ........................electronic Focusing speed........................
-
Page 32: Start-Up
Axio Imager START-UP The Axio Imager microscope can be installed, converted and started up by the customer. On request, the microscope is also installed or converted by Zeiss Service with costs. Before installing and starting-up the microscope, be sure to carefully read the notes on instrument safety (see Section 1). -
Page 33: Attaching Or Changing Binocular Tube Or Phototube
START-UP Axio Imager Attaching or changing binocular tube or phototube Carl Zeiss Attaching or changing binocular tube or phototube All binocular tubes listed in the system overview (refer to Section 2.4) can be attached to the manual or the motorized stand as described below. -
Page 34: Mounting The Tube Lens Turret
START-UP Carl Zeiss Mounting the tube lens turret Axio Imager Mounting the tube lens turret • Use SW 3 ball-headed screwdriver to loosen clamping screw (3-3/3) and remove the tube (3-3/1) upward. • Unscrew four fastening screws (3-3/2), remove coupler plate (3-3/4) upward and store it for any future use. -
Page 35: Inserting The Eyepiece Reticle
Make sure the line figure always faces the field stop. Eyepiece reticles may only be installed by Zeiss service technicians working in a dust-free environment. -
Page 36: Setting The Interpupillary Distance On The Binocular Tube
START-UP Carl Zeiss Setting the interpupillary distance on the binocular tube Axio Imager Setting the interpupillary distance on the binocular tube • To adjust the eyepiece distance to your individual interpupillary distance, swing the eyepiece tubes symmetrically toward or away from one another (Fig. -
Page 37: Fitting Components To The Camera Port Of The Binocular Phototube
Adapter for Interface 60N (external thread M52 x 1) The Axio Imager uses a new connector type "Interface 60N" to adapt the camera. The known adapters for "Interface 60" (inside diameter 30 mm), however, can also be used further on. -
Page 38: Screwing In Objectives
START-UP Carl Zeiss Screwing in objectives Axio Imager Screwing in objectives • Move the mechanical stage with stage carrier to the lower stop position. • Remove dust caps (3-9/2) from the respective openings on the objective nosepiece. • Remove objectives (3-9/1) from the case and... -
Page 39: Replacing The Dic Prism On The Universal Condenser
START-UP Axio Imager Replacing the DIC prism on the universal condenser Carl Zeiss • When using a motorized condenser (3-11/1) (on the motorized stand) thread the connecting cable (3-11/3) through the opeing in the stage carrier to the back and plug the plug into socket (3-11/2) on the right of the stand base. -
Page 40: Inserting Reflector Turret, Compensator Mount 6X20 Or 4-Position Modulator Turret
START-UP Carl Zeiss Inserting reflector turret, compensator mount 6x20 or … Axio Imager 3.11 Inserting reflector turret, compensator mount 6x20 4-position modulator turret Install or change the motorized reflector turret or modulator turret only when the microscope is switched off. -
Page 41: Changing The Stage Carrier
START-UP Axio Imager Changing the stage carrier Carl Zeiss 3.13 Changing the stage carrier • To remove the stage carrier (3-15/3), grip it firmly and loosen the clamping lever (3-15/2) until the stage carrier can be taken out of the guide from the right to the left. -
Page 42: Setting The Dovetail Guide Of The Stage Carrier
START-UP Carl Zeiss Setting the dovetail guide of the stage carrier Axio Imager 3.15 Setting the dovetail guide of the stage carrier When stage carrier 430701-9901-000 is used, the specimen space needs to be shifted for specimens of less than 13 mm, so that the specimen can be focused. -
Page 43: Attaching The Condenser Carrier To The Transmitted-Light/Reflected-Light Stage Carrier
START-UP Axio Imager Attaching the condenser carrier to … Carl Zeiss 3.16 Attaching the condenser carrier to the transmitted-light/reflected- light stage carrier • Use the drive knob (3-18/2) to adjust the guide of the condenser carrier (3-18/3) in such a way that the two screws (3-18/4) are accessible. -
Page 44: Equipping 2-Position Filter Wheels 2X, Discrete
START-UP Carl Zeiss Equipping 2-position filter wheels 2x, discrete Axio Imager 3.18 Equipping 2-position filter wheels 2x, discrete 3.18.1 Filter wheel, manual supplied neutral-density filter transmitted light or reflected light consists of: 1 filter with 50% − − 2 filters with 25% 1 filter with 12% −... -
Page 45: Filter Wheel, 2-Position, Motorized
START-UP Axio Imager Equipping 2-position filter wheels 2x, discrete Carl Zeiss 3.18.2 Filter wheel, 2-position, motorized The motorized filter wheel 2x is to be equipped with the same filter set as the manual filter wheel To insert the filters in the two filter wheels, the motorized filter wheel 2x must be opened on the corresponding side. -
Page 46: Installing And Removing P&C Reflector Modules
Insert only fluorescence filters having a free aperture of ≥ 22 mm, as otherwise the image may be masked. Make sure this requirement is met, when using filters from other manufacturers. Filter sets or fully assembled FL P&C reflector modules can be ordered from Carl Zeiss. 430000-7344-001... - Page 47 This is to ensure that the wedge angle of the barrier filters is in the same, defined position in the reflector modules used thus compensating or minimizing the already minimal module-to- module image shift when Zeiss filter sets are used. If it is necessary to mount filters that do not carry...
-
Page 48: Changing The Beam Splitter In The Reflector Module Fl P&C
START-UP Carl Zeiss Changing the beam splitter in the reflector module FL P&C Axio Imager 3.21 Changing the beam splitter in the reflector module FL P&C In mounting filters and beam splitters, take extreme care to prevent damage to and contamination of the optical components. -
Page 49: Activating/Deactivating The High-Performance Focus
START-UP Axio Imager Activating/deactivating the high-performance focus Carl Zeiss The reflective (coated) side (3-27/3) of the beam splitter has a beveled edge (3-27/1) or corner (3-27/2). • Place the excitation half of the module (3-26/1) onto the emission half (3-26/4) (retaining pins 3-26/5b and eyelets 3-26/5a mesh with one another). -
Page 50: Mounting The Tft Display To The Motorized Stand
START-UP Carl Zeiss Mounting the TFT display to the motorized stand Axio Imager 3.23 Mounting the TFT display to the motorized stand CAUTION When mounting the TFT display, the microscope must be switched off. • Mount the TFT display (3-29/2) to the right side of the motorized stand (3-29/1) using the three screws (3-29/3). -
Page 51: Installing The Focus Linear Sensor
START-UP Axio Imager Installing the focus linear sensor Carl Zeiss 3.25 Installing the focus linear sensor Only in connection with Axio Imager.Z2 / .Z2m stands. Use adjusting block 430702-0102-000 for installation. • Switch on the microscope (see Section 4.3.1.1). •... -
Page 52: Assembling The Multidiscussion Equipment
3.26 Assembling the multidiscussion equipment For the installation of the multidiscussion equipment, we recommend you call on Zeiss Microscopy Service (see Section 5.5), as it requires careful optical adjustment and centering of the fields of view of the individual co-observer tubes. - Page 53 START-UP Axio Imager Assembling the multidiscussion equipment Carl Zeiss Multidiscussion equipment Co-observer tube End connector R Clamping screw End connector L Setscrew Dovetail Connector for power supply Connecting piece R Binocular tube Plug High light-intensity extension arm Connecting piece L Plug-type power supply Fig.
-
Page 54: Connecting To Power
100 to 127 V or 200 to 240 VAC, 50/60 Hz. The power unit is set automatically to the line voltage available. Fig. 3-33 Axio Imager, manual 3.27.2 Motorized stand • Plug connecting plug (3-34/2) of power supply... -
Page 55: Hal 100 Halogen Illuminator
START-UP Axio Imager HAL 100 halogen illuminator Carl Zeiss 3.28 HAL 100 halogen illuminator The HAL 100 illuminator is used as light source for transmitted-light and reflected-light techniques (except fluorescence) Axio Imager. Attachment to the reflected-light or transmitted- light socket is performed analogously. -
Page 56: Separate Power Supply Of The Hal 100 Halogen Illuminator In Reflected Light
Separate power supply of the HAL 100 halogen illuminator in reflected light For the combined use of transmitted light and reflected light (mixed light) on the Axio Imager, the halogen illuminator needs to be connected to a separate power supply in reflected light. -
Page 57: Adjusting The Hal 100 Halogen Illuminator
START-UP Axio Imager HAL 100 halogen illuminator Carl Zeiss 3.28.3 Adjusting the HAL 100 halogen illuminator Coarse adjustment • Loosen clamping screw (3-35/1 or 3-35/8) and remove the operational halogen illuminator (3-38/2) from the microscope stand. • Switch on microscope as described in Section 4.3. -
Page 58: Replacing The Hal 100 Halogen Lamp
START-UP Carl Zeiss HAL 100 halogen illuminator Axio Imager 3.28.4 Replacing the HAL 100 halogen lamp CAUTION Hot surface! You need not remove the lamp housing from the stand to replace the halogen lamp. Do not store the supplied replacement tool (3-39/7) for lamp replacement in the lamp housing while the illuminator is operating. -
Page 59: Installing The Led Illuminator For Transmitted Light
START-UP Axio Imager Installing the LED illuminator for transmitted light Carl Zeiss 3.29 Installing the LED illuminator for transmitted light The LED illuminator for transmitted light can be installed optionally on the transmitted light port on the rear side of the instrument or on the bottom of the condenser carrier. - Page 60 START-UP Carl Zeiss Installing the LED illuminator for transmitted light Axio Imager Installing illuminator condenser carrier • Remove the halogen illuminator from the transmitted-light port and disconnect the illuminator plug. Close the transmitted-light port with the cover cap. • Move microscope stage and condenser carrier fully up using focusing drive (stage) and height control (condenser).
-
Page 61: Attachment Lamp Vis-Led For Transmitted Light
START-UP Axio Imager Attachment lamp VIS-LED for transmitted light Carl Zeiss 3.30 Attachment lamp VIS-LED transmitted light 3.30.1 Installing the attachment lamp VIS-LED The attachment lamp VIS-LED is only intended for use with transmitted light. CAUTION Avoid looking directly into the LED light. -
Page 62: Adjusting The Attachment Lamp Vis-Led
START-UP Carl Zeiss Attachment lamp VIS-LED for transmitted light Axio Imager 3.30.2 Adjusting the attachment lamp VIS-LED • Switch on the add-on illuminator via the microscope. • Switch off the diffusion disk for transmitted light remove filter wheels transmitted light. -
Page 63: Hbo 100 Illuminator
START-UP Axio Imager HBO 100 illuminator Carl Zeiss 3.31 HBO 100 illuminator 3.31.1 Inserting the HBO 103 W/2 mercury vapor short-arc lamp For safety reasons, the HBO 100 illuminator and the HBO 103 W/2 mercury vapor short-arc lamp are supplied separately packed. -
Page 64: Aligning The Hbo 100 Illuminator
START-UP Carl Zeiss HBO 100 illuminator Axio Imager 3.31.3 Aligning the HBO 100 illuminator The HBO 100 illuminator is available in two versions (manual and automatic alignment). The self-adjusting HBO 100 (423011-0000-000) will be aligned automatically after switching on the transformer of the illuminator. -
Page 65: Installing The Switching Mirror For Two Illuminators (Manual Or Motorized)
Axio Imager stand simultaneously, e.g., a halogen illuminator (HAL 100) and a fluorescence illuminator (HBO 100). While the manual switching mirror can be used on all Axio Imager stands, the motorized switching mirror may only be employed on the M1/M2 or Z1/Z2 stands (firmware version 01.318 or higher). -
Page 66: Electrical Connections On The Rear Side Of The Microscope
Connectors for transmitted-light halogen illuminator Power connector Sync connector for camera synchronization LM set button for light manager function RS 232 port Fig. 3-49 Axio Imager, manual (rear side) 3.32.2 Motorized stand Legend to Fig. 3-50: CAN connector USB connector... -
Page 67: Changing The Mechanical Stage
START-UP Axio Imager Changing the mechanical stage Carl Zeiss 3.33 Changing the mechanical stage Mechanical stages can be bolted on or turned and centered depending on their type. The range of stage travel is 75 mm in the x direction and 50 mm in the y direction. -
Page 68: Adjusting The Travel Range On Ergonomic Drive
START-UP Carl Zeiss Changing the mechanical stage Axio Imager • Press the stage to the front against the spring pin and lower it towards the back of stage carrier (3-52/2), and then release it. • Retighten screw cap (3-52/3). Centering the stage... -
Page 69: Removing And Attaching Additional Sleeves
START-UP Axio Imager Changing the mechanical stage Carl Zeiss 3.33.4 Removing and attaching additional sleeves The two drive knobs are fitted with additional sleeves, providing an even finer setting of the specimen position. They can be removed if faster specimen movement is more important. -
Page 70: Changing The Specimen Holder
START-UP Carl Zeiss Rotary stage Pol Axio Imager 3.33.6 Changing the specimen holder • Loosen two knurled screws (3-55/2). • Remove specimen holder (3-55/1) from the mechanical stage (3-55/3) to the front. • Attach the desired specimen holder (3-55/4) to... -
Page 71: Centering Rotary Stage Pol
START-UP Axio Imager Rotary stage Pol Carl Zeiss 3.34.3 Centering rotary stage Pol With high-power objectives, stage centricity can be exact only for one selected objective. The centricity will be exact for all objectives, if an objective nosepiece Pol is used. -
Page 72: Centering Objectives
Carl Zeiss Rotary stage Pol Axio Imager 3.34.4 Centering objectives The 6-position objective nosepiece Pol of the Axio Imager is equipped with five centering objective mounts (without DIC slot) and one objective mount with DIC slot (non-centering). This mount centered relative stage. -
Page 73: Installing Polarizer D, Fixed
START-UP Axio Imager Installing Polarizer D, fixed Carl Zeiss 3.35 Installing Polarizer D, fixed If the stand is provided with a detachable stage carrier, remove it (see Section 3.13), put it aside upside down and install the polarizer from top. -
Page 74: Operation
OPERATION Carl Zeiss Coded Axio Imager operation and function controls Axio Imager OPERATION Coded Axio Imager operation and function controls Fig. 4-1 Axio Imager operation and function controls (manual version) 430000-7344-001 M70-2-0020 e 06/2009... - Page 75 OPERATION Axio Imager Coded Axio Imager operation and function controls Carl Zeiss Legend to Fig. 4-1: Eyepieces Binocular tube Slot for analyzer slider (usable only, if camera path deflection, left, has not been installed) Push-pull rod for camera path deflection, left, with interface 60N...
- Page 76 OPERATION Carl Zeiss Coded Axio Imager operation and function controls Axio Imager Eyepieces (4-1/1) − All "Br. foc" eyepiece types are fitted with a control for the compensation of ametropia of the user's eyes (see Section 3.4). Besides, they permit eyepiece reticles to be mounted (see Section 2.7).
- Page 77 OPERATION Axio Imager Coded Axio Imager operation and function controls Carl Zeiss − The positions of the two filter wheels are labeled accordingly and set by turning the knurled wheels. The filters can be combined in any way. Slot for FL attenuator, discrete (4-1/9) −...
- Page 78 OPERATION Carl Zeiss Coded Axio Imager operation and function controls Axio Imager Control wheel for luminous-field diaphragm (4-1/17) − Control wheel for continuous adjustment of the luminous-field diaphragm (transmitted light) Focusing drive – Fine focusing control (4-1/18), right-hand side − Control for fine focusing −...
- Page 79 OPERATION Axio Imager Coded Axio Imager operation and function controls Carl Zeiss Condenser (4-1/25) Dependent on the model, the achromatic-aplanatic universal condenser (4-4/1) is equipped with: − Swivel-type front lens − Turret disk for: Brightfield - H Darkfield - D...
- Page 80 OPERATION Carl Zeiss Coded Axio Imager operation and function controls Axio Imager Intensity button (4-1/34) − Reduces the light intensity of halogen illuminator HAL. Intensity button (4-1/35) − Increases the light intensity of halogen illuminator HAL. Toggle switch for transmitted/reflected-light halogen illuminator (4-1/36) −...
- Page 81 OPERATION Axio Imager Coded Axio Imager operation and function controls Carl Zeiss M70-2-0020 e 06/2009 430000-7344-001...
-
Page 82: Axio Imager Operation And Function Controls (Motorized Version)
Axio Imager operation and function controls (motorized version) In this section, those operation and function controls of the motorized version of the Axio Imager are described that are different from the manual version. Controls not described here correspond to the manual version. - Page 83 OPERATION Axio Imager Axio Imager operation and function controls (motorized version) Carl Zeiss Fig. 4-5 Axio Imager operation and function controls (motorized version) M70-2-0020 e 06/2009 430000-7344-001...
- Page 84 OPERATION Carl Zeiss Axio Imager operation and function controls (motorized version) Axio Imager Binocular phototube with motorized eyepiece shutter (4-5/1) − In addition to the manually operated beam splitter, the binocular phototube with motorized eyepiece shutter 30°/25 (425506-0000-000) is equipped with a motorized eyepiece shutter, which is operated via the button on the right side (alternately on/off) or via the TFT display.
- Page 85 OPERATION Axio Imager Axio Imager operation and function controls (motorized version) Carl Zeiss FL attenuator discrete mot. for reflected light (4-5/5) − The FL attenuator discrete should be used to attenuate the fluorescence path when using the HBO 100. − Before inserting the FL attenuuator, first activate the click-stop mechanism (4-7/1) by pushing in.
-
Page 86: Switching Microscope And Hal 100 Illuminator On/Off
OPERATION Carl Zeiss Switching microscope and HAL 100 illuminator on/off Axio Imager Button for quick-action stage lifting to OPERATING POSITION (4-5/15 or 21) − On activation of this button, the stage will be moved into the focus position saved last. -
Page 87: Switching The Hbo 100 On/Off
(2TV tube mot.) The 2TV tube mot. (4-11) is available for all Axio Imager stands of type .M2 / .M2m and .Z2 / .Z2m. Like all other binocular tubes this tube is to be mounted to the coupler plate and connected to the stand via the CAN bus. - Page 88 OPERATION Carl Zeiss Binocular phototube 30 /25 mot. with two camera ports (2TV tube mot.) Axio Imager You can set the light path and the eyepiece shutter via the buttons of the control panel (4-11/4, 4-13/1) on the right side of the tube.
-
Page 89: Mechanical Stage 75X50 Mot. Can
OPERATION Axio Imager Mechanical Stage 75x50 mot. CAN Carl Zeiss Mechanical Stage 75x50 mot. CAN 4.6.1 Assembling Mechanical Stage 75x50 mot. CAN − While assembling the stage, take care that you do not disconnect any existing cable connections from the stage motors. -
Page 90: Connecting Mechanical Stage 75X50 Mot. Can
OPERATION Carl Zeiss Mechanical Stage 75x50 mot. CAN Axio Imager 4.6.2 Connecting Mechanical Stage 75x50 mot. CAN The connector panel of the Mechanical Stage 75x50 mot. CAN (Version 2 and mot. standard) is located on the left-hand side. • Using the CAN bus cable, connect the CAN connector of the mechanical stage (4-16/2) with the CAN connector on the stand (back panel). -
Page 91: Docking Station
OPERATION Axio Imager Mechanical Stage 75x50 mot. CAN Carl Zeiss The CAN / USB converter may only be operated with the power supply unit provided by the manufacturer. The plug-type power supply is a protection class II device (totally insulated). If its housing is damaged, the power supply unit needs to be put out of operation. -
Page 92: Functions Of The Light Manager
OPERATION Carl Zeiss Functions of the Light Manager Axio Imager Functions of the Light Manager It is the function of the Light Manager to temporarily create optimum illumination settings for the various contrast methods and magnifications used and to make these settings reproducible to the user by providing the possibility to store them permanently. -
Page 93: Light Manager Mode: Off
OPERATION Axio Imager Functions of the Light Manager Carl Zeiss 4.7.1 Light Manager Mode: OFF If the Light Manager is (temporarily) switched off, the microscope behaves like a classical light microscope. Strating from a selected magnification and a corresponding lamp voltage, the operator must readjust the latter manually to get a comparable impression of image brightness when setting higher or lower magnifications. -
Page 94: Light Manager Mode: Smart
OPERATION Carl Zeiss Functions of the Light Manager Axio Imager 4.7.3 Light Manager Mode: SMART In SMART mode, the Light Manager automatically calculates the optimum brightness for a specific contrast method for all objectives specified via the TFT display (or the MTB 2004). -
Page 95: Light Manager Of The Coded Microscope
If a motorized neutral-density double filter wheel has been configured in reflected light, it will be set to 100% transmission and is thus inactive. On the manual stands Axio Imager.A2, .A2m, .D2, .D2m, the Light Manager can be deactivated temporarily. To this end, you must keep the RL reflected-light shutter on/off button (4-1/11) depressed while switching on the microscope. -
Page 96: Light Manager Of Motorized Microscope
4.7.6 Light Manager of motorized microscope The Light Manager of the motorized microscope (Axio Imager.M2, .M2m, .Z2, .Z2m) controls the light intensity for the observation of specimens in such a way that for all adjusted magnifications the operator gets the same impression of image brightness. The operating mode of the Light Manager can be selected via the Settings menu on the TFT screen (OFF, CLASSIC, SMART). -
Page 97: Operating The Motorized Microscope Via The Touchscreen Of The Tft Display
Operating the motorized microscope via the touchscreen of the TFT display 4.8.1 Screen layout On the motorized Axio Imager, the operator can operate and configure the microscope, set it up for different users and use optional functions via the TFT display. The TFT display is designed as touch- sensitive screen. - Page 98 OPERATION Carl Zeiss Operating the motorized microscope via the touchscreen of the TFT display Axio Imager 4.8.1.3 Control area Tabs The control area is where the actual operation of controllable components takes place. The control area is subdivided into further subareas (see Fig.
- Page 99 OPERATION Axio Imager Operating the motorized microscope via the touchscreen of the TFT display Carl Zeiss At the bottom edge of the control area, a bar is arranged containing buttons for selecting the contrast method. The Contrast Manager is controlled via the following page: Microscope –> Revolver –>...
-
Page 100: Menu Structure
(without administrator login, the user has reading privileges only). In the second Axio Imager product generation, the stand type (BioMed or Material) does no longer have to be preselected in the user interface! Fig. -
Page 101: Home Page
OPERATION Axio Imager Operating the motorized microscope via the touchscreen of the TFT display Carl Zeiss 4.8.3 Home page After switch on, the microscope is initialized. This process takes a few seconds. The Home page (Fig. 4-23) appears when the instrument is first started up. - Page 102 OPERATION Carl Zeiss Operating the motorized microscope via the touchscreen of the TFT display Axio Imager − Load Position button: When this button is pressed, the stage travels to the load position. The load position lies approximately 10 mm below the operating position.
- Page 103 OPERATION Axio Imager Operating the motorized microscope via the touchscreen of the TFT display Carl Zeiss When the focusing drive is used in a regular way, a pop-up window (Fig. 4-28) will appear as soon as the upper or lower limit stop is reached.
-
Page 104: Favorites Page
OPERATION Carl Zeiss Operating the motorized microscope via the touchscreen of the TFT display Axio Imager 4.8.4 Favorites page In order to streamline the operation of the microscope, a frequently used page can be defined as a favorites page. When it is selected, the system will jump directly to this page. - Page 105 In this context, reflected-light fluorescence counts as a reflected-light method. For this reason, the second-generation Axio Imager does not come with an FL button. If motorized components are installed, the corresponding contrast is set at the touch of the button.
- Page 106 OPERATION Carl Zeiss Operating the motorized microscope via the touchscreen of the TFT display Axio Imager Reflector tab Depending on the reflector turret installed, 6 or 10 control elements for reflector positions 1 to 6 or 1 to 10 will appear. The reflector modules already configured are recognizable by the text showing on the button.
- Page 107 OPERATION Axio Imager Operating the motorized microscope via the touchscreen of the TFT display Carl Zeiss C-DIC/TIC tab On this page, the desired method can be selected by pressing the relevant button, provided the objective configured and the analyzer installed in the reflector turret are suited for this method.
- Page 108 OPERATION Carl Zeiss Operating the motorized microscope via the touchscreen of the TFT display Axio Imager • Before you can save a fixed position, you need to set the desired Azimuth and Shift values. • Press Save position. A pop-up window (Fig. 4-37) with the four position buttons will open.
- Page 109 OPERATION Axio Imager Operating the motorized microscope via the touchscreen of the TFT display Carl Zeiss 4.8.5.2 Light page Light path and intensity control functionalities are consolidated on the Light page. As many as four tabs are available here, depending on the configuration of the microscope: −...
- Page 110 OPERATION Carl Zeiss Operating the motorized microscope via the touchscreen of the TFT display Axio Imager The light path can be controlled by pressing the buttons. Various options are available, depending on the type of component. In Fig. 4-42, you can see how the first light path switch in the 2TV tube is controlled, while Fig.
- Page 111 OPERATION Axio Imager Operating the motorized microscope via the touchscreen of the TFT display Carl Zeiss Eyepiece Top Port Back Port − 2TV tube (Top Port/Back Port) and motorized camera path deflection at Side Port are installed. Bino- − Three mirrors (deflection plane, eyepieces, Top Port/Back...
- Page 112 OPERATION Carl Zeiss Operating the motorized microscope via the touchscreen of the TFT display Axio Imager Eyepiece Top Port − Tube with Bino Shutter (eyepiece shutter) installed. Bino- Shutter − Mirror for deflection to eyepieces is unknown. − Light path for Top Port is unknown.
- Page 113 OPERATION Axio Imager Operating the motorized microscope via the touchscreen of the TFT display Carl Zeiss Working with two power supplies and two illuminators: Second-generation Axio Imagers can be equipped with an additional external CAN bus enabled power supply. When such a device is detected during the switch-on operation, it will be automatically initialized.
- Page 114 OPERATION Carl Zeiss Operating the motorized microscope via the touchscreen of the TFT display Axio Imager F/A RL tab The luminous-field diaphragm diameter and the aperture diaphragm for the reflected-light path can be set here. This function will be available only if a motorized field diaphragm or aperture diaphragm is installed.
- Page 115 OPERATION Axio Imager Operating the motorized microscope via the touchscreen of the TFT display Carl Zeiss 4.8.5.3 Automatic operation page This menu items contains two tabs: − Soft Keys and − HW Settings Soft Keys tab On this page, ten functions or courses of action...
- Page 116 OPERATION Carl Zeiss Operating the motorized microscope via the touchscreen of the TFT display Axio Imager 4.8.5.4 XYZ page The Microscope/XYZ page contains two tabs: Position and Measure. The availability of the XYZ page depends on the microscope stage used: −...
- Page 117 OPERATION Axio Imager Operating the motorized microscope via the touchscreen of the TFT display Carl Zeiss For XY and Z, the two pairs of Set to Zero buttons function as follows: Manual zero setting, i.e. the current position is defined as zero point and the display set to zero.
- Page 118 OPERATION Carl Zeiss Operating the motorized microscope via the touchscreen of the TFT display Axio Imager Measure tab This tab will be accessible only if you use a motorized (CAN bus) stage. Otherwise, the Start button and a display for the Z-distance ΔZ are displayed on the Position tab.
-
Page 119: Settings Page
OPERATION Axio Imager Operating the motorized microscope via the touchscreen of the TFT display Carl Zeiss 4.8.6 Settings page The Settings page is accessible from the Home page by pressing the Settings button on the navigation button bar. In diesem Teil der Software wird das motorische Stativ konfiguriert. Einige Angaben sind für die automatischen Funktionen Lichtmanager und Kontrastmanager unbedingt erforderlich. - Page 120 OPERATION Carl Zeiss Operating the motorized microscope via the touchscreen of the TFT display Axio Imager In the Configure Objective # popup window, you can choose among various options: − Empty position button Deletes the existing objective configuration at the position currently selected. Acknowledge the safety query with Yes.
- Page 121 Fig. 4-59 Allocating the DIC slider Via Cat. No. button − The user must enter the Zeiss reference number (XXXXXX-XXXX-XXX) to select an objective. To execute the configuration procedure, press the Save button. To abort the procedure, press the Cancel button.
- Page 122 OPERATION Carl Zeiss Operating the motorized microscope via the touchscreen of the TFT display Axio Imager Reflector tab With the controls on this tab, you can configure the reflector turret. The tab shows up to ten buttons dependent on the...
- Page 123 OPERATION Axio Imager Operating the motorized microscope via the touchscreen of the TFT display Carl Zeiss Instead of fluorescence filter sets, just dyes may be selected. If this is the case, the user would choose the relevant dye from the subselection options listed.
- Page 124 OPERATION Carl Zeiss Operating the motorized microscope via the touchscreen of the TFT display Axio Imager • If a lamp-switching mirror is employed in the reflected-light path, the Lamp port to be used needs to be allocated to that mirror in the last configuration step.
- Page 125 After all objectives were focused, press the End button. If no TFT is installed (Axio Imager M2p), parfocality may also be adjusted manually. For this to be possible, the objective must have been successfully configured with the aid of the MTB 2004 configuration program.
- Page 126 Axio Imager Closed Loop To monitor the stability of the focusing drive, a focus linear sensor can be used for the Axio Imager.Z2 / m. If available, this sensor can be switched on and off here. Fig. 4-69 Closed Loop...
- Page 127 OPERATION Axio Imager Operating the motorized microscope via the touchscreen of the TFT display Carl Zeiss Stage tab If a motorized microscope stage (equipped with a CAN bus controller) is used, this tab will be displayed. Once an objective has been configured, the stage is assigned a defined travel speed for the objective position concerned.
- Page 128 OPERATION Carl Zeiss Operating the motorized microscope via the touchscreen of the TFT display Axio Imager Adapter Up to three buttons are displayed here dependent on the equipment of the camera path deflection and the tube used. The status of the ports is detected by the system during initialization (and on activation of the Settings/Components page).
- Page 129 OPERATION Axio Imager Operating the motorized microscope via the touchscreen of the TFT display Carl Zeiss Miscellaneous tab Under this tab, the user can configure other optional components of transmitted-light and reflected-light illumination. − TL illumination RL illumination − −...
- Page 130 OPERATION Carl Zeiss Operating the motorized microscope via the touchscreen of the TFT display Axio Imager RL-illumination The light source to be employed in reflected light must be indicated here. If a switching mirror for two illuminators is used, this mirror will appear in this configuration menu following successful initialization.
- Page 131 OPERATION Axio Imager Operating the motorized microscope via the touchscreen of the TFT display Carl Zeiss Motorized DIC turret Modulator turret allocation for transmitted-light DIC. This is where the user selects the appropriate DIC prisms for turret positions 2, 3 and 4.
- Page 132 Operating the motorized microscope via the touchscreen of the TFT display Axio Imager With the second-generation Axio Imager, it is possible to configure a number of positions for the motorized condenser. This is done, however, within the MTB 2004 configuration program, with the configuration written directly into the condenser.
- Page 133 OPERATION Axio Imager Operating the motorized microscope via the touchscreen of the TFT display Carl Zeiss 4.8.6.2 Extras page From the Extras page, you can get to the Light manager, Contrast manager, Oil stop, Dazzle protection, Ethernet and Miscellaneous tabs.
- Page 134 Microscope -> Settings -> Extras -> Dazzle Protect(ion) Ethernet On this tab, you can choose settings for the connection of the Axio Imager via Ethernet. For a manually entered IP address to be accepted, acknowledgment with OK is required. Fig. 4-89 Microscope ->...
- Page 135 OPERATION Axio Imager Operating the motorized microscope via the touchscreen of the TFT display Carl Zeiss Miscellaneous This tab allows you to calibrate the TFT display. Fig. 4-90 Microscope -> Settings -> Extras -> Misc(ellaneous) 4.8.6.3 Info page Settings-Info page...
-
Page 136: User Page
OPERATION Carl Zeiss Operating the motorized microscope via the touchscreen of the TFT display Axio Imager 4.8.7 User page From this page, the user can access three other pages: − User selection − User configuration − Admin 4.8.7.1 User selection page The User selection page contains a tab which Fig. - Page 137 OPERATION Axio Imager Operating the motorized microscope via the touchscreen of the TFT display Carl Zeiss 4.8.7.2 User configuration page On this page, user-defined configurations can be created and saved. This page is protected by password. Upon entry user password, configuration for the user chosen on the User selection page can be adapted.
- Page 138 OPERATION Carl Zeiss Operating the motorized microscope via the touchscreen of the TFT display Axio Imager Each setting can be given an individual name. • Press the Rename button. • Enter the name and acknowledge by pressing the ENTER button on the keyboard.
- Page 139 OPERATION Axio Imager Operating the motorized microscope via the touchscreen of the TFT display Carl Zeiss Left buttons tab On this tab, the control buttons on the left-hand side of the stand can be assigned. • Click on the Top left button pair.
- Page 140 OPERATION Carl Zeiss Operating the motorized microscope via the touchscreen of the TFT display Axio Imager Top right tab On this tab, the control buttons on the right-hand side of the stand can be assigned. • Click on the Top right button pair.
- Page 141 OPERATION Axio Imager Operating the motorized microscope via the touchscreen of the TFT display Carl Zeiss Favorites page tab • On this page, the user can define one of the tabs listed as a target to be jumped to directly.
- Page 142 OPERATION Carl Zeiss Operating the motorized microscope via the touchscreen of the TFT display Axio Imager Active illumination after switch-on (light path) Here, the user can select the light path which is to be active when the microscope is switched on.
- Page 143 OPERATION Axio Imager Operating the motorized microscope via the touchscreen of the TFT display Carl Zeiss User administration tab On this tab, the administrator can create, administer and preconfigure users. Upon pressing the User # button, a pop-up menu appears, which offers the following functions: User activation / deactivation −...
-
Page 144: Display Page
OPERATION Carl Zeiss Operating the motorized microscope via the touchscreen of the TFT display Axio Imager 4.8.8 Display page Using the ◄► buttons on the Display page, the user can adjust the brightness of the TFT display and of the light control LEDs.. -
Page 145: Illumination And Contrast Methods
KÖHLER illumination principle. These fundamental rules of microscope adjustment are described in detail below in Section 4.9.1 (3) "Transmitted-light brightfield according to KÖHLER" for the Axio Imager. Instrument configuration −... - Page 146 Illumination and contrast methods Axio Imager Fig. 4-114 Microscope settings on Axio Imager for transmitted-light brightfield • Use both centering screws (4-114/6 or 4-115/1) on the condenser carrier to center the luminous-field diaphragm image (4-114/C). Then, open the diaphragm until its edge just disappears from the field of view (4-114/D).
- Page 147 OPERATION Axio Imager Illumination and contrast methods Carl Zeiss Specimen field size and objective aperture change after every objective change as possibly does the centering slightly. Therefore, repeat the adjustment of luminous-field diaphragm and aperture diaphragm to obtain optimum results.
-
Page 148: Setting Transmitted-Light Darkfield
OPERATION Carl Zeiss Illumination and contrast methods Axio Imager 4.9.2 Setting transmitted-light darkfield General principle Due to their transparency, unstained biological specimens, such as bacteria or living cell cultures, are often barely or not at all visible in transmitted-light bright field. This changes markedly if such specimens are viewed in transmitted-light dark field, where the specimen is illuminated using an aperture that is larger than that of the objective used. - Page 149 OPERATION Axio Imager Illumination and contrast methods Carl Zeiss • Reinsert the eyepiece in the tube. • If the height of the dark-field condenser is set correctly and sensitively, it is possible to reduce any brightening in the field of view left, and the luminous-field diaphragm image appears almost perfectly in focus.
- Page 150 OPERATION Carl Zeiss Illumination and contrast methods Axio Imager Use of the achromatic-aplanatic universal condenser 0.9 H/0.8-0.9 DF The achromatic-aplanatic universal condenser 0.9 H/0.8-0.9 DF (4-117/1) is equipped with a front lens each for brightfield (4-117/3) and for darkfield (4-117/2), as well as with an aperture diaphragm (4-117/6).
-
Page 151: Setting Transmitted-Light Phase Contrast
OPERATION Axio Imager Illumination and contrast methods Carl Zeiss 4.9.3 Setting transmitted-light phase contrast General principle The phase contrast technique is ideal for examining thin, unstained specimens, e.g. culture cells. The human eye is unable to see phase differences (differences in refractive index and thickness) between the different cell components. - Page 152 OPERATION Carl Zeiss Illumination and contrast methods Axio Imager • If congruence is not perfect (4-119/A), use the two SW 1.5 screwdrivers (4-118/1 and 4) for turning the two centering screws (4-118/2 and 3) to recenter the bright phase stop until complete congruence with the dark phase ring is achieved (4-119/B).
-
Page 153: Setting Transmitted-Light Differential Interference Contrast (Dic)
− Condenser with turret disk containing DIC prisms (DIC I, DIC II, DIC III) − Analyzer module D DIC P&C (424921-0000-000) in reflector turret. Only this module may be used on the Axio Imager as it provides a homogeneous field of view in combination with the special condenser modules I, II and III. - Page 154 OPERATION Carl Zeiss Illumination and contrast methods Axio Imager The DIC method employs polarized light and therefore is disturbed by birefringent objects, such as films, in the light path between polarizer and analyzer, as are occasionally used in conjunction with histological sections. The same applies to acrylic glass culture chambers, if the chamber bottom is made of plastic.
- Page 155 OPERATION Axio Imager Illumination and contrast methods Carl Zeiss Adjusting the transmitted-light DIC with motorized four-position modulator turret for transmitted light • On the nosepiece, swivel in the objective suitable for DIC. • On the reflector turret, swivel in analyzer module DIC ACR shiftfree for transmitted light.
-
Page 156: Setting Transmitted-Light Polarization For Orthoscopic Observation
OPERATION Carl Zeiss Illumination and contrast methods Axio Imager 4.9.5 Setting transmitted-light polarization for orthoscopic observation Magnified viewing, e.g. of a thin section, in polarized light is called orthoscopy (Greek: orthos = straight; skopein = seeing), because illumination is by "straight" light rays, which – with the aperture diaphragm largely closed –... - Page 157 Push the analyzer slider (4-122/1) into the respective slot or swivel in the analyzer module (4-122/4) on the reflector turret. The field of view appears dark due to the polarizers being crossed. If you work with the analyzer slider on the Axio Imager, swivel the reflector turret to a blank turret position.
- Page 158 OPERATION Carl Zeiss Illumination and contrast methods Axio Imager Setting the microscope The microscope has been prepared as described in Section 4.9.5.1 (3). • Rotate the rotary stage Pol with the specimen, e.g. a synthetic fiber, until the specimen appears as dark as possible.
- Page 159 OPERATION Axio Imager Illumination and contrast methods Carl Zeiss Conclusions The grayish-white color appearing first in the bright position in the above example (4-123/1 corresponds to a path difference of 150 nm according to the Michel-Lévy color chart (Fig. 4-124).
- Page 160 OPERATION Carl Zeiss Illumination and contrast methods Axio Imager 4.9.5.3 Measuring path differences For the accurate measurement of path differences, measuring compensators are required. These compensators reset or compensate the path difference produced by the specimen to zero (1 order black).
- Page 161 OPERATION Axio Imager Illumination and contrast methods Carl Zeiss − After insertion of the compensator λ and rotation of the specimen by 90° (2 click stops), the interference color remains to be white, in this case, however, it is a "higher-order white" and thus the path difference is >...
- Page 162 OPERATION Carl Zeiss Illumination and contrast methods Axio Imager 4.9.5.4 Transmitted-light circular polarization contrast Unlike standard polarization contrast, circular polarization contrast does not show any dark (extinction) positions that depend on the angle of rotation (azimuth) of the specimen relative to polarizer or analyzer.
- Page 163 OPERATION Axio Imager Illumination and contrast methods Carl Zeiss Fig. 4-125 Components for circular polarization contrast • Do not view an (anisotropic) specimen unless the above adjustment has been done. • Place the specimen to be examined onto the stage.
-
Page 164: Setting Transmitted-Light Polarization For Conoscopic Observation - Determining The Optical Character Of Crystals
− Achromatic-aplanatic universal condenser 0.9 H − Rotary stage Pol − Polarizer D (rotatable or fixed) Analyzer slider or analyzer module D in reflector turret − The phototube Pol can be installed on all Axio Imager stand types. 430000-7344-001 M70-2-0020 e 06/2009... - Page 165 (4-126/2) on the right side to move the reticle into the light path. • Move a selected crystal to the center of the Fig. 4-126 Axio Imager mit montiertem reticle. Fototubus Pol • Swivel in the 40x, 50x or 100x objective and, if necessary, refocus the specimen using the focusing drive.
- Page 166 OPERATION Carl Zeiss Illumination and contrast methods Axio Imager • Push the Bertrand lens slider into the light path. Focus the axial figure by means of the lever of the slider, on the tube lens turret, swivel the position with the Bertrand lens into the light path, and focus the axial image by turning the focusing wheel.
-
Page 167: Setting Reflected-Light Brightfield
Instrument equipment − Axio Imager MAT with connected and adjusted HAL 100 halogen illuminator. − H P&C reflector module in reflector turret, 6x20 compensator mount with darkfield stop for reflected light (424706-0000-000) or 4-position modulator turret. - Page 168 OPERATION Carl Zeiss Illumination and contrast methods Axio Imager Setting reflected-light brightfield according to KÖHLER − The microscope has been started properly as described in Section 3. − The microscope has been switched on. • Switch on the halogen lamp for reflected light using the reflected-light/transmitted-light toggle switch (4-1/36) on the microscope stand.
- Page 169 OPERATION Axio Imager Illumination and contrast methods Carl Zeiss Fig. 4-128 Microscope settings on Axio Imager MAT in reflected-light brightfield M70-2-0020 e 06/2009 430000-7344-001...
-
Page 170: Setting Reflected-Light Darkfield
Instrument equipment − Axio Imager MAT with connected and adjusted HAL 100 halogen illuminator. − Epiplan-Neofluar, EC Epiplan-Neofluar, Epiplan objectives additionally labeled with "HD". − Reflector module DF P&C, 6x20 compensator mount with darkfield stop for reflected light (424706-... -
Page 171: Setting Reflected-Light Dic And Reflected-Light C-Dic
Instrument equipment − Axio Imager MAT with connected and adjusted HAL 100 halogen illuminator. − Rotary mechanical stage 75x50/240° − EC Epiplan-Neofluar, Epiplan objectives additionally labeled with "DIC" or "Pol". - Page 172 OPERATION Carl Zeiss Illumination and contrast methods Axio Imager • Place the specimen on the stage, focus on it and rotate the control wheel (4-1291) on the C-DIC slider 6x20 or the modulator turret (4-130/1) until the specimen detail of interest is visible at maximum contrast.
-
Page 173: Setting Reflected-Light Tic
The reflected-light TIC technique (microinterferometry; TIC = Total Interference Contrast in circularly polarized light) can be used to image and measure object structures available in different azimuths. Instrument equipment − Axio Imager MAT with connected and adjusted HAL 100 halogen illuminator. − EC... - Page 174 OPERATION Carl Zeiss Illumination and contrast methods Axio Imager The values for a and b (see Fig. 4-133) are determined using the eyepiece reticle or the micrometer eyepiece. If you are working with white light (without interference filter), λ = 550 nm must be used.
- Page 175 OPERATION Axio Imager Illumination and contrast methods Carl Zeiss Caution: • If the step and the environment are of different materials, the phase jumps inherent to the material must be taken into account. Whilst the phase jump for all non-conductors is 180° and for semiconductors only deviates slightly from 180°, i.e.
-
Page 176: Setting Epi-Fluorescence
OPERATION Carl Zeiss Illumination and contrast methods Axio Imager 4.9.11 Setting epi-fluorescence CAUTION To reduce the transmission, use an FL attenuator, discrete (423616-0000-000 or 423617- 0000-000). The gray filters mounted in the 2-position filter wheels (428300-0000-000 or 428301-0000-000) are not permanently stable. - Page 177 Fig. 4-134 Components for epi-fluorescence risk of specimen bleaching, close it so far that it on Axio Imager is visible in the field of view. • Finally, refocus on the specimen and optimize the position of the HBO 100 collector as described in Section 3.31.3.
-
Page 178: Setting Reflected-Light Polarization - Detection Of Bireflection And Reflection Pleochroism
OPERATION Carl Zeiss Illumination and contrast methods Axio Imager 4.9.12 Setting reflected-light polarization – Detection of bireflection and reflection pleochroism Incident-light polarization presents another contrasting option for polished sections of ore minerals, coals, ceramic products, certain metals and metal alloys, as these specimens often show a varied reflection behavior in linearly polarized light depending on the orientation of the crystals and specimen features. - Page 179 OPERATION Axio Imager Illumination and contrast methods Carl Zeiss If the microscope is equipped with the phototube Pol, the following settings are required for this contrast method: – The Bertrand lens must be inactive (rear push-pull rod (4-135/6) on right side pulled out).
-
Page 180: Care, Maintenance, Troubleshooting And Service
Instrument care Axio Imager CARE, MAINTENANCE, TROUBLESHOOTING AND SERVICE Instrument care Care of the Axio Imager is restricted to the following operations: • Eliminate contaminations on the instrument according to the rules for prevention of accidents. • Switch off the instrument each time after use and place the instrument cover on it to protect it from dust and humidity. -
Page 181: Instrument Maintenance
On the manual Axio Imager model, the fuse compartment is on the back of the microscope and contains two T 5.0 A/H / 250 V, 5x20 mm fuses. -
Page 182: Changing Fuses On The Vp232-2 Can Power Supply
CARE, MAINTENANCE, TROUBLESHOOTING AND SERVICE Carl Zeiss Instrument maintenance Axio Imager 5.2.3 Changing fuses on the VP232-2 CAN power supply Be sure to pull the power plug before changing fuses. Should any fuse fail, the cause of such failure must... -
Page 183: Troubleshooting
® Use of no or non-specified Use immersion oil 518 F from immersion oil with immersion Carl Zeiss; see p. 186. objectives. Air bubbles in the immersion oil. Remove the bubbles by applying new oil. M70-2-0020 e 06/2009... - Page 184 CARE, MAINTENANCE, TROUBLESHOOTING AND SERVICE Carl Zeiss Troubleshooting Axio Imager Problem Cause Remedy Low resolving power and poor Immersion oil on the front lens of Clean the front lens of the dry image contrast. a dry objective. objective; see p. 180.
- Page 185 CARE, MAINTENANCE, TROUBLESHOOTING AND SERVICE Axio Imager Troubleshooting Carl Zeiss Problem Cause Remedy Dirt or dust in the field of view. The condenser has not been Focus the condenser and swivel focused correctly and front lens front lens 0.9 correctly in or out;...
-
Page 186: Spares, Consumables And Tools
CARE, MAINTENANCE, TROUBLESHOOTING AND SERVICE Carl Zeiss Spares, consumables and tools Axio Imager Spares, consumables and tools Designation Cat. No. Application 12V 100W halogen lamp 380079-9540-000 For HAL 100 illuminator HBO 103 W/2 mercury vapor short-arc 380301-9350-000 For HBO 100 illuminator lamp SW 1.5 ball-headed screwdriver *... -
Page 187: Requesting Service
Requesting service All repairs of mechanical, optical or electronic components inside the instrument and of the electrical components of the Axio Imager microscopes may only be performed by Carl Zeiss service staff or specially authorized personnel. To ensure optimum setting and trouble-free function of your microscope over a longer period of time, we recommend that you enter into a service/maintenance agreement with Carl Zeiss. -
Page 188: Appendix
APPENDIX Carl Zeiss List of abbreviations Axio Imager APPENDIX List of abbreviations Alternating Current Automatic Component Recognition Suitable for eyeglass wearers cod. Coded Canadian Standards Association Cover slip thickness D / DF Darkfield Diameter (e.g. of filters) Differential Interference Contrast Deutsches Institut für Normung (German Standards Institute) - Page 189 APPENDIX Axio Imager List of abbreviations Carl Zeiss Wrench size across flats Slow-blow (fuse type) Transmitted light Television Underwriter Laboratories ultraviolet Verband Deutscher Elektrotechniker (Association of German Electricians) visual Magnification of objective W 0.8" Whitworth-type thread 0.8" W-PL Wide-field eyepiece...
-
Page 190: Index
APPENDIX Carl Zeiss Index Axio Imager Index Page 2TV tube mot............................87 3200 K ..............................77 Adjusting aid ...........................75, 76 Ambient conditions ..........................29 Ametropia .............................35 Analyzer ............................156, 162 Analyzer module ..........................157 Analyzer slider .........................75, 76, 157 Aperture diaphragm ......................79, 146, 177 Attachment lamp VIS-LED........................61... - Page 191 APPENDIX Axio Imager Index Carl Zeiss DIC prisms ............................39, 40 Differential interference contrast......................153 Diffusing glass, reflected-light......................75, 80 Diffusing glass, transmitted-light......................75, 77 Dimensions............................29 Docking station .............................50 Dockingstation ............................91 Ergonomic drive.............................68 Eyecups ..............................35 Eyepiece reticle ............................35 Eyepieces.........................27, 32, 34, 35, 75, 76 Filter set..............................46...
- Page 192 APPENDIX Carl Zeiss Index Axio Imager Light Manager............................92 Light sources ............................30 Line voltage.............................29, 30 LM Set..............................80 LM-Set ............................75, 82 Luminous-field diaphragm ..................75, 78, 82, 145, 177 Maintenance ............................181 Mechanical stage.........................32, 67, 70, 75 Mechanical Stage 75x50 mot. CAN .......................89 Menu structure............................100 Mercury vapor short-arc lamp ......................177...
- Page 193 APPENDIX Axio Imager Index Carl Zeiss Smoothness............................69 Spares ..............................186 Specimen holder..........................32, 70 Stage carrier ........................38, 67, 68, 70, 71 Stage carrier dovetail guide Adjustment range ..........................41 Specimen space expansion .........................42 Stage focusing..........................30, 31 Stage lift, quick-action ........................82, 86 Stage lowering, quick-action......................82, 85 Stage micrometers..........................27...
-
Page 194: Industrial Property Rights
APPENDIX Carl Zeiss Industrial property rights Axio Imager Industrial property rights Instruments, instrument components or methods described in this manual are protected by patents and registered utility models: US6276804 US6392796 US5015082 CH691699 GB2306585 US6123459 DE29821694 430000-7344-001 M70-2-0020 e 06/2009...
Need help?
Do you have a question about the Axio Imager and is the answer not in the manual?
Questions and answers
im having trouble getting Osram 100w halogen bulbs GY6.35 12V could i use a LED equivalent ?
The Zeiss Axio Imager uses the HAL 100 halogen illuminator as a light source for transmitted-light and reflected-light techniques (except fluorescence). The manual does not mention compatibility with LED equivalents for the Osram 100W halogen bulbs (GY6.35 12V). To ensure proper function and avoid damage, it is recommended to use the specified halogen bulb or consult Zeiss for compatible LED alternatives.
This answer is automatically generated