Cassia X1000 Manual
Hide thumbs
Also See for X1000:
- User manual (81 pages) ,
- Installation manual (21 pages) ,
- Quick start manual (17 pages)
Advertisement
Quick Links
platform: Ubuntu 16.04.3 LTS device:
Connect X1000_TKR03FL device to your
Azure IoT services
Table of Contents
Introduction
•
Prerequisites
•
Prepare the Device
•
Connect to Azure IoT Central
•
Integration with Azure IoT Explorer
•
Additional Links
•
Introduction
About this document
This document describes how to connect X1000_TKR03FL to Azure IoT Hub using the Azure IoT Explorer with
certified device application and device models.
IoT Plug and Play certified device simplifies the process of building devices without custom device code. Using
Solution builders can be integrated quickly using the certified IoT Plug and Play enabled device based on Azure
IoT Central as well as third-party solutions.
This getting started guide provides step by step instruction on getting the device provisioned to Azure IoT Hub using
Device Provisioning Service (DPS) and using Azure IoT Explorer to interact with device's capabilities.
X1000_TKR03FL is device combined with Cassia Networks™ X1000 Enterprise Bluetooth Gateway and TKR03FL (IP67
compliant) BLE liquid temperature data logger measurable wirelessly from -40 to 125 degrees C and floatable on liquid
inside a tank. The Cassia Networks X1000 is the most reliable long-range Bluetooth gateway for demanding and outdoor
enterprise Bluetooth IoT applications. It extends Bluetooth's range up to 1000 feet and enables remote control of 22
Bluetooth low power devices (and 100's in broadcast mode) without requiring changes to end devices. X1000
enterprise Bluetooth gateway delivers cost-effective connectivity to demanding indoor/outdoor enterprise Bluetooth IoT
environments. It supports Power over Ethernet (PoE) with power received from the uplink Ethernet port. It attaches to a
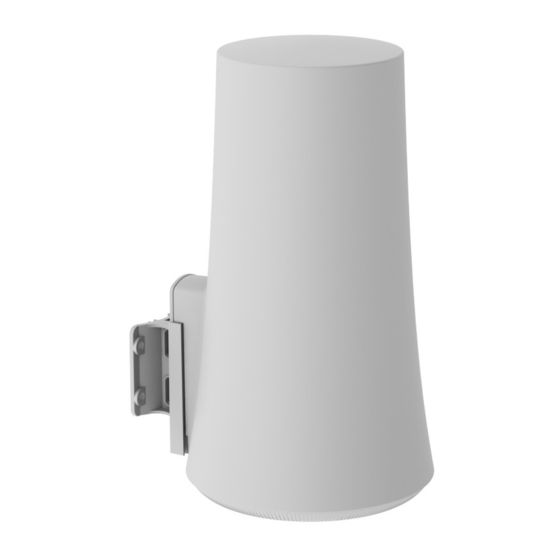
pole or wall with an included mounting kit, or it can be placed on a flat space. The weather-proof, IP65-rated X1000 is
ideal for manufacturing facilities, school and corporate campuses, shipyards and outdoor plant facilities.
By combining the X1000 Cassia Gateway with high signal reception sensitivity and the TKR03FL liquid temperature data
logger with a long battery life (2 years or more), we can provide solutions such as a liquid temperature monitoring for the
brewery. You can use it without worrying about battery replacement even in long-distance usage scenes or in
environments where radio waves are difficult to reach.
X1000_TKR03FL
language: Python
Advertisement

Subscribe to Our Youtube Channel
Related Manuals for Cassia X1000


Summary of Contents for Cassia X1000
- Page 1 It supports Power over Ethernet (PoE) with power received from the uplink Ethernet port. It attaches to a pole or wall with an included mounting kit, or it can be placed on a flat space. The weather-proof, IP65-rated X1000 is ideal for manufacturing facilities, school and corporate campuses, shipyards and outdoor plant facilities.
- Page 2 This section describes how to install application and setup the config file. The Cassia Gateway has web console to manage the application and ssh login capability to edit the configuration file for connecting DPS and register sensor devices mac address. The following...
- Page 3 The Cassia X1000 enterprise Bluetooth router has an IP65-rated enclosure and may be deployed in indoor and outdoor environments. The X1000 can be attached to a pole or wall (a mounting kit is included) or placed on a surface like a desk or counter space.
- Page 4 NOTE: the user can choose Ethernet cable with L connector on one side to avoid the stress when installing the bottom cap. Figure 4: How to connect Power Set up the X1000 Bluetooth Gateway 4.1. Find Gateway’s MAC Address Please find Cassia Gateway’s MAC address on the bottom of the Gateway.
- Page 5 Then, power up your Cassia Gateway, search its WIFI hotspot from your laptop and connect your laptop to the WIFI hotspot. If you can’t find the WIFI hotspot, please press and hold the reset button at the bottom of Cassia Gateway for 10 to 15 seconds while the Gateway is powered on.
- Page 6 Setup using Ethernet Connection If you don’t have a laptop which supports WiFi, please connect the Cassia Bluetooth Gateway to a managed Ethernet switch and access the DHCP table or scan using a port scanning tool to locate the IP address assigned to the Gateway’s MAC ID.
- Page 7 The Cassia Bluetooth Gateway supports Ethernet (Wired), WIFI and Cellular dongles as networking uplink. In this guideline, we use Ethernet as the uplink connection. Below is the configuration with wired and DHCP. Figure 10: Setup network configuration for your Gateway Below is the configuration with wired and static IP.
- Page 8 Figure 12: Configuration of Router Mode on Gateway Console 4.6. How to install Application on Gateway Please prepare for the application and put on your PC directory. Then follow the steps on Gateway console: Container->Install APP “Select File” -> Open -> “Install”. Figure 13: Install application on Gateway At the time of initial installation, it will take time due to environment construction executed.
- Page 9 Provision a device with symmetric keys 5.4. Login SSH Login to Gateway with SSH. example: ssh -g cassia@192.168.0.8 -p 20022 Figure 15: Login ssh 5.5. How to run the application on the gateway The configuration file is in the following location.
- Page 10 After a reboot X1000, the application is automatically launched and starts sending the data collected from sensor to the Azure IoT Hub. To reboot X1000 please login Gateway’s web page and select “Other” tab then “Reboot” button at the bottom of window.
- Page 11 Connect to Azure IoT Central This section is mandatory section. Describe how to connect to Azure IoT Central. To configure a device to connect to Azure IoT Central you need the following. Login to Azure IoT Central and Navigate to the Build page. Please choose Custom apps. Figure 17: choose Custom apps Azure IoT Central automatically suggests an application name based on the application template you’ve selected.
- Page 12 Figure 19: Billing info The application will be created after few seconds. Figure 20: Provisioning your application To add a new device template to your application, select the Device Templates tab in the left pane. On the Select type page, scroll down until you find the X1000_TKR03FL tile from Featured device templates. To add a real device, select +New.
- Page 13 Figure 21: Create a new device Select the device from All devices. Figure 22: All devices Click the Connect button and device connection page will be pupped. Figure 23: device connection Please copy the information the use to connect. Please flash the generated device key and ID scope on the application that run on your device.
- Page 14 Figure 24: device connection information...
- Page 15 Integration with Azure IoT Explorer Set the pre-prepared IoT Hub Connection String in Azure IoT Explorer. Figure 25: Add connection string Add a device. Figure 26: Add a device Set it up as shown in the image below. You can choose any device name. Figure 27: Create new device Note the Connection String.
- Page 16 Figure 28: Note connection string Set the Connection String to X1000 BLE Gateway Please refer to the section 3.5 Edit configuration file and specify the “Connection string” information in the After the setting is completed, restart the BLE Gateway. configuration file.
- Page 17 Figure 30: Monitor telemetry data Additional information Product Page Additional Links Please refer to the below link for additional information for Plug and Play Manage cloud device messaging with Azure-IoT-Explorer Import the Plug and Play model Configure to connect to IoT Hub How to use IoT Explorer to interact with the device...
Need help?
Do you have a question about the X1000 and is the answer not in the manual?
Questions and answers