
Related Manuals for FALMEC Prisma FDPRI36W5SB


Summary of Contents for FALMEC Prisma FDPRI36W5SB
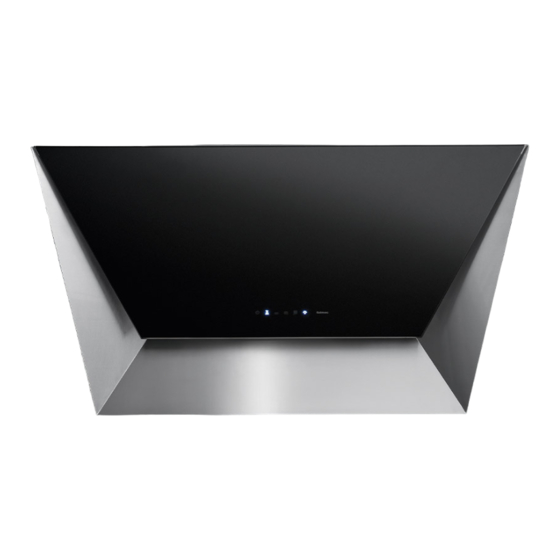
- Page 1 Design Prisma FDPRI36W5SB | FDPRI36W5SW INSTRUCTIONS BOOKLET INSTRUCTIONS BOOKLET MANUAL DE INSTRUCCIONES MODE D'EMPLOI LIBRETTO ISTRUZIONI...
- Page 2 66lb PRISMA 46" Cod.: FDPRI36W5SB 120VAC 60Hz 280W FDPRI36W5SW 30 kg 7 7/8" 200 mm 13 3/4" 13 3/4" 350 mm 440 mm 39 3/8" - 1000 mm 7 1/8" 180 mm 26 7/8" - 683 mm 5 7/8" 150 mm 38 1/4"...
- Page 3 ø 5 7 / 8 " EN- cable length 5,0ft (1,5m) FR- longueur de câble 5,0ft (1,5m) ES- longueur de câble 5,0ft (1,5m) IT- lunghezza cavo 5,0ft (1,5m) ø 5 7 / 8 " 3/8" - 10 mm EN - Alternative rear outlet: the motor protrudes 3/8" (10 mm) from the back of the hood FR - Sortie alternative arrière : le moteur dépasse de l'arrière de la hotte de 3/8"...
- Page 4 EN - Installation with vertical outlet: Measurements for installation (1). Hood fastening (2). FR - Installation avec sortie verticale: Mesures pour l'installation (1). Fixation de la hotte (2). ES - Instalación con salida vertical: Medidas para la instalación (1). Fijación de la campana (2). IT - Installazione con uscita verticale: Misure per l’installazione (1).
- Page 5 EN - Check valve installation (3) and suction pipe assembly (4). FR - Installation du clapet anti-retour (3) et montage du tuyau d'aspiration (4). ES - Instalación de la válvula antirretorno (3) y montaje del tubo de aspiración (4). IT - Installazione valvola di non ritorno (3) e montaggio tubo d’aspirazione (4). ø...
- Page 6 EN - Installation with rear outlet: Measurements for installation (5). Motor repositioning (6). FR - Installation avec une sortie arrière: Mesures pour l'installation (5). Repositionnement du moteur (6). ES - Instalación con salida posterior: Medidas para la instalación (5). Reubicación del motor (6). IT - Installazione con uscita posteriore: Misure per l’installazione (5).
- Page 7 EN - Motor repositioning (7). FR - Repositionnement du moteur (7). ES - Reubicación del motor (7). IT - Riposizionamento motore (7). (x2) (x4) Connettore comandi Panel control connector Cavo alimentazione Power cable...
- Page 8 EN - Check valve installation (8). Hood fastening (9). FR - Installation du clapet anti-retour (8). Fixation de la hotte (9). ES - Instalación de la válvula antirretorno (8). Fijación de la campana (9). IT - Installazione valvola di non ritorno (8). Fissaggio cappa (9). (x2) EN - Mandatory safety screws FR - Vis de sécurité...
- Page 9 EN - Optional chimney FR - Cheminée en option ES - Camino opcional IT - Camino opzionale (x6) Ø1/8" - 6mm (x2) Ø1/8" (x2)
- Page 10 EN - Assembly of factory-fitted filter (14)+(15). FR - Montage du filtre de série (14)+(15). ES - Montaje del filtro de serie (14)+(15). IT - Montaggio filtro di serie (14)+(15). EN - Assembly of foptional filter (16) KACL941 FR - Montage du filtre en option (16) ES - Montaje del filtro opcional (16) IT - Montaggio filtro opzionale (16) (x2)
-
Page 11: Safety Instructions And Warnings
SAFETY INSTRUCTIONS ELECTRICAL SAFETY AND WARNINGS The electrical system to which the hood is to be connected must be in accordance Installation operations are to be carried with local standards and supplied with earthed out by skilled and qualified installers in ac- connection in compliance with safety regulations cordance with the instructions in this booklet and in the country of use. -
Page 12: Intended Use
If the equipment is sold or transferred to another per- Do not prepare food over an open flame under the son, make sure that the booklet is also supplied so hood. Never use the hood without the metal an- that the new user can be made aware of the hood's ti-grease filters: in this case, grease and dirt will depos- operation and relative warnings. -
Page 13: Operation
• fixed equipment not provided with a power supply cable and plug, or any TOUCH PUSHBUTTON PANEL other device that ensures disconnection from the electrical mains, with an opening gap of the contacts that enables total disconnection in overvoltage category III conditions. Said disconnection devices must be provided in the mains power supply in compliance with installation regulations. -
Page 14: Maintenance
MAINTENANCE DISPOSAL AFTER END OF USEFUL LIFE Before cleaning or carrying out maintenance operations, discon- The crossed-out trash or refuse bin symbol on the appliance means that the product is WEEE, i.e. “Waste electrical and electronic equip- nect the equipment by removing the plug or switching off the main switch. -
Page 15: Sécurité Technique
CONSIGNES DE SÉCURITÉ SÉCURITÉ ÉLECTRIQUE ET MISES EN GARDE Le circuit électrique, auquel est reliée la hotte, doit être aux normes et muni d’un Le travail d'installation doit être effectué raccordement à la terre, conformément aux par des installateurs compétents et quali- normes de sécurité... -
Page 16: Destination D'utilisation
Il est très important que ce manuel d'instructions Ne pas utiliser la hotte avec les mains mouillées ou les soit conservé avec l'appareil pour toute consulta- pieds nus. tion future. Contrôler toujours que toutes les parties électriques Si l'appareil devait être vendu ou transféré à une autre (lumières, aspirateur) soient éteintes lorsque l'appa- personne, s'assurer que le manuel soit remis avec ce- reil n'est pas utilisé. - Page 17 BRANCHEMENT ÉLECTRIQUE INSTRUCTIONS DE MONTAGE (partie réservée uniquement à un personnel qualifié) partie réservée uniquement à un personnel qualifié Avant d'effectuer toute opération sur la hotte, débrancher l'appa- La hotte peut être installée selon diverses configurations. reil du réseau électrique. Les phases de montage génériques valent pour toutes les installa- Veiller à...
-
Page 18: Entretien
ENTRETIEN ÉLIMINATION EN FIN DE VIE Avant de procéder à toute opération de nettoyage ou d'entre- Le symbole de la poubelle barrée reporté sur l'appareil en votre pos- tien, désactiver l'appareil en enlevant la fiche ou en agissant sur session indique que le produit est un DEEE, c'est-à-dire un « Déchet l'interrupteur général. -
Page 19: Seguridad Técnica
INSTRUCCIONES DE SEGURIDAD SEGURIDAD ELÉCTRICA Y ADVERTENCIAS La instalación eléctrica a la cual se conecta la campana debe respetar las normas corres- Las operaciones de instalación deben efec- pondientes y tener obligatoriamente una conexión tuarlas instaladores competentes y cualifi- a tierra según las normas de seguridad del país de cados, siguiendo cuanto se indica en este manual uso;... -
Page 20: Destino De Uso
Si el equipo debe venderse o cederse a otra persona, El peso máximo total de los posibles objetos coloca- compruebe que se adjunte el manual, de manera que dos o colgados (cuando esté previsto) en la campana el nuevo usuario pueda estar informado sobre el fun- no debe superar los 1,5 kg. -
Page 21: Mantenimiento
¿CUÁNDO LAVAR O CAMBIAR LOS FILTROS? • la instalación de alimentación disponga de una conexión de tierra eficaz y correcta según las normas vigentes; Los filtros metálicos deben lavarse cada 30 horas de uso. • la toma usada para la conexión sea fácilmente accesible una vez instalada la Los filtros de carbón activo deben sustituirse cada 3-4 meses en función del uso campana. - Page 22 ELIMINACIÓN AL FINAL DE LA VIDA ÚTIL dichas instrucciones. LIMPIEZA DE LAS SUPERFICIES INTERNAS Se prohíbe limpiar las partes eléctricas o las partes del motor si- El símbolo del contenedor tachado que se encuentra en su equipo tuadas dentro de la campana con líquidos o solventes. indica que el producto es un RAEE, es decir, un “Residuo de Aparatos Para las partes metálicas internas, consulte el apartado anterior.
-
Page 23: Istruzioni Di Sicurezzae Avvertenze
ISTRUZIONI DI SICUREZZA Prima di installare la cappa verificare che la tensione di rete corrisponda a quella riportata dalla targhetta E AVVERTENZE posta all’interno della cappa. Il lavoro d’installazione deve essere esegui- La presa usata per il collegamento elettrico deve es- to da installatori competenti e qualificati, sere facilmente raggiungibile con l’apparecchiatura secondo quanto indicato nel presente libretto e... -
Page 24: Installazione
Dopo l’installazione delle cappe in acciaio inox è ne- Non utilizzare mai la cappa senza i filtri metallici anti- cessario eseguire la pulizia della stessa per rimuove- grasso; grasso e sporco in questo caso si depositereb- re i residui di collante del protettivo e le eventuali bero nell'apparecchio compromettendone il funzio- macchie di grasso e oli, che, se non rimosse, possono namento. -
Page 25: Funzionamento
FUNZIONAMENTO In caso di : • apparecchi dotati di cavo senza spina: la spina da utilizzare deve essere di tipo “normalizzato”. Il fili devono essere collegati come segue: giallo-verde per QUANDO ACCENDERE LA CAPPA? la messa a terra, blu per il neutro e il filo marrone per la fase. La spina deve Accendere la cappa almeno un minuto prima di iniziare a cucinare per convo- essere collegata ad un'adeguata presa di sicurezza. -
Page 26: Manutenzione
MANUTENZIONE SMALTIMENTO A FINE VITA Prima di procedere a qualsiasi operazione di pulizia o di manu- Il simbolo del cestino barrato riportato sull’apparecchiatura in suo pos- tenzione, disinserire l’apparecchio togliendo la spina o agendo sesso indica che il prodotto è un RAEE, cioè un “Rifiuto derivante dal- sull’interruttore generale. - Page 27 NOTES...
- Page 28 Falmec S.p.A via dell’Artigianato, 42 z.i. 31029 Vittorio Veneto Treviso — Italy info@falmec.com falmec.com Codice / Code Matricola / Serial Number...
Need help?
Do you have a question about the Prisma FDPRI36W5SB and is the answer not in the manual?
Questions and answers