Table of Contents
Advertisement
Advertisement
Table of Contents

Related Manuals for Amarey A90+


Summary of Contents for Amarey A90+
- Page 2 Amarey Customer Care Thank you for choosing Amarey. In order to better use the intelligent robot vaccum, please scan the QR code below to download the APP. If you encounter any problems during use, please contact Amarey Customer Service Center, and we will do our best to solve it for you.
- Page 3 • Do not use Appliance to pick up anything that is burning or smoking, such as cigarettes, matches, hot ashes, or anything that could cause a fire. • Only charge the following amarey batteries: maximum 14.4V,2600mAh Lithium-ion battery. Other type of batteries may burst causing injury. Always contact Amarey Customer Service Center for the correct replacement of battery.
- Page 4 • The battery must be removed and discarded according to local laws and regulations before disposal of the Robot. • Please dispose of used batteries according to local laws and regulations. • WARNING Chemical Exposure: If the battery pack is leaking, do not allow the liquid to come in contact with skin or eyes. If contact has been made, wash the affected area with copious amounts of water and seek medical advice.
- Page 5 • Reinstall the battery (with the tape on it) in the product and secure the battery cover. • Pack the product in original packaging or in a suitable packaging that prevents any movement during transportation. • Can only use land transportation (Air transport is prohibited). Battery Storage •...
- Page 6 CE Warning 1. Risk of explosion if battery is replaced by an incorrect type. Dispose of used batteries according to the instructions. 2. Adapter shall be installed near the equipment and shall be easily accessible. 3. The operating temperature of the device can′t exceed 40℃ and shouldn′t be lower than 0℃. 4.
- Page 7 CONTENTS 1. Package Contents..........................7 2. Instructions............................11 3. Maintenance..........................24 4. Troubleshooting..........................29 5. Technical Specifcations........................33...
- Page 8 1. Package Contents 1.1 Package Contents Amarey A90+ Self-Empty Base 4 X Side Brush 2 X Cleaning Cloth Sponge Filter and High Efficiency Filter 2 X Dust Bag Cleaning Tool...
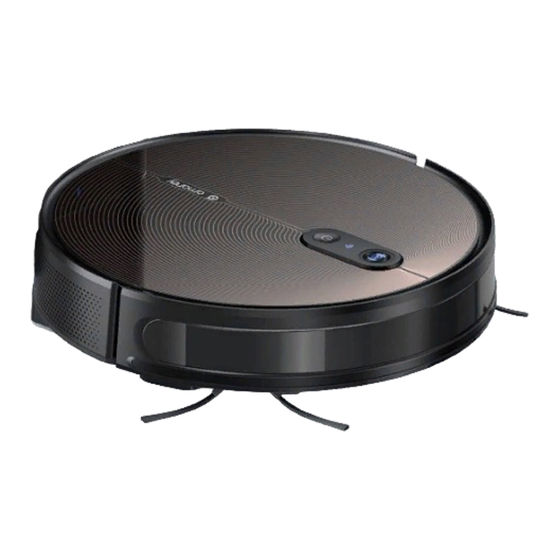
- Page 9 1.2 Product Diagram ①Top View ②Bottom View Anti-collision Sensors and Bumper Anti-fall Sensors Camera Wi-Fi Indicator Start/Pause Universal Wheel Side Brushes Wheel Main Brush Dust Bin Reservoir 2 in 1 Main Power Switch (On/Off)
- Page 10 ③Dust Bin Primary Filter Sponge Filter High Efficiency Filter Dust Bin Cover Dust Bin Release Button Water Inlet...
- Page 11 ④Self-Empty Base Upper Cover Charging Indicator Signal Emission Area Charging Contact Points Vacuuming Mouth...
- Page 12 2. Instructions 2.1 Notes Before Cleaning Before robotic vacuum works, please refer to the following guidelines to check the cleaning area. Remove power cords and small Before using A90+ on a rug with When the robot is cleaning, please Do not use A90+ in a space less objects from the foor that the tasseled edges, please roll the rug put away the objects on the edge...
- Page 13 2.2 Preparation ①Before usage, please remove the protective strip. Protective strip Protective strip ②Install the side brushes by pressing them into each slot until you hear a “click”.
- Page 14 ③Turn on the main power switch at the bottom(“1” refer to power on, “0” refer to power off), the robot will play the booting voice in about 10s, and you can start using it after the voice broadcast is over. 2.3 Charge The Robot ①Please place the self-empty station against the wall on a flat ground.
- Page 15 ②Connect the plug of the power cord to the socket. When the dust collection station is connected to the power, the white light is on, otherwise robot vacuum cannot be automatically charged back. ③Turn on the power switch at the bottom of the robot, and then place the robot on the charging stand correctly. With the announcement of "charging", the robot starts to charge.
- Page 16 2.4 Install The Dust Bag (1) Open the upper cover (2) Install a new dust bag (3) Make sure the dust bag (4) Close the cover is in place...
- Page 17 -APP control ①Download APP by scanning below QR code. for 5s, and you will hear voice prompt "Reset ②Press WI-FI, enter network configuration mode", and the blue Wi-Fi indicator will flash rapidly, which means the robot start entering network configuration mode. ③Enter the home page of APP, click "+"...
- Page 18 -Voice Control How to connect Siri? Open the Amarey APP, enter [My] -> [Voice Control] -> [Siri Shortcut Command], click on the "+" on the upper right, and enter [Add Finger Order]. ① Click the "+" on the right ② Manually enter the "Shortcut ③...
- Page 19 How to Connect Amazon Alexa? The Amarey A90+ robot vacuum supports Alexa voice control. You can learn how to configure Alexa through the URL below. https://app.ankobot.com:8143/web/APPHelp/us/voice/alexa.html Tips: · Due to App upgrading, the operation may have little difference with above instruction, please follow the instruction in APP.
- Page 20 2.6 2 in 1 Vacuum and Mop ① Remove the dust bin, and ②Stick the cleaning cloth on ③Fix the cleaning cloth plate ④Install the dust bin back into pour water into the reservoir the plate. on the dust bin. the robot.
- Page 21 2.7 Self-empty When the vacuum robot completes its work and returns to the self-empty station, the self-empty station will suck and empty the dust from the dust bin. The self-empty station will make a louder sound when it is working, but it only lasts about 5 seconds.
- Page 22 2.8 Clean Mode 1) Auto Cleaning Method 1: Power on robot, after the startup music, press on panel. Method 2: Click“Start cleaning”on APP to start cleaning. Note: If power is less than 20%, Robot will not work, please charge it before next cleaning. If power is less than 20% during cleaning, the robot returns to the charging dock for recharge and resumes cleaning where it left off.
- Page 23 4) Smart Area Area cleaning After Smart Map generated successfully, you can divide the map into different areas according the cleaning needs. You can set one or more cleaning areas. The robot will only clean the selected area. No-go Zone You can set the area that does not need to be cleaned as“No-go Zone”through the APP, and the vacuum robot will not enter the no-go zone.
- Page 24 6) Power Off If the robot is not used for a long time, please turn off the main power switch.
- Page 25 3. Maintenance 3.1 Accessories Cleaning and Maintenance In order to maintain the normal operation of the sweeping robot, it's recommended to clean and maintain the accessories referring to the following table: Accessories Replacement Frequency Cleaning Frequency Every 3-6 months After each use Side brush Every 2 weeks Every 3-6 months...
- Page 26 3.2 Cleaning Instructions ①. Mopping System Please turn off the power switch of the robot vacuum before cleaning the accessories. (3) Remove the mop from the plate, Remove the dust bin and the cleaning cloth plate. (2) Wipe the parts of the reservoir with a clean cloth, wash and dry it.
- Page 27 ③.Filters (2) Clean the dust bin and filters with provided Cleaning Tool. (1) Take the filters out from the dust bin. (3) Put the filters back together in the dust bin.
- Page 28 ④. Main Brush Open the brush cover; take out the main brush; use a cleaning tool to clean the main brush. If there are hairs entangled in the brush, use scissors to cut the hairs off.
- Page 29 ⑤.Side Brush After removing the side brush, use a cleaning tool to clean the side brush. ⑥.Universal Wheel ⑦.Anti-fall sensor Clean the universal wheel with a cloth. Use a dry cloth to clean cliff sensors to ensure the sensitivity.
- Page 30 4. Troubleshooting During the use of the product, if you encounter the following situations, you can check it and solve it independently. Problems Causes Solutions Ensure the charging cord is plugged into the dock and wall outlet, Charging Dock has no electricity. and the light on the Charging Dock is white.
- Page 31 The robot vacuum has been suspended It is recommended to suspend the robot vacuum for no more than for more than 30 minutes. 30 minutes. The robot vacuum did not start cleaning It is recommended to let the robot vacuum start cleaning from the from the charging stand.
- Page 32 Robot is suspended or stuck near a cliff. Please put the robot on the flfloor,or clean the cliff sensors Robot suspended in the air Camera abnormal Wipe camera with alcohol cotton ball gently. Camera is dirty. Pat the left, middle and right sides of the infrared bumper to The bumper may get stuck.
- Page 33 The automatic cleaning task has not After the robot vacuum has finished cleaning, it will automatically return been completed. to the charging stand. Unable to create a family map on the app Use the mopping function when creating Don't use the mopping function when creating the map for the first time. the map for the first time.
- Page 34 5. Technical Specifcations A90+ Robotic Vacuum Cleaner Robot Vacuum Dust Collection Station Dimensions 325*325*80mm Dimensions 256*200*350mm Battery 2600mAH Adapter Input Voltage 110-240VAC Wireless connection 2.4GHz WiFi Rated Output 20V/1.2A Rated Power Rated Frequency 50/60Hz Rated Voltage 14.4V Charging Time Working Hours 120min...
Need help?
Do you have a question about the A90+ and is the answer not in the manual?
Questions and answers
it wont connect to wifi, when docked it wont empty container
To fix the Amarey A90+ not connecting to WiFi:
1. Ensure the robot vacuum is in setup mode (WiFi indicator should flash slowly).
2. Connect to a 2.4GHz WiFi network (it does not support 5GHz).
3. Restart the router and the vacuum, then try connecting again.
To fix the vacuum not emptying the container when docked:
1. Ensure the self-empty base is properly connected to power.
2. Check if the dust bin is correctly inserted.
3. Verify that the charging contact points are clean.
4. Make sure the vacuuming mouth of the base is not blocked.
5. Restart the robot and docking station, then test again.
This answer is automatically generated