
Related Manuals for NEC VT615


Summary of Contents for NEC VT615
- Page 1 Projector WT615/WT610 User’s Manual The WT615 projector is not distributed in the U.S.A or Canada.
- Page 2 Important Information Safety Cautions Precautions Please read this manual carefully before using your NEC WT615/WT610 Projector and keep the manual handy for future reference. Your serial number is located on the right side of your projector. Record it here: CAUTION To turn off main power, be sure to remove the plug from power outlet.
- Page 3 The Federal Communications Commission does not allow any modifications or changes to the unit EXCEPT those specified by NEC Display Solutions of America, Inc. in this manual. Failure to comply with this government regulation could void your right to operate this equipment. This equipment has been tested and found to comply with the limits for a Class B digital device, pursuant to Part 15 of the FCC Rules.
- Page 4 Do not attempt to retrieve any objects that might fall into your projector. Do not insert any metal objects such as a wire or screwdriver into your projector. If something should fall into your projector, disconnect it immediately and have the object removed by a qualified NEC service personnel. 3. Do not place any liquids on top of your projector.
- Page 5 Do not touch them as the pieces of glass may cause injury. If this happens, contact your NEC dealer for lamp replacement. •...
-
Page 6: Table Of Contents
Table of Contents Important Information ................1. Introduction ..................What's in the Box? ......................2 Introduction to the Projector ..................3 Part Names of the Projector ..................5 Opening and Closing the Mirror Cover ..............6 Top Features ......................7 Terminal Panel Features .................. - Page 7 Table of Contents 4. Convenient Features ..............Turning Off the Image and Sound ................51 Freezing a Picture....................... 51 Using the Pointer ......................51 Enlarging and Moving a Picture .................. 52 Getting Integrated Help ....................52 Using a USB Mouse ....................53 Using the Remote Mouse Function ................
-
Page 8: Introduction
Introduction What's in the Box? ............2 Introduction to the Projector ........3 Part Names of the Projector ........5 Opening and Closing the Mirror Cover ..............6 Top Features ......................7 Terminal Panel Features ..................8 Part Names of the Remote Control ......10 Battery Installation .................... -
Page 9: What's In The Box
1. Introduction What's in the Box? Make sure your box contains everything listed. If any pieces are missing, contact your dealer. Please save the original box and packing materials if you ever need to ship your Projector. Remote control Batteries (AAA (7N900501) Projector Power cable... -
Page 10: Introduction To The Projector
Present from anywhere in the room when using as a wireless LAN projector, no physical signal cable connec- tion to a PC is required. * The NEC optional wireless LAN card is required (NWL-100A or NWL-100E See page 25.). •... - Page 11 1. Introduction About this user's manual The fastest way to get started is to take your time and do everything right the first time. Take a few minutes now to review the user's manual. This may save you time later on. At the beginning of each section of the manual you'll find an overview.
-
Page 12: Part Names Of The Projector
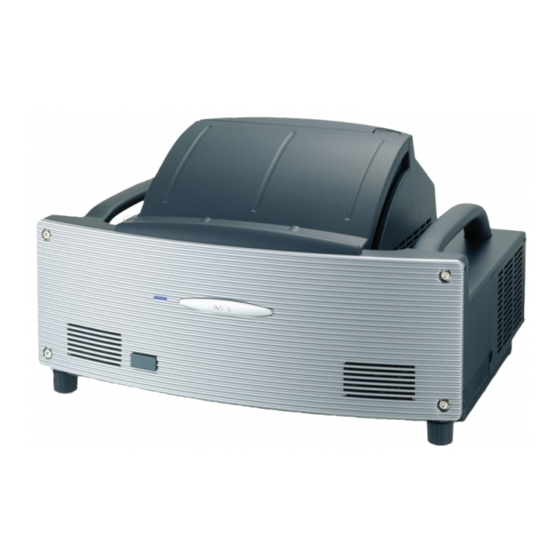
1. Introduction Part Names of the Projector Front indicator Mirror cover Lights blue to indicate that the projector is turned on or in the Standby mode. Mirror cover lock switch NOTE: When [Standby Mode] is set to “Power-saving”, this indicator lights blue only with power on. -
Page 13: Opening And Closing The Mirror Cover
1. Introduction Opening and Closing the Mirror Cover To close the mirror cover: To open the mirror cover: 1. Slowly close the mirror cover while holding both ends. 1. Slide the mirror cover lock switch to the unlock position. 2. Slowly open the mirror cover holding both ends. NOTE: •... -
Page 14: Top Features
1. Introduction Top Features 5. SOURCE Button Use this button to select a video source such as a PC, PC CARD VCR, DVD player or Viewer (PC card). Press and release this button quickly to display the FOCUS Source List. SOURCE MENU Each time this button is pressed for a minimum of ONE... -
Page 15: Terminal Panel Features
1. Introduction Terminal Panel Features REMOTE PCCONTROL PC CARD AUDIO IN AUDIO OUT DVI-I COMPUTER S-VIDEO IN DVI-I IN COMPUTER IN MONITOR OUT AUDIO IN VIDEO IN /MONO 1. COMPUTER IN / Component Input Connector 6. AUDIO OUT Mini Jack (Stereo Mini) (Mini D-Sub 15 Pin) Connect an additional audio equipment here to listen to audio coming from your COMPUTER, DVI-I, VIDEO... - Page 16 Insert a PC card, commercially available LAN card or using the supplied USB cable. You can operate your NEC optional wireless LAN card here. computer's mouse functions from the remote control. NOTE: A dummy card is inserted into each slot at the time of shipment.
-
Page 17: Part Names Of The Remote Control
1. Introduction ¿ Part Names of the Remote Control 6. MAGNIFY (+) (–) Buttons Use these buttons to adjust the image size. The image can be magnified about the center of the screen up to 400%. See page 52. POWER 7. - Page 18 1. Introduction 20. SLIDE (+) (–) Buttons Press (+) to select the next folder or slide and press (–) to select the previous folder or slide. 21. ASPECT Button Press this button to display the Aspect Ratio select menu. See page 90. 22.
-
Page 19: Battery Installation
1. Introduction Battery Installation Slip the cover back over the bat- Remove the battery cover. Remove both old batteries and teries until it snaps into place. NOTE: Do not pull the battery install new ones (AAA). Ensure NOTE: Do not mix different types of cover by force. -
Page 20: Part Names And Functions Of The Supplied Electronic Pen (Wt615 Only)
1. Introduction Part Names and Functions of the Supplied Electronic Pen (WT615 only) The WT615 comes with an electronic pen. The electronic pen works as a USB mouse connected to the projector. See page for connecting a USB mouse. The electronic pen and the projector’s sensors can be used to convert your whiteboard into a virtual touchscreen which allows you to operate your projector’s menu or use the ChalkBoard feature. -
Page 21: Installation And Connections
Installation and Connections Setting Up the Screen and the Projector ....16 Making Connections ..........19 When Viewing a DVI Digital Signal ............... 19 Connecting Your PC or Macintosh Computer ............19 To connect SCART output (RGB) ................. 20 Using two Analog COMPUTER inputs simultaneously ........21 Connecting an External Monitor ................ - Page 22 2. Installation and Connections This section describes how to set up your projector and how to connect video and audio sources. When installing the projector for the first time, read the WT615/WT610 Setup Guide carefully. Your projector is simple to set up and use. But before you get started you must first: 1.
-
Page 23: Setting Up The Screen And The Projector
2. Installation and Connections Setting Up the Screen and the Projector 1. Refer to "Throw Distance (C)" in the diagram and use a distance between the screen and projector that corre- sponds to the screen size. As an example, when projecting to a 60" screen, set the projector with a separation of approximately 10.4"/26.3 cm from the screen. - Page 24 For more details utilizing rear projection screens and their applications with this projector, please contact your NEC dealer. Not recommended • Controlled ambient light environments will allow for an image of higher contrast and depth to be displayed.
- Page 25 2. Installation and Connections Ambient environmental condition • Do not place the screen near vents. Air movement hitting the screen, causing the projected image to ripple. • Do not illuminate the projector with strong light sources such as halogen lamp. Doing so can cause the object detection sensor to malfunction, resulting in the projector not turning on.
-
Page 26: Making Connections
Macintosh (Notebook type) NOTE: For older Macintosh, use a commercially available pin adapter (not supplied) to connect to your Mac's video port. NOTE: The WT615/WT610 is not compatible with video decoded outputs of either the NEC ISS-6020 or ISS-6010. -
Page 27: To Connect Scart Output (Rgb)
SCART is a standard European audio-visual connector for TVs, VCRs and DVD players. It is also referred to as Euro-connector. NOTE: The ADP-SC1 SCART adapter is obtainable from your NEC dealer in Europe. Contact your NEC dealer in Europe for more information. -
Page 28: Using Two Analog Computer Inputs Simultaneously
2. Installation and Connections Using two Analog COMPUTER inputs simultaneously If you need to use two analog COMPUTER inputs simultaneously, connect a DVI-A to VGA cable as shown below. DVI-I IN COMPUTER IN REMOTE PCCONTROL PC CARD AUDIO IN AUDIO OUT DVI-I COMPUTER S-VIDEO IN DVI-I IN... -
Page 29: Connecting An External Monitor
2. Installation and Connections Connecting an External Monitor MONITOR OUT REMOTE PCCONTROL PC CARD AUDIO IN AUDIO OUT DVI-I COMPUTER S-VIDEO IN DVI-I IN COMPUTER IN MONITOR OUT AUDIO IN VIDEO IN /MONO RGB/VGA signal cable (commercially available or supplied with an external monitor) RGB/VGA signal cable (supplied) -
Page 30: Connecting Your Dvd Player
2. Installation and Connections Connecting Your DVD Player AUDIO IN COMPUTER COMPUTER IN REMOTE PCCONTROL PC CARD AUDIO IN AUDIO OUT DVI-I COMPUTER S-VIDEO IN DVI-I IN COMPUTER IN MONITOR OUT AUDIO IN VIDEO IN /MONO Optional 15-pin-to-RCA (female) 3 cable (ADP-CV1) Audio cable Component video RCA 3 cable (not supplied) -
Page 31: Connecting Your Vcr Or Laser Disc Player
2. Installation and Connections Connecting Your VCR or Laser Disc Player VIDEO IN S-VIDEO IN AUDIO IN REMOTE PCCONTROL PC CARD AUDIO IN AUDIO OUT DVI-I COMPUTER S-VIDEO IN DVI-I IN COMPUTER IN MONITOR OUT AUDIO IN VIDEO IN /MONO Video cable (not supplied) Audio cable (not supplied) S-video cable (not supplied) -
Page 32: Connecting To A Network
NEC's optional wireless LAN card (NWL-100 series) is available, refer to the Service Page for NEC Projectors (http://www.nec-pj.com). * For more information on supported wired LAN cards for the NEC projectors, refer to the Service Page for NEC Projectors (http://www.nec-pj.com). - Page 33 2. Installation and Connections (B) Example of wireless LAN connection (Network Type → Mode: Infrastructure) Wireless LAN card Built-in wireless LAN function Wireless LAN card (optional) Access Point Wired LAN To make connection with a wired LAN via an access point, you need to select the Infrastructure mode. From the menu, select [Setup] →...
-
Page 34: Inserting And Removing A Pc Card
2. Installation and Connections Inserting and Removing a PC Card To insert the NEC optional wireless LAN card or a PC memory card (also referred to as PC card in this manual), follow the steps below. CAUTION: * Direction for Inserting the PC Card The PC card has a top and bottom and must be inserted into the PC card slot in a specific direction. - Page 35 2. Installation and Connections PC Card Type The PC Card slot accepts PCMCIA Type II only. NOTE: The projector does not support NTFS formatted flash memory card. Be sure to use a flash memory card formatted with the FAT32, FAT16 or FAT file system. To format your flash memory card in your computer, refer to the document or help file that comes with your Windows operating systems.
-
Page 36: Connecting The Supplied Power Cable
2. Installation and Connections Connecting the Supplied Power Cable Connect the supplied power cable to the projector. First connect the supplied power cable's three-pin plug to the AC IN of the projector, and then connect the other plug of the supplied power cable in the wall outlet. Make sure that the prongs are fully inserted into both the AC IN and the wall outlet. -
Page 37: Projecting An Image (Basic Operation)
Projecting an Image (Basic Operation) Turning on the Projector..........31 Adjusting the Position and Size of the Projected Image (Focus Adjustments) ..........33 Selecting a Source ............ 40 ¿ Optimizing an RGB Image Automatically....41 Turning Up or Down Volume ........41 Adjusting Pincushion or Barrel Distortion (Pincushion) ............ -
Page 38: Turning On The Projector
3. Projecting an Image (Basic Operation) This section describes how to turn on the projector and to project a picture onto the screen. Turning on the Projector NOTE: • The projector has two power switches: a main power switch and a POWER (ON/STAND BY) button (POWER ON and OFF on the remote control). - Page 39 3. Projecting an Image (Basic Operation) Note on Startup screen (Menu Language Select screen) When you first turn on the projector, you will get the Startup menu. This menu gives you the opportunity to select one of the 21 menu languages. To select a menu language, follow these steps: 1.
-
Page 40: Adjusting The Position And Size Of The Projected Image (Focus Adjustments)
3. Projecting an Image (Basic Operation) Adjusting the Position and Size of the Projected Image (Focus Adjustments) • After turning on the power, projected images may flicker for 3 to 5 minutes until the lamp lighting is stabilized. Also after turning on the projector, the picture position may be slightly changed. Wait 10 minutes until the light status and projected images become stable. - Page 41 3. Projecting an Image (Basic Operation) 3. Press the MENU button. The menu will be displayed. 4. Press the FOCUS +/- buttons and align the focus of the projected image. Cabinet controls Remote control PC CARD VIDEO COMPUTER VIEWER FOCUS ASPECT AUTO ADJ.
- Page 42 3. Projecting an Image (Basic Operation) 7. Adjust the height to keep the projector level by rotating the feet on the front and the rear. Tilting the projector will move the Tilt Indicator’s slider to the left or right accordingly. Tilt the projector so that both of the sliders of “Back/Front”...
- Page 43 3. Projecting an Image (Basic Operation) 11. Press the FOCUS +/– buttons to align the focus of the projected image again. • Repeat step 9 to 11 if the display image is not aligned with the screen. • On the WT615 you can use the electronic pen to help you set up the projector parallel to the screen.
- Page 44 3. Projecting an Image (Basic Operation) 3. Touch the center of the mark lightly with the electronic pen. Touch The [Parallel Detect] screen will be displayed. When the marker is in the center of the gauge, go to Step 6. When the marker is not in the center of the gauge, it means that the projector and the screen are not parallel to each other.
- Page 45 3. Projecting an Image (Basic Operation) NOTE: • In terms of the optical characteristics of this projector, in addition to keystone distortion (page 102), there may be occurrences of slight pincushion type or barrel type distortion. To adjust the projected image with the screen, first perform Steps 9 to 11 on pages (Adjustment of the projection distance →...
- Page 46 3. Projecting an Image (Basic Operation) [Symptom 3] As illustrated in the diagram to the right, when the left edge of the image is wid- ened vertically, either the projector is not placed straight in front of the screen or the projector is directed slightly to the left.
-
Page 47: Selecting A Source
3. Projecting an Image (Basic Operation) Selecting a Source Selecting the computer or video source Using the Remote Control Press any one of the COMPUTER, VIDEO or VIEWER buttons. VIDEO VIDEO COMPUTER VIEWER ASPECT AUTO ADJ. SLIDE PIC-MUTE HELP VOLUME FOCUS ZOOM FREEZE... -
Page 48: Optimizing An Rgb Image Automatically
3. Projecting an Image (Basic Operation) Optimizing an RGB Image Automatically Adjusting the Image Using Auto Adjust Optimizing an RGB image automatically. Press the Auto Adjust button to optimize an RGB image automatically. [Poor picture] SELECT VIDEO COMPUTER VIEWER ASPECT AUTO ADJ. -
Page 49: Adjusting Pincushion Or Barrel Distortion (Pincushion)
3. Projecting an Image (Basic Operation) Adjusting Pincushion or Barrel Distortion (Pincushion) If pincushion or barrel distortion become conspicuous, adjust with [Pincushion]. Reference • Pincushion or barrel distortion in this projector The amount of pincushion and barrel distortion in this projector is 2% or less (TV distortion) in each of the horizontal and vertical directions (for screen sizes of 40 inches to 100 inches). - Page 50 3. Projecting an Image (Basic Operation) • Press the SELECT button and align the cursor with [Top], Screen (solid line) Projected area (dotted line) then press the SELECT button to allow adjustment of the protrusions and indentations of the upper edge of the projected image.
-
Page 51: Using The Laser Pointer
3. Projecting an Image (Basic Operation) ¶ Using the Laser Pointer You can use the laser to draw your audience's attention to a red dot that you can place on any object. CAUTION: • Do not look into the laser pointer while it is on. •... -
Page 52: º Using The Electronic Pen (Wt615 Only)
3. Projecting an Image (Basic Operation) Using the Electronic Pen (WT615 only) The electronic pen and the projector’s sensors can be used to convert your whiteboard into a virtual touchscreen which allows you to operate your projector’s menu or use the ChalkBoard feature. Important •... - Page 53 3. Projecting an Image (Basic Operation) 3. Press the SELECT button to select [Pen Calibration] and press the ENTER button. One “O ”mark will be displayed on the screen. 4. Touch the circle “O” mark lightly with the electronic pen. Another “O”...
- Page 54 3. Projecting an Image (Basic Operation) ChalkBoard Function You can use the electronic pen to operate the ChalkBoard function. See also page 55. NOTE: Hold the electronic pen upright against the screen when using it. Otherwise, the actual pen stroke may not be displayed on the screen.
-
Page 55: ¾ Turning Off The Projector
3. Projecting an Image (Basic Operation) Turning off the Projector To turn off the projector: Cabinet controls Remote control 1. Press the POWER (ON/STAND BY) button on the projector SELECT POWER cabinet or the POWER OFF button on the remote control. LASER MAGNIFY PAGE... -
Page 56: After Use
3. Projecting an Image (Basic Operation) µ After Use Preparation: Make sure that the main power is turned off. 1. Close the mirror cover. After closing the mirror cover, lock the mirror cover by sliding the mirror cover lock switch to the lock position. 2. -
Page 57: Convenient Features
Convenient Features Turning Off the Image and Sound ......51 · Freezing a Picture............51 » Using the Pointer ............51 ¿ Enlarging and Moving a Picture ......... 52 ´ Getting Integrated Help ..........52 ² Using a USB Mouse ..........53 ¶... -
Page 58: Turning Off The Image And Sound
4. Convenient Features ³ Turning Off the Image and Sound Press the PIC-MUTE button to turn off the image and sound for a short period of time. VIDEO COMPUTER VIEWER AUTO ADJ. ASPECT SLIDE Press again to restore the image and sound. PIC-MUTE HELP NOTE: The menu still remains visible even when the image is turned off. -
Page 59: Enlarging And Moving A Picture
4. Convenient Features ¿ Enlarging and Moving a Picture You can enlarge the area you want up to 400 percent. To do so: 1. Press the POINTER button to display the pointer. POWER LASER MAGNIFY PAGE POINTER DOWN 2. Move the pointer to the area you want to enlarge. -
Page 60: Using A Usb Mouse
4. Convenient Features ² Using a USB Mouse Using a USB mouse gives you a smooth operation. A commercially available USB mouse can be used. NOTE: There may be some brands of a USB mouse that the projector does REMOTE PCCONTROL PC CARD AUDIO IN... -
Page 61: Using The Remote Mouse Function
4. Convenient Features ¶ Using the Remote Mouse Function The built-in remote mouse function enables you to operate your computer's mouse functions from the remote control. It is a great convenience for clicking through your computer-generated presentations. Connecting to your computer for the remote mouse function If you wish to use the remote mouse function, use the supplied USB cable to connect the USB port (Type B) of the projector and the USB port (type A) of your computer. -
Page 62: Making Freehand Drawings On A Projected Image (Chalkboard)
4. Convenient Features Making Freehand Drawings on a Projected Image (ChalkBoard) The ChalkBoard feature allows you to write and draw messages on a projected image. NOTE: The ChalkBoard feature is available only when the supplied electronic pen (WT615 only) or a USB mouse is used. To display the ChalkBoard tool bar, click the middle button on your mouse, press and hold the button B of the elec- tronic pen for a minimum of 0.5 second, or select [Setup] →... -
Page 63: ¾ Storing Images Displayed On The Projector On The Pc Card Or Usb Memory (Capture)
4. Convenient Features Storing Images Displayed on the Projector on the PC card or USB memory (Capture) The Capture features allows you to capture an image from a source that is currently being displayed. The image is saved as JPEG in the PC card or USB memory. [Important] •... -
Page 64: Preventing Unauthorized Use Of The Projector
4. Convenient Features µ Preventing Unauthorized Use of the Projector Assigning a keyword prevents the projector from being used by unauthorized individuals. Assigning a Keyword for the first time 1. Press the MENU button. The menu will be displayed. 2. Press the SELECT button to select the Setup submenu and press the ENTER button. - Page 65 4. Convenient Features 4. Press the SELECT button four times to select “Security”. 5. Press the ENTER button to display the Security screen. 6. Press the SELECT button once to select the Keyword entry box and press the ENTER button. The Software keyboard will be displayed.
- Page 66 4. Convenient Features 7. Enter an alphanumeric keyword using the Software keyboard For example, to enter “1234”, follow the steps 7-1 to 7-4 below. NOTE: • Please make a note of your keyword. • Do not use spaces (SP) in your keyword. 7-1.
- Page 67 4. Convenient Features Checking If Security is enabled Turn off the projector and turn it back on to check if the Security function is enabled. 1. Press the POWER (ON/STAND BY) button. The "Power Off / Are you sure?" message will appear. Press the ENTER button or the POWER (ON/STAND BY) or the POWER OFF button again.
- Page 68 “Disable”. 9. Press the SELECT button to select “OK” and press the ENTER button. The Security Function is now disabled. NOTE: Do not forget your keyword. However, if you forget your keyword, NEC will provide you with your Release Code.
-
Page 69: Using A Usb Memory Device
NOTE: • Some USB memory devices (brands) may not work. See our website for available USB memory devices: http://www.nec-pj.com • The projector does not support NTFS formatted flash memory card or USB memory device. Be sure to use a flash memory card or USB memory device formatted with the FAT32, FAT16 or FAT file system. -
Page 70: ¹ Operation Using An Http Browser
IP address of the projector has been set in the “HOSTS” file of the computer being used. Example 1: When the host name of the projector has been set to “pj.nec.co.jp”, http://pj.nec.co.jp/index.html is specified for the address or the entry column of the URL. - Page 71 4. Convenient Features Structure of the HTTP Server Power: This controls the power of the projector. On ....Power is switched on. Off ....Power is switched off. Picture: Controls the video adjustment of the projector. Brightness ... Increases the brightness adjustment value. Brightness ...
- Page 72 4. Convenient Features Mute: This controls the mute function of the projector. Picture On ..Mutes the video. Picture Off ..Cancels the video muting. Sound On ..Mutes the audio. Sound Off ..Cancels the audio muting. OSD On ..Mutes the on-screen display. OSD Off ..
-
Page 73: Using The Projector To Operate A Computer Connected On A Network (Desktop Control Utility 1.0)
4. Convenient Features Using the Projector to Operate a Computer Connected on a Network (Desktop Control Utility 1.0) When Desktop Control Utility 1.0 on the included User Supportware 2 CD-ROM is installed on the computer, that computer can be operated using the projector over a network. For example, say you have a PowerPoint file on a computer in your office that you want to use for a presentation at a meeting. - Page 74 4. Convenient Features Operations on the Computer 1. Connect the computer to the LAN and make the required settings. 2. Install Desktop Control Utility 1.0 on the computer. • For instructions on installation, refer to the included “Wired and Wireless Network Setup Guide”. •...
- Page 75 4. Convenient Features Operations on the projector – Connecting to the computer 1. Make the LAN settings on the projector. Make the LAN settings at [Setup] → [Installation] → [LAN Mode] in the menu. (See page 111) 2. Connect a commercially available USB mouse to the projector. (See page 53) 3.
- Page 76 4. Convenient Features 9. Input the password you made a note of in the previous Step [6] in “Operations on the Computer”. 10. Input the password and click “OK”. The password input window is turned off. 11. Click the PC search icon The PC search window appears.
- Page 77 4. Convenient Features The following operations are available only with buttons on the projector cabinet or the remote control. Disconnect icon ....Use to cut off communications with the computer. Shift icon ......Select this icon and press the ENTER button to set the shift lock mode. Select this icon and press the ENTER button again to cancel the shift lock mode.
-
Page 78: Using The Viewer
Using the Viewer Making the Most out of the Viewer Function ....72 Operating the Viewer Function from the Projector (playback) ......... 73 » Changing Background Logo ........79... -
Page 79: Making The Most Out Of The Viewer Function
Both PNG and GIF format support non-interlaced images only. “Index” file is a file created using the Ulead Photo Explore 8.0 contained on the supplied NEC User Supportware 2 CD-ROM. See the “NEC User Supportware 2 User’s Guide” included on the NEC User Supportware 2 CD-ROM for installing the Ulead Photo Explore 8.0 on your computer. -
Page 80: Operating The Viewer Function From The Projector (Playback)
5. Using the Viewer Operating the Viewer Function from the Projector (playback) This section describes the operation for showing slides created using the Viewer function with the projector. It is also possible to make slides directly from the images projected with the projector. Projecting slides (Viewer) Preparation: Use the Capture feature to store graphic files (JPEG, BMP, non-interlaced GIF or non-interlaced PNG files) in a PC card or USB memory inserted into the projector’s slot. - Page 81 5. Using the Viewer Viewer Window Elements Thumbnail/file name Number of files “_ _CAP_ _” folder Slot 1 3 Files _CAP_ List of folders _RESTORE RECYCLED 0000.jpg 0001.jpg 0002.jpg Scroll bar Cursor (orange) Information 1/3 0000.jpg 60KB select : ENTER Cursor ........
- Page 82 5. Using the Viewer Setting Option for Viewer Play Mode: Manual ....Views a slide manually when the Viewer source is selected. Auto ...... Plays back slides automatically when the Viewer source is selected. Interval: Specifies interval time between 5 and 300 seconds. Start: Specifies start screen when the Viewer source is selected.
- Page 83 5. Using the Viewer Exiting Viewer To exit Viewer, switch to another input such as Computer, DVI (DIGITAL/ANALOG), Video, S-Video or LAN. * To switch to another input, there are two ways: * Press the COMPUTER or VIDEO button on the remote control. * Press the MENU button on the remote control to display the Viewer menu.
- Page 84 5. Using the Viewer Deleting Captured Images Using the Delete command on the Viewer menu allows you to delete captured images. To delete captured images: Preparation: Make sure that the PC card is inserted into the PC card slot or USB memory into the USB port of the projector.
- Page 85 5. Using the Viewer To delete all the captured images: 1. Repeat steps 1 to 3 in the above described procedure. 2. Press the EXIT button to select the “__CAP__” folder in the directory (pane on the left). Slot 1 3 Files __CAP__ _RESTORE...
-
Page 86: Changing Background Logo
Once you have changed the background from the NEC logo to another, you cannot return the logo to back- ground even by using “Reset”. To put the NEC logo back in the background logo, repeat the above steps. The NEC logo file is included on the supplied User Supportware 2 CD-ROM (/Logo/nec_b_x.jpg). -
Page 87: Using On-Screen Menu
Using On-Screen Menu Using the Menus ............81 Menu tree ..............82 Menu Elements ............84 Menu Descriptions & Functions [Source] ....85 Menu Descriptions & Functions [Adjust] ....88 Menu Descriptions & Functions [Setup] ....98 Menu Descriptions & Functions [Information] ..126 Menu Descriptions &... -
Page 88: Using The Menus
6. Using On-Screen Menu Using the Menus 1. Press the MENU button on the remote control or the projector cabinet to display the menu. Submenu window Submenu Main menu Currently available buttons NOTE: The commands such as ENTER and EXIT in the gray bar show available buttons for your operation. 2. -
Page 89: Menu Tree
6. Using On-Screen Menu Basic menu items are indicated by Menu tree shaded area. Menu Item Source Computer, DVI (DIGITAL), DVI (ANALOG), Video, S-Video, Viewer, LAN, Test Pattern, Entry List Adjust Basic Brightness Contrast Color Sharpness Wall Color Off, Blackboard, Blackboard (Gray), Light yellow, Light green, Light blue, Sky blue, Light rose, Pink Aspect Ratio 4:3, Letterbox, Wide Screen, Crop... - Page 90 6. Using On-Screen Menu Menu Item Setup Security Security Cabinet Button Unlock, Lock Password (Menu) Entry, Delete Password (Logo) Entry, Delete Security Enable, Disable, Keyword, Use Protect Key, Drive, Read, Register, Delete Installation Orientation Desktop Front, Ceiling Rear, Desktop Rear, Ceiling Front Screen Screen Type: 4:3, 16:9 / Position LAN Mode...
-
Page 91: Menu Elements
6. Using On-Screen Menu Menu Elements Slider Highlight Close button Help button Radio button Check box Solid triangle Cancel button OK button Menu windows or dialog boxes typically have the following elements: Highlight ....Indicates the selected menu or item. Solid triangle .. -
Page 92: Menu Descriptions & Functions [Source]
Network Setup Guide” for installing the Photo Explore 8.0 for NEC. See page for viewing slides. Selects a signal from the NEC optional wireless LAN card or a commercially available wired LAN card plugged into the projector's card slot. Test Pattern Displays a test pattern to check your adjustments or image position. - Page 93 6. Using On-Screen Menu Entry List Use the SELECT button on your remote control or the projector cabinet to select the signal and press the ENTER button on the remote control or the projector cabinet to display the Entry Edit Command screen. Entering the Currently Projected Signal into the Entry List 1.
- Page 94 6. Using On-Screen Menu Entry Edit Command You can edit signals on the Entry List. Load ...... Enables you to select a signal from the list. Store ..... Enables you to store the currently projected signal. Cut ......Enables you to remove a selected signal from the list and place it on the "clipboard" in the projector. Copy ......
-
Page 95: Menu Descriptions & Functions [Adjust]
6. Using On-Screen Menu ´ Menu Descriptions & Functions [Adjust] Basic [Brightness] Adjusts the brightness level or the back raster intensity. [Contrast] Adjusts the intensity of the image according to the incoming signal. [Color] Increases or decreases the color saturation level (not valid for RGB and DVI digital). - Page 96 6. Using On-Screen Menu [Hue] Varies the color level from +/- green to +/-blue. The red level is used as reference. This adjustment is only valid for Video, Component and TV standard inputs (not valid for RGB and DVI digital). [Sharpness] Controls the detail of the image for Video (not valid for RGB and DVI digital).
- Page 97 6. Using On-Screen Menu Selecting Aspect Ratio [Aspect Ratio] (not available for Viewer) Screen Type 4:3 Screen Type 16:9 Aspect Ratio allows you to select the best Aspect mode to display your source image. When screen type 4:3 is selected for the source, the following selections will display: 4:3 ......
- Page 98 6. Using On-Screen Menu Controlling Volume [Volume] You can adjust the volume level of the projector speakers and AUDIO OUT (Stereo Mini Jack). Reset To reset the settings for “Basic”, select “Reset” and press the ENTER button. The message "The setting values on page will be reset. Are you sure?” will be displayed. Select “Yes”...
- Page 99 6. Using On-Screen Menu [Detail Settings] This will provide you with three pages of menus that provide more detailed settings. [Page1] Selecting Reference Setting [Reference] This feature allows you to use color correction or gamma values as reference data to optimize for various types of images.
- Page 100 6. Using On-Screen Menu Adjusting Color Temperature [Color Temperature] This feature adjusts the color temperature using the slider. NOTE: * When "Presentation" is selected in [Reference], this function is not available. * When [White Balance] settings has been changed, the color temperature value on screen does not reflect the real color temperature.
- Page 101 6. Using On-Screen Menu Selecting Signal Type [Signal Type] Select either the computer signal type or the component signal type. RGB ....... Computer signal Component .... Component signals such as Y/Cb/Cr, Y/Pb/Pr NOTE: This feature is available on the computer signal only. If you do not get a better picture even when you set "Signal Select" to "Component"...
- Page 102 6. Using On-Screen Menu Image Options Adjusting Clock and Phase [Clock/Phase] This allows you to manually adjust Clock and Phase. Clock ..... Use this item to fine tune the computer image or to remove any vertical banding that might appear. This function adjusts the clock frequencies that eliminate the horizontal banding in the image.
- Page 103 6. Using On-Screen Menu Selecting Resolution [Resolution] This allows you to activate or deactivate the Advanced AccuBlend feature. Auto ...... Turns on the Advanced AccuBlend feature. The projector automatically reduces or enlarges the current image to fit the full screen. Native ....
- Page 104 6. Using On-Screen Menu Video Selecting Noise Reduction Level [Noise Reduction] (not available for RGB, DVI digital, Viewer and LAN; available for TV standard inputs) Select one of the three levels for reducing video noise: Low, Medium or High. NOTE: The lower the Noise Reduction level, the better the image quality by way of higher video bandwidth. Selecting Color Matrix [Color Matrix] (not available for RGB, DVI digital, Viewer and LAN;...
-
Page 105: ² Menu Descriptions & Functions [Setup]
6. Using On-Screen Menu ² Menu Descriptions & Functions [Setup] WT615 only Basic Pen Calibration (WT615 only) Calibrate so that pen touches are properly detected by the sensor on the WT615. Important Before you use the electronic pen for the first time or when you have changed the position of the projector or the screen size, be sure to use [Pen Calibration] to calibrate the electronic pen and the screen. - Page 106 6. Using On-Screen Menu Correcting Pincushion Mode [Pincushion] If the horizontal and vertical sides bend outwards, use [Pincushion] to correct the distortion. For more information, see “ Adjusting Pincushion or Barrel Distortion [Pincushion]” on page 42. Selecting Cornerstone Mode [Cornerstone] This option allows you to correct trapezoidal distortion.
- Page 107 6. Using On-Screen Menu 4. Press the 3D REFORM button on the remote control twice. The Cornerstone adjustment screen is displayed. 5. Use the SELECT button to select one icon which points in the direction you wish to move the projected image frame.
- Page 108 6. Using On-Screen Menu 10 .Press the SELECT button to select the “OK” and press the ENTER button. This completes the Cornerstone (3D Reform) correction. Selecting “Cancel” will return to the adjustment screen without saving changes. Selecting "Reset" will return to the factory default. Selecting "Undo"...
- Page 109 6. Using On-Screen Menu Selecting Keystone Mode [Keystone] This option allows you to correct keystone distortion manually. Selecting this item will display the Keystone adjustment screen. 1. Press the SELECT button to adjust the horizontal keystone. 2. Press the SELECT button to select "Vertical".
- Page 110 6. Using On-Screen Menu Setting Lamp Mode to Normal or Eco [Lamp Mode] This feature enables you to select two brightness modes of the lamp: Normal and Eco modes. The lamp life can be extended up to 4000 hours by using the Eco mode. Selecting Eco mode decreases fan noise compared to in Normal mode.
- Page 111 6. Using On-Screen Menu Menu Selecting Menu Color [Menu Color Select] You can choose a color for the menu. Turning On / Off Source Display and Message [Display Select] Source ....This option turns on or off input name display such as Computer, DVI (DIGITAL/ANALOG), Video, and No Input to be displayed in the top right corner of the screen.
- Page 112 6. Using On-Screen Menu Selecting Menu Display Time [Menu Display Time] This option allows you to select how long the projector waits after the last touch of a button to turn off the menu. The preset choices are "Manual", "Auto 5 sec", "Auto 15 sec", and "Auto 45 sec". The "Auto 45 sec" is the factory preset. NOTE: •...
- Page 113 6. Using On-Screen Menu Setting a Password [Password (Menu)] / [Password (Logo)] A password can be set for your projector to avoid operation by an unauthorized person. When [Password (Menu)] is set, changing the menu from Basic to Advanced will display [Password (Menu)] input screen.
- Page 114 6. Using On-Screen Menu Security The Security function enables you to protect your projector so that the projector will not project a signal unless you enter a keyword. There is also an option to lock the projector by using a registered PC card* as a protect key. Once you have registered your PC card as a protect key, you are required to insert the registered PC card into the PC card slot of the projector each time you turn on the projector.
- Page 115 3. Enter your keyword in the Release Code input screen. You can view the projected image. NOTE: Do not forget your keyword. However, if you forget your keyword, NEC or your dealer will provide you with your Release Code. See more information at the end of this section.
- Page 116 If you've lost your registered PC card, proceed as follows: NOTE: NEC or your dealer will provide you with your Release Code in exchange for your registered keyword and Request Code. See more information at the end of this section.
- Page 117 6. Using On-Screen Menu Installation Selecting Projector Orientation [Orientation] This reorients your image for your type of projection. The options are: desktop front projection, ceiling rear projection, desktop rear projection, and ceiling front projection. Selecting Aspect Ratio and Position for Screen [Screen] Screen Type ...
- Page 118 Europe : http://www.nec-display-solutions.com Global : http://www.nec-pj.com • To use wireless LAN, insert the NEC optional wireless LAN card (NWL-100*) into the PC Card slot. See "Inserting and Removing a PC Card” on page 27. • Always insert or remove the LAN card when the main power is turned off. Failure to do so may cause projector malfunction or damage to the LAN card.
- Page 119 6. Using On-Screen Menu To select a wireless LAN access point: 1. On the "Profile" tab, select "Profiles" and then select "Profile 1" or "Profile 2". 2. On the "Profile" tab, select "Advanced” and press the ENTER button. 3. On the Advanced menu, select "Network Type" → "Site Survey" and press the ENTER button. 4.
- Page 120 6. Using On-Screen Menu Profile Profiles (for PC Card): To execute a wireless LAN easily using Image Express Utility 2.0, select “Easy Connection. Up to two settings for the optional wireless LAN card can be stored in memory of the projector. Select "Profile 1"...
- Page 121 6. Using On-Screen Menu Advanced menu Network Type (required for wireless only) Site Survey: Displays a list of available SSIDs for wireless LAN on site. Select an SSID which you can access. To select an SSID, highlight the SSID and use the SELECT to select “OK”...
- Page 122 6. Using On-Screen Menu WEP (required for wireless only) Select this option whether using the WEP (Wired Equivalent Privacy) key for encryption or not. To use encryption, specify WEP key. Disable ....Will not turn on the encryption feature. Your communications may be monitored by someone. 64bit ......
- Page 123 6. Using On-Screen Menu Using Software Keyboard to enter an encryption key 1. Select one of Key 1, Key 2, Key 3 and Key 4 and press the ENTER button. The software keyboard will be displayed. 2. Use the SELECT button to select one key and press the ENTER button.
- Page 124 6. Using On-Screen Menu Mail Alert Mail: Checking this box enables Alert Mail feature. This option notifies your computer of an error message via e-mail when using wireless or wired LAN. The error message will be noticed when the projector lamp has reached the end of its usable life or an error occurs in the projector.
- Page 125 6. Using On-Screen Menu Specifying a Name for Your Projector [Projector Name] Specify a unique projector name. Press to display the software keyboard and type in. Up to 16 alphanumeric characters can be used. After entering a name, select “OK” and press the ENTER button. Using Software Keyboard 1 to 0 and Characters ..
- Page 126 6. Using On-Screen Menu Selecting Power-saving in Standby Mode The projector has two standby modes: Normal and Power-saving. Power-saving mode is the mode that allows you to put the projector in the power-saving condition which consumes less power than the Normal mode. The projector is preset for Normal mode at the factory. NOTE: •...
- Page 127 6. Using On-Screen Menu Options Setting Auto Adjust [Auto Adjust] This feature sets the Auto Adjust mode so that the RGB image can be automatically or manually adjusted for noise and stability. You can automatically make adjustment in two ways: Normal and Fine. Off ......
- Page 128 6. Using On-Screen Menu Enabling High Speed Fan Mode [Fan Mode] This option allows you to select two modes for fan speed: Auto mode and High speed mode. Auto ...... The built-in fans automatically run at a variable speed according to the internal temperature. High ......
- Page 129 6. Using On-Screen Menu Selecting Signal Format [Signal Select] Computer Allows you to set "Computer" to automatically detect an incoming RGB or component source such as a computer or DVD player. However there may be some RGB and component signals that the projector is unable to detect.
- Page 130 6. Using On-Screen Menu Tools Selecting the ChalkBoard [ChalkBoard] This option displays the ChalkBoard tool bar. The ChalkBoard function can also be used with the electronic pen on WT615. See page 47. Selecting Board Color [Board Color] This option allows you to select a board color of ChalkBoard.
- Page 131 6. Using On-Screen Menu Usng Digital Zoom [Digital Zoom] This option allows you to reduce and move the projected image. Selecting this item will display the Digital Zoom adjustment screen. Press the ZOOM button on the remote control to display the Digital Zoom menu.
- Page 132 6. Using On-Screen Menu Using Off Timer [Off Timer] 1. Select your desired time between 30 minutes and 16 hours: Off, 0:30, 1:00, 2:00, 4:00, 8:00, 12:00, 16:00. 2. Select “OK” and press the ENTER button on the remote control. 3.
-
Page 133: Menu Descriptions & Functions [Information]
6. Using On-Screen Menu Setting Closed Caption [Closed Caption] This option sets several closed caption modes that allows text to be superimposed on the projected image. Caption 1-4 ... Text is superimposed. Text 1-4 ....Text is displayed in full screen. Off ...... - Page 134 6. Using On-Screen Menu Usage Time Remaining Lamp Time (%) Lamp Hour Meter (H) Projector Usage (H) NOTE: The progress indicator shows the percentage of remaining lamp life. The value informs you of the amount of lamp and projector usage respectively. Source Page1 Input Terminal Signal Type...
- Page 135 6. Using On-Screen Menu LAN Profile This page shows information on settings for a LAN card. IP Address ..... Indicates the IP address of the projector when a LAN card is used. Subnet Mask ..Indicates the subnet mask of the projector when a LAN card is used. Gateway ....
-
Page 136: º Menu Descriptions & Functions [Reset]
6. Using On-Screen Menu Version Firmware Data º Menu Descriptions & Functions [Reset] Returning to Factory Default The Reset feature allows you to change adjustments and settings to the factory preset for sources by the following methods: [Current Signal] Resets the adjustments for the current signal to the factory preset levels. All the items in “Adjust (except “Wall Color”) can be reset. - Page 137 6. Using On-Screen Menu Clearing Lamp Hour Meter [Clear Lamp Hour Meter] Resets the lamp clock back to zero. NOTE: The projector will turn off and go into standby mode after 2100 hours (up to 4100 hours in Eco mode) of service. In this condition you cannot clear the lamp hour meter on the menu.
-
Page 138: Maintenance
Maintenance Handling and Care of Mirror Surface ...... 132 Cleaning the Cabinet ..........133 » Replacing the Lamp ..........134... -
Page 139: Handling And Care Of Mirror Surface
7. Maintenance This section describes the simple maintenance procedures you should follow to replace the lamp, and to clean the cabinet and the mirror. Handling and Care of Mirror Surface If the projector is not to be used for an extended period of time, close the mirror cover. This will protect the projector against dropping an object or gathering dust. -
Page 140: Cleaning The Cabinet
7. Maintenance Cleaning the Cabinet 1. Turn off the projector before cleaning. 2. Clean the cabinet periodically with a damp cloth. If heavily soiled, use a mild detergent. Never use strong detergents or solvents such as alcohol or thinner. The projector has a sensor which detects an object in front of the largest mirror or in the light path. If the sensor detects any object, the projector will not turn on. -
Page 141: Replacing The Lamp
Eco mode) of use, the lamp bulb may shatter, and pieces of glass may be scattered in the lamp housing. Do not touch them as the pieces of glass may cause injury. If this happens, contact your NEC dealer for lamp replacement. To replace the lamp: 1. - Page 142 4. Insert a new lamp housing until the lamp housing is plugged into the socket. CAUTION Do not use a lamp other than the NEC replacement lamp (WT61LP). 5. Secure it in place with the two screws. Be sure to tighten the screws.
- Page 143 7. Maintenance 6. Reattach the lamp cover. 7. Tighten the lamp cover screw. Be sure to tighten the screw. 8. After you install a new lamp, select the menu [Reset] → [Clear Lamp Hour Meter] to clear the Remaining Lamp Time and the Lamp Hour Meter. NOTE: When the lamp exceeds 2100 hours (up to 4100 hours in Eco mode) of service, the projector cannot turn on and the menu is not displayed.
-
Page 144: Appendix
Appendix Troubleshooting ............138 Specifications ............142 Cabinet Dimensions ..........144 Pin Assignments of D-Sub COMPUTER Input Connector ............145 Compatible Input Signal List ........146 PC Control Codes and Cable Connection ....147 Using Software Keyboard ........148 Troubleshooting Check List ........149... -
Page 145: Troubleshooting
8. Appendix Troubleshooting This section helps you resolve problems you may encounter while setting up or using the projector. Indicator Messages POWER Indicator Indicator Condition Projector Condition Note The main power is off – Blinking light Green 0.5 sec On, The projector is getting ready to turn on. - Page 146 8. Appendix Common Problems & Solutions (See also "Power/Status/Lamp Indicator" on page 138.) Problem Check These Items Does not turn on • Check that the power cable is plugged in and that the power button on the projector cabinet or the remote control is on.
- Page 147 8. Appendix Problem Check These Items Vertical stripes in RGB • Press the AUTO ADJUST button on the projector cabinet or the AUTO ADJ. button on the remote control. See mode page 41. • Adjust the computer image manually with the “Clock”/“Phase” in “Adjust” → “Image Options”. See page 95. USB mouse does not •...
- Page 148 Usually, the combination of the ‘Fn” key along with one of the 12 function keys gets the external display to come on or off. For example, NEC laptops use Fn + F3, while Dell laptops use Fn + F8 key combinations to toggle through external display selections.
-
Page 149: Specifications
8. Appendix Specifications This section provides technical information about the WT615/WT610 DLP™ Projector's performance. Model Number WT615/WT610 Optical DMD™ 0.7" Single Chip Digital Micromirror Device (DMD™), aspect ratio 4:3 Resolution 1024 768 pixels* up to UXGA with Advanced AccuBlend Mirror Aspherical mirror Lamp 275 W DC standard (210W Eco mode) - Page 150 Meets EMC Directive (EN55022, EN55024, EN61000-3-2, EN61000-3-3) Meets Low Voltage Directive (EN60950, TÜV GS Approved) For additional information visit: US : http://www.necdisplay.com Europe : http://www.nec-display-solutions.com Global : http://www.nec-pj.com Digital Light Processing and DLP are trademarks of Texas Instruments. The specifications are subject to change without notice.
-
Page 151: Cabinet Dimensions
8. Appendix Cabinet Dimensions PC CARD UNLOCK FOCUS MIRROR SOURCE LOCK MENU SELECT ENTER EXIT REFORM AUTO ADJUST POWER STATUS STAND BY LAMP 313 (12.3) With mirror cover open 380 (15.0) REMOTE PCCONTROL PC CARD AUDIO IN AUDIO OUT DVI-I S-VIDEO IN DVI-I IN COMPUTER IN... -
Page 152: Pin Assignments Of D-Sub Computer Input Connector
8. Appendix Pin Assignments of D-Sub COMPUTER Input Connector Mini D-Sub 15 Pin Connector Signal Level 11 12 13 14 15 Video signal : 0.7Vp-p (Analog) 9 10 Sync signal : TTL level Pin No. RGB Signal (Analog) YCbCr Signal Green or Sync on Green Blue Ground... -
Page 153: Compatible Input Signal List
8. Appendix Compatible Input Signal List Signal Resolution Frequency H. Refresh Rate Dot Clock ( Dots ) ( kHz ) ( Hz ) ( MHz ) NTSC – 15.734 – – 15.625 – SECAM – 15.625 – VESA 31.47 59.94 25.175 31.47 25.175... -
Page 154: Pc Control Codes And Cable Connection
8. Appendix PC Control Codes and Cable Connection PC Control Codes Function Code Data POWER ON POWER OFF INPUT SELECT COMPUTER INPUT SELECT DVI (ANALOG) INPUT SELECT DVI (DIGITAL) INPUT SELECT VIDEO INPUT SELECT S-VIDEO INPUT SELECT VIEWER PICTURE MUTE ON PICTURE MUTE OFF SOUND MUTE ON SOUND MUTE OFF... -
Page 155: Using Software Keyboard
8. Appendix PC Control Connector (DIN-8P) To GND of PC To TxD of PC To RxD of PC NOTE1: Pins 2, 3, 5, 6 and 8 are used inside the projector. NOTE 2: For long cable runs it is recommended to set communication speed within projector menus to 9600 bps. Using Software Keyboard 1 to 0 and Characters ...... -
Page 156: Troubleshooting Check List
8. Appendix º Troubleshooting Check List Before contacting your dealer or service personnel, check the following list to be sure repairs are needed also by referring to the “Troubleshooting” section in your user’s manual. This checklist below will help us solve your problem more efficiently. - Page 157 Native resolution: Refresh rate: Video adapter: Other: Projector DVD player Video equipment Signal cable VCR, DVD player, Video camera, Video game or other NEC standard or other manufacturer’s cable? Model number: Length: inch/m Manufacturer: Distribution amplifier Model number: Model number: Switcher...
Need help?
Do you have a question about the VT615 and is the answer not in the manual?
Questions and answers