Table of Contents
Advertisement
Quick Links
Advertisement
Table of Contents

Related Manuals for sunjoe SJ1440SG-RM


Summary of Contents for sunjoe SJ1440SG-RM
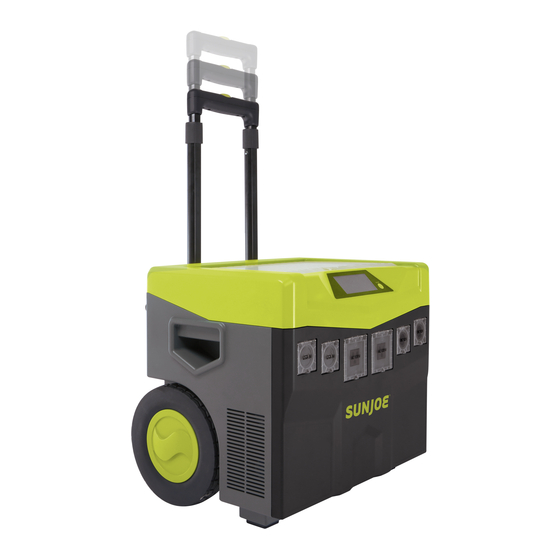
- Page 1 PORTABLE GENERATOR 1800 W | INDOOR + OUTDOOR OPERATOR’S MANUAL Model SJ1440SG-RM A Division of Snow Joe , LLC ® Form No. SJ-SJ1440SG-RM-880E-M-V1 © 2021 by Snow Joe , LLC SAVE THESE INSTRUCTIONS ® All rights reserved. Original instructions.
-
Page 2: General Safety
1800 W | INDOOR + OUTDOOR OPERATOR’S MANUAL Model SJ1440SG-RM A Division of Snow Joe , LLC ® Form No. SJ-SJ1440SG-RM-880E-M-V1 IMPORTANT! WARNING! When using the generator, basic safety precautions should always be followed to reduce the risk of Safety Instructions fire, electric shock, and personal injury. - Page 3 Limitation on Use • Make sure the generator is properly grounded and placed in a dry location. If improperly grounded, the entire generator could become electrically charged and cause WARNING! The generator is not intended for use electrocution. in connection with life support systems or other medical equipment or devices.
-
Page 4: Battery + Charging Safety Instructions
Battery + Charging Safety • Electrical plugs must match the outlet – Never modify the plug in any way. Do not use any adapter plugs with Instructions grounded appliances. Unmodified plugs and matching outlets will reduce the risk of electric shock. • Do not use the supplied battery charger to charge other We pay a great deal of attention to the design of every battery cordless tools. -
Page 5: Safety Symbols
Safety Symbols The following table depicts and describes safety symbols that may appear on this product. Read, understand, and follow all instructions on the machine before attempting to assemble and operate. Symbols Descriptions Symbols Descriptions READ THE OPERATOR'S MANUAL(S) – Read, understand, WARNING! Electrical shock hazard. - Page 6 Know Your Portable Generator Read the owner’s manual and safety instructions carefully before operating the portable generator. Compare the illustration below to the portable generator in order to familiarize yourself with the location of the various controls and adjustments. Save this manual for future reference.
- Page 7 Technical Data AC Input Charger Input Voltage Range ....90 – 130 V A.C. Inverter Generator Rated Input Range ...... 120 V A.C. Input Voltage Range .........10.7 – 15.5 V D.C. Max Charging Power ....80 ± 10 W Rated Input Voltage ........12.5 V D.C. AC Charging Cord Length ...
-
Page 8: Charging Operation
Charging Operation Appliances Runtimes Generator output 120 V A.C. can be used to drive electrical There are two charging options for your Sun Joe portable applicances such as lamps, computers, electric tools, etc. ® generator: USB output 5 V D.C can supply power to cellular phone and •... - Page 9 5. To read the battery current voltage, turn the unit on. 2. Plug the branch connectors into the solar panel cables Push and hold the ON/OFF button for approximately (Fig. 5). (one-way connectors ensure the polarity is 1.5 seconds and release the button when the unit beeps correct).
- Page 10 4. Use 2 x 25 ft (2 x 7.6 m) solar connector cables if 7. Plug the negative branch connector to solar charging necessary. input NEGATIVE (-) terminal (Fig. 10). 5. Align the branch connectors with solar connector cables, Solar charging input insert male end and press firmly until the locking tabs Fig.
- Page 11 Adding More Sun Joe Foldable Solar 11. With direct sunlight, a typical 60 W solar panel may take ® up to 60 hours to fully recharge the generator depending Panels (Optional - Sold Separately) on the intensity of the sunlight on the solar panel. Connecting solar panels in parallel up to 240 W for a 12 V DC 12.
- Page 12 Features LCD Display Backlight 1. The generator LCD display backlight comes pre- programmed from the factory to briefly light the panel and then turn off automatically. 2. To reprogram the backlight to stay on until turned off manually, press and hold the ON/OFF button for approximately 3 seconds (Fig.
- Page 13 LCD Display Indicators The battery indicator displays the battery's current voltage level. Battery The battery's voltage is shown in DC volts. The output indicator displays the total power being pulled from the AC Output Power inverter or the DC terminals (consumption power). The input indicator displays the total power being input into the generator Input Power from the solar panel(s) or the AC charger (charging power).
-
Page 14: Operation
Operation 3. The generator will then be activated and the LCD panel will display the self-test's progress. All indicators will be illuminated at the same time when the generator initially Output Panel powered on (Fig. 19). The generator contains a total of 6 electrical outlets (Fig. 17): Fig. - Page 15 Simultaneous Charging and 3. To turn it off, press and hold the ON/OFF power button for approximately 1.5 second, release when the unit beeps Output Mode (Fig. 23). 1. One or more loads/devices are connected to outlets and one or more sources of input power are connected. Fig.
- Page 16 Jump-starting a Vehicle Battery (Fig. 25) Retractable Handle (Fig. 26) IMPORTANT! If possible, park the vehicle as close to the 1. Use your thumb to press the release button, then pull and generator as possible. extend the telescoping handle. 1. Remove covers from the battery terminals. 2.
-
Page 17: Replacement + Installation Of The Battery
Replacement + Installation Replacing the battery 1. Tools required: of the Battery • Phillips screwdriver 1. Use only batteries meeting the following criteria: • Electrical tape • Battery type: Sealed lead-acid, AGM. (deep cycle) • Adjustable wrench • Nominal voltage: 12 V D.C. 2. - Page 18 4. Remove the connection of the positive (+) red cable from 1. Batteries vary according to device. Consult your manual the battery, wrap the lug of the cable with electrical tape for specific information. (Fig. 29). 2. Install only new batteries of the same type in your product 5.
-
Page 19: Maintenance
Maintenance Make certain that the generator is kept clean and stored properly. Only operate the unit on a flat, level surface in a clean, dry operating environment. DO NOT expose the unit to extreme conditions, excessive dust, dirt, moisture or corrosive vapors. CAUTION! DO NOT use a garden hose to clean the generator. -
Page 20: Troubleshooting
Troubleshooting The following error codes may be displayed on the LCD display if the described fault conditions occur. Error Code Description Description of Condition Solution Displayed of Error • The unit will automatically • Unit shuts down reset once the fault •... - Page 21 • Unit continues to run • System is still operating but input voltage • If the warning is ignored has dropped too close to the shut down DC output under the generator will limit (11.0 to 10.7 V D.C.) voltage warning eventually go into the •...
-
Page 22: Optional Accessories
Optional Accessories WARNING! ALWAYS use only authorized Snow Joe + Sun Joe replacement parts and accessories. NEVER use ® ® replacement parts or accessories that are not intended for use with this portable generator. Contact Snow Joe + Sun Joe if you ®... - Page 23 SNOW JOE + SUN JOE REFURBISHED GOODS WARRANTY ® ® Snow Joe + Sun Joe may from time to time change the design of GENERAL CONDITIONS: ® ® its products. Nothing contained in this warranty shall be construed Snow Joe + Sun Joe operating under Snow Joe , LLC warrants...
- Page 24 snowjoe.com...
Need help?
Do you have a question about the SJ1440SG-RM and is the answer not in the manual?
Questions and answers