Table of Contents
Advertisement
Quick Links
Advertisement
Table of Contents

Summary of Contents for Kings Power SP-550
- Page 1 TIME STAMP TIME/DATE/NUMBERING PRINTER USER’S MANUAL...
- Page 2 1. The details of this User’s Manual are subject to change without prior notification. 2. This User’s Manual has been prepared with the utmost care to cover all aspects of the time stamp’s use. If you feel, However, that some explanations are inadequate, unclear, or difficult to understand, please do not hesitate to contact the dealer or the shop from which you have purchased your Time Stamp.
- Page 3 TABLE OF CONTENTS...
- Page 4 1. FEATURES Main applications: Payroll / job cost recorder, time stamp or numbering machine. ● The Quartz Time Stamp ● 13 preprogrammed comments ● Dot-Matrix printer ● Alphanumeric printing ● Perpetual calendar ● Selectable 4-digit year imprint ● Automatic daylight saving time ●...
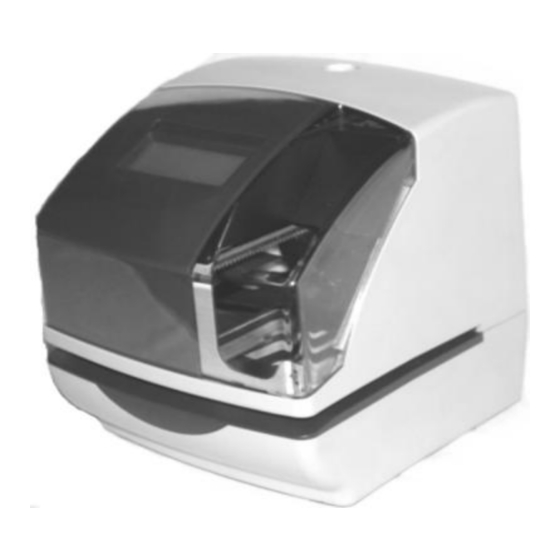
- Page 5 2. PREPARATION Package Contents Unpack the Time Stamp and check its contents to ensure that the Time Stamp and all accessories are included. ● User’s manual x 1 ● Wall-Mount: Screw ● Key Template x 1 ● Fuse (Ac 1A) x 1 Structure of Time Stamp <Front>...
-
Page 6: Quick Easy Setup
3. QUICK EASY SETUP Unlock the key and remove Replace the cover and lock. the top cover. Plug the Ac cord into the Ac outlet Remove the Protection Pad. and insert a card. -
Page 7: Optional Functions
4. OPTIONAL FUNCTIONS Following optional functions are available by adding an optional board. External Time Signal for Bell, Built-in buzzer. External Time Signal and Built-in Buzzer External Time Signal and Built-in Buzzer shall be controlled by Time table program and their duration setting. - Page 8 5. SETTING THE TIME STAMP To set the Time Stamp, you must plug the AC cord into the AC outlet and remove the cover. Then press the [F] button once, the Time Stamp goes into the program mode showing the “▲” on the display position under the “TIME” mark. Function keys: [F] (function) button: You can select the desired program setting by pressing this [F] button, Selected program setting mode is indicated by the “▲”...
-
Page 9: Setting The Time
6. SETTING THE TIME Example: Change the time from PM 10:20 to AM 11:30 2. Setting the “Minute” Press the [F] button, and position the “▲” under the “TIME” mark. Press the [+] or [-] button to set at The “Hour” flashes. (The flashing “30”... -
Page 10: Setting The Date
7. SETTING THE DATE Example: Change the date from January 9, 2004 to OCT 10, 2004. 3. Setting the “Date” Press the [F] button, and position the “▲” under the “DATE” mark. The Press the [+] or [-] button to set at “Year”... -
Page 11: Setting The 12/24 Hour Format
8. SETTING THE 12/24 HOUR FORMAT Example: Setting the hour format to 24 hour. Press the [F] button, and position If you want to set another the “▲” under the “Hour” mark. The function, press the [F] button flashing digit indicates “Hour to continue setting. -
Page 12: Setting The Print Order
9. SETTING THE PRINT ORDER Example: Set the print order to “Year, Month, Date, Hour and Minute”. ※ Please see page 10 for reference. Press the [F] button, and position the “▲” under the “Print Order” mark. The flashing digit indicates “Print Order Options”. - Page 13 Y=Year, M=Month, D=Date, DOW=Day of the week, H=Hour, Min=Minute, S=Second, C=Comment, N=Number Print Example Print Example Print Order Options Print Order Options 31 JAN ’04 SENT JAN 31 16 D.M.Y.C ’04 JAN 31 SENT D.H.Min 31 10:00 17 Y.M.D.C M.D.H.Min JAN 31 10:00 18 C.D.H.Min SENT 31 10:00...
-
Page 14: Setting The Print Pattern
10. SETTING THE PRINT PATTERN In this function, the printing of Year digit, the printing type of minute, and change of Leading Zero can be set. Example: Setting the Year imprint to 4 digits, the minute to 1/100 min, and the Leading Zero to enabled. - Page 15 2. Setting the “Type of minute” P R IN T Press the [+] or [-] button to set at P A T T E R N ▲ “2”, and press the [E] button. At the same time, the flashing changes from ●...
-
Page 16: Setting The Preprogramed Comments
11. SETTING THE PREPROGRAMED COMMENTS Example: Setting the comment to “SENT” COMMENT Press the [F] button, and position the “▲” ▲ under the “COMMENT” mark. The flashing digit indicates “Comment Options”. (The flashing means it can be changed.) ● ● ●... -
Page 17: Setting The Customized Comments
12. SETTING THE CUSTOMIZED COMMENTS * Maximum 3 lines comment can be set to print. * This time stamp can print 31 characters (161 font size) at maximum, however number of characters will depend on font size. Refer to the “24. CHARACTER CODE FOR ALPHANUMBERIC”. - Page 18 Setting the “Character Code” Press the [F] button, and position the “▲” under the “COMMENT” Such as example, the 1st character is “C”, press the [+] or [-] button to set at mark. “04”, and press the [E] button. Character Character Comment Position...
- Page 19 The 2nd character is “F”, Follow the same procedure for further press the [+] or [-] button to set characters settings. at “07”, and press [E] button. Setting the 2nd comment line Press the [E] button to change the The character code “07”...
- Page 20 The 2nd character is “SPACE”, Follow the same procedure for further then press the [+] or [-] button to set characters settings at “01”, and press the [E] button. Setting the 3rd comment line T he character code “01” m eans “SPA C E ” Press the [E] button to change the C O M M ENT comment line number to “C3”.
- Page 21 The 2nd character is “O”, After you finished setting the then press the [+] or [-] button to customized comments, press the [E] set at “10”, and press [E] button. button again, the LCD screen will return to normal mode. T he c harac ter c o de “10”...
- Page 22 Setting the Print Position of Customized Comments Left orientated Center orientated Right orientated CFH HOTEL CFH HOTEL CFH HOTEL 09 JAN ‘04 09 JAN ‘04 09 JAN ‘04 LONDON LONDON LONDON Example: Change the print position to “Right orientated”. Change the “Print Position” Press the [F] button, and position the “▲”...
- Page 23 Confirming and Change the Customized Comments Example: 1st comment line: No change. 2nd comment line: Change from year to time “HH:MM”. 3rd comment line: No change. CFH HOTEL CFH HOTEL Change from 09 JAN ’04 09 JAN 12:00 year to time LONDON LONDON 1.
- Page 24 2. Changing the Customized Comments Such as example, press the [+] or [-] button to set at “5”, and then press the [E] button. At this time, flashing changes from the “Character Position” to the “Character Code”. C O M M E NT ▲...
-
Page 25: Setting The Language
13. SETTING THE LANGUAGE This function is available if you select “Month”, “Day of the week” or “Comment” in previous “PRINT ORDER”. Example: Change the print language to French. Change the “Language” Press the [E] button and position the “▲” under the “LANGUAGE”... -
Page 26: Setting The Print Method
14. SETTING THE PRINT METHOD Example: Change the print direction to “Left” and the print activation to “Combination”. Change the Print Direction Press the [F] button and position the “▲” under the “PRINT METHOD” Such as example, press the [+] or [-] button to set at “2”, and then press At the same time, the flashing digit indicates “Print Direction Option”... - Page 27 After you finished setting the language, press the [E] button again, the LCD screen will return to normal mode. Automatic: Time stamp to print by simply inserting a card or piece of paper. Semi-automatic: Time stamp to print by pressing the push bar only when a card or piece of paper is inserted.
-
Page 28: Setting The Daylight Saving Time
15. SETTING THE DAYLIGHT SAVING TIME ※ At 2:00 AM on the first day of summer time, the clock automatically gains one hour to show 3:00 AM. At 3:00 AM on the last day of summer time, the clock automatically loses one hour to show 2:00 Am. - Page 29 Set the starting date 2. Setting the “Year” 4. Setting the “Date” Such as example, press the [E] Press the [+] or [-] button to set at “28”, and press the [E] button. button because the year 2004 is not to be changed. ▲...
- Page 30 Set the ending date 5. Setting the “Year” 7. Setting the “Date” Such as example, press the [E] button Press the [+] or [-] button to set at because the year 2004 is not to be “26”, and press the [E] button. changed.
- Page 31 Deleting the Daylight Saving Time setting To delete the daylight saving time setting, change the display of “month” of the starting setting to “- -”. Example: To delete the daylight saving time setting. Press the [E] button twice. At the Press the [F] button and position the “▲”...
-
Page 32: Setting The Number
16. SETTING THE NUMBER This function, you can set up the digits of printed number, the Repeat Time of number, and type of Number reset. Example: set up the Number Digit to 5 digits and the repeat times to 1 time, and the reset to 0. - Page 33 Print example: 0 time repeat 01time repeat 12345 JAN 9 ‘04 12345 JAN 9 ‘04 1st time 1st time 12345 JAN 9 ‘04 12346 JAN 9 ‘04 2nd time 2nd time 12345 JAN 9 ‘04 12347 JAN 9 ‘04 3rd time 3rd time 12345 JAN 9 ‘04 12348 JAN 9 ‘04...
-
Page 34: Setting The Initial Number
17. SETTING THE INITIAL NUMBER ※Up to 8 digit can be set, however the number of digits for “Initial Number” depends on how you set the “Number”. Example: setting the initial number to “100”. Refer “16. SETTING THE NUMBER” The 1st INITIAL NUMBER digit... - Page 35 18. SETTING THE TIME TABLE PROGRAM This function allow special mark “★” printing, an External Time Signal (optional) and a Built-in buzzer (optional). These functions can be programmed for each day of the week and each time period. ※Up to 48 programs can be set (Program No.1 Through No.48). ※The “Ext.
- Page 36 (2) Setting the Code for “Action” Press the [+] or [-] button to set at “1”, and then press the [E] button. At the same time, ▼ TIME TABLE the display changes to the following figure. PROGRAM ● ● ● ●...
- Page 37 3. Setting program No.2 (Special mark off) “★” (1) Setting the code for “Day of the week”. Press the [E] button, and then the Program No. ▼ is entered. At the same time, the flashing changes TIME TABLE PROGRAM ● ●...
- Page 38 (4) Setting the “Minute” MO TU WE TH FR SA Press the [+] or [-] button to set at “01”, and then press the [E] button. ▼ ▼ At the same time, the display changes to the *OFF TIME TABLE PROGRAM ●...
- Page 39 (3) Setting the “Hour” Press the [+] or [-] button to set at “09”, and MO TU WE TH FR SA then press the [E] button. ▼ ▼ At the same time, the flashing changes from EXT. TIME TABLE PROGRAM SIGNAL the “Hour”...
- Page 40 (2) Setting the Code for “Action” Press the [+] or [-] button to set at “4”, and then press the [E] button. At the same time, the display changes ▼ TIME TABLE to the following figure. PROGRAM ● ● ● ●...
- Page 41 Confirming the Time Table Program settings To confirm the programs that has been set, press the [F] button SU MO TU WE TH FR SA and position the “▲”over the “Time Table Program” mark. At the same time, the “Program No.” flashes, and then press the [E] button. ▼...
- Page 42 SETTING THE EXTERNAL TIME SIGNAL /BUILT-IN BUZZER This function is to set the durations of External Time Signal and Built-in Buzzer. For the number of seconds, 1 through 59 can be selected. ※ For this feature to be functional, the optional pc board must be connected to the Time stamp.
-
Page 43: Setting The Password
20. SETTING THE PASSWORD If the password is set. When you are setting the time stamp, the time stamp ask to you enter the password. If the password you entered does not coincide with the setting, you can not change the setting values. ※You may set a password by any four digit number from 0001 to 9998. - Page 44 Deleting the Password The code “----” must be entered to delete the password. Example: Delete the password “0109”. Press the [F] button and position the “▲” the “PASSWORD” mark. ▼ PASSWORD ● ● ● ● Press the [+] or [-] button to set the first two digits at [--], and then press [E] button.
- Page 45 21. RESET When the reset switch is pushed, the program will return to the factory defaults. You must make a new setting.
-
Page 46: Wall Mounting
22. WALL MOUNTING Caution: The supplied screws are intended for use on a thick wooden wall or wooden column. Do not use any other materials. The Time Stamp may come off if used on other materials. Install the supplied wall-mount screws Replace cover and lock. -
Page 47: Replacing The Ribbon Cartridge
23. REPLACING THE RIBBON CARTRIDGE Unlock the key and remove the Turn the knob of the new cartridge cover. in direction of the arrow (clockwise) to tighten the ribbon. Hold the ribbon cartridge by its tab Place the cartridge inside the Time and pull straight out to remove it. - Page 48 ※Notice: install the ribbon cartridge so that the ribbon is between the print head and ribbon mask. Printing will not come out properly if the ribbon is placed behind the ribbon mask. Turn the knob of the cartridge in the Replace the cover and lock.
- Page 49 24. CHARACTER CODE FOR ALPHANUMEC Number: Sequential number HH: Hour MM: Minute SS: Second ※ ※ DOW: Day of the week 1 ~ 15: Language Specific Character Note : ( ) is to include the following meaning. Code=26: 2/4 digit setting of Year, Code 2A and 2b: AM/PM setting of Hour, Code=2C to 30: Number digits depend on the setting.
- Page 50 Note : ( ) is to include the following meaning. Code=6F: 2/4 digit setting of Year, Code =73 and 74: AM/PM setting of Hour, Code=75 to 79: Number digits depend on the setting.
- Page 51 Note : ( ) is to include the following meaning. Code=d2: 2/4 digit setting of Year, Code =d6 and d7: AM/PM setting of Hour, Code=d8 to dC: Number digits depend on the setting.
-
Page 53: Installing The Ni-Cd Battery
25. INSTALLING THE Ni-Cd BATTERY (OPTIONAL) ※ Optional back-up battery will require approximately 72 hours to fully recharge. Unlock the key and remove the Replace the cover and lock. cover. Insert the battery connector into the compartment connector (CN7) to install the battery. - Page 54 26. CONNECTING THE EXTERNAL TIME SIGNAL (OPTIONAL) Unlock the key and remove the The two wires of external alarm cover. unit, inset into the external time signal connector of time stamp. The connector for external time Replace the cover and lock. signal is on the back of the time stamp.
-
Page 55: Troubleshooting
27. TROUBLESHOOTING 1. The Time Stamp does not operate. Ensure the power code is properly plugged into the AC outlet. 2. The Time Stamp does not print. Ensure the ribbon cartridge is installed correctly. 3. The card is jammed. Press the push bar and try to pull out the card at the same time. 4.