
Related Manuals for Rockville RVM10FD


Summary of Contents for Rockville RVM10FD
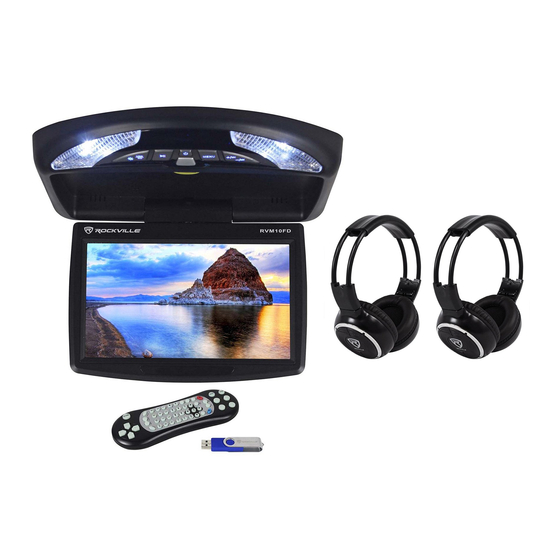
- Page 1 RVM10FD RVM13FD RVM16FD RVM18FD RVM20FD RVM22FD RVM24FD RVM25FD FLIP DOWN ROOF MOUNT TFT LCD MONITORS USER’S MANUAL NTSC VIDEO PLAYER color ENTERTAINMENT TRANSMITTER...
- Page 2 We hope that this unit will bring you years of performance and reliability. Please read this installation guide carefully for proper use of your Rockville Flip Down Roof Mounted Monitor. Should you need technical assistance during or after your installation please call our technical help line at 1-646-758-0144, Monday through Friday, 9am to 5pm EST.
-
Page 3: Table Of Contents
Table of Contents Powering the Unit ................... Installation ...................... Wiring Guide ....................Photos ......................Games ......................Movies ......................Music ......................E-Books ......................USB/SD ......................Remote ..................... 9-10 FM Transmitter ....................Settings ......................Specs ....................... 13-15 Powering the Unit • Turn the engine key to the “ACC” or “ON” position •... -
Page 4: Installation
4. Attach the metal mounting plate to the roof using the screws. Make sure screws attach to interior roof liner. 5. Attach the Rockville unit to the metal mounting plate using the screws. WARNING: • Be careful not to screw and puncture the exterior roof. -
Page 5: Wiring Guide
Wiring Guide These units are designed to function as the screen for in-dash DVD units, external video players, and game consoles. See bolow. -
Page 6: Photos
Photos • Insert media into the USB or SD slots. • From the main menu select the “JPEG” application. • Browse the files on your media using the remote or the instrument panel. • To return to the previous folder select the folder icon with the set of ellipses or press the “Return”... -
Page 7: Games
Games • This unit includes a USB loaded with playable 32-bit games. • Insert the media into the USB slot. • From the main menu select the “GAME” application. • Browse the files on your media using the remote or the instrument panel. -
Page 8: Movies
Movies • Insert media into the USB or SD slots. • From the main menu select the “VIDEO” application. • Browse the files on your media using the remote or the instrument panel. • To return to the previous folder select the folder icon with the set of ellipses or press the “Return”... -
Page 9: Music
Music • Insert media into the USB or SD slots. • From the main menu select the “AUDIO” application. • Browse the files on your media using the remote or the instrument panel. • To return to the previous folder select the folder icon with the set of ellipses or press the “Return”... -
Page 10: E-Books
E-Books • Insert media into the USB or SD slots. • From the main menu select the “E-Book” application. • Browse the files on your media using the remote or the instrument panel. • To return to the previous folder select the folder icon with the set of ellipses or press the “Return”... -
Page 11: Remote
Remote... - Page 12 Tip: Basic functions can be accessed from the instrument panel, but some in-depth functions can only be performed with the remote. Power Turn unit on and off. TFT Menu Access unit settings menu. PBC Menu Setup playback settings. Title Return to the title screen. Up Arrow Navigate up when available.
-
Page 13: Fm Transmitter
FM Transmitter • For wireless audio playback this unit comes with a built in FM modulator. • This unit has multiple frequencies it can be set to. • You can access these setitings from the “System Setup” menu. • Once you select the desired frequency, tune your cars FM radio to the set frequency. -
Page 14: Settings
Settings From the “System Setup” menu you can access various settings. • Brightness: increase or decrease. • Contrast: increase or decrease. • Hue: increase or decrease. • Saturation: increase or decrease. • Auto Power Down: turn on or off. Unit will power down after a period of inactivity. •... -
Page 15: Specs
Specs RVM10FD Screen Size 10” Wide Screen Contrast Ratio 500:1 Type Super Bright TFT-LCD Aspect Ratio 16:9 Resolution 800 x 640 pixels Color System NTSC/PAL Auto Switch Power Supply DC 12V Power Consumption Voltage 10.8-15V DC Operation Temperature -10°C~60°C Audio Signal-to-Noise >96 dB... - Page 16 RVM18FD Screen Size 18” Wide Screen Contrast Ratio 1000:1 Type Super Bright TFT-LCD Aspect Ratio 16:9 Resolution 1440 x 900 pixels Color System NTSC/PAL Auto Switch Power Supply DC 12V Power Consumption Voltage 10.8-15V DC Operation Temperature -10°C~60°C Audio Signal-to-Noise >96 dB RVM20FD Screen Size...
- Page 17 RVM24FD Screen Size 24” Wide Screen Contrast Ratio 1000:1 Type Super Bright TFT-LCD Aspect Ratio 16:9 Resolution 1920 x 1080 pixels Color System NTSC/PAL Auto Switch Power Supply DC 12V Power Consumption Voltage 10.8-15V DC Operation Temperature -10°C~60°C Audio Signal-to-Noise >96 dB RVM25FD Screen Size...
- Page 18 Visit us at: Rockvilleaudio.com Due to constant improvements, these specifications are subject to change without notice. Copyright 2014...
Need help?
Do you have a question about the RVM10FD and is the answer not in the manual?
Questions and answers