
Related Manuals for Rockville RVD13-HD


Summary of Contents for Rockville RVD13-HD
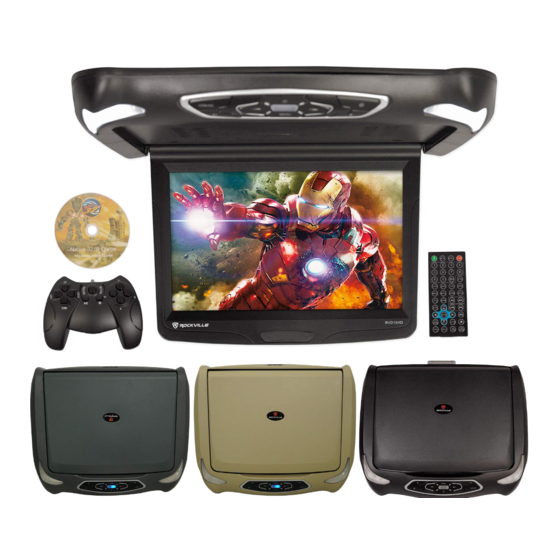
- Page 1 RVD13-HD RVD15-BGB RVD17-HD FLIP DOWN ROOF MOUNT HIGH DEFINITION LCD MONITOR WITH DVD PLAYER OWNER’S MANUAL...
- Page 2 We are very proud to bring you what we consider to be the absolute best value in mobile audio products. The Rockville RVD-HD series are called true all in one be- cause the DVD player and a load of entertainment options are all included in one chassis.
-
Page 3: Table Of Contents
18-20 Troubleshooting ................Precautions • To minimize the risk of improper installation Rockville recommends that the installation of this product be performed by an MECP-Certi ed professional installer. • Improper installation may cause damage to the vehicle or injury to the driver and occupants. -
Page 4: Powering Unit
Powering the Unit • Turn the engine key to the “ACC” or “ON” position • Press and hold the power button for 3 seconds • The unit will turn on. • When the engine key is turned to the “OFF” position, the unit will turn off. Tip: If the unit does not turn on, check to ensure all wires are connected properly. -
Page 5: Control Panel
RVD13HD Control Panel Side Panel Rear Panel HDMI ATTENTION Be sure to insert disc label side up! Press once to play and pause content. Play/Pause Stop Press once to stop content. Eject Press quickly to eject disc. Skip Back Skip to previous chapter, song, picture, page, or video Skip Forward Skip to next chapter, song, picture, page, or video Press to adjust selected menu item value. - Page 6 RVD15BGB Control Panel ATTENTION Be sure to insert disc label side up! R V D1 5B GB USB/SD Button Press once to switch between USB and SD mode. Play/Pause Press once to play and pause content. Press to adjust selected menu item value. In Disc/USB/SD mode —...
- Page 7 RVD17HD Control Panel Right Rear Panel Left Rear Panel L VIDEO OUT ATTENTION RV D1 7HD Be sure to insert disc label side up! Press once to turn unit ON. While unit is on, press quickly to swith to Power Button/ AV/DVD/HDMI mode.
-
Page 8: Game Controller/Remote
Game Controller Remote Control... - Page 9 Game Controller Fucntions Down Move down Move left. Left Move up. Move right. Right Return Return to main menu. Volume – Press to decrease volume. Volume + Press to increase volume. Game function A. Function A Function B Game function B. Stop Stop game.
-
Page 10: Dvd/Usb/Sd/Hdmi
Getting Started • Insert the DVD, label side up, into the disc drive. • Wait for the DVD to load. • Navigate the DVD menu for options. Control • Play/pause and navigate through the DVD menu options using the designated buttons found on both the control panel and the remote. -
Page 11: Advanced Functions
Advanced Functions Picture Contol via Unit • Press the MENU button on the unit to bring up the on-screen picture control menu. • Select the desired sub-menu (COLOR, OSD, FUNCTION, and SOUND) by pressing the power button on the unit. •... -
Page 12: Installation
RED (+12V) cable from battery terminal. 1. Disconnect the original dome light. 2. Detach metal mounting plate from Rockville unit. Release the screen from its locked position to access the necessary screws and set them aside. 3. Attach the metal mounting plate to the roof using the screws provided. Make sure screws attach to interior roof liner. -
Page 13: Installation Notes
Installation Notes... -
Page 14: Wiring
WIRING RVD13HD AV In • Left audio input Tip: AV In - Use these to connect an external media • Right audio input deice such as a camera, • Video input game console, etc. AV Out • Left audio output Tip: Use these to project the display onto external •... - Page 15 WIRING RVD15BGB • Left audio input AV In • Right audio input • Video input L VIDEO OUT • Left audio output AV Out • Right audio output • Video output • Black = ground • Red = constant +12V •...
-
Page 16: Interchangeable Cover, Rvd15Bgb
Interchangeable Covers, RVD15BGB Chassis Cover 1. Remove the unit from vehicle roof and place on a at surface. Remove the chassis cover using the included removal tool. Insert the tool into the slot found to the left and right of the AV outputs on the rear of the unit to release the cover. - Page 17 Interchangeable Covers, RVD15BGB Screen Cover 1. Remove the unit from vehicle roof and place on a at surface. Remove the screen cover using the included removal tool. Open the screen to approximate- ly a 45 degree angle. Insert the tool into the slots found on the top edge of the screen to remove the cover.
-
Page 18: System Menu Set-Up
System Menu Set-up Enter System Set-up SYSTEM SETUP Press set up button and use arrow keys to TV SYSTEM POWE R RESUME select SYSTEM SETUP. SCREEN SAVER TV TYPE PASSWOR D RATIN G DEFAULT Display Mode SYSTEM SETU P Select TV SYSTEM from menu . Choose TV SYSTE M NTSC POWE R RESUME... - Page 19 TV Type SYSTEM SETUP Set the proper TV aspect ratio. TV SYSTE M POWE R RESUME SCREEN SAVER TV TYPE 4:3P S PASSWOR D 4:3L B RATIN G 16:9 DEFAULT Password SYSTEM SETUP In this menu you can set the parental lock TV SYSTEM POWE R RESUME password using four numbers.
- Page 20 Language Menu Set-up Language Set-up LANGUAG E SETU P Press set up button and use arrow keys to OSD LANGUAGE AUDI O LANG select SYSTEM SETUP. SUBTITL E LANG MENU LANG OSD Language LANGUAG E SETU P Select OSD LANGUAGE to set the unit OSD LANGUAG E CHINES E AUDI O LANG...
-
Page 21: Troubleshooting
Troubleshooting No display Check for loose or disconnected cables. Check input mode settings on the on-screen menu. Check ground cable. Make sure the area it is attached to has no rust or corrosion and is clean. Make sure ground connection is very tight and secure. - Page 22 Visit us at: RockvilleAudio.com Due to constant improvements, these specifications are subject to change without notice. Copyright 2020...
Need help?
Do you have a question about the RVD13-HD and is the answer not in the manual?
Questions and answers