Table of Contents
Advertisement
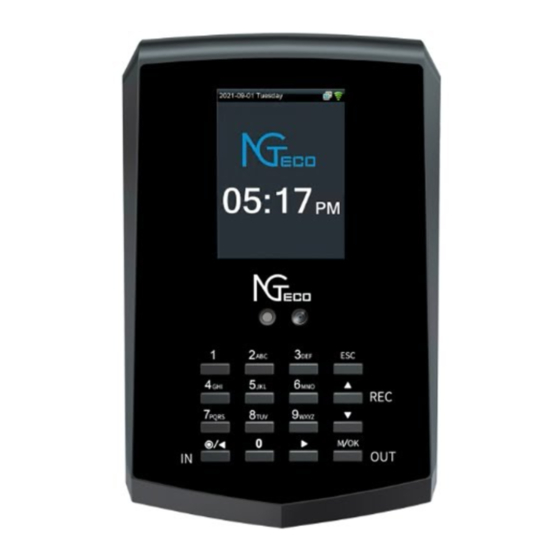
KF460
User Manual
KF460
Date: April 2021
Doc Version: 1.0
English
Thank you for choosing our product. Please read the instructions carefully
before operation. Follow these instructions to ensure that the product is
functioning properly. The images shown in this manual are for illustrative
purposes only.
For further details, please visit our Company's website
www.ngteco.com.
User Manual
Advertisement
Table of Contents

Related Manuals for NGTeco KF460


Summary of Contents for NGTeco KF460
- Page 1 KF460 User Manual User Manual KF460 Date: April 2021 Doc Version: 1.0 English Thank you for choosing our product. Please read the instructions carefully before operation. Follow these instructions to ensure that the product is functioning properly. The images shown in this manual are for illustrative purposes only.
- Page 2 KF460 User Manual About the Manual This manual introduces the operations of KF460 product. All figures displayed are for illustration purposes only. Figures in this manual may not be exactly consistent with the actual products. P a g e Copyright©2021 NGTECO CO., LTD. All rights reserved.
-
Page 3: Table Of Contents
............................. 17 OWNLOAD SERS COMMUNICATION SETTINGS ......................18 ..............................18 THERNET ........................... 19 IRELESS ETWORK ............................22 ONNECTION SYSTEM .............................. 22 ..............................23 ............................23 ARAMETER ..............................24 UTOTEST P a g e Copyright©2021 NGTECO CO., LTD. All rights reserved. - Page 4 ................37 ETUP ERIOD AND TTENDANCE ULE FROM APPENDIX ............................38 13.1 T9 I ..............................38 NPUT STATEMENT ON THE RIGHT TO PRIVACY .................... 39 ENVIRONMENT-FRIENDLY USE DESCRIPTION ..................40 P a g e Copyright©2021 NGTECO CO., LTD. All rights reserved.
-
Page 5: Safety Measures
Lightning - Install external lightning conductors to protect against electrical storms. It stops power- ups from destroying the system. It is recommended to install the device in areas with limited access. P a g e Copyright©2021 NGTECO CO., LTD. All rights reserved. -
Page 6: Electrical Safety
• The warranty service does not cover accidental damage, damage caused by mis-operation, and damage due to independent installation or repair of the product by the user. P a g e Copyright©2021 NGTECO CO., LTD. All rights reserved. -
Page 7: Instruction For Use
The distance between the user and the device should be same while enrolling and verifying. Also, the distance between the device and the ground must be same while enrolling and verifying. Recommended Standing Posture and Facial Expression: P a g e Copyright©2021 NGTECO CO., LTD. All rights reserved. - Page 8 During enrollment, locate your face at the center of the screen, and follow the voice prompt "Focus eyes inside the green box". The user needs to move forward and backward to adjust the eye position during the face registration. P a g e Copyright©2021 NGTECO CO., LTD. All rights reserved.
-
Page 9: Verification Modes
1:1 Face Verification mode The device compares the current face with the registered face of the entered user ID. Enter User ID and press "Face". P a g e Copyright©2021 NGTECO CO., LTD. All rights reserved. -
Page 10: Password Verification
DHCP, IP Address, Subnet mask, Gateway, Wi-Fi, set the App connection. System: Set the system parameters, such as Date/Time, Face parameters, Autotest, Reset and USB upgrade. Pay Period: Set the Pay period type and Start day of the week. P a g e Copyright©2021 NGTECO CO., LTD. All rights reserved. -
Page 11: User Management
3.1 Add User • Only the registered users can make verification in the device. • Start the device and open the Main Menu. Enter "Users" "Add User". P a g e | 10 Copyright©2021 NGTECO CO., LTD. All rights reserved. -
Page 12: Enter User Id
Employee ID will become a negative number when exporting the report. When the User List is displayed, the First name and Last Name will be combined. P a g e | 11 Copyright©2021 NGTECO CO., LTD. All rights reserved. -
Page 13: Enter User Role
Press ▼ / ▲ to select the "Verification Mode" on the Add User interface, press [M/OK]. The available verification modes are: Password/Face User ID only Password Face only Face + Password Note: "/" means "or", and "+" means "and". P a g e | 12 Copyright©2021 NGTECO CO., LTD. All rights reserved. -
Page 14: Enrolling A Face
Press ▼ / ▲ to select the “Password” on the Add User interface, press [M/OK]. Input the 1 to 8 digits password and press [M/OK], then re-type the password. P a g e | 13 Copyright©2021 NGTECO CO., LTD. All rights reserved. -
Page 15: Users List
3.2.2 Delete a User Press ▼ / ▲ to select a user to edit and press [M/OK]. Select "Delete": You can choose different user data to delete. P a g e | 14 Copyright©2021 NGTECO CO., LTD. All rights reserved. -
Page 16: Upload Users
USB disk. If you don’t enroll any user in the device, the content of each field in the download template file will be empty. You need to fill in the content according to your needs and upload it to the device. P a g e | 15 Copyright©2021 NGTECO CO., LTD. All rights reserved. -
Page 17: Upload User File
If the upload is successful, the device will prompt "Upload is done". When the uploaded data is empty or the uploaded file format is wrong, the device will prompt "Failed to upload." P a g e | 16 Copyright©2021 NGTECO CO., LTD. All rights reserved. -
Page 18: Download Users
Note: When uploading user photos, the device will detect whether there is a userphoto folder in the USB disk. If there is no userphoto folder, upload will fail. P a g e | 17 Copyright©2021 NGTECO CO., LTD. All rights reserved. -
Page 19: Communication Settings
Subnet Mask: Modify it if necessary. Gateway: It is necessary to set an address if the device and PC are in different network segment. Modify if necessary. P a g e | 18 Copyright©2021 NGTECO CO., LTD. All rights reserved. -
Page 20: Wireless Network
Select the required Wi-Fi name from the available list and input the correct password in the password interface, and then press Connect to Wi-Fi (OK). When the Wi-Fi is connected successfully, the home screen will display the Wi-Fi logo. P a g e | 19 Copyright©2021 NGTECO CO., LTD. All rights reserved. - Page 21 Subnet Mask: The default Subnet Mask of the Wi-Fi network is 255.255.255.0. It can be modified according to the network availability. Gateway: The default Gateway address is 0.0.0.0. It can be modified according to the network availability. P a g e | 20 Copyright©2021 NGTECO CO., LTD. All rights reserved.
- Page 22 After the upload is successful, it returns to the standby interface. After a while, the device displays that the Wi-Fi is connected. P a g e | 21 Copyright©2021 NGTECO CO., LTD. All rights reserved.
-
Page 23: App Connection
IP Address: IP Address of the device. Port: The Port number of the device. Password: Password to connect to the NGTeco Time app. Note: The device must be connected to Wi-Fi or the Ethernet successfully, otherwise the QR code will not be displayed. -
Page 24: Date Time
Note: The end time of DST cannot be set for next year. More specifically, the end time must be later than the start time in the same year. 5.2 Face Parameter Select "System" "Face". The recommended thresholds are as follows: Threshold High Medium Medium High P a g e | 23 Copyright©2021 NGTECO CO., LTD. All rights reserved. -
Page 25: Autotest
Test Keyboard: Checks if the keyboard is available. Test Face: Checks if the camera is normal. Test Clock RTC: Checks if the RTC (Real-Time Clock) is accurate. P a g e | 24 Copyright©2021 NGTECO CO., LTD. All rights reserved. -
Page 26: Reset
The firmware program of device can be updated with upgrade package in USB disk. You are not suggested to upgrade the firmware by yourself. If you need the upgrade file, please contact our technical support personnel. P a g e | 25 Copyright©2021 NGTECO CO., LTD. All rights reserved. -
Page 27: Help
The pay period ensures that the users will be paid regularly for their work. It also simplifies the reporting requirements for employer liabilities. P a g e | 26 Copyright©2021 NGTECO CO., LTD. All rights reserved. -
Page 28: Weekly Pay Period
Then press ▼ key and set the start day of the week. Press ▼ key and set the pay period effective date. Then press [M/OK] to save. P a g e | 27 Copyright©2021 NGTECO CO., LTD. All rights reserved. -
Page 29: Semi-Monthly Pay Period
Then press ▼ key and set the start day of the monthly. Then press ▼ key and set the start day of the week. Then press [M/OK] to save. P a g e | 28 Copyright©2021 NGTECO CO., LTD. All rights reserved. -
Page 30: Data Management
Delete User Photo: Deletes all the users' registration photos. Delete All Data: Deletes all the enrolled users' information, attendance records, short messages and work codes etc. Clean Permission: Clears the users’ admin permission. P a g e | 29 Copyright©2021 NGTECO CO., LTD. All rights reserved. -
Page 31: Attendance Rule
View Punch Record: When this option is turned on, the users can view their attendance records by themselves. If the View Punch Record is turned off, the users cannot view the attendance records. P a g e | 30 Copyright©2021 NGTECO CO., LTD. All rights reserved. -
Page 32: Time Data
9.1 Today's Attendance This menu ensures to view the attendance records of all users who have successfully verified that day, and the attendance records are sorted by time. P a g e | 31 Copyright©2021 NGTECO CO., LTD. All rights reserved. -
Page 33: View History Attendance
The interface to select users will be displayed. Press ▲ / ▼ to select date and time, and then enter date and time. Select the attendance state as Check-in/Check-out. Then press [M/OK] to save. P a g e | 32 Copyright©2021 NGTECO CO., LTD. All rights reserved. -
Page 34: Time Report
You can check the storage status as well as the firmware information of the device through the [System Info] option. Select the specific option to check the parameters: Device Usage: Displays the Number of users, Admin users, Password, Face, Attendance record and User photos quantity. P a g e | 33 Copyright©2021 NGTECO CO., LTD. All rights reserved. -
Page 35: Connect To Ngteco App
12 Connect to NGTeco App The App Connection interface allows you to connect the NGTeco Time Mobile app with the time clock. Once connected, you can perform User management, Report management, etc. on the Mobile app. The process is as follows: Download and install the NGTeco Time App on your phone. -
Page 36: Register Users From App
Open the User List on the clock to enroll user’s face. 12.2 Attendance View Attendance Record Go to Attendance menu. Select View User's Attendance Record. You can also select the date. P a g e | 35 Copyright©2021 NGTECO CO., LTD. All rights reserved. - Page 37 Select the user and click the Edit Punch icon. Edit the check-in/out time. Select the Punch Date and Time. Select the Punch State. Click Save & Sync to sync the attendance details to the clock. P a g e | 36 Copyright©2021 NGTECO CO., LTD. All rights reserved.
-
Page 38: Download Time Report From App
Set the Duplicate Punch Interval. Set the Maximum Work Hours. Set the Time format for report generation. Click Save & Sync to sync the settings to the clock. P a g e | 37 Copyright©2021 NGTECO CO., LTD. All rights reserved. -
Page 39: Appendix
Press ►to type "a". Press ►to type "A". Press ►to type numerals. Input "2021" in the same way. 1. Press ► to type "symbols" 2. Press "1" to input "." P a g e | 38 Copyright©2021 NGTECO CO., LTD. All rights reserved. -
Page 40: Statement On The Right To Privacy
Statement on the Right to Privacy Dear Customers, Thank you for choosing this hybrid biometric recognition product that NGTeco has developed and manufactured. As a world-renowned provider of core biometric recognition technologies, we are constantly researching and building new products, and strive to follow the privacy laws of each country in which our products are sold. -
Page 41: Environment-Friendly Use Description
Note: 80% of the parts in this product are manufactured with non-hazardous environment-friendly materials. The hazardous substances or elements contained cannot be replaced with environment- friendly materials at present due to technical or economic constraints. P a g e | 40 Copyright©2021 NGTECO CO., LTD. All rights reserved. - Page 42 1600 Union Hill Road Alpharetta, GA 30005 Tel: +1 (770) 800-2321 E-mail: ngtime@ngteco.com www.ngteco.com Copyright © 2021 NGTECO CO., LTD. All Rights Reserved. P a g e | 41 Copyright©2021 NGTECO CO., LTD. All rights reserved.
Need help?
Do you have a question about the KF460 and is the answer not in the manual?
Questions and answers