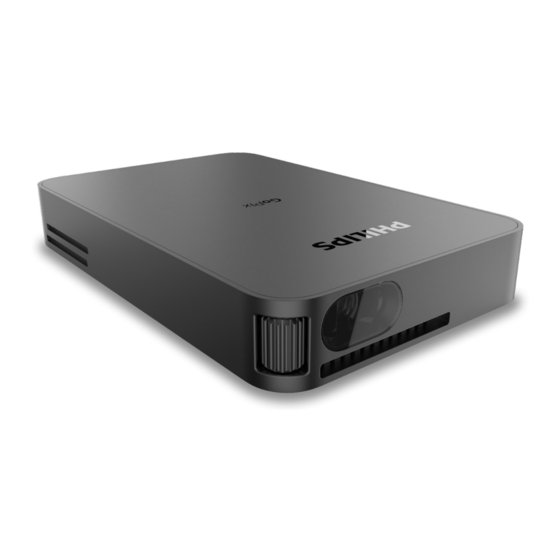
Summary of Contents for Philips GoPix 1
- Page 1 User Manual GoPix 1 Portable projector GPX1100 Register your product and get support at www.philips.com/support...
-
Page 2: Table Of Contents
Table of contents Introduction �������������������������������������������������3 Connect to devices through USB-C .....10 Use EasyLink ..............10 Dear customer ...............3 5 Change settings �����������������������������������11 About this user manual ..........3 What’s in the box ............3 Language settings ............11 Customer service centre ..........3 Input source selection ..........11 General safety information ���������������... -
Page 3: Introduction
Introduction What’s in the box GoPix 1 projector (GPX1100) Remote control Dear customer Tripod Thank you for purchasing this projector. USB-C to USB-C cable (video/charge) We hope you enjoy this product and the many Quick Start Guide functions it offers! -
Page 4: General Safety Information
The product has built-in battery. Do not product. dissemble and modify. The built-in battery Do not remove the type label from this product, should be replaced by qualified service staff as this will void the warranty. only. Philips · GoPix 1 GPX1100... -
Page 5: Power Supply
2 Overview Power supply Use only a PD charger which is certified for this product (see Technical data, page 16). Front view Check whether the mains voltage of the power supply matches the mains voltage available at the setup location. This product complies with the voltage type specified on the product. -
Page 6: Remote Control
Press twice to switch the projector off. Plug the fast charger into the wall outlet. The LED on the projector turns red. Operation by built-in battery The projector can be also operated on built-in battery for portability. Philips · GoPix 1 GPX1100... -
Page 7: Prepare The Remote Control
Charge the projector Charge the projector for 1.5 hours before first use. Charge the projector when the low battery icon appears in the projection screen. • To charge the projector, connect the projector to an external power supply as described in the section “Operation by external power”. -
Page 8: Placement Options
Projection Mode - Rotate Rear Ceiling, then instructions. An improper ceiling press OK. installation may result in accident, injury or damage. Philips · GoPix 1 GPX1100... -
Page 9: Connect
4 Connect Notice You need to connect the projector to an HDMI or USB-C device, so that the projection screen can show images. Make sure all devices are disconnected from the power outlet before establishing or changing any connections. Connect to devices through Using tripod HDMI The projector comes with a tripod which allows... -
Page 10: Connect To Devices Through Usb-C
With this connection, images are Use EasyLink shown on the projection screen, and audio is played on the projector. This projector supports Philips EasyLink which Using the USB-C cable, connect the uses the HDMI CEC (Consumer Electronics connector on the projector Control) protocol. -
Page 11: Change Settings
5 Change settings options will be deactivated. • Manual Keystone: Manually correct keystone or distorted images in the This section helps you change the settings of horizontal orientation. the projector. • Projection Mode: Adjust the projection to When the projector is turned on, press the correct position based on different on the remote control to access the settings installation of the projector. -
Page 12: Restore Default Settings
Position: Re-position the settings menu on the projection screen when it appears. • Software Version: Display the current software version of the projector. • Firmware Upgrade: Upgrade system software via a USB device (see Update software, page 13). Philips · GoPix 1 GPX1100... -
Page 13: Cleaning
Update software The latest software of the projector can be found on www.philips.com/support for you to get the best features and support from the projector. Follow the on-screen instructions to complete the update. -
Page 14: Troubleshooting
Connect to devices through HDMI, page 9. The projector cannot read the USB stick. • The projector does not support the exFAT file system. • Format the USB stick in FAT format, then use it. Philips · GoPix 1 GPX1100... - Page 15 Problems Solutions No image from the external HDMI device. • Check if the HDMI input is selected. • Disconnect the HDMI cable or switch off the HDMI device. • Wait 3 seconds. • Reconnect the HDMI cable or switch on the HDMI device again.
-
Page 16: Appendix
Screen distance ..80 cm to 200 cm / 24” - 60” Projection modes ... front, rear, front/rear ceiling Package content Keystone correction ..auto (vertical), manual GoPix 1 projector (GPX1100), remote control Focus adjustment ........... manual with 2 AAA batteries, tripod, USB-C to USB-C Auto rotate ..............yes... -
Page 17: Ce Statement
This device complies with Industry Canada CAN The Declaration of Compliance can be ICES-3 (B)/NMB-3(B) consulted on the site www.philips.com. RSS-Gen & RSS-247 statement: This device FCC statement complies with Industry Canada RSS standard(s). Operation is subject to the following two 15�19 Labeling requirements�... - Page 18 Screeneo Innovation SA/PHILIPS products or Screeneo Innovation SA/PHILIPS approved products. Screeneo Innovation SA shall not be held liable for any damage resulting from electromagnetic interference that occurs from the use of any interface cables other than those designated as Philips · GoPix 1 GPX1100...
- Page 19 Screeneo Innovation SA Route de Lully 5c - 1131 Tolochenaz - Switzerland Philips and the Philips Shield Emblem are registered trademarks of Koninklijke Philips N.V. used under license. Screeneo Innovation SA is the warrantor in relation to the product with which this booklet was packaged.


Need help?
Do you have a question about the GoPix 1 and is the answer not in the manual?
Questions and answers