Advertisement
Quick Links
INSTRUCTION MANUAL
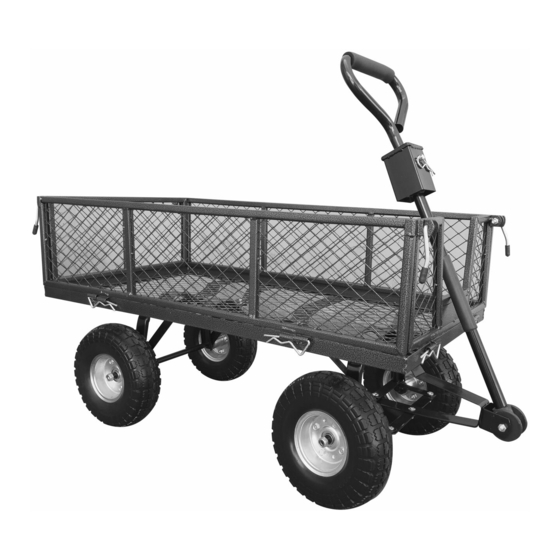
GARDEN TROLLEY
Model No: THGT -- Product No: 193854001
ASSEMBLY REQUIRED
SAVE THESE INSTRUCTIONS
SPARES & SUPPORT: 01793 333212
IMPORTANT
Please read & understand this manual, paying attention to the safety instructions, before use.
The manufacturer reserves the right to change the product specification and livery according to
continued product improvements.
Images used are for information purposes only and may differ from the actual product.
07-02-2017
Advertisement

Subscribe to Our Youtube Channel
Related Manuals for The Handy THGT


Summary of Contents for The Handy THGT
- Page 1 INSTRUCTION MANUAL GARDEN TROLLEY Model No: THGT -- Product No: 193854001 ASSEMBLY REQUIRED SAVE THESE INSTRUCTIONS SPARES & SUPPORT: 01793 333212 IMPORTANT Please read & understand this manual, paying attention to the safety instructions, before use. The manufacturer reserves the right to change the product specification and livery according to continued product improvements.
-
Page 3: Table Of Contents
CONTENTS SPECIFICATION INTENDED USAGE IMPORTANT INFORMATION GENERAL SAFETY INSTRUCTIONS SET UP & PREPARATION FOR OPERATION MAINTENANCE & STORAGE TROUBLE SHOOTING PARTS DIAGRAM & LIST WARRANTY If you require any assistance with regards to the contents or operation of your machine, please contact us: Tel: 01793 333212 - Mon to Friday 8.00am to 5.30pm (excl. -
Page 4: Specification
INTENDED USAGE The Large Garden Trolley is designed for use in private gardens and primarily used around GRASS OR LAWN AREAS, but not in public facilities, parks or sports grounds and not for agricultural or forestry use. This is a garden trolley, therefore extended use over abrasive surfaces (e.g. concrete, tarmac etc.) could cause premature wear on the trolley tyres. -
Page 5: General Safety Instructions
GENERAL SAFETY INSTRUCTIONS It is important that you read and understand the owner’s manual and labels affixed to the machine. Learn its application and limitations as well as the specific potential hazards. Retain these instructions for future reference. The operator is responsible for following the warnings & instructions in this manual and on the product. - Page 6 DRESS PROPERLY Do not wear loose clothing, gloves, scarfs, neckties or jewellery (rings, wrist watches), which can be caught in moving parts. Protective electrically non-conductive gloves and non-skid heavy duty footwear are highly recommended when working. Wear a face or dust mask if the operation is dusty. Always wear safety glasses/goggles and/or face shields.
-
Page 7: Set Up & Preparation For Operation
Place the Right and Left Rear Axle Braces onto SET UP & PREPARATION the Rear Axle Support FOR OPERATION Follow the operating instructions step-by- step and use the pictures provided as a visual guide to easily assemble the machine. Please ensure that you have all the necessary parts, before commencing with the assembly. - Page 8 STEP 4 Attach the Steering Link Connector to the Front Axle Support arms, using Bolts, Washers and Nuts. The connector should sit over the axle as pictured. Position the straight arm of the Yoke between the Centre Front Axle Brace & Front Axle Support.
- Page 9 Slide the Large Washer over the Front Axle Support protruding leg (this is stepped) and slide the Split Pin through the hole. Split open the Pin legs to secure. STEP 10 Turn the Trolley over onto it’s wheels (DO NOT try and lift on your own, ask for assistance!) STEP 8 Attach the Pull Adapter (13) to the Yoke by...
-
Page 10: Maintenance & Storage
STEP 12 Position the Side Lock Handles through the tabs on the top right and left of the front and STORAGE back Side Panels and secure using the nut Never allow carried material to remain in the provided (do not overtighten). Ensure the Trolley for extended periods of time. - Page 11 PARTS DIAGRAM PARTS LIST Item No Part No. Description TH220-1-1 TH220-2-2 Side Panel TH220-3-3 Front Panel TH220-4-4 Rear Panel TH219-1 Wheel Assembly TH220-6-6 Rear Axle Support TH220-7-7 Right Rear Axle Brace TH220-8-8 Left Rear Axle Brace TH220-9-9 Front Axle Support with Axles TH220-10-10 Central Front Axle Brace TH220-11-11...
- Page 12 Item No Part No Description TH215-A1-16 Split Pin – 2.5x45 TH219-2 Wheel Washer 16mm TH215-C-18 Carriage Support Bolt, Washer & Nut - M8x15mm TH215-A4-19 Bolt, Washer & Nut - M6x16mm TH215-D-20 R-Clip - 40x105 TH215-E1-21 Bolt, Washer & Nut for Pull Handle - M8x60 TH215-F-22 Panel Lever TH215-A2-23...
- Page 13 GJ HANDY & CO LTD USER WARRANTY POLICY Users Statement of Warranty Each new machine is warranted against defective material or assembly of material under normal usage. The warranty applies to the original purchaser and covers faulty parts and the labour involved in replacing and repairing those parts, which are of original manufacture.
- Page 14 GJ HANDY & CO LTD USER WARRANTY POLICY Not covered by this warranty a) The warranty policy does not cover any depreciation or damages caused by ordinary wear, rusting or corrosion, lack of correct maintenance or operation, misuse, abuse, lack of transportation or accident.
-
Page 16: Email: Customerservice@Handydistribution.co.uk
For spares or support of your Handy product, please contact us: Tel: 01793 333212 Email: customerservice@handydistribution.co.uk (Mon – Fri 8.00am to 5.30pm excl. Bank Holidays) To see our range of garden machinery & equipment visit: www.thehandy.co.uk Making gardening easier & affordable since 1938 Distributed by Handy Distribution, Murdock Road, Dorcan, Swindon, SN3 5HY...
Need help?
Do you have a question about the THGT and is the answer not in the manual?
Questions and answers