Table of Contents
Advertisement
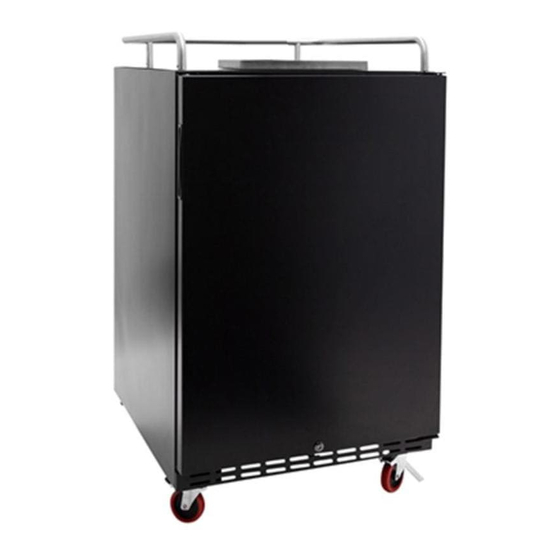
Built-In Kegerator
BR7001SS / BR7001SSOD
BR7001BL
Refrigerators for the KC7000 Series of Kegerators
Owner's Manual
For more information on other great EdgeStar products on the web, go to
https://www.edgestar.com
To use the EdgeStar self-diagnostic tool, go to
https://support.edgestar.com
V2.4-07132018
Advertisement
Table of Contents

Related Manuals for EdgeStar BR7001SS


Summary of Contents for EdgeStar BR7001SS
- Page 1 Built-In Kegerator BR7001SS / BR7001SSOD BR7001BL Refrigerators for the KC7000 Series of Kegerators Owner’s Manual For more information on other great EdgeStar products on the web, go to https://www.edgestar.com To use the EdgeStar self-diagnostic tool, go to https://support.edgestar.com V2.4-07132018...
- Page 2 Important Safety Information Improper handling can cause serious damage to the EdgeStar kegerator and/or injury to the user. This kegerator is designed for domestic use only. Do not use the unit for industrial or commercial use. Any other use may invalidate the warranty. Please review the ratings label located on the rear panel of the unit for electrical and other technical data related to this unit.
- Page 3 General Safety To prevent back and other types of injuries, use at least two people to move and install the kegerator. This unit is not intended for use by persons, including children, with reduced physical, sensory, or mental capabilities, unless they have been given supervision or instruction concerning the use of the appliance by the person(s) responsible for their safety.
-
Page 4: Table Of Contents
ORMAL OUNDS ……………………………………………………………………………………………………………………… 17 EFROSTING …………………………………………………………………………………… 17 REPARING THE EGERATOR FOR TORAGE CLEANING AND MAINTENANCE…………………………………………………………………………………………… 18 …………………………………………………………………………………………………………….. 18 XTERIOR LEANING ……………………………………………………………………………………………………………… 18 NTERIOR LEANING TROUBLESHOOTING………………………………………………………………………………………………………… 18 SPECIFICATIONS……………………………………………………………………………………………………………… 20 EDGESTAR LIMITED WARRANTY……………………………………………………………………………….. ………….. ... -
Page 5: Introduction
The instruction manual should be read before use. Introduction Thank you for purchasing this EdgeStar kegerator. We hope that this purchase will be the beginning of a lasting and rewarding relationship between you and EdgeStar. We will provide the customer support and exemplary products necessary to nurture that relationship. -
Page 6: Parts Identification
Parts Identification Tip: Gather the model and serial number from the product label and write them down before installing the kegerator. Front View Back View... -
Page 7: Accessories
Accessories Your kegerator will come with a set of standard accessories. These include a drip tray, guard rail, guard rail installation pegs, door handle, casters, and dispense tower screws. The other equipment / accessories you receive for the dispense kit and CO2 tank will be based upon the type of kegerator you purchased. -
Page 8: Electrical Requirements
kegerator should also be placed in a location that is strong enough to support its total weight, keeping in mind that it will weigh substantially more when fully loaded than when empty. Before you plug the kegerator into a power supply, be sure to let it stand upright for at least 24 hours to allow the compressor’s oils to settle. -
Page 9: Recommended Grounding Method
Important: Once you are ready to install it in a cabinet or directly on the floor, you must adjust the feet to level the kegerator. Installing the Stainless Steel Door Handle BR7001SS, BR7001SSOD models only To install a door handle: Remove the four screws from the side of the door. This should be the side opposite of the door hinge. -
Page 10: Installing The Casters
Caution: Do not over-tighten the screws as this may cause damage to the handle or to the stainless steel door. Installing the Casters This unit comes with four (4) casters. These are an optional accessary to assemble if you would like to make the unit more mobile. - Page 11 Carefully slide the bottom of the door forward and down, and place it on a padded surface to prevent damaging it. Remove the screws from the upper right hinge. Place the upper right hinge in a safe place in case you need to reverse the door in the future. Remove the plastic caps from the upper left hinge corner.
-
Page 12: Free Standing Installation
Free Standing Installation Note: Please refer to the dispense kit installation guide to complete the full assembly of the kegerator. A free standing installation will allow you to install the kegerator in almost any place you desire. Please follow the safety information referenced on the “Important Safety Information” page in this manual. -
Page 13: Built-In Installation
Built-in Installation Note: Please refer to the dispense kit installation guide to complete the full assembly of the kegerator. A built-in installation allows the kegerator to be placed under counter. This installation requires several more steps and considerations than a free standing installation. Countertop Opening for Dispense Kit Important Notes: ... -
Page 14: Installation Requirements
Installation Requirements Once an opening is created in the countertop the next step is to install the cabinet. When installing the kegerator under a counter, follow the recommended spacing dimensions shown below. Make sure the top cover, guard rail, drip tray, and installation pegs are NOT installed on the top of the cabinet. -
Page 15: Enclose Space Between Cabinet And Countertop
Enclose Space Between Cabinet and Countertop Once the cabinet is installed and the two openings of the cabinet and countertop are aligned, you must seal off the open space that will be created above the kegerator cabinet and under the countertop. If this open space is not properly sealed, the cabinet will lose its cold air and allow warm air to enter. -
Page 16: Keg Loading
Keg Loading Half Barrel Keg 5 lb. CO2 tank Double Gauge Regulator Slim Quarter Keg Sixth Barrel Keg 5 lb. CO2 tank Double Gauge Regulator Three Sixth Barrel Kegs 5 lb. CO2 tank ... -
Page 17: Operation
Operation Installation Check List Before Operation 1. Have all packing materials and tape been removed from the interior and exterior of the kegerator? 2. Have the installation instructions been followed, including connecting the machine to electricity? And has proper grounding been installed for the kegerator? 3. -
Page 18: Normal Sounds
Normal Sounds Your new kegerator may make sounds that are not familiar to you. Most of the new sounds are normal. Hard surfaces like the floor and walls can make the sounds seem louder than they actually are. The following describes the kinds of sounds that might be new to you and what may be making them. -
Page 19: Cleaning And Maintenance
Cleaning and Maintenance Periodic cleaning and proper maintenance will ensure efficiency, top performance, and long life. Exterior Cleaning The door and cabinet may be cleaned with a mild detergent and lukewarm water solution such as 2 tablespoons of baking soda to 1 quart of water. Do not use solvent based or abrasive cleaners. - Page 20 Troubleshooting Continued Symptoms Possible Cause Solution The Kegerator does not turn There is a power failure. Ensure the unit is plugged in and the power outlet has power. The unit is not plugged in. Plug the unit in to a power outlet that has sufficient amperage.
-
Page 21: Specifications
Specifications Note: Technical data and performance information are provided for reference only. Description of EdgeStar 24” Built-in EdgeStar 24” Built-in EdgeStar 24” Built-in product Kegerator Indoor/Outdoor Kegerator Kegerator Model BR7001SS BR7001SSOD BR7001BL Voltage / Frequency AC 115 V~60 Hz AC 115 V~60 Hz... -
Page 22: Edgestar Limited Warranty
WHAT IS COVERED: For a period of ONE (1) YEAR from the date of original retail purchase, EdgeStar will repair or replace any part free of charge including labor that fails due to a defect in materials or workmanship. Labor will be performed free of charge at an authorized EdgeStar repair facility and EdgeStar will supply new, rebuilt, or refurbished parts free of charge.
Need help?
Do you have a question about the BR7001SS and is the answer not in the manual?
Questions and answers