Table of Contents
Advertisement
Quick Links
Advertisement
Table of Contents

Subscribe to Our Youtube Channel
Related Manuals for Grundig Meglio Series


Summary of Contents for Grundig Meglio Series
- Page 1 All manuals and user guides at all-guides.com...
- Page 2 All manuals and user guides at all-guides.com CONGRATULATIONS Congratulations on the purchase of your GRUNDIG MEGLIO TV. The following instructions will assist you in operating each of the models in the MEGLIO range. You may already be familiar with using a similar unit, but please take the time to read the instructions relevant for your model.
-
Page 3: Table Of Contents
All manuals and user guides at all-guides.com CONTENTS UNPACKING ............................. 1 TV STAND INSTALLATION........................2 WALL MOUNT BRACKET INSTALLATION ................... 3 VIEW OF THE TV AND FUNCTIONS ....................4 REMOTE CONTROL........................... 7 INSTALLATION AND CONNECTION ....................10 BASIC OPERATIONS ........................11 TELETEXT ............................ -
Page 4: Unpacking
All manuals and user guides at all-guides.com UNPACKING The following items will be included with the purchase of a MEGLIO TV. Please refer to the model numbers outlined below for your specific accessories. If any items are missing from the below list, please contact the warranty line on 1800 509 394. -
Page 5: Tv Stand Installation
All manuals and user guides at all-guides.com INSTALLATION NOTES Connect your TV to Mains Power (AC 100-240 Volts, 50/60). Only connect this TV to Mains Power that matches the power specifications (AC 100-240 Volts, 50/60) of this TV. Locate the TV in the room where light does not directly strike the screen. Total darkness or a reflection on the picture screen can cause eyestrain. -
Page 6: Wall Mount Bracket Installation
All manuals and user guides at all-guides.com WALL MOUNT BRACKET INSTALLATION This TV is VESA Standard wall mountable. Please see below image of the 4 VESA standard holes (GLED2211HDV/W - 100mm x 100mm) (GLED3211HDV - 200mm x 100mm). The wall mount bracket and screws are not included with your TV. -
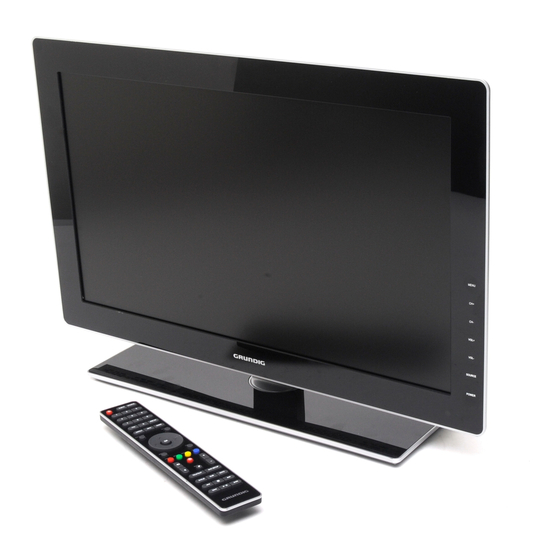
Page 7: View Of The Tv And Functions
All manuals and user guides at all-guides.com VIEW OF THE TV AND FUNCTIONS Front View Back View (GLED2211HDV/W) Back View (GLED3211HDV/W) - 4 -... - Page 8 All manuals and user guides at all-guides.com HDMI1 Input TV KEY FUNCTIONS The HDMI Input allows you to connect your HDMI Cable for greater definition. HDMI2 Input Remote Sensor The HDMI Input allows you to connect your HDMI Receives the remote signals from the remote Cable for greater definition.
- Page 9 All manuals and user guides at all-guides.com Audio Input (R) WMV, JPEG, BMP, WMA, MP3, AC3, AAC files. GLED3211HDV/W: The AV Audio Input (Right) must be connected HDMI1 Input with the RED cable for a composite connection. The HDMI Input allows you to connect your Audio Input (L) HDMI Cable for greater definition.
-
Page 10: Remote Control
All manuals and user guides at all-guides.com REMOTE CONTROL - 7 -... - Page 11 All manuals and user guides at all-guides.com REMOTE CONTROL KEY FUNCTIONS STANDBY Button: Press this button to switch the TV on or off. NUMERIC Buttons: Press these buttons to select a channel or select a page or select a track number in DVD mode.
- Page 12 All manuals and user guides at all-guides.com DOWN NAVIGATION Button: Press this button to scroll up through the Menus, or to scroll downwards through the channel list. EXIT Button: Press this button to exit Menu settings. YELLOW /REPEAT Button: Press this button to repeat play, or to display yellow subject in Teletext or in the sub-Menu.
-
Page 13: Installation And Connection
All manuals and user guides at all-guides.com REMOTE CONTROL BATTERY INSTALLATION The remote control requires two AAA batteries. Below are steps to assist you with replacing the batteries. Open the back cover of the battery compartment. Install the batteries into the battery tray. There is +/- polarity marking in the battery compartment. -
Page 14: Basic Operations
All manuals and user guides at all-guides.com Input via the RCA Cable. 4. YPbPr Component Video Input should be connected with the YPbPr Video Output of your DVD, VCR or Camcorder. 5. HDMI Input should be connected with the HDMI Output of your DVD, VCR or Camcorder. 6. -
Page 15: Teletext
All manuals and user guides at all-guides.com 3) After auto tuning, the amount of programs found and stored will be shown on the display and the first channel (typically channel "1") will begin to play automatically. 4) To change between Digital TV (DTV) and Analog TV (ATV), press the SOURCE Button on the remote control to select the preferred mode. -
Page 16: Main Menu Operations
All manuals and user guides at all-guides.com MAIN MENU OPERATIONS Press the MENU Button and then the NAVIGATION Buttons on the remote control to select the sub-Menus or the options you want to change. Then press the OK Button to confirm. Press the MENU Button when you want to return to the previous Menu, and press the EXIT Button to exit Menu setting. - Page 17 All manuals and user guides at all-guides.com so clear you can use the Arrow Buttons to highlight the Fine-Tune option and select Fine-Tune. Notes: You need to set the Color System and Sound System before manual tuning. For Australia, color system is PAL, and sound system is BG. DTV Manual Tuning Use the DOWN orUP Buttons to select DTV Manual Tuning in the Channel Menu.
-
Page 18: Picture Menu
All manuals and user guides at all-guides.com Signal Information (Only for DTV) Press UP or DOWN Buttons to select the Signal Information in the Channel Menu. Then press the OK Button to show the related information of the current channel. PICTURE MENU To enter the Picture Menu, press the MENU Button and then press the LEFT or RIGHT Buttons to select the Picture Menu. -
Page 19: Sound Menu
All manuals and user guides at all-guides.com and warm. Noise Reduction Press the UP or DOWN Button to scroll through the Noise Reduction options. You can set Noise Reduction to Off, Low, Middle, High, and Default. SOUND MENU To enter the Sound Menu, press the MENU Button, then press the ◄ or Button to select the Sound Menu ◄... -
Page 20: Time Menu (In Tv Mode Only)
All manuals and user guides at all-guides.com turn on Audio Description and adjust the Audio Description volume by pressing the Left or Right Buttons. Please note: Audio Description is only available in DTV mode and when broadcast by the local station. TIME MENU (IN TV MODE ONLY) To enter the Time Menu, press the MENU button, then press the LEFT or RIGHT button to select the Time Menu, and press the OK button to confirm. -
Page 21: Lock Menu
All manuals and user guides at all-guides.com Lock Menu To enter the Lock Menu, press the MENU Button, then press the LEFT or RIGHT Button to select the Lock Menu, and press the OK Button to enter. Press the UP or DOWN Buttons to scroll through the options in the Lock Menu. Press the OK Button to enter the sub-Menu. - Page 22 All manuals and user guides at all-guides.com Parental Guidance Select Parental Guidance, and then press the OK Button to enter the sub-Menu to set the program rating and to block the selected rating programs. Key Lock When Key Lock mode is on, all buttons including the Standby Button on the side of unit will be locked from operation.
-
Page 23: Setup Menu
All manuals and user guides at all-guides.com is set as ON the mode will be lock from operation. Set Source: Once a source is chosen, your TV will power on to the chosen source. Channel Number: In either DTV or ATV mode only, you can select a channel number to be set as the TVs preset channel. - Page 24 All manuals and user guides at all-guides.com PVR File System (only for DTV) Press the UP or DOWN Buttons to select PVR File System, then press the OK Button to enter sub-Menu and then use the UP or DOWN Buttons to scroll through the options. Select Check PVR File System and then press the OK Button to enter.
- Page 25 All manuals and user guides at all-guides.com select your type of recording format. Once you select a format, you are able to press the Right or Left Buttons to select the size you wish to use (for example 1G, 2G, 3G… or all). Once a particular size is booked for recording, you will be able to use the remaining space of your Hard Disc Drive for your data storage.
-
Page 26: Epg Menu
All manuals and user guides at all-guides.com Subtitle language Enter it to set subtitle language. Audio language Enter it to set audio language Aspect Ratio Press the UP or DOWN Buttons to select Aspect Ratio, then press the OK Button to enter the sub-Menu. Press the UP or DOWN Buttons to select your desired aspect ratio. - Page 27 All manuals and user guides at all-guides.com ◄ ◄ To see what is going to be broadcast after the current program, press the Button. Press the Button to move to the current program information. To view a different channel, press the UP or DOWN Buttons. If you wish to book a program to watch later, press the Navigation Buttons to highlight the program you want to book as Recording or for watching later.
-
Page 28: Dtv Recording
All manuals and user guides at all-guides.com viewing. You may also set the reminder to Once, Everyday or Weekly. Schedule (Yellow Button) Press the YELLOW Button to view the schedule list of booked programs for watching or recording. There are two different icons shown in the schedule list for identifying booked programs for watching or recording. -
Page 29: Multi-Media Operation
All manuals and user guides at all-guides.com All the functions (Play, FB, FF, Prev., Next, Pause and Stop) in the menu can only be performed when the menu is on. You may directly press the button or move the cursor to select the option when the menu is on to perform the function. - Page 30 All manuals and user guides at all-guides.com PHOTO/MUSIC/ MOVIE /TEXT Press the LEFT or RIGHT Buttons to select the icon, then enter your storage device to view the files. Press the OK Button to play the file. Press the RED Button to delete the file you selected from your storage device.
-
Page 31: Dvd Player Operation
All manuals and user guides at all-guides.com LEFT or RIGHT Button to adjust display size. Phase Press the UP or DOWN Button to select Phase, then press the OK Button to enter sub-Menu. Press the Left or Right Button to adjust. Position Reset Press the UP or DOWN Button to select Position Reset, then Press the OK Button to reset to the default settings. - Page 32 All manuals and user guides at all-guides.com display. Press the NAVIGATION Buttons to select the corresponding Icon at the bottom of the table and then press NAVIGATION buttons to select the file. Press the OK Button to play. 7. For the other operations, refer to the instructions of Remote Control. System Setup Press the DVD Setup Button to enter the System Setup Menu.
- Page 33 All manuals and user guides at all-guides.com AUDIO SETUP The ability to modify audio settings are DVD disc specified but may be modified from this menu. DIGITAL SETUP The ability to modify digital setup settings are DVD disc specified but may be modified from this menu. DYNAMIC RANGE The Dynamic Range allows you to adjust the compression ratio for different audio effect.
-
Page 34: Troubleshooting
If you have any issues or queries about the functions of this TV, please check the below table which includes a list of FAQs to assist with any issues. If this table is not of assistance, please contact the Grundig warranty line on 1800 509 394. Issue... -
Page 35: Specifications
All manuals and user guides at all-guides.com SPECIFICATIONS Model No. GLED2211HDV Series Screen size 21.5 inches Screen format 16:9 Resolution 1920 x 1080 Contrast 1000:1 Brightness 250 cd/m² Display colours 16.7M View angle 170° (horizontal) / 160° (vertical) Response time 5 ms TV system DTV: DVB-T;... - Page 36 All manuals and user guides at all-guides.com Model No. GLED3211HDV Series Screen size 31.5 inches Screen format 16:9 Resolution 1920 x1080P Contrast 4000:1 PANEL Brightness 400 cd/m² Display colours 16.7M View angle 176° (horizontal) / 176° (vertical) Response time 8.5 ms TV system DTV: DVB-T;...
-
Page 37: Display Modes (Vga Only)
All manuals and user guides at all-guides.com DISPLAY MODES (VGA ONLY) Mode Resolution Horizontal Freq. (KHz) Vertical Freq. (Hz) 640X350 31.469 70.086 720X400 31.469 70.087 640X480 35.000 66.667 832X624 49.726 74.551 1152X870 68.681 75.062 720X576 35.910 59.950 1152X864 53.783 59.959 VESA CVT 1280X720 56.456... - Page 38 All manuals and user guides at all-guides.com Display modes which are not listed in the above table, may not be supported, by this unit. For an optimal picture it is recommended to choose a mode listed in the table above. You have available modes compatible with Windows and MAC.
-
Page 39: Safety Instructions
All manuals and user guides at all-guides.com SAFETY INSTRUCTIONS PLEASE READ THESE INSTRUCTIONS CAREFULLY BEFORE YOU OPERATE THIS UNIT 1. Clean with a dry cloth only, to clean up dust, water drops or smudges from the screen or cabinet. Also make sure you disconnect the TV when you are cleaning the unit. -
Page 40: Warranty
In the unlikely event that your product fails to work normally, please contact Grundig Warranty on 1800 509 394 (Australia) or 0800 450 259 (New Zealand) and have your receipt of purchase on hand.
Need help?
Do you have a question about the Meglio Series and is the answer not in the manual?
Questions and answers