Table of Contents
Advertisement
Quick Links
Advertisement
Table of Contents

Subscribe to Our Youtube Channel
Related Manuals for Transcend JetFlash 110


Summary of Contents for Transcend JetFlash 110
- Page 6 JetFlash™ User’s Manual (Version 2.1)
-
Page 7: Table Of Contents
Table of Contents Introduction ....................2 Package Contents........................2 Features............................ 2 System Requirements ......................2 Driver Installation..................3 ® Driver Installation for Windows 98SE ................... 3 ® ™ Driver Installation for Windows Me, 2000, XP and Vista ..........3 ™ Driver Installation for Mac OS 9.0, or Later ................. -
Page 8: Introduction
Introduction ™ Congratulations on purchasing Transcend’s JetFlash . This tiny device allows you to exchange huge amounts of data and information between it and any desktop or notebook computer with a ™ USB port. The JetFlash plugs directly into your desktop or notebook computer, has a large storage capacity and much faster data transfer rates, making it perfect for storing and transferring your files, folders, documents, photos and other personal digital content. -
Page 9: Driver Installation
® Driver Installation for Windows 98SE Put the Driver CD into the CD-ROM (Auto-Run supported). Click the Win98SE Driver button. If the product does not attach CD, you can download the Windows 98SE driver from Transcend’s website, http://www.transcendusa.com/Support/DLCenter/Driver/JF_win98driver.zip. ® ™... -
Page 10: Formatting The Jetflash
Formatting the JetFlash™ ™ 1. Plug the JetFlash into a USB port and right-click on the removable disk. ™ 2. Select “Format” in the drop down menu to format the JetFlash ™ WARNING! Formatting the Disk will erase all of the data on your JetFlash ™... -
Page 11: Safely Remove The Jetflash™ From A Computer
Safely Remove the JetFlash™ from a Computer ™ ® Remove the JetFlash in Windows 98SE ™ Disconnect the JetFlash from your system directly when data is not transferring. ™ ® ™ Remove the JetFlash in Windows Me, 2000, XP and Vista 1. -
Page 12: Jetflash™ 150 Series
JetFlash™ 150 Series Specifications Size: 59mm x 19mm x 10mm Weight: 10 g Certificates: CE, FCC, BSMI Ordering Information Transcend P/N Memory Size Color TS256MJF150 256MB Green TS512MJF150 512MB Blue TS1GJF150 TS2GJF150 Silver TS4GJF150 Orange... -
Page 13: Jetflash™ 120 Series
JetFlash™ 120 Series Specifications Size: 75mm x 25mm x 11mm Weight: 15 g Certificates: CE, FCC, BSMI Ordering Information Transcend P/N Memory Size Color TS128MJF120 128MB Amber TS256MJF120 256MB Orange TS512MJF120 512MB TS1GJF120 Blue TS2GJF120 Light Blue TS4GJF120 Turquoise... -
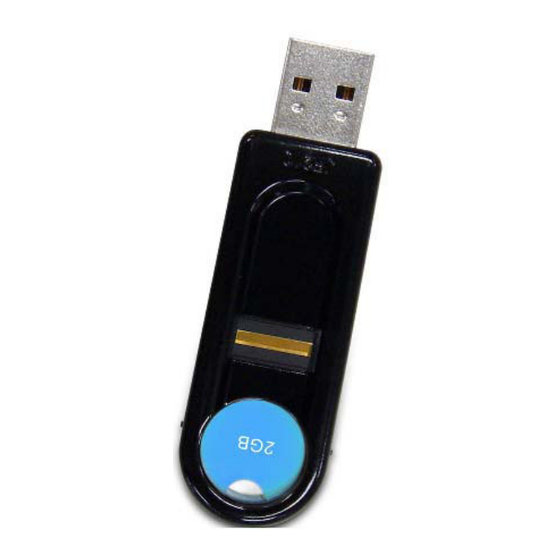
Page 14: Jetflash™ 110 Series
JetFlash™ 110 Series Specifications Size: 64mm x 21mm x 10mm Weight: 11 g Certificates: CE, FCC, BSMI Ordering Information Transcend P/N Memory Size Color TS128MJF110 128MB Gold TS256MJF110 256MB Green TS512MJF110 512MB Blue TS1GJF110 TS2GJF110 Gray TS4GJF110 Amber... -
Page 15: Jetflash™ 2A Series
75mm x 25mm x 11mm (Mini Size) Size: 88mm x 33mm x 15mm (Normal Size) 15 g (Mini Size) Weight: 24 g (Normal Size) Certificates: CE, FCC, BSMI Ordering Information Transcend P/N Memory Size Color TS128MJF2A 128MB Silver, Mini Size TS256MJF2A 256MB Silver, Mini Size... -
Page 16: Jetflash™ V20 Series
JetFlash™ V20 Series Specifications Size: 75mm x 25mm x 11mm Weight: 15 g Certificates: CE, FCC, BSMI Ordering Information Transcend P/N Memory Size Color TS512MJFV20 512MB Orange TS1GJFV20 Blue TS2GJFV20 TS4GJFV20 Green... -
Page 17: Jetflash™ V30 Series
JetFlash™ V30 Series Specifications Size: 60mm x 16.5mm x 8.1mm Weight: Certificates: CE, FCC, BSMI Ordering Information Transcend P/N Memory Size Color TS512MJFV30 512MB Orange TS1GJFV30 Blue TS2GJFV30 TS4GJFV30 Green... -
Page 18: Jetflash™ V60 Series
JetFlash™ V60 Series Specifications Size: 61mm x 18.6mm x 9.8mm Weight: 10 g Certificates: CE, FCC, BSMI Ordering Information Transcend P/N Memory Size Color TS512MJFV60 512MB Sunset Orange TS1GJFV60 Sea Blue TS2GJFV60 Fiery Red TS4GJFV60 Lime Green TS8GJFV60 Purple... -
Page 19: Jetflash™ 130 Series
JetFlash™ 130 Series Specifications Size: 60mm x 16.5mm x 8.1mm Weight: Certificates: CE, FCC, BSMI Ordering Information Transcend P/N Memory Size Color TS512MJF130 512MB Orange TS1GJF130 Blue TS2GJF130 TS4GJF130 Green... -
Page 20: Jetflash™ 160 Series
JetFlash™ 160 Series Specifications Size: 61mm x 18.6mm x 9.8mm Weight: 10g (512MB~4GB), 11g (8GB) Certificates: CE, FCC, BSMI Ordering Information Transcend P/N Memory Size Color TS512MJF160 512MB Orange TS1GJF160 Blue TS2GJF160 TS4GJF160 Green TS8GJF160 Gray... -
Page 21: Jetflash™ 168 Series
JetFlash™ 168 Series Specifications Size: 61mm x 18.6mm x 9.8mm Weight: 10 g Certificates: CE, FCC, BSMI Ordering Information Transcend P/N Memory Size Panel Art TS1GJF168 Orchid TS2GJF168 Bamboo TS4GJF168 Blossom TS8GJF168 Chrysanthemum... -
Page 22: Jetflash™ 210 Series
JetFlash™ 210 Series Specifications Size: 70mm x 23mm x 11mm Weight: 13 g Certificates: CE, FCC, BSMI Ordering Information Transcend P/N Memory Size Lens Color TS1GJF210 Orange TS2GJF210 Blue... -
Page 23: Jetflash™ V10 Series
JetFlash™ V10 Series Specifications Size: 64mm x 21mm x 10mm Weight: 11 g Certificates: CE, FCC, BSMI Ordering Information Transcend P/N Memory Size Color TS1GJFV10 Blue TS2GJFV10 TS4GJFV10 White TS8GJFV10 Black... -
Page 24: Jetflash™ 180 Series
JetFlash™ 180 Series Specifications Size: 49.7mm x 15.4mm x 6.9mm Weight: 14 g Certificates: CE, FCC, BSMI Ordering Information Transcend P/N Memory Size Color TS1GJF180 Blue TS2GJF180 TS4GJF180 Green... -
Page 25: Jetflash™ V90 Series
JetFlash™ V90 Series Specifications Size: 33.9 mm x 13.2 mm x 4.8 mm Weight: Certificates: CE, FCC, BSMI Ordering Information Transcend P/N Memory Size Panel TS2GJFV90 Pearl Shell... -
Page 26: Jetflash™ T2 Series
JetFlash™ T2 Series Specifications Size: 42.6mm x 16.0mm x 3.1mm Weight: Certificates: CE, FCC, BSMI Ordering Information Transcend P/N Memory Size Art Color TS1GJFT2 Blue TS2GJFT2 TS4GJFT2 Green... - Page 27 ™ JetFlash Software User’s Manual (Version 2.2)
- Page 28 Table of Contents Disclaimer of Liability ......................1 Introduction ..........................2 Features.............................2 Software System Requirements ......................2 Usage Considerations......................3 General Use............................3 Backing Up Data ..........................3 Reminders............................3 Connecting to a Computer ....................4 Disconnecting from a Computer ...................5 ™ Removing the JetFlash in Windows 98SE ..................5 ™...
- Page 29 ™ DataBackup Function for Windows Me, 2000, XP and Vista ............53 Backup Data ............................54 Restore Data............................56 Synchronize Data..........................59 ™ My JetFlash Disk ........................63 ™ JetFlash Online Update Function ..................64 ™ Exit JetFlash Software.......................65 Troubleshooting ........................66 Transcend Limited Warranty ....................67 Terminology..........................68...
-
Page 30: Disclaimer Of Liability
Disclaimer of Liability This software is the copyrighted work of the respective third party provider, Transcend Information, Inc. has not guaranteed or assured the quality of this licensed software. Your use of the software is governed by the terms of the end user license agreement, which accompanies or is included with the software. You shall not install this software that is accompanied by or includes a License Agreement, unless you first agree to the terms of the License Agreement. -
Page 31: Introduction
DataBackup Function: Backup, Restore and Synchronize your Data using the JetFlash ™ My JetFlash Access your JetFlash directly ™ Online Update Link to Transcend’s website to download the latest JetFlash elite ® Driverless (Only Windows 98SE needs driver) USB powered. No external power, or battery needed Software System Requirements Desktop or notebook computer with a working USB port. -
Page 32: Usage Considerations
Software User’s Manual, do NOT attempt to edit, delete, or modify any of the information in these folders. Backing Up Data Transcend does NOT take any responsibility for data loss, or damage during operation. If you ™ decide to store data on your JetFlash we strongly advise that you regularly backup the data to a computer, or other storage medium. -
Page 33: Connecting To A Computer
Connecting to a Computer ™ Plug the JetFlash directly into an available USB port on your desktop, or notebook computer. Figure 1. Connecting to a computer ™ When the JetFlash is successfully connected to a computer the unit’s LED will light up. A new ™... -
Page 34: Disconnecting From A Computer
Disconnecting from a Computer ™ NEVER disconnect the JetFlash from a Computer when its LED is flashing, a flashing LED indicates that data is being transferred. ™ ® ™ After you are finished using the JetFlash in Windows Me/2000/XP/Vista always click on the “Exit” option in the QuickMenu to end the session properly. -
Page 35: Remove The Jetflash ™ In Mac ™ Os 9.0, Or Later And Linux
™ WARNING! To prevent data loss, always use this procedure to remove the JetFlash from ® ™ Windows Me, 2000, XP and Vista ™ ™ ™ Remove the JetFlash in Mac OS 9.0, or Later and Linux Kernel 2.4.2, or Later ™... -
Page 36: Kernel 2.4.2, Or Later
Put the Software CD into the CD-ROM (Auto-Run supported). Click on the “Win98SE Driver” button to begin installing the driver. If the product does not attach CD, you can download the Windows 98SE driver from Transcend’s website, http://www.transcendusa.com/Support/DLCenter/Driver/JF_win98driver.zip. Figure 6. Windows 98SE Driver Installation The InstallShield Wizard will guide you through the installation process. -
Page 37: Setting Up The Software
“JetFlash elite” button in the JetFlash window. Figure 7. Software CD main screen Copy the “JFSW.exe” file from the Software CD or download it from Transcend’s website ™ ™ http://www.transcendusa.com/products/JFelite.asp to your JetFlash . This file is the JetFlash ™... - Page 38 ™ Double click on the “JFSW.exe” file to start the JetFlash Software program and the QuickMenu icon will appear on the Windows System Tray. ™ Click on the “QuickMenu” icon on the Windows System Tray to launch the JetFlash Software’s Main Menu. Figure 9.
-
Page 39: Jetflash Autologin Function
™ JetFlash AutoLogin Function ™ When the AutoLogin Function is enabled you can use your JetFlash to automatically log you in to any ™ website where you have a registered account. The JetFlash will keep a secure list of all your usernames ™... - Page 40 The first time you click on the “AutoLogin” option a New Password window will appear and an AutoLogin icon will be placed on the Windows System Tray. Enter your in “Password” and “Re-enter Password”. Click on the “OK” button to complete the Password setup. The Password you enter will be used to access the AutoLogin, please do NOT forget your password.
- Page 41 ™ 5. Method 2: An alternate method for adding a website’s Username and Password to the JetFlash ’s Database of registered accounts is to go to a website where you have a registered account, enter your Username and Password and click on the “Login” button. Figure 13.
- Page 42 ™ 7. Method 3: The final method for adding a website’s Username and Password to the JetFlash ’s Database of registered accounts is to go to a website where you have a registered account and enter your Username and Password . Figure 15.
- Page 43 ™ After saving a website’s Username and Password to the JetFlash ’s Database you can setup the ™ JetFlash to automatically log you in to any of the websites that are listed in the Database. Click on the AutoLogin icon and select the “Database Setup” option in the pop up menu. Figure 18.
-
Page 44: Pc-Lock Function For Windows
™ JetFlash PC-Lock Function ™ When the PC-Lock Function is enabled, you can use your JetFlash as a key to Lock your computer protecting it from use by others. ® ™ The PC-Lock function is only supported on Windows Me/2000 (SP4)/XP (SP2)/Vista Operating Systems. - Page 45 After selecting the Lock Time you can enter the Text to be displayed on the screen while the computer is locked. You can edit the text by clicking on the “Font” button. Figure 22. Select Text to be displayed After clicking on the “Add Picture” button and adding your favorite picture (.jpg and .bmp formats), a picture slideshow will be displayed while the PC-Locked screen is running.
-
Page 46: Lock Your Computer
Clicking on the “OK & PowerDown” button will start the PC-Lock and Power OFF the computer. ™ After the computer Powers OFF, disconnect the JetFlash from the USB port. If anyone tries to Power ON the computer they will only see the PC-Locked screen until the Lock Time ends, or the ™... -
Page 47: Unlock Your Computer
Unlock Your Computer ™ To unlock the computer, you must re-insert your JetFlash . The locked status on the screen will disappear and you are now free to use your computer. The computer’s locked status will also automatically end after the specified Lock Time has expired. -
Page 48: Jetflash Favorites Function
™ JetFlash Favorites Function ™ When the Favorites Function is enabled you can use the JetFlash to save all your Internet Explorer ™ favorites. The advantage of this feature is that you can plug your JetFlash into another computer, open Internet Explorer and your personal favorites will be automatically listed. - Page 49 ™ Selecting “Yes” will add a folder to the JetFlash ’s Removable Disk letter. The folder is named “Favorites” and it is here that your Internet favorites will be saved. Figure 28. Favorites folder ™ You can update, or add Internet favorites from a computer to your JetFlash by clicking on the Favorites icon and selecting “Local Import”...
- Page 50 The Warning window will appear, this informs you that you must close any Internet Explorer sessions ™ that are running before the JetFlash ‘s Favorites list can be exported to Explorer. Click on the “Yes” button to close all Internet Explorer sessions and continue. Figure 32.
-
Page 51: Jetflash ™ Secret-Zip Function
™ JetFlash Secret-Zip Function ™ When the Secret-Zip Function is enabled, you can use your JetFlash to save files as a Compressed file, or a Password protected (AES Encrypted) and Compressed file. This section contains information on: Secret-Zip Password Setup Secret-Zip Compress Files Secret-Zip Password Protect and Compress Files ®... - Page 52 The Setup Password window will appear and a Secret-Zip icon will be placed on the Windows System Tray. Figure 37. Secret-Zip Setup Password In Setup Password window you can enter your own Hint . It is important that you realize your Hint is ™...
- Page 53 Whatever “Hint , ” “Password” and “Confirm Password” you enter when you log in to the Secret-Zip Function will become your User profile for any files you save to the “Secret” folder. If you try to open a “Secret” file in another Secret-Zip session, you will prompted with the files’ original Hint and you will have to enter the “Password”...
-
Page 54: Secret-Zip Compress Files Function For Windows Me, 2000, Xp And Vista
® ™ Secret-Zip Compress Files Function for Windows Me, 2000, XP and Vista Click on the “Secret-Zip” option in the QuickMenu window. Figure 40. JetFlash Software Secret-Zip The Setup Password window will appear and a Secret-Zip icon will be placed on the Windows System Tray. - Page 55 The first time you click on the “Secret-Zip” option in the QuickMenu two folders will be added to the ™ JetFlash ‘s Removable Disk letter. One folder is named “Zip” and it is here you can save ™ Compressed files to your JetFlash Figure 42.
-
Page 56: Secret-Zip Password Protect And Compress Files Function For Windows
® Secret-Zip Password Protect and Compress Files Function for Windows ™ 2000, XP and Vista Click on the “Secret-Zip” option in the QuickMenu window. Figure 45. JetFlash Software Secret-Zip The Setup Password window will appear and a Secret-Zip icon will be placed on the Windows System Tray. - Page 57 The first time you click on the “Secret-Zip” option in the QuickMenu two folders will be added to the ™ JetFlash ’s Removable Disk letter. One folder is named “Secret” and it is here you can save ™ Password Protected and Compressed files to your JetFlash Figure 47.
- Page 58 Dragging and dropping a file(s) onto the “Secret” folder will automatically Encrypt and Compress the file(s) in the folder. After saving files to the “Secret” folder click on the Secret-Zip icon. Select the “Secure “\secret” folder” option in the pop up menu to ensure all the files are Encrypted and Compressed as special Password Protected “FA invisible”...
-
Page 59: Forgotten Your Password
An alternate method for opening a file in the “Secret” folder is to double click on the file. The Browse for Folder window will appear, select a destination for the file and click on the “OK” button to continue. Figure 52. Select location for Decrypted file The Decrypt and Decompress window will appear listing your Hint profile, enter your Password and click on the “OK”... -
Page 60: Jetflash E-Mail Function
™ JetFlash E-Mail Function ™ When the E-Mail Function is enabled, you can use your JetFlash to securely Send , Receive and Save E-mails using a compatible computer. When you are finished using the E-Mail Function no traces of your correspondence will be left on the PC. -
Page 61: Setup An E-Mail Account
The first time you click on the “E-Mail” option in QuickMenu the E-Mail Password setup window will appear. Enter a “Password” and “Confirm” the password, you can also enter a “Hint” (a reminder, should you forget your password). Click on the “OK” button to complete the E-Mail Password setup. The Password you enter will be used to log in to the E-Mail function, please do NOT forget your password. - Page 62 In the Account Manager window you can import any Outlook Express/Windows Mail E-mail accounts that are on the computer you are using into the Current accounts provided you have the relative permissions and passwords, otherwise click on the “New” button to begin setting up your E-mail account.
- Page 63 In the Receive window enter the address of the POP3 mail server you will be accessing to receive your incoming mail, you must also enter your Username and Password . You can get the Address, Username and Password from your ISP (Internet Service Provider). Figure 59.
- Page 64 After you enter all the relevant E-mail Account information click on the “OK” button to complete the setup of your account. Figure 61. E-mail Account Setup The Account Manager window will reappear with your new E-Mail Account listed in the Current Accounts.
-
Page 65: Using Your E-Mail Account
Using Your E-Mail Account ™ You can use the JetFlash E-Mail to perform all the usual E-mail functions such as Receiving , Sending and Saving E-mail messages. This section contains information on: Receiving E-Mail Sending E-Mail Saving E-Mail After you setup your E-mail account(s) click on the “E-Mail” option in the QuickMenu window. Figure 63. -
Page 66: Receiving Mail
The E-Mail Inbox window appears, this is the default E-mail function window. Figure 65. Inbox Receiving Mail Click on the “Check Mail” button in the Inbox window to check if your POP3 E-mail server account is holding any mail. Figure 66. Inbox Check Mail server... - Page 67 The Connecting to… and POP3 Server Login windows will appear. Enter your Username and Password and click on the “OK” button to continue. Figure 67. Enter POP3 Server Account Information After you successfully login, the Check account Completed window will appear, click on the “Close” button to continue.
- Page 68 The Inbox window will appear listing the E-mails that the server is holding. Figure 69. Inbox E-mails To receive an E-mail from the server, select the E-mail and click on the “Receive” button. Figure 70. Receive an E-mail The Confirmation window will appear. Selecting “Yes” will remove the mail(s) from the server, so other E-mail applications will not be able to receive the E-mail(s).
- Page 69 You do not have to check the E-mail Server to see if you have mail, simply click on the “Receive All” ™ button and all E-mails will be downloaded directly onto the JetFlash Figure 72. Receive all E-mails from Server If you setup a number of E-mail Accounts and you want to specify an account for Receiving and Sending E-mails, click on the “Send and Receive All”...
- Page 70 The E-mail will open in a new window. Figure 75. E-mail message...
-
Page 71: Sending Mail
Sending Mail Click on the “Outbox” button to open the Outbox window. Figure 76. Outbox Click on the “New Mail” button in the Outbox window to compose a new E-mail. Figure 77. Compose new E-mail... - Page 72 After writing your E-mail click on the “Send” button to send the mail. Figure 78. Write E-mail and Send The Send mail… window will momentarily appear. Figure 79. Connect to SMTP server to Send mail...
- Page 73 Then, the Send mail Completed window will appear, click on the “Close” button to continue. Figure 80. E-mail sent successfully The Outbox window will appear with a list of all your Sent E-mails. Figure 81. Outbox containing Sent E-mails...
-
Page 74: Saving Mail
Saving Mail To save a Received E-mail, open the mail and click on the “Save as” button in the E-mail window. Figure 82. Save a received E-mail The Save As window will appear. Select a destination for the E-mail and click on the “Save” button to save a copy of the E-mail. - Page 75 To save an Unsent E-mail, open the mail and click on the “Save” button in the E-mail window. Figure 84. Save a Unsent E-mail...
-
Page 76: Edit Your E-Mail Address Book
Edit your E-Mail Address Book You can use the JetFlash E-Mail to edit your address book such as Add new contact , Import csv file , and Export csv file . This section contains information on: Add new contact Import csv file Export csv file Click on the “E-mail”... -
Page 77: Add New Contact
Add new contact Click on “File” and select “New” . Figure 87. Add new contact Input contact name and E-Mail address and then click on “OK” . Figure 88. Input contact name and E-Mail address Edit the content and then click on “OK” . Figure 89. -
Page 78: Import Csv File
Successfully add new contact. Figure 90. Add new contact Import csv file Click on “File” and select “Import”. Figure 91. Import address book Choose a csv file and then click on “Open” . Figure 92. Open a csv file... - Page 79 You can click on “OK” directly with default value or edit the contact details. Click on “Contact Details” you want to use at the left column. Click on “Column in E-Mail” you want to correspond to at the right column. Click on the right arrow .
-
Page 80: Export Csv File
Csv file has bee successfully added to address book. Figure 95. Import csv file Export csv file Click on “File” and select “Export”. Figure 96. Export address book Input the file name and click on “Save” . - Page 81 Figure 97. Save the csv file...
-
Page 82: Jetflash Databackup Function
™ JetFlash DataBackup Function ™ When the DataBackup Function is enabled you can use the JetFlash to Backup , Restore and Synchronize your important data and information. This section contains information on: Backing Up Data Restoring Data Synchronizing Data ® ™... -
Page 83: Backup Data
Backup Data In the Backup window select the checkbox of the source drive(s), folder(s), or file(s) that you want to ™ Backup. The default location for Backed up data on the JetFlash Removable Disk: –> \DataBackup\ –> \Disk Click on “Backup path:” and enter a new path to change the location of your Backed Up data. Figure 100. - Page 84 A summary of the Backup Task will appear. Click on the “Close” button to complete the Backup process. Figure 103. Backup Task Summary...
-
Page 85: Restore Data
Restore Data In the Backup window click on the “Restore” button to open the Restore window. Figure 104. Restore Menu A list of the data you have Backed Up will appear in the Restore window. Select the checkbox of the drive(s), folder(s), or file(s) that you want to Restore. - Page 86 If you select a different path from the original the Browse For Folder window will appear. Select a path for the data you are going to Restore and click on the “OK” button. Figure 106. Restore data destination path Click on the “Restore” button to Restore your data. Figure 107.
- Page 87 A summary of the Restored Task will appear. Click on the “Close” button to complete the Restore process. Figure 109. Restore Task Summary...
-
Page 88: Synchronize Data
Synchronize Data Synchronizing Data ensures you have the most up-to-date content in any file that you have Backed Up to ™ the JetFlash . If you update the content of a file on the computer and you previously backed up this file to ™... - Page 89 Select the Source to Destination icon in the ACTION column to update the Target file. Figure 112. Update Target File Select the Destination to Source icon in the ACTION column to update the Source file. Figure 113. Update Source File Select the No Action icon in the ACTION column to take no action and leave the contents of the Source and Destination files as they are.
- Page 90 Figure 114. Take No Action...
- Page 91 Click on the “Synchronize” button to Synchronize your data. Figure 115. Synchronize data After the data is Synchronized the “Synchronization complete” window will appear, click on the “OK” button to continue. Figure 116. Synchronization complete A summary of the Synchronization Task will appear. Click on the “Close” button to complete the Synchronization process.
-
Page 92: My Jetflash Disk
™ My JetFlash Disk Click on the “My JetFlash” option in the QuickMenu window. Figure 118. JetFlash Disk ™ ™ The JetFlash ‘s Removable Disk window will appear listing the contents of the JetFlash Figure 119. JetFlash Removable Disk... -
Page 93: Jetflash ™ Online Update Function
1. Click on the “Online Update” option in the QuickMenu window. Figure 120. JetFlash Software Online Update ™ 2. Then you will link to Transcend's website to download the latest Jetflash elite . ™ Besides, you can also download the latest JetFlash elite at below location, http://www.transcendusa.com/products/JFelite.asp... -
Page 94: Exit Jetflash Software
™ Exit JetFlash Software WARNING! To prevent data loss, always use this procedure to Exit the JetFlash Software. ™ When you are finished using the JetFlash Software it is IMPORTANT! to follow this procedure for Exiting the program. Click on the “QuickMenu” icon on the Windows System Tray and select the “Exit”... -
Page 95: Troubleshooting
™ JetFlash for repair. If you are unable to remedy a problem from the following hints, please consult your dealer, service center, or local Transcend branch office. We also have FAQ and Support services on our websites. ® Software CD cannot auto-run in Windows Go to the Device Manager in the Control Panel and enable the Auto-Insert function for the CD-ROM drive. -
Page 96: Transcend Limited Warranty
Transcend is not responsible for recovering any data lost due to the failure of a ™... -
Page 97: Terminology
Terminology .bmp ................................12 BitMaP is a graphics file format native to the Windows Operating System .exe..............................2, 8, 57 An executable file contains a program. .jpg ................................12 Joint Photographic Experts Group is a standard used for compressing still images. .zip................................17 A standard used to compress data, commonly used in Windows OS. AES Encryption............................1 Advanced Encryption Standard is a strong Encryption method used to keep data secure. - Page 98 ™ Linux ..............................5, 6, 57 An Open Source computer Operating System. ™ ..............................5, 6, 57 Macintosh is a personal computer made by Apple. notebook..............................1, 3, 7 Portable lightweight computer capable of running off of battery power. Outlook Express ............................24 An e-mail client reader that is used in Windows OS. POP3 mail server ............................25 Post Office Protocol is a mail server that receives mail and filters it into the appropriate user folder.
Need help?
Do you have a question about the JetFlash 110 and is the answer not in the manual?
Questions and answers