Table of Contents
Advertisement
Quick Links
Advertisement
Table of Contents

Related Manuals for Zanussi ZGNX645X


Summary of Contents for Zanussi ZGNX645X
- Page 1 User Manual GETTING STARTED? EASY. ZGNX645X EN User Manual...
-
Page 2: Safety Information
VISIT OUR WEBSITE TO: Get usage advice, brochures, trouble shooter, service and repair information: www.zanussi.com/support SAFETY INFORMATION Before the installation and use of the appliance, carefully read the supplied instructions. The manufacturer is not responsible for any injuries or damage that are the result of incorrect installation or usage. - Page 3 WARNING: Unattended cooking on a hob with fat or oil can be • dangerous and may result in fire. NEVER try to extinguish a fire with water, but switch off the • appliance and then cover flame e.g. with a lid or a fire blanket. WARNING: The appliance must not be supplied through an •...
-
Page 4: Safety Instructions
SAFETY INSTRUCTIONS plug (if applicable) can make the terminal This appliance is suitable for the following markets: become too hot. • Use the correct electricity mains cable. GB IE • Do not let the electricity mains cable tangle. • Make sure that a shock protection is installed. INSTALLATION •... - Page 5 Make sure to connect the appliance according • Do not use large cookware that overlap the to current installation regulations. Follow the edges of the appliance. This can cause damage requirements for adequate ventilation. to the worktop surface. • Make sure the flame does not go out when you quickly turn the knob from the maximum to the minimum position.
-
Page 6: Installation
• Disconnect the appliance from the mains • Flat the external gas pipes. supply. • Cut off the mains electrical cable close to the appliance and dispose of it. INSTALLATION Location WARNING! Refer to Safety chapters. The hob may be located in a kitchen, a kitchen/ diner or bed sitting room (with a volume greater than 20 m³), but not in a bathroom or shower room. -
Page 7: Injectors Replacement
The connection should be suitable for connecting to R 1/2 (1/2 BSP male thread). When the final connection has been made, it is essential that a thorough leak test is carried out on the hob and installation. Make sure that the main connection pipe does not exert any strain on the hob. - Page 8 The hob has a terminal block which is marked as follows: • L — Live terminal • N — Neutral terminal • or E — Earth terminal Before carrying out the connection, make sure: 1. The limiter valve and the electrical system can take the appliance load (see the rating plate) 2.
- Page 9 REPLACEMENT OF THE CONNECTION ASSEMBLY CABLE The replacement of electric cable must be carried out exclusively by the service force centre or by personnel with similar competencies, in accordance with the current regulations. To replace the connection cable use only H03V2V2-F T90 or equivalent type.
-
Page 10: Possibilities For Insertion
B. Supplied brackets If a furniture unit is installed at a distance of 400 mm above the hob, there must be a minimum safety distance of 50 mm to the left or right from the edge of the hob. CAUTION! Install the appliance only on a worktop with flat surface. -
Page 11: Product Description
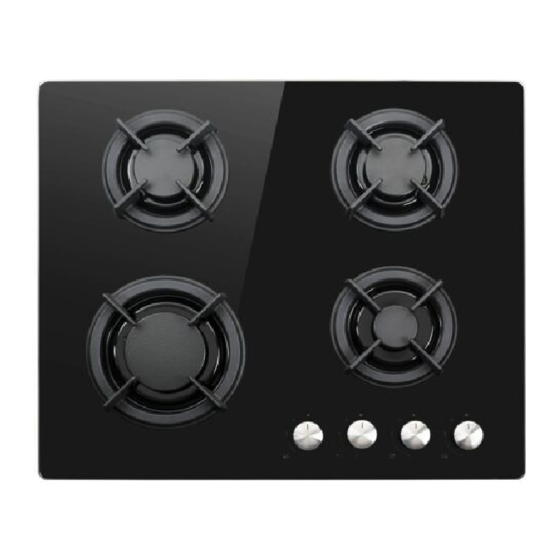
PRODUCT DESCRIPTION COOKING SURFACE LAYOUT Semi-rapid burner Multi Crown burner Auxiliary burner Control knobs CONTROL KNOB Symbol Description Symbol Description minimum gas supply no gas supply / off position ignition position / maximum gas supply DAILY USE WARNING! Refer to Safety chapters. BURNER OVERVIEW A. -
Page 12: Ignition Of The Burner
IGNITION OF THE BURNER If the burner accidentally goes out, Always light the burner before you put turn the control knob to the off position on the cookware. and try to light the burner again after minimum 1 minute. WARNING! Be very careful when you The spark generator can start use open fire in the kitchen automatically when you switch on the... -
Page 13: Care And Cleaning
CAUTION! Make sure that pot Diameter of cook- handles are not above the front edge Burner ware (mm) of the cooktop. CAUTION! Make sure that the pots Multi Crown 180 - 260 are placed centrally on the burner in order to get the maximum stability and Semi-rapid 120 - 220 a lower gas consumption. -
Page 14: Periodic Maintenance
moist cloth and a non-abrasive detergent. After components well clean to prevent difficult lighting cleaning, wipe the hob dry with a soft cloth. and check that the burner crown holes are not • To clean the enamelled parts, caps and crowns, obstructed. -
Page 15: Technical Data
LABELS SUPPLIED WITH THE ACCESSORIES BAG Stick the adhesive labels as indicated below: MOD. MOD. MOD. TYPE PROD.NO. IP20 PROD.NO. PROD.NO. SER.NO. 0049 SER.NO SER.NO 03 IT DATA DATA MADE IN ITALY A. Stick it on Guarantee Card and send this part C. -
Page 16: Energy Efficiency
INJECTOR BURNER POWER kW POWER kW MARK G30 28-30 mbar G31 37 mbar Multi Crown 3,55 Semi-rapid 0,45 Auxiliary 0,33 ENERGY EFFICIENCY PRODUCT INFORMATION ACCORDING TO EU 66/2014 Model identification ZGNX645X Type of hob Built-in hob Number of gas burners... -
Page 17: Environmental Concerns
Left rear - Semi-rapid 54.5% Right rear - Semi-rapid 58.1% Energy efficiency per gas burner (EE gas burner) Left front - Multi Crown 59.7% Right front - Auxiliary not applicable Energy efficiency for the gas hob 57.4% (EE gas hob) EN 30-2-1: Domestic cooking appliances burning gas - Part 2-1 : Rational use of energy - General ENERGY SAVING •... - Page 20 WWW.ZANUSSI.COM/SHOP...
Need help?
Do you have a question about the ZGNX645X and is the answer not in the manual?
Questions and answers