
Related Manuals for LG E730


Summary of Contents for LG E730
- Page 1 All manuals and user guides at all-guides.com 繁 體 中 文 简 体 中 文 日 本 語 E N G L I S H 使用手冊 LG-E730 www.lg.com P/NO : MFL67343619 (1.1)
- Page 2 all-guides.com...
- Page 3 All manuals and user guides at all-guides.com 繁體中文 LG-E730 使用手冊 本手冊將幫助您開始使用您的手機。 • 此手冊中的部份內容可能會因手機程式之改良或不同網絡 商提供的服務而令實際情況有所不同,這並不會另行通知。 • 由於本手機設有觸控螢幕鍵盤,因此不適合視障人士使 用。 • Copyright ©2011 LG Electronics, Inc. All rights reserved. LG 及 LG 標誌乃 LG 集團及其相關公司的註冊商標。 所有其他 商標均屬於其擁有者。 • Google™、Google Maps™、Gmail™、YouTube™、Google Talk™ 及 Android Market™ 均為 Google, Inc. 的商標。...
-
Page 4: Table Of Contents
內容 All manuals and user guides at all-guides.com 安全及有效使用準則 ......7 返回最近使用的應用程式 ....40 通告欄 ............. 40 了解您的手機 ........16 檢視狀態列 ..........41 裝置組件 ..........27 螢幕鍵盤 ..........44 安裝智能卡(SIM 卡)及電池 ...30 輸入重音字母 ......... 45 為手機充電 ..........32 Google 帳戶設定 ........46 使用記憶卡... - Page 5 All manuals and user guides at all-guides.com 使用 Wi-Fi Cast ........53 搜尋聯絡人 ..........63 啟用 Wi-Fi Direct 透過 SmartShare 新增聯絡人 ..........63 進行分享 ..........53 常用的聯絡人 ......... 64 使用 SmartShare ........54 將通訊錄從舊手機移動至新手機 ..65 通話功能 ..........59 訊息 ............66 撥打電話...
- Page 6 內容 All manuals and user guides at all-guides.com 處理帳戶資料夾 ........71 視像攝錄機 ..........81 編寫及發送電子郵件 ......71 瞭解取景器 ..........81 拍攝快速影片 ......... 82 社交網絡 ..........73 拍攝影片後 ..........82 新增您的帳戶至手機 ......73 使用進階設定 ......... 83 檢視及更新您的狀態 ......74 觀看影片時調整音量 ......84 從手機移除帳戶...
- Page 7 All manuals and user guides at all-guides.com FM 收音機 ..........88 LG 螢幕 (On-Screen) 手機 2.0 ....96 搜尋電台 ..........89 螢幕 (On-Screen) 手機 2.0 圖示 .... 96 螢幕 (On-Screen) 手機 2.0 功能 .... 96 實用程式 ..........91 如何在電腦上安裝螢幕 (On-Screen) 設定鬧鐘...
- Page 8 all-gui des.c...
- Page 9 內容 All manuals and user guides at all-guides.com 手勢 ............106 配件 ............118 位置及安全 ........... 107 技術數據 ..........119 應用程式 ..........108 帳號及同步處理 ........109 疑難排解 ..........120 隱私設定 ..........110 儲存裝置 ..........110 語言及鍵盤 ........... 111 語音輸入及輸出 ........111 協助工具...
-
Page 10: 安全及有效使用準則
All manuals and user guides at all-guides.com • 無線電波暴露指引的量度單位叫 請讀取以下簡易的使用規則。 違 反這些準則可能會發生危險或觸犯 作特定吸收比率或 SAR。 SAR 測 法律。 試使用標準方法進行,用手機以 在所有使用的頻帶最高的合格電 射頻能量暴露準則 源水平傳輸。 無線電波暴露及比吸收率 (SAR) 資 • 雖然不同型號 LG 手機的 SAR 水 訊。本手機型號 LG-E730 已為遵守 平有所差異,但所有這些手機的 無線電波暴露的應用安全要求而設 設計均符合無線電波暴露的相關 計。 這些要求乃基於可確保所有使 指引。 用者安全的科學指引,範圍涵蓋任 • 國際非離子化輻射保護委員會 何年齡與任何健康狀況的人士。 (ICNIRP) 建議的 SAR 限制,即平... - Page 11 • 經 DASY4 測試,本手機型號 產品保護及維護 在耳邊使用的最高 SAR 值為 警告: 0.690 W/kg (10g),隨身攜帶時則為 0.757 W/kg (10g)。 請僅使用經認可適用於此特定型號手機 的電池、充電器及配件。 使用其他種 • 採用了電氣與電子工程師學會 類的配件可能會導致手機的認可或保養 (IEEE) 建議的 SAR 限制,即平均 失效,並可能引致危險。 1 克組織 1.6 W/kg 的國家/地區居 民的 SAR 數據資訊。 • 請勿拆開此裝置。 如手機需要維 修,請由合資格的維修技師進行 維修。 • 根據 LG 的政策,保養期內的維修 可能會包括更換部件或主板,這...
- Page 12 All manuals and user guides at all-guides.com 些用於更換的部件或主板可能全 手機,否則它可能會對敏感的醫 新的或是經過翻新的,但其功能 療設備造成影響。 與被更換的部件相同。 • 請勿以濕水的手操作充電中的手 • 請遠離如電視、收音機或個人電 機。 這可能會引致觸電和造成手 腦等電器產品而使用手機。 機嚴重損壞。 • 裝置需遠離發熱來源,如散熱器 • 請不要在易燃材料附近為手機充 或烹調器具。 電,因為充電期間手機會發熱並 導致火災。 • 請勿摔落手機。 • 使用乾布清潔裝置表面(請勿使 • 請勿讓此裝置遭機械震動或衝 用苯、稀釋劑或酒精等溶劑)。 擊。 • 切勿在布質家具上為手機充電。 • 請於任何有特殊限制的地方關閉 • 手機應在通風良好的環境中充電。 手機。 例如,請勿在醫院內使用...
- Page 13 安全及有效使用準則 All manuals and user guides at all-guides.com • 請勿讓此裝置接觸過多煙霧或塵 幕受損並不在保養範圍內。 埃。 • 您的手機是一部電子裝置,在正 • 請勿將手機置於信用卡或車票附 常操作期間,會產生熱力。 在沒 近,這可能會影響磁帶上的資料。 有足夠通風的環境下,長時間與 皮膚直接接觸可能導致不適或輕 • 請勿以尖銳物件敲打螢幕,否則 度灼傷。 因此,操作期間或操作 可能會對手機造成損毀。 之後處理手機時,請謹慎使用。 • 請勿將手機暴露於液體或濕氣中。 • 請小心使用配件,例如耳機。 如 有效地操作手機 非必要,請勿觸及天線。 電子裝置 • 如果玻璃螢幕碎裂,請勿使用、 所有手機均可能受訊號干擾,這可 接觸或嘗試移除或修補玻璃。 因 能會影響手機效能。 妄用或不正確使用而導致玻璃螢...
- Page 14 all-gui des.c...
- Page 15 All manuals and user guides at all-guides.com • 請勿在未得到批准下在醫療儀器 • 請專心一致駕駛。 附近使用您的手機。 避免將手機 • 請視乎駕駛情況,駛離馬路並停 放置在心臟起搏器附近,例如您 泊好汽車後才撥打或接聽電話。 胸口上的口袋。 • RF 能量可能會影響車內某些電子 • 一些助聽器可能會受手機干擾。 系統,例如車載立體聲音響及安 • 手機可能會輕微干擾電視、收音 全設備等。 機、個人電腦等。 • 如果您的汽車設有安全氣袋,切 勿讓已安裝的無線設備或手提無 道路安全 線設備阻擋氣袋。 這可能會導致 檢查您駕駛時所在地區使用手機的 氣袋無法正常彈出,使其失去保 法例及規則。 護作用或造成嚴重人身傷害。 • 駕駛時切勿使用手持手機。...
- Page 16 安全及有效使用準則 All manuals and user guides at all-guides.com • 如果在外出時聆聽音樂,請確保 • 使用耳機時,如果您未能聽見附 將音量設定至合適水平,以便可 近的人說話,或者坐在您身邊的 以對周圍環境產生警覺。 這在路 人能聽見您正在聆聽的聲音,就 邊時特別重要。 應將聆聽音量調低。 避免損害您的聽覺 注意:來自耳機的過度噪音和壓力可導 致聽力損失。 如果長時間以較大音量收聽,可能 會對聽覺造成損害。 所以我們建議 開啟或關閉手機時,不要將它放於 太近耳朵。 我們亦建議將音樂及通 話音量設定至合適水平。...
- Page 17 All manuals and user guides at all-guides.com 玻璃部件 潛在爆炸環境 • 請勿在燃料補給點使用手機。 您的手機的部分部件以玻璃製造。 如您的手機摔在堅硬的表面上或受 • 請勿在燃料或化學物質附近使用 猛烈撞擊,玻璃部件可能會破裂。 電腦。 如玻璃破裂,請勿接觸或嘗試移除 • 請勿在放置了手機及配件的汽車 碎片。 請停止使用您的手機,直 車廂運送或擺放易燃氣體、液體 至授權的服務供應商為您更換玻璃 或爆炸物。 部件。 在飛機上 爆破地區 無線裝置可引致飛機干擾。 請勿在進行爆破時使用手機。 請嚴 • 登機前,請先關掉手機。 格遵守相關限制、規定或條例。...
- Page 18 安全及有效使用準則 All manuals and user guides at all-guides.com • 未經地勤人員批准,請勿在陸上 電池資訊及保護 使用手機。 • 充電前,您無須完全放電。 跟其 他電池系統不同,沒有記憶影響 兒童 可降低電池的效能。 請將手機放在兒童接觸不到的安全 • 請只使用 LG 電池及充電器。 LG 地方。 手機包含微細零件,如果拆 充電器是為將電池壽命擴至最大 開,可能造成哽咽危險。 而設。 • 請勿拆解電池或造成電池短路。 緊急通話 • 請保持電池的金屬接點清潔。 某些流動網絡可能無法使用緊急通 話。 因此,您不應僅倚賴手機作為 • 當電池不再提供可接受的效能, 緊急通話的方式。 請向您本地的服 請更換電池。 電池組在必須更換 務供應商查詢。 前可重新充電數百次。...
- Page 19 All manuals and user guides at all-guides.com • 如果電池很久沒有使用,重新充 • 如果需要更換電池,請帶同手機 電以擴展其用量。 前往最近的授權 LG 電子產品服務 點或經銷商以尋求協助。 • 請勿直接將充電器暴露於日光下 • 請謹記在手機完全充電後從牆壁 或高濕度環境(如浴室)中。 插座拔出充電器,避免充電器造 • 請勿將電池置於過熱或過冷的地 成不必要的電力損耗。 方,此類場合可能會損害電池效 • 電池的實際壽命將取決於網絡設 能。 定、產品設定、使用模式、電池 • 若使用類型不當的電池,則有發 及環境條件。 生爆炸的危險。 • 請根據製造商的指示來處理廢棄 電池。 請盡量回收利用。 請勿作 為家庭廢棄物處理。...
- Page 20 all-gui des.c...
-
Page 21: 了解您的手機
All manuals and user guides at all-guides.com 了解您的手機 在您開始使用手機前,請先閱讀這裏! 在您將手機送往維修或致電服務人 要解除安裝應用程式: 員前,請檢查您手機出現的問題有 應用程式 > 設定 > 應用程式 > 管 否在此部分描述。 理應用程式 當所有應用程式出現後,捲動並 1. 手機記憶體 選擇您想解除安裝的應用程式。 當手機記憶體的可用空間少於 10% 點按強制停止。 ,手機便可能無法接收新訊息。 您 需要檢查您的手機記憶體,並刪除 一些數據如應用程式或訊息,以騰 出更多可用記憶。... - Page 22 All manuals and user guides at all-guides.com • 關閉 Google Mail™、日曆、通訊 2. 優化電池壽命 錄及其他應用程式的自動同步。 關閉無須持續在背景運行的功能, • 您下載的部分應用程式可能減少 便能延長兩次充電之間的電池壽 電池電力。 命。 您可監控應用程式及系統資源 的電池電量消耗。 要檢查電池電源水平: • 應用程式 > 設定 > 關於手機 > 狀 延長手機電池的壽命: • 關閉不使用的無線電通訊。 不使 態 用 Wi-Fi、藍芽或 GPS 時,請關閉 電池狀態(充電中或未充電)及電 這些應用程式。 池存量(已充電的百分比)等會在 • 降低螢幕亮度,並設定較短的螢 螢幕頂部顯示。...
- Page 23 了解您的手機 All manuals and user guides at all-guides.com 3. 在安裝開放原始碼的應用程式 要監察及控制電池電力的使用情 況: 及操作系統前 • 應用程式 > 設定 > 關於手機 > 電 警告: 池使用狀況 如果您安裝及使用並非由製造商提供的 電池使用時間會在螢幕頂部顯示。 作業系統,可能會導致手機出現故障。 讓您知道最後把手機連接到電源的 此外,您的手機將不再受保養。 時間,或如果已連接到電源,即表 示手機最後使用電池電力運作的時 間。 螢幕顯示使用電池電力的應用 程式或服務,並根據耗用的電量由 多至少排列。...
- Page 24 All manuals and user guides at all-guides.com 4. 使用硬性重新設定(出廠設 警告: 定) 爲了保護您的手機和您的個人資料,請 如果手機需要還原成為本來的狀 只從受信任的來源下載應用程式,例如 態,使用硬性重新設定重新啟動手 Android Market™。 如果手機載有並非 機。 正確地安裝的應用程式,手機可能無法 正常運作或出現嚴重錯誤。 您必須從 1. 關閉手機後,用左手按住音量下 手機解除安裝該等應用程式及所有相關 鍵 + 電源鍵。 的數據及設定。 2. 當手機底部的 LED 亮起,用右手 點按並按住功能表鍵 + 返回鍵。 必須在螢幕顯示 LG 標誌前立即進 行此步驟。 確保左手仍然按住音 量下鍵和電源鍵。...
- Page 25 了解您的手機 All manuals and user guides at all-guides.com 5. 使用 microSD 卡 3. 當螢幕顯示 LG 標誌,繼續按鍵約 2 秒鐘,然後在 LG 標誌消失前同 圖片、音樂及影片檔只能儲存到外 時鬆開所有按鍵。 置記憶體。 等候至少 1 分鐘,讓手機進行硬性 在使用內置相機前,您需要將 重新設定。 然後,您便可以重新開 microSD 記憶卡插入手機。 啟手機。 如果您沒有插入記憶卡,便無法儲 注意:若進行硬性重新設定,所有 存相機拍攝的相片和影片。 用戶應用程式及用戶數據將被刪 除。 這並不能還原。 請記住先備 份所有重要的數據,才進行硬性重...
- Page 26 all-gui des.c...
- Page 27 All manuals and user guides at all-guides.com 6. 開啟及切換應用程式 要停止應用程式: 應用程式 > 設定 > 應用程式 > 管 在 Android 能夠輕鬆使用多重任務, 理應用程式 因為您可同時運行兩個或以上的應 用程式。 您無須在開啟另一應用程 捲動至該應用程式,點按停止以 式前退出應用程式。 使用及切換數 停止使用。 個開啟中的應用程式。 Android 會管 提示! 長按主頁鍵以返回最近的應用 理每一個應用程式,根據需要停止 程式。 螢幕將會顯示最近使用的應用 及啟動程式,確保閒置的應用程式 程式列表。 不會耗用不必要的資源。...
- Page 28 了解您的手機 All manuals and user guides at all-guides.com 7. 安裝 LG PC Suite • 只需在電腦和手機之間拖放便 LG PC Suite IV 是助您使用 UBS 數 可輕鬆傳輸多媒體檔案(相 據傳輸線連接手機至電腦的程式。 片、影片、音樂) 連接後,您可以在電腦上使用手機 • 將手機的文字訊息傳輸至電腦 的功能。 • 在不會損失數據的情況下更 新軟件 LG PC Suite IV 的主要功能 • 輕鬆建立、編輯和刪除手機 LG-E730 不支援以下功能: 資料 –LG Air Sync (Web Sync, R-Click) • 與電腦數據同步手機數據(通...
- Page 29 All manuals and user guides at all-guides.com • 在完成 LG PC Suite IV 安裝後, 您可於 LG 網站下載此程式。 瀏覽 至 http://www.lg.com 網站選擇(支援 請確保大容量儲存設定(功能 > 手機支援)處下載並安裝 LG 手機 表 > 設定 > 儲存裝置 > 僅限大容 支援軟件以獲取您的手機安裝程式 量儲存)在停用模式以正常執行 和使用資訊。 LG PC Suite IV。 在下載相關手機支援軟件後並執...
- Page 30 點按開啟 USB 儲存裝置,然後選 擇「確定」以確認您要在手機的 注意:要以 USB 數據線將手機與電腦 microSD 卡與電腦之間傳送檔案。 同步,您需要安裝在電腦上安裝 LG 當手機作為 USB 儲存體連接,您將 PC Suite。 會收到通知。 您現在便可將檔案複 請參閱上頁以安裝 LG PC Suite。 製至 microSD 卡。 使用手機隨附的 USB 線,將手機 提示! 要重新在手機上使用 microSD 連接至電腦的 USB 連接埠。 連接 卡,您需要開啟通告欄並點按關閉 USB 後,您將會收到已進行 USB 連接...
- Page 31 All manuals and user guides at all-guides.com 9. 將手機直立 期間您無法在手機上存取 microSD 卡,因此您亦無法使用依賴 microSD 如普通手機一樣,垂直握住手機。 卡的應用程式,例如相機、媒體匣 LG-E730 擁有內置天線。 小心不要 及音樂。 刮花或損壞手機背部,這可能會影 響效能。 要從電腦中斷連接您的手機: 撥打 / 接聽電話或傳送 / 接收數據 開啟通告欄,點按關閉 USB 儲存 時,避免握住天線所在的手機下部 裝置,安全地從電腦中斷連接您的 分。 這樣做可能影響通話品質。 手機。...
- Page 32 all-gui des.c...
- Page 33 了解您的手機 All manuals and user guides at all-guides.com 10. 螢幕凍結時 如果螢幕凍結或當您嘗試操作手機 時沒有回應: 取出電池,重新插入,然後開啟手 機。 或者 按住電源/鎖定鍵 10 秒以關閉手機。 如果問題仍然存在,請聯絡服務中 心。...
-
Page 34: 裝置組件
All manuals and user guides at all-guides.com 裝置組件 電源/鎖定鍵 聽筒 • 長按此鍵以開啟 / 關閉手 感應器 機電源。 • 短按可鎖定 / 解除鎖定觸 相機鏡頭 控螢幕。 主頁鍵 從任何畫面返回桌面。 返回鍵 返回前一個畫面。 功能表鍵 • 查看可使用的選項。 • 長按此鍵以轉到 Google 咪高風 Search™。... - Page 35 了解您的手機 All manuals and user guides at all-guides.com 注意:感應器 警告: 當接收及撥出通話時,感應器會感應手 若將較重物體置於手機上,或坐在手機 機接近您的耳朵,並自動關閉畫面背光 上會損壞 LCD 和觸控螢幕功能。 請勿 照明及鎖上觸控螢幕。 此功能有助延 將保護貼蓋住 LCD 感應器。 這可能會 長電池壽命,並防止於通話期間無意地 導致感應器出現故障。 啟動觸控螢幕。...
- Page 36 All manuals and user guides at all-guides.com 耳筒插孔 相機鏡頭 智能卡插槽 充電器/USB 插孔 電池蓋 電源/鎖定鍵 音量鍵 • 在桌面:控制鈴聲音量。 • 通話中:控制聽筒音量。 • 播放曲目時:控制媒體音 量。 microSD 卡插槽 電池 喇叭...
-
Page 37: 安裝智能卡(Sim 卡)及電池
了解您的手機 All manuals and user guides at all-guides.com 安裝智能卡(SIM 卡)及電池 開始使用您的新手機前,您需要先 設定手機。 要插入智能卡及電池: 要取下電池蓋,請用一隻手握住 手機。 用另一隻手的拇指按壓電 池蓋。 用指尖挖開並用食指取下 電池蓋。... - Page 38 all-gui des.c...
- Page 39 All manuals and user guides at all-guides.com 將智能卡滑入智能卡插槽。 確保 對準手機及電池的金屬接觸面 智能卡的金屬接觸面朝下。 插入電池 (1) 並按下直至卡緊入 位 (2)。...
-
Page 40: 為手機充電
了解您的手機 All manuals and user guides at all-guides.com 為手機充電 在電池盒上對準電池蓋 (1) 並按下 直至卡緊入位 (2)。 打開頂部的充電器插孔蓋。 插入充 電器,並將其連接至電源插座。 注意:第一次充電時必須將電池完全充 電,以提高電池壽命。... -
Page 41: 使用記憶卡
All manuals and user guides at all-guides.com 使用記憶卡 要安裝記憶卡: 將記憶卡插入插槽中。 並確保金屬 接觸面朝下。 要安全移除記憶卡: 應用程式 > 設定 > 儲存裝置 > 移除 SD 卡。... - Page 42 了解您的手機 All manuals and user guides at all-guides.com 在桌面點按應用程式標籤 ,以 警告: 開啟應用程式功能表。 手機開啟時,請勿插入或移除記憶卡。 捲動並點按設定 > 儲存裝置。 這樣做可能會損壞您的記憶卡及手機, 點按解除移除 SD 卡然後點按確 而記憶卡內儲存的數據亦可能毀損。 定以確認。 點按清除 SD 卡 > 清除 SD 卡 > 清 要格式化記憶卡: 除全部,然後確認選擇。 您的記憶卡可能已格式化。 如尚 如您已設定圖形鎖定,輸入圖形 未格式化,您必須在使用前將其格 鎖定,然後選擇清除全部。 式化。 注意:如您的記憶卡包含其他內容,記 注意:格式化記憶卡時,所有已儲存在...
-
Page 43: 將螢幕鎖定及解鎖
All manuals and user guides at all-guides.com 將螢幕鎖定及解鎖 要喚醒手機,輕按電源/鎖定鍵。 鎖 定螢幕會出現。 點按並向上拖動鎖 如果您有一段時間不使用手機,會 定螢幕就可解鎖您的桌面。 您最後 自動關閉並鎖定螢幕。 這有助防止 檢視的畫面將會開啟。 意外按鍵,並可節省電池電力。 鎖定螢幕 當您不使用 LG-E730 時,請輕按電 源/鎖定鍵 鎖定您的手機。 您可鎖定您的螢幕,以確保只有您 能解鎖以使用手機。 當您設定鎖定螢幕時,如果有任何程 式正在執行,這些程式在鎖定模式時 如是首次設定解鎖圖形、PIN 碼或 也可能仍然會繼續執行。 建議先結 密碼: 束所有程式,再進入鎖定模式,避免 • 應用程式 > 設定 > 位置及安全 > 設... - Page 44 all-gui des.c...
- Page 45 了解您的手機 All manuals and user guides at all-guides.com 設定後,您可更改螢幕鎖定功能表 當您記不起您的解鎖圖案: 更改。 如果您在手機已有您的Google 帳戶 登入記錄,但錯誤輸入解鎖圖案 5 注意: 次,請點按忘記解鎖圖案鈕。 然 使用圖案鎖定的注意事項。 後,您需要登入您的 Google 帳戶以 請記住您所設定的解鎖圖 案,這是非 解鎖您的手機。 常重要的。 如果錯誤輸入圖案的次數 達到 5 次,您將無法存取您的手機。 您有 5 次輸入解鎖圖案、PIN 或密碼的 機會。 如果您已使用全部 5 次機會, 您可在 30 秒後再次嘗試。...
-
Page 46: 您的桌面
All manuals and user guides at all-guides.com 您的桌面 觸控螢幕提示 翻閱–要捲動清單或快速移動, 用手指掃過螢幕(快速拖動並放 以下是一些小秘訣,讓您輕鬆使用 手)。 觸控螢幕操作手機。 點按–要選擇功能表/選項或開啟應 注意: 用程式,只需點按即可。 • 要選擇某個項目,請觸控圖示中心。 點按並按住–要開啟選項功能表或 • 請勿過份用力按壓;只需輕力但確切 抓住要移動的物件,點按並按住該 地點按,觸控螢幕已能感應。 選項。 • 使用手指尖點按您需要的選項。 請注 拖移–要捲動清單或緩慢移動,用 意不要碰到其他按鍵。 手指在觸控螢幕上拖動就可。... - Page 47 您的桌面 All manuals and user guides at all-guides.com 主頁 點按手機圖示開啟觸控撥號鍵 盤,撥打電話。 只需將手指左右滑動便可檢視控制 板。 您可使用小工具、捷徑(至 點按通訊錄以開啟您的通訊錄。 您喜愛的應用程式)、資料夾和牆 點按訊息圖示,進入訊息功能 紙,自訂每個控制板。 表。 在此您可以建立新訊息。 點按螢幕底下的應用程式標籤。 注意:視乎您的手機供應商,某些螢幕 您便可檢視您安裝的全部應用程 圖像可能會有差異。 式。 要開啟應用程式,只需點按應 用程式清單中的圖示。 在桌面上,您可檢視螢幕下方的快 速按鍵。 快速按鍵提供簡易的存取 方法,讓您一按即能使用您最常用 的功能。...
-
Page 48: 自訂桌面
All manuals and user guides at all-guides.com 自訂桌面 在新增模式功能表,選擇您想新 增的項目。 您會在桌面上看到一 您可新增小工具、捷徑、資料夾或 個新項目。 牆紙自訂桌面。 將您喜愛的小工具 將項目拖放至所需位置,然後放 新增至桌面上,您便可更方便地使 開手指。 用您的手機。 要從桌面移除項目: 要將項目新增至桌面: • 桌面 > 點按並按住您想移除的圖 桌面 > 功能表鍵 > 新增 示 > 將圖示拖放至 或 點按並按住桌面的空白部分。 提示! 要從應用程式功能表新增應用 程式圖示至桌面,點按並按住您要新增 的應用程式。... -
Page 49: 返回最近使用的應用程式
您的桌面 All manuals and user guides at all-guides.com 返回最近使用的應用程式 通告欄 點按並按住主頁鍵。 螢幕顯示彈 通告欄顯示於螢幕的頂部。 出視窗,當中載有您最近使用的 應用程式。 點按圖示以開啟應用程式, 或 者按返回鍵回到使用中的應用 程式。 鈴聲 - 震動 Wi-Fi 藍芽 數據連接... - Page 50 all-gui des.c...
-
Page 51: 檢視狀態列
All manuals and user guides at all-guides.com 您可點按並向下滑動通告欄。 下表說明可能在狀態列中看到的圖 示含義。 或者,您可在桌面按功能表鍵,並 選擇通知。 您可在此檢查及管理鈴 圖示 說明 聲、Wi-Fi、藍芽和 GPS 狀態,以及 沒有智能卡 其他通知。 無訊號 檢視狀態列 飛航模式 狀態列使用不同圖示顯示手機資 訊,例如訊號強度、新訊息、電池 已連接至 Wi-Fi 網絡 壽命、啟動中的藍芽及數據連接。 Wi-Fi Direct 已開啟 有線耳機... - Page 52 您的桌面 All manuals and user guides at all-guides.com 圖示 說明 圖示 說明 正在通話 系統警告 通話保留 鬧鐘已設定 喇叭開啟 新留言訊息 電話話筒已靜音 鈴聲靜音 未接來電 震動模式 藍芽開啟 電池已完全充電 已連接至一個藍芽裝置 電池充電中...
- Page 53 All manuals and user guides at all-guides.com 圖示 說明 圖示 說明 數據輸入及輸出 還有 3 個通知未顯示 手機已通過 USB 線連接至 正在同步數據 電腦 下載完成 數據下載 新 Gmail 數據上載 新 Google 語音訊息 正在取得 GPS 新訊息 從 GPS 接收位置數據 正在播放歌曲 On-Screen 電話已連接...
-
Page 54: 螢幕鍵盤
您的桌面 All manuals and user guides at all-guides.com 螢幕鍵盤 圖示 說明 您也可以使用螢幕鍵盤輸入文字。 待辦事項 當您需要輸入文字時,螢幕鍵盤會 FM 收音機已在背景啟動 自動顯示在螢幕上。 要手動顯示鍵 盤,只需點按您要輸入文字的文字 USB 共享網絡已啟動 欄位即可。 可攜式 Wi-Fi 熱點已啟動 使用鍵盤輸入文字 點按一下以大寫您輸入的下一 USB 共享網絡及可攜式 個字母。 點按兩下即可大寫所有 Wi-Fi 熱點已啟動 字母。... -
Page 55: 輸入重音字母
All manuals and user guides at all-guides.com 輸入重音字母 點按切換至數字及符號鍵 盤。 您亦可以點按並按住這個標籤 當您選擇法文或西班牙文作為文字 輸入語言,您可輸入特殊的法文或 以瀏覽設定功能表。 西班牙文字元(例如:「á」)。 點按以檢視或按住以變更寫入 例如,要輸入「á」,點按並按住 語言。 「a」鍵直至放大鍵放大並顯示其他 編寫訊息時點按以插入表情圖 語言的字元。 示。 然後選擇所需的特殊字元。 點按以輸入一個空格。 點按以在訊息欄新建一行。 點按以刪除前一字母。 點按以隱藏螢幕鍵盤。... - Page 56 all-gui des.c...
-
Page 57: Google 帳戶設定
All manuals and user guides at all-guides.com Google 帳戶設定 首次開啟手機時,您有機會啟用網 只要您已在手機上設定 Google 帳 絡、登入 Google 帳戶,以及選擇您 戶,您的手機便會自動與您的 想如何使用部分 Google 服務。 Google 帳戶在互聯網上同步。 要設定 Google 帳戶: 您在網上的通訊錄、Gmail 訊息、日 • 從提示設定畫面登入 Google 帳 曆活動及這些應用程式和服務中的 戶。 其他資訊將與您的手機同步。 (視 乎您的同步設定而定) 或者 • 應用程式 > 選擇 Google 應用程 登入後,您可使用... -
Page 58: 連接到網絡及裝置
All manuals and user guides at all-guides.com 連接到網絡及裝置 Wi-Fi 要延長電池壽命,請在不使用 Wi-Fi 時將其關閉。 使用 Wi-Fi ,您可以在無線接入點 (AP) 範圍內高速瀏覽互聯網。 使用 注意:如果您不在 Wi-Fi 區域範圍內 Wi-Fi 享用無線互聯網,而不會收取 或將 Wi-Fi 設定為關閉,您的移動網絡 額外費用。 供應商可能會向您收取額外的移動數 據費用。 連接至 Wi-Fi 網絡 要在您的手機上使用 Wi-Fi,您需要 開啟 Wi-Fi 並連接至 Wi-Fi 網絡 連接無線存取點,亦即「熱點」。 應用程式... - Page 59 連接到網絡及裝置 All manuals and user guides at all-guides.com • 可使用的 Wi-Fi 網絡會以清單顯 藍芽 示。 已加密的網絡旁邊會有一個 您可執行相應程式使用藍芽傳送數 鎖形圖示。 據,而無須像大部分其他手機般從 點按一個網絡以開始連接。 藍芽功能表進行操作。 • 如該網絡為開放,手機會提示您 提示! 您可透過 LG-E730 享用藍芽 點按連接,以確認您希望連接至 高速。 該網絡。 如果您想分享檔案的裝置亦支援高速藍 • 如該網絡已加密,手機會提示您 芽,檔案便會自動透過高速網絡進行傳 輸入密碼或其他憑證。 (請向您 輸。 要使用藍芽高速數據傳輸,使用 的網絡管理員查詢詳情) 前請確保已關閉裝置上的 Wi-Fi。 藍芽 高速的設定視乎不同裝置而定。 請向...
- Page 60 All manuals and user guides at all-guides.com 開啟藍芽並與藍芽裝置配對您的 使用藍芽傳送圖片 手機 選擇圖片 > 功能表鍵 > 分享 > 應用程式 > 設定 > 無線及網絡 > 藍芽 藍芽 > 開啟藍芽 檢查是否已開啟藍芽,然後選擇 進入藍芽設定 > 掃描裝置 掃描裝置。 從清單中選擇您想配對的裝置。 選擇要將檔案發送至的設備。 配對成功後,您的裝置就會連接到 該裝置。 如果您想配對的裝置不在清單上, 請確保該裝置已設定為可偵測性, 然後再進行掃描。...
-
Page 61: 共享手機的數據連接
連接到網絡及裝置 All manuals and user guides at all-guides.com 共享手機的數據連接 有關共享網絡及可攜式熱點的最新 資訊,包括受支援的操作系統及其 USB 共享網絡及可攜式 Wi-Fi 熱點 他詳情,請瀏覽 http://www.android. 在沒有可用的無線網絡連線可用時 com/tether。 是個非常好的功能。 您可以透過 USB 線(USB 共享網絡)與單一電 USB 共享網絡及可攜式 Wi-Fi 熱點 腦共享手機的流動數據連接。 您亦 設定: 可將手機變為可攜式 Wi-Fi 熱點, • 應用程式 > 設定 > 無線及網絡 > 同時跟多過一部裝置共享手機的數... - Page 62 all-gui des.c...
-
Page 63: 要重新命名或保護可攜式熱點
All manuals and user guides at all-guides.com 要重新命名或保護可攜式熱點 提示! 您可以更改手機 Wi-Fi 網絡名稱 如果您的電腦運行 Windows 7 或近期推 (SSID),並保護手機的 Wi-Fi 網絡。 出的 Linux 系統(如 Ubuntu),則基本 上不需要為共享網絡而設定電腦。 但 在桌面點按應用程式標籤 ,然 如果電腦正運行較早期的 Windows 版 後選擇設定。 本或其他操作系統,則可能需要透過 點按無線及網絡並選擇網絡共享 USB 建立網絡連接。 有關支援 USB 共 和可攜式熱點。 享網絡的操作系統及其設定方式的最 確保已勾選可攜式... - Page 64 連接到網絡及裝置 All manuals and user guides at all-guides.com • 設定 Wi-Fi 熱點對話方塊會開啟。 碼。 您可點按安全功能表內的開 啟,從 Wi-Fi 網絡移除安全性。 • 您可以更改當掃描 Wi-Fi 網絡時 其他電腦所看見的網絡 SSID(名 注意! 稱)。 如果您將安全選項設定為開啟,則無法 • 您也可以點按安全功能表,使用 防止其他人士在未經授權的情況下使用 預先共用的金鑰 (PSK) 設定 Wi-Fi 網上服務,並可能產生額外收費。 要 受保護存取 2 (WPA2) 的網絡。 避免未經授權的使用,您應該保留啟用 • 如果您點按 WPA2 PSK 安全選 此安全選項。...
-
Page 65: 使用 Wi-Fi Cast
All manuals and user guides at all-guides.com 使用 Wi-Fi Cast 從已掃描裝置列表選擇裝置進行 連接。 您可與使用相同 Wi-Fi 和 Wi-Fi 點按連接。 Directed 網絡連接的 Android 手機 使用者分享您的音樂、圖片和影片 啟用 Wi-Fi Direct 透過 SmartShare 內容。 進行分享 事先檢查 Wi-Fi 和 Wi-Fi Directed 網 Wi-Fi Direct 自動調頻附近的 Wi-Fi 絡連接,確保使用者已連接至相同 Direct 裝置並會列出搜尋到的裝置,... -
Page 66: 使用 Smartshare
連接到網絡及裝置 All manuals and user guides at all-guides.com 使用其他 Wi-Fi 功能時無法啟用 注意﹕當手機成為群組所有者時,將 Wi-Fi Direct 。 會較成為用戶時消耗更多電池電量。 應用程式 > 設定 > 無線及網絡 > Wi-Fi Direct 連接並不提供互聯網服務。 Wi-Fi Direct 設定 連接及使用網上服務可能需要額外付 費。 請向網絡供應商諮詢收費詳情。 確保已開啟 Wi-Fi Direct 功能。 從已掃描裝置列表選擇裝置進行 使用 SmartShare 連接。 SmartShare 使用 DLNA(數碼生活網 強制的... - Page 67 All manuals and user guides at all-guides.com 開啟 SmartShare 及允許共享內容 在共享內容部分下,點按為想共 享的內容類型加上核取符號。 從 點按應用程式標籤 ,然後選擇 圖片、影片及音樂中選擇。 SmartShare。 SmartShare 現已啟用以共享內容。 點按功能表鍵並選擇設定。 點按可偵測性的核取方塊以開 從遠方資料庫共享內容至其他裝置 啟。 讓您的播放裝置(例如:電視)從 • 如果您想自動接受其他裝置的分 遠方資料庫(例如:電腦)播放多 享請求,點按始終接受請求。 媒體內容。 • 如果您想自動允許其他裝置上載 注意:請確保裝置的 DLNA 功能已正確 檔案至手機,點按接收檔案。 設定(例如:電視及電腦)。...
- Page 68 all-gui des.c...
- Page 69 連接到網絡及裝置 All manuals and user guides at all-guides.com 點按右上方的按鈕以從播放器選 使用媒體匣應用程式瀏覽圖片 擇裝置。 或影片時,點按並按住以選擇檔 案。 然後,您便可選擇多個用以 點按左上方的按鈕以從媒體庫選 共享的檔案。 擇裝置。 點按功能表上的分享並選擇 您可瀏覽資料庫。 SmartShare。 點按內容縮圖或按功能表鍵,然 SmartShare 將自動啟用並包括所 後選擇播放按鍵。 選檔案。 從手機共享內容至播放裝置(如電 從播放器選擇裝置以播放檔案。 視) 注意:請確保播放裝置的 DLNA 功能已 正確設定。...
- Page 70 All manuals and user guides at all-guides.com 要從遠方資料庫下載內容 注意:依照相似步驟,可使用音樂播放 點按應用程式標籤 ,然後選擇 器、相機和影片播放器分共享內容。 SmartShare。 通知:使用本程式時檢查您的裝置是否 點按左上方的按鈕以從媒體庫選 已經由 Wi-Fi 連接到您的家居網絡。 部 擇裝置。 分 DLNA 裝置(如電視)只支援 DLNA 的 您可瀏覽資料庫。 DMP 功能,這些裝置將不會在播放裝置 點按內容縮圖,然後點按下載功 清單上出現。 您的裝置可能無法播放部 能表鍵。 分內容。 通知:不支援某些類型的內容。...
- Page 71 連接到網絡及裝置 All manuals and user guides at all-guides.com 要將手機的內容上載至媒體庫 通知:有些 DLNA 認證裝置不支援 DMS 上 載功能並不會進行上載。 另某些類型的內 注意:確保正確安裝 SD 卡並勾選設定 容或不支援。 功能表中的接收檔案。 點按應用程式標籤 ,然後選擇 SmartShare。 點按左上方的按鈕,然後選擇我 的手機。 您可瀏覽資料庫。 點按並按住內容縮圖,然後點按 上載功能表鍵。 選擇要上載的媒體庫裝置。...
-
Page 72: 通話功能
All manuals and user guides at all-guides.com 通話功能 撥打電話 從通訊錄中撥打電話 點按 開啟按鈕。 點按 可開啟通訊錄。 使用鍵盤輸入號碼 若要刪除數 捲動通訊錄清單,或點按搜尋以 字,點按 。 輸入您想致電的聯絡人名稱的首 數個字母。 點按 撥打電話。 在清單內點按您想致電的聯絡 要結束通話,點按結束圖示 人。 。 提示! 要在撥打國際電話時輸入「+」 ,點按並按住 。... -
Page 73: 接聽來電和拒接來電
通話功能 All manuals and user guides at all-guides.com 接聽來電和拒接來電 調整通話音量 當您在鎖定狀態接收來電時,向右 要在通話時調整通話音量,使用手 拖動 以接聽來電。 機側的向上及向下音量鍵。 向左拖動 以拒接來電。 通話期間撥打第二個電話 如果您要傳送道歉訊息,請從底部 第一次通話中,點按撥號鍵盤 拖動道歉訊息列。 並撥號。 您也可以點按通訊錄 搜尋聯絡人,然後選擇您想致 提示! 道歉訊息 電的號碼。 您可使用此功能迅速發送訊息。 如果 您需要在會議中回覆訊息,此功能將 點按 撥打電話。 十分有用。... - Page 74 all-gui des.c...
-
Page 75: 檢視通話記錄
All manuals and user guides at all-guides.com 檢視通話記錄 兩個通話均會在通話螢幕中顯 示。 您的原來通話會被鎖定及 在桌面點按 ,然後選擇通話記 保留。 錄標籤。 點按顯示的號碼,在通話之間切 您可檢視所有已撥、已接及未接話 換。 或點按 合併通話開始會 音通話的完整清單。 議通話。 提示! 點按任何通話記錄項目,檢視 要結束使用中通話,點按結束, 通話的日期、時間和持續時間。 或按主頁鍵並向下滑動通知列, 然後選擇結束所有通話。 提示! 點按功能表鍵,然後點按刪除 全部,刪除所有記錄項目。 注意:您撥打的每一個通話均需收費。... -
Page 76: 通話設定
通話功能 All manuals and user guides at all-guides.com 通話設定 您可設置手機的通話設定,例如來 電轉接及服務供應商提供的特別功 能。 在桌面點按應用程式標籤 ,以 開啟應用程式功能表。 捲動並點按設定。 點按通話設定,選擇您要調整的 選項。... -
Page 77: 通訊錄
All manuals and user guides at all-guides.com 通訊錄 新增聯絡人 您可在手機上新增通訊錄,並與您 的 Google 帳戶或其他帳戶(須支援 點按 ,輸入新聯絡人的號碼, 同步通訊錄)內的通訊錄同步。 然後按功能表鍵。 點按新增通訊 錄,然後建立新通訊錄。 搜尋聯絡人 若要為新聯絡人新增圖片,點按 在桌面 圖片圖示。 點按 可開啟通訊錄。 從拍攝照片或從相簿挑選。 點按搜尋,使用鍵盤輸入該聯絡 點按 選擇通訊錄類型。 人姓名。 點按一個聯絡資訊類別,然後輸 入聯絡人的詳情。 點按儲存。... -
Page 78: 常用的聯絡人
通訊錄 All manuals and user guides at all-guides.com 常用的聯絡人 從最愛清單移除聯絡人 點按 可開啟通訊錄。 您可將常用的聯絡人分類為您的最 愛。 點按群組標籤,在清單上方選 擇最愛,然後選擇聯絡人以檢視 新增聯絡人至您的最愛 詳情。 點按 可開啟通訊錄。 點按聯絡人名稱右面的藍色星 點按一個聯絡人以檢視詳情。 星。 星號會轉為灰色,表示該聯 點按聯絡人名稱右上角的星星。 絡人已從您的最愛清單移除。 星星變為藍色。... -
Page 79: 將通訊錄從舊手機移動至新手機
PC Suite IV 中的欄位不同,則需 使用電腦同步程式,將通訊錄以 要對應欄位。 對應欄位後,按一 CSV 檔案格式從舊手機匯出至電 下確定。 通訊錄將會新增至 PC 腦。 Suite IV。 先在電腦上安裝 PC Suite IV。 如果 PC Suite IV 偵測到 LG-E730 執行該程式,並使用 USB 線將 手機的連接(使用 USB 線),按 Android 行動手機連接到電腦。 同步或同步通訊錄,將儲存在電 選擇 。 轉到檔案 > 匯入,然 腦上的通訊錄與手機同步。... - Page 80 all-gui des.c...
-
Page 81: 發送訊息
All manuals and user guides at all-guides.com 訊息 LG-E730 將文字訊息和多媒體訊息 注意:如訊息有多個收件者,您需要為 結合在一個易用的功能表中。 每一位收件者分別繳付文字訊息費用。 發送訊息 點按輸入訊息欄位開始編寫訊 點按桌面上的 圖示,然後點 息。 按新訊息以開啟空白訊息。 按功能表鍵以開啟選項功能表。 在收件者一欄中輸入聯絡人名稱 從新增主旨、附加、插入表情符 或聯絡人號碼。 當您輸入該聯 號、捨棄和所有訊息中選擇。 絡人名稱時,會顯示匹配的聯絡 點按發送以發送訊息。 人。 您可點按一個建議的收件 者。 您可以新增多個聯絡人。... -
Page 82: 訊息串連方塊
All manuals and user guides at all-guides.com 訊息畫面會開啟,訊息內容會顯 警告:如您新增圖像、影片或音 示在收件者/號碼之下。螢幕會顯 頻檔案至一個文字訊息,它會自動轉 示回覆。 當您檢視及發送更多訊 換為多媒體訊息,而您亦會被收取相 息,便會建立一個訊息串連。 應費用。 警告:160 個字元的限制可能會依 訊息串連方塊 國家/地區而有所不同,取決於語言及 文字訊息的編碼方式。 與另一方交換的訊息(文字訊息、 多媒體訊息)可按時間順序顯示, 讓您方便地查看對話總覽。... -
Page 83: 使用表情符號
訊息 All manuals and user guides at all-guides.com 使用表情符號 表情符號能使您的訊息更生動。 在編寫新訊息時點按功能表鍵,然 後選擇插入表情符號。 更改訊息設定 LG-E730 已為您預先定義訊息設 定,讓您可立即發送訊息。 您可按 偏好更改這些設定。... -
Page 84: 管理電郵帳戶
All manuals and user guides at all-guides.com 電郵 您可以使用電子郵件應用程式讀 要新增其他電郵帳戶: 取 Google Mail 以外服務中的電子郵 • 應用程式 > 電子郵件 > 在電子郵 件。 電子郵件應用程式支援以下帳 件帳戶選擇 戶類型:POP3、IMAP 及 Exchange。 初次設定完成後,電郵會顯示您的 您的服務供應商或系統管理員可提 收件匣內容。 如果您已新增多於一 供您需要的帳戶設定。 個帳戶,您可在帳戶間切換。 要變更電郵帳戶的設定: 管理電郵帳戶 • 應用程式 > 電子郵件 > 在電子郵 當您第一次在電腦上開啟電子郵件 件帳戶選擇 應用程式,會開啟設定精靈以協助... -
Page 85: 電郵帳戶螢幕
電郵 All manuals and user guides at all-guides.com 要刪除電子郵件: –點按可開啟聯合收件匣,內裡 • 應用程式 > 電子郵件 > 在電子郵 載有發送至您所有帳戶的訊息。 件帳戶選擇 > 點按您想刪除的帳 聯合收件匣的訊息左側會按照帳戶 戶 > 移除帳戶 以在帳戶螢幕內用於帳戶的相同顏 色編碼標示。 電郵帳戶螢幕 –點按資料夾圖示以開啟帳戶資 您可點按某一個帳戶以檢視其收件 料夾。 匣。 預設情況下,您發出電子郵件 只有帳戶內最近期的電郵才會下載 的帳戶以勾選標記表示。 至您的手機。 要下載更多(更早) 的電子郵件訊息,點按電子郵件清 單底下的載入更多訊息。... - Page 86 all-gui des.c...
-
Page 87: 處理帳戶資料夾
All manuals and user guides at all-guides.com 處理帳戶資料夾 輸入將會收到訊息的收件者的地 址。 當您輸入文字時,會從您的 每個帳戶設有收件匣、寄件匣、已 通訊錄顯示匹配的地址。 以分號 發送及草稿資料夾。 您可能會有更 分隔多個地址。 多資料夾,視乎您的帳戶服務供應 如有需要,新增副本/密件副本及 商所支援的功能而定。 新增附件檔案。 編寫及發送電子郵件 輸入訊息的文字。 要編寫及發送訊息 在電子郵件應用程式,點按功能 表鍵,然後點按編寫。... - Page 88 電郵 All manuals and user guides at all-guides.com 點按發送按鈕。 如您沒有連接至網絡,例如正處 於飛航模式,您發送的訊息會儲 存在寄件匣料夾內,直至您再次 連接至網絡。 如載有任何有待處 理的訊息,會於帳戶螢幕顯示寄 件匣。 提示! 當收件匣收到新電子郵件,您 會收到聲音或震動通知。 點按電子郵 件通知以結束相關通知。...
-
Page 89: 社交網絡
All manuals and user guides at all-guides.com 社交網絡 新增您的帳戶至手機 您可在手機上使用社交網絡,並管 理您在網上社區內的微型博客。 您 點按並按住桌面。 顯示不同小 可更新目前狀態、上載相片,並檢 工具時,選擇 Social+ 並點按 視朋友們的狀態更新。 設定按鍵。 您亦可使用不同 如您沒有這些帳戶,您可到它們的 方法。 從桌面選擇應用程式 > 設 網站設立一個帳戶。 定 > 帳戶及同步處理 > Social+ 設 定。 附註:連接及使用網上服務可能需要 在 Facebook、Twitter 及 MySpace 額外付費。 請向網絡供應商諮詢收費 中選擇希望使用的社交網絡應用... -
Page 90: 檢視及更新您的狀態
社交網絡 All manuals and user guides at all-guides.com 請等待系統基於您的社區確認您 當您點按輸入方塊,螢幕會切換 的詳細資料。 以評論更新您的目前狀態或上載 照片。 如果您點按社區,可看見其目前 狀態。 提示! 您可透過選擇核取方塊,同時 更新您的狀態和上載相片至 Facebook 檢視及更新您的狀態 for LG、Twitter for LG 和 MySpace for 您可隨時使用 Social+ 小工具 LG。 檢視及更新社交社區內容。 在 Social+ 小工具選擇您要登 附註:視乎網絡服務而定。 入的社交網絡服務。 您將會看見 您的狀態及內容。... -
Page 91: 從手機移除帳戶
All manuals and user guides at all-guides.com Facebook 和 Twitter 提示! 您可同步朋友聯絡資料和聯絡 在主頁點按應用程式標籤 ,以 人清單。 開啟應用程式功能表。 在 Facebook 和 Twitter 中選擇希望 從手機移除帳戶 使用的社交網絡應用程式。 選擇應用程式 > 設定 > 帳號及同 輸入您在社區內設定的電子郵件 步處理。 地址及密碼,然後點按登入。 選擇您希望刪除的一個帳戶,然 請等待系統基於您的社區核對您 後點按移除帳號。 的詳細資料。 如您點按您的社區,您可查看該 社區的即時狀態。... - Page 92 all-gui des.c...
-
Page 93: 瞭解取景器
All manuals and user guides at all-guides.com 相機 瞭解取景器 切換鏡頭–在後置相機鏡頭與前置相機鏡頭 之間切換。 變焦–拉近或拉遠鏡頭。 或者,您可使用側 音量鍵。 亮度–決定及控制進入圖像的光線量。 場景模式–選擇自動、人像、風景、運動、 夜間及黃昏。 設定–點按此圖示開啟設定功能表。 影片模式 - 向下滑動此圖示可切換到影片模 式。 拍攝相片 圖片庫–點按可觀賞您最後拍攝的相片。 這 容許您從相機模式存取圖片庫並檢視已儲存 的相片。... -
Page 94: 快速拍照
All manuals and user guides at all-guides.com 快速拍照 拍攝相片後 開啟相機應用程式。 拍攝的相片將顯示在螢幕上。 握住手機,將鏡頭對準拍攝的 點按以使用 SmartShare、 分享 對象。 eBuddy XMS、 Facebook、 Gmail、 Picasa、 Social+、 輕輕點按並按住 ,對焦方塊會 Twitter、 Wi-Fi Cast、 訊 顯示在取景器螢幕的中央。 息、 電子郵件或藍芽分享 當對焦方塊變為綠色,表示相機 您的相片。 已成功對焦拍攝對象。 從 鬆開手指。 提示! 如您擁有 SNS 應用程式帳戶並 已在手機中設定,您可將相片分享至... -
Page 95: 使用進階設定
相機 All manuals and user guides at all-guides.com 點按可將圖像設為通訊錄 設為 - 如您想知道此功能如何操作, 圖示或牆紙。 點按便可。 此會向您提供快速指 點按以編輯所選擇相片的 南。 重新命名 名稱。 捲動清單以變更相機設定。 選擇選 點按以刪除圖像。 項後,請點按返回鍵。 點按以立即拍攝新相片。 當前 –在指定一點上對焦臉部追蹤自 的相片將會被儲存。 動偵測並標籤人臉。 –選擇圖像大小。 如果您選擇高 使用進階設定 解像度,檔案大小會增加,即表示 在取景器內點按 以開啟所有進 在記憶體中儲存的相片會較少。 階選項。 - 還原所有相機預設設定。... - Page 96 All manuals and user guides at all-guides.com –ISO 等級決定相機感光器的敏 –自動向您顯示您剛才拍攝的 感度。 ISO 愈高,鏡頭對光線的敏 相片。 感度愈高。 當您在光線較暗環境下 –啟動以使用手機的定位服務。 拍照且無法使用補光燈時,此功能 您可隨時隨地拍攝相片,並標籤相 非常有用。 片拍攝的位置。 如您將已標籤的 –改善不同光線環境下的顏色 相片上載至支援地理位置標記的網 品質。 誌,您的相片便會在地圖上顯示。 –在圖片上套用藝術效果。 注意:本功能在 GPS 啟動時才能使 –設定在按拍攝按鈕後的延遲時 用。 間。 此功能最適合自拍時使用。 –選擇各種拍攝模式。...
- Page 97 相機 All manuals and user guides at all-guides.com 提示! 當您退出相機後,某些設定將 返回預設,例如白平衡、色彩效果、 計時器及拍攝模式。 拍攝下一張相片 前,請先檢查這些設定。 提示! 設定功能表乃疊於取景器上, 因此當您更改圖像顏色或品質的設定, 您會在設定功能表背後看見預覽圖像 的更改。...
- Page 98 all-gui des.c...
-
Page 99: 視像攝錄機
All manuals and user guides at all-guides.com 視像攝錄機 瞭解取景器 切換鏡頭–在後置相機鏡頭與前置相機鏡頭 之間切換。 變焦–拉近或拉遠鏡頭。 或者,您可使用側 音量鍵。 亮度–決定並控制進入影片的光線量。 影片大小–點按以設定所錄製影片的大小( 像素)。 設定–點按此圖示開啟設定功能表。 相機模式–將此圖示向上滑動,以切換至相 機模式。 開始錄製 媒體匣–點按以觀看您最後錄製的影片。 這 容許您從相機模式存取媒體匣並觀看已保存 的影片。... -
Page 100: 拍攝快速影片
視像攝錄機 All manuals and user guides at all-guides.com 拍攝快速影片 拍攝影片後 將相機模式按鍵向下滑動,而圖 代表該影片的靜止圖像會在螢幕上 示將會變更為 。 出現。 視像攝錄機的取景器會在螢幕上 點按以播放影片。 播放 顯示。 點按以使用 SmartShare、 分享 水平握住手機,將鏡頭對準拍攝 Facebook、 Gmail、 Wi-Fi 影片的對象。 Cast、 Youtube、 訊息、 電子郵件或藍芽分享您的 按錄製 按鍵一下以開始錄影。 相片。 錄製將顯示於取景器底部,同時 點按以編輯所選擇影片的 重新命名 計時器會顯示影片錄製的長度。 名稱。 點按螢幕上的 以停止攝錄。... -
Page 101: 使用進階設定
All manuals and user guides at all-guides.com 點按此鍵可直接錄製另外一個影 –如您想知道此功能如何操作, 片。 當前的影片將會被儲存。 點按便可。 此會向您提供快速指 南。 點按以刪除剛錄製的影片。 點 按確定以確認。 取景器將再次 捲動清單以調整視像攝錄機設定。 出現。 選擇選項後,請點按返回鍵。 –改善不同光線環境下的顏色 使用進階設定 品質。 從取景器中點按 以開啟所有進 –為影片選擇新色調。 階選項。 –還原所有影片的相機預設設 定。... -
Page 102: 觀看影片時調整音量
視像攝錄機 All manuals and user guides at all-guides.com 觀看影片時調整音量 –設定影片的最長錄製持續時 要在影片播放途中調整音量,您可 間。 您可選擇標準或多媒體訊息限 使用在手機側面的音量鍵。 制大小上限,以透過多媒體訊息發 送影片。 –選擇靜音以錄製沒有聲音的 影片。 –自動檢視自動向您顯示剛才錄 製的影片。... -
Page 103: 多媒體
All manuals and user guides at all-guides.com 多媒體 時間軸檢視 您可在記憶卡儲存多媒體檔案,輕 易存取您所有的圖像及影片檔案。 LG-E730 的媒體匣讓您以時間軸形式 檢視您的相片和影片。 在格線檢視 媒體匣 模式,拖放 至右方,便 點按應用程式標籤 ,然後選擇媒 會由最近期開始,顯示您拍攝相片 體匣。 開啟目錄列清單,裡面儲存 的日期。 如果您選擇特定日期,當 您所有的多媒體檔案。 日拍攝的所有相片將會分為一組。 注意:請確保您將記憶卡安裝到手機, 音樂 以儲存相片和存取您全部的圖片。 如 LG-E730 具有內置音樂播放器,讓 沒有記憶卡,手機則不會顯示儲存於 Picasa 相簿內沒有 Picasa 圖像的相片 您播放所有您最愛的曲目。 要存取... - Page 104 all-gui des.c...
-
Page 105: 使用 Usb 大容量儲存裝置傳送 音樂檔案
多媒體 All manuals and user guides at all-guides.com 使用 USB 大容量儲存裝置傳送音 注意:您必須先安裝 SD 卡。 如沒有 樂檔案 SD 卡,則無法使用 USB 大容量儲存。 使用 USB 線連接 LG-E730 至電 腦。 注意:如果您已安裝 LG Android 平台驅 動程式,將會立即看見開啟 USB 儲存 如果您沒有在電腦上安裝 LG 體的彈出視窗。 Android 平台驅動程式,您需要手 動變更設定。 選擇設定 > 儲存裝... - Page 106 All manuals and user guides at all-guides.com 選擇要播放的歌曲。 點按以查看目前播放列表。 點按以暫停播放。 點按以查看歌詞。 如果歌曲包 括歌詞,此選項才會開啟。 點按以恢復播放。 要在聆聽音樂時調節音量,按手機 點按以跳至專輯、播放列表或隨 左方的向上及向下音量鍵。 機中的下一首歌曲。 點按並按住清單上的任何歌曲, 便 點按以跳至專輯、播放列表或隨 會顯示播放、新增至播放列表、作 機中的上一首歌曲。 為鈴聲、刪除、分享、搜尋和詳細 點按以查看音樂庫螢幕。 資料選項。 點按以設定重複播放。 點按以隨機模式播放目前播放 列表。...
-
Page 107: Fm 收音機
多媒體 All manuals and user guides at all-guides.com FM 收音機 注意:音樂檔案的版權可能受國際公約 LG-E730 具有內置 FM 收音機,只要 和國內版權法保護。 作出適當調校,就可以隨時隨地聆 因此,您或需要取得授權或許可,才可 聽您最愛的電台。 以複寫或複製音樂。 在某些國家,國內法律禁止私人複製 注意:您需要插入耳機才可收聽收音 受版權保護的材料。 下載或複製檔案 機。 請將之插入耳機插孔。 前,先檢查有關國家關於使用這類材料 的國家法律。... -
Page 108: 搜尋電台
All manuals and user guides at all-guides.com 搜尋電台 按功能表鍵,然後點按自動掃 描。 您可以使用手動或自動搜尋功能調 如有預設頻道,您將會看見詢 校電台。 電台便會儲存至特定的 問「重設所有頻道並啟動自動掃 頻道編號,因此您不用再次尋找它 描?」的彈出視窗。 如果您選擇 們。 確定,將會刪除所有預設頻道, 您最多可以將 48 個頻道儲存到手 然後開始自動掃描。 機。 在自動掃描的過程中,如您希望 自動調頻 停止掃描點按停止。 只會儲存您 在桌面點按應用程式標籤 ,然 停止掃描之前的已掃描頻道。 後選擇 FM 收音機。... - Page 109 多媒體 All manuals and user guides at all-guides.com 注意:您亦可使用螢幕轉輪以手動方 式調頻。 提示! 要改善收音機的接收效果,您 可延長耳機線,因為耳機線也有收音機 天線的功能。 若連接的耳機並非為了接收電台訊號而 特製,接收效果或會欠佳。...
- Page 110 all-gui des.c...
-
Page 111: 實用程式
All manuals and user guides at all-guides.com 實用程式 設定鬧鐘 使用計算機 應用程式 > 鬧鐘/時鐘 > > 新 應用程式 > 計算機 增鬧鐘 觸控數字鍵以輸入數字。 設定時間後,LG-E730 會讓您知 對於簡單計算,點按所需的運 道距離鬧鐘響起還剩下多少時 算符號(+、-、x 或 ÷),然後 間。 按 =。 設定暫停時間、震動、鬧鐘提示 對於複雜的計算,按功能表鍵, 音和拼圖鎖,然後新增標籤為鬧 然後點按進階面板,再選擇 鐘命名。 點按儲存。 sin、cos、tan、log 等等。... -
Page 112: 新增事件至日曆
實用程式 All manuals and user guides at all-guides.com 新增事件至日曆 若要新增備註至您的事件,點按 說明,然後輸入詳細資料。 應用程式 > 日曆 若要重複鬧鐘,請設定重複,如 要檢查事件,點按日期。 如果您 有需要亦可設定提醒。 想新增新事件,點按功能表鍵。 點按儲存,將事件儲存至日曆。 點按新事件。 點按主題,然後輸入事件名稱。 更改您的預設日曆檢視模式 檢查日期,並輸入事件開始及完 應用程式 > 日曆 結的時間。 您可在螢幕頂部找到日曆的不 然後點按地點,輸入事件的地 同檢視類型(日、星期、月、日 點。 程)。... -
Page 113: Polaris Office
All manuals and user guides at all-guides.com Polaris Office 檢視檔案 手機用戶現在可以直接在流動裝置 Polaris Office 是專業的流動辦公室 上輕易檢視各式各樣的檔案類型, 解決方案,讓使用者隨時隨地使 包括 Microsoft Office 文件和 Adobe 用流動裝置輕鬆檢視不同類型的 PDF。 使用 Polaris Office 檢視器檢視 辦公室文件,包括 Word、Excel 和 文件時,物件和版面會保持與原始 PowerPoint 檔案。 文件相同。 管理檔案 Polaris Office 為手機用戶提供方便管 理檔案的功能,包括直接在裝置上 複製、剪下與貼上,以及刪除檔案 和資料夾。... -
Page 114: 網絡功能
All manuals and user guides at all-guides.com 網絡功能 瀏覽器 使用網絡工具列 瀏覽器令您透過手機盡享快捷、全 點按以返回頁面。 彩色的遊戲、音樂、新聞、體育、 點按以前往您在目前頁面後連 娛樂及更多。 無論您身在何處,有 接的一頁。 當您按返回鍵返回 何需求。 上一頁,這就是其相反操作。 點按以顯示所有您已開啟的 注意:連接到這些服務和下載內容需 視窗。 繳交額外費用。 請向網絡供應商諮詢 收費詳情。 點按以新增新視窗。 點按以變更瀏覽器設定。... -
Page 115: 使用選項
All manuals and user guides at all-guides.com 使用選項 分享網頁–讓您與其他人分享 網頁。 按功能表鍵檢視選項。 書簽–檢視您目前的書簽及新增 更多 新書簽。 您亦可以檢視您的瀏 • 在頁面中搜尋:讓您在目前網頁 覽器記錄。 尋找字母或字詞。 新增書簽–將目前網頁新增至 • 選取文字:讓您從網頁複製任何 書簽。 文字。 稍後讀取–新增到稍後讀取。 • 新增捷徑至主頁:將目前網頁的 捷徑新增至桌面。 新增 RSS 收取點–將目前網頁新 增至 RSS 收取點。 • 頁面資訊:顯示該網頁的資訊。 • 下載:顯示下載記錄。... - Page 116 all-gui des.c...
-
Page 117: Lg 螢幕 (On-Screen) 手機 2.0
All manuals and user guides at all-guides.com LG 螢幕 (On-Screen) 手機 2.0 LG 螢幕 (On-Screen) 手機 2.0 讓您透 啟動 LG Home Panorama 或變更 過 USB、藍芽或 Wi-Fi 連接,使用 On-Screen 手機偏好。 電腦檢視您的手機螢幕。 結束 螢幕 (On-Screen) 手機程 您亦可在電腦上利用滑鼠或鍵盤, 式。 控制您的手機。 將螢幕 (On-Screen) 手機視窗最... - Page 118 All manuals and user guides at all-guides.com • 滑鼠操控:讓您在電腦螢幕上使 腦將檔案發送至手機內。 只須選 用滑鼠拖動並點按,以控制您的 擇您想傳送的檔案,然後拖放至 手機。 螢幕 (On-Screen) 手機視窗內。 您 發送的檔案將會儲存在 OSP 資料 • 使用鍵盤輸入文字:讓您使用電 夾內。 腦鍵盤編寫文字訊息或備註。 • 即時事件通知:如有,顯示彈出 • 檔案傳輸(手機至電腦):從 視窗,就任何來電或文字、鬧鐘 手機(例如:媒體匣、影片播放 及事件通知向您發出提示通知。 器、音樂及 Polaris Office)手機的 • LG Home Panorama:顯示 LG Home 將檔案發送至電腦內。 只須按滑 鼠右鍵,並將檔案拖動至您的電 的整個工作空間。 您可輕易管理 腦內。 圖示或小工具,並透過雙按捷徑 執行應用程式。 • 檔案傳送(電腦至手機):從電...
-
Page 119: 如何在電腦上安裝螢幕 (On-Screen)
LG 螢幕 (On-Screen) 手機 2.0 All manuals and user guides at all-guides.com 如何將手機連接至電腦 注意:請確保 LG Home 為預設啟動 螢幕 (On-Screen) 手機 2.0 提供 程式。 USB、藍芽和 Wi-Fi 連接。 請依照 OSP 程式連線精靈的指示。 如何在電腦上安裝螢幕 (On-Screen) 手機 注意:請確保已選擇設定 > 無線及網 路 > 螢幕手機設定中的 On-Screen 手機... -
Page 120: 要檢查手機至電腦連接
All manuals and user guides at all-guides.com 要檢查手機至電腦連接 只要已連接裝置,向下拖動桌 面上方的狀態列,以檢查螢幕 (On-Screen) 手機的連接狀態。 要中斷電腦與手機的連接 點按在螢幕 (On-Screen) 手機視窗 左上角的 。 或向下拖動桌面上 方的通知列,然後選擇「已連接 On-Screen 手機」。 點按中斷連接對 話方塊的「確定」。... -
Page 121: 無線及網絡
All manuals and user guides at all-guides.com 設定 您亦可設定流動網絡及桌面,點按 Wi-Fi–啟動 Wi-Fi 以連接可使用的 應用程式標籤 ,然後捲動並點 Wi-Fi 網絡。 按設定。 Wi-Fi 設定–讓您設定及管理無線存 取點。 設定網絡通知,或新增 Wi-Fi 無線及網絡 網絡。 從 Wi-Fi 設定螢幕進入進階 您可在此管理 Wi-Fi 和藍芽。 您 Wi-Fi 設定螢幕。 按功能表鍵並點 亦可設定流動網絡和切換至飛航模 按進階。 式。 Wi-Fi Direct 設定–設定 Wi-Fi Direct 飛航模式–切換至飛航模式後,所... - Page 122 all-gui des.c...
- Page 123 All manuals and user guides at all-guides.com 藍芽–啟動藍芽以連接至藍芽裝 提示! 如何取得 MAC 位址 置。 若要在某些設有 MAC 過濾器的無線網 藍芽設定–設定裝置名稱及可找到 絡建立連線,您需要把 LG-E730 手機的 的裝置,並掃描其他裝置。 或者, MAC 位址輸入到路由器。 檢查您以前配置的藍芽裝置列表, 您可在以下用戶介面找到 MAC 位址: 以及手機最近一次掃描藍芽裝置時 點按應用程式 > 設定 > 無線及網絡 > 所偵測到的藍芽裝置。 Wi-Fi 設定,然後按功能表鍵。 再選擇 進階 > MAC 位址。...
-
Page 124: 通話設定
設定 All manuals and user guides at all-guides.com 通話設定 VPN 設定–顯示您以前配置的虛擬 專用網絡 (VPN) 列表。 允許您新增 < 固定撥號 > 不同類型的 VPN。 選擇固定撥號,以開啟並編輯一份 流動網絡–設定數據漫遊、網絡模 可從您手機撥打的號碼清單。 需要 式和運營商、存取點名稱 (APNs) 等 使用 PIN2,您可以向網絡商索取此 等。 PIN2。 僅可從手機撥出固定撥號列 螢幕手機設定–讓您開啟螢幕電話 表包含的號碼。 並變更 On-Screen phone 密碼(預設 < 語音留言 > 密碼為「0000」)。... - Page 125 All manuals and user guides at all-guides.com 語音信箱設定–如果您正在使用您 道歉訊息–當您想拒接來電,使用 的服務供應商所提供的語音信箱服 此功能可以快速發送訊息。 如果您 務,此選項允許您輸入電話號碼用 需要在會議中拒接來電,此功能將 來接聽或者管理您的語音信箱。 十分有用。 視像通話設定–變更視像通話設 < 其他通話設定 > 定。 通話限制–選擇您想要何時限制通 來電轉接–選擇線路繁忙時、無人 話。 輸入通話限制密碼。 請向您的 接聽時或無法接通時轉駁所有通 網絡供應商暸解此服務詳情。 話。 拒接來電–讓您設定拒接來電功 通話時間–檢視上次通話、所有通 能。 從關閉、拒接來電列表及拒接 話、撥出通話、已接來電的通話時 所有來電中選擇。 間。...
- Page 126 設定 All manuals and user guides at all-guides.com 聲音 通話費用–檢視您的通話收費。 ( 此服務視乎您的網絡而定;一些網 < 標準 > 絡供應商不支援此功能) 靜音模式–讓您將所有聲音(包括 其他設定–您可更改以下設定: 來電及提示鈴聲)靜音,但不包括 • 本機號碼:選擇是否在撥出的電 播放音樂及影片的聲音,以及您已 話中顯示您的電話號碼。 設定的鬧鐘。 您必需在其相關應用 • 來電等候:如已啟動來電等候, 程式為媒體及鬧鐘靜音。 當您在通話中接到來電,手機便 震動–允許您設定來電時手機震 會通知您(視乎您的網絡供應商 動。 而定)。...
- Page 127 All manuals and user guides at all-guides.com 音量–允許您設定鈴聲、多媒體及 < 回饋 > 鬧鐘的音量。 如果您沒有勾選「 觸控音效–當您使用撥號鍵盤撥號 使用來電音量作為通知音量」的選 時,允許您設定手機播放按鍵音。 項,那麼您可以分別設定來電和通 選擇項目時發聲–當您點按按鈕、 知的音量。 圖示或者其他對您的點按作出反應 的螢幕上的項目時,允許您設定您 < 來電 > 的手機播放按鍵音。 電話鈴聲–允許您設定預設的來電 螢幕鎖定聲音–允許您設定鎖定或 鈴聲。 解鎖螢幕時播放聲音。 < 通知 > 觸覺回饋–按下螢幕按鍵與出現特 通知鈴聲–允許您設定預設的通知 定的操作行為時會震動。 鈴聲。...
- Page 128 all-gui des.c...
- Page 129 設定 All manuals and user guides at all-guides.com 顯示 手勢 亮度–調校螢幕亮度。 使用動作手勢–調校文字輸入欄 位、來電、鬧鐘、媒體匣和影片播 自動旋轉螢幕–設定當您旋轉手機 放器的手勢設定。 時自動切換方向。 重新設定手勢感應器–將手機放在 動畫–設定以顯示動畫。 平面上,以校準移動感應器。 螢幕逾時–設定螢幕逾時的時間。 顯示字體–變更顯示字體。...
-
Page 130: 位置及安全
All manuals and user guides at all-guides.com 位置及安全 設定螢幕鎖定–設定解鎖圖案以保 護您的手機。 開啟一系列畫面,以 使用無線網絡–如選擇使用無線網 指導您繪畫螢幕解鎖圖案。 您可以 絡,手機會使用 Wi-Fi 和流動網絡 設定 PIN 碼或密碼,而不是圖形或 確定您大概所處的位置。 如選擇 者無設定。 此選項,系統會問您是否同意允許 當您開啟手機或喚醒螢幕時,您需 Google 在提供這些服務時,使用您 要繪製解鎖圖形以解鎖螢幕。 所處的位置。 設定 SIM 卡 鎖定–設定鎖定 SIM卡 使用 GPS 衛星定位–如選擇使用 或更改 SIM卡 PIN碼。 GPS 衛星定位,手機會確定您所處... -
Page 131: 應用程式
設定 All manuals and user guides at all-guides.com 應用程式 選擇裝置管理員–新增一個或多個 管理員。 您可檢視並管理應用程式。 使用安全認證–可讓您存取安全證 未知的來源–安裝並非從 Market 下 書。 載的應用程式的預設設定。 從 SD 卡安裝–選擇從 SD 卡安裝加 警告: 密證書。 視乎您所安裝的應用程式,手機可能無 設定密碼–設定或變更憑證儲存密 法正確操作,並可能透過互聯網被非法 碼。 用於建立您的位置及存取個人資資訊。 清除儲存空間–清除所有內容的憑 爲了保護您的手機和您的個人資料,請 證儲存並重設密碼。 只從受信任的來源下載應用程式,例如 Android Market。... -
Page 132: 帳號及同步處理
All manuals and user guides at all-guides.com 帳號及同步處理 管理應用程式–管理及移除已安裝 的應用程式。 < 一般同步處理設定 > 正在運作的服務–檢查正在運作的 背景資料–允許應用程式在背景中 服務。 同步資料,而不論您是否啟動它 儲存空間使用量–檢視應用程式的 們。 取消勾選此設定會幫助節省電 儲存空間使用量。 池電力,同時也會降低(但不會完 電池使用狀況–查看使用電池的項 全停止)資料用量。 目。 自動同步處理–應用程式會自動同 開發–設定開發應用程式的選項。 步處理 資料。 < 管理帳號 > 您新增到此手機上的所有 Google 帳 戶和其他帳戶的列表。... -
Page 133: 隱私設定
設定 All manuals and user guides at all-guides.com 如果您點按該螢幕上的某一帳戶, 用此方法重設您的手機,您會被提 則該帳戶的螢幕會開啟。 示重新輸入您第一次啟動 Android 時 所輸入的訊息。 隱私設定 儲存裝置 重設為原廠設定–如果您選擇 重設 為原廠設定,手機內部儲存空間所 < USB 連接模式 > 有資料,包括您的 Google 帳戶資 僅限大容量儲存–如果您插入例如 料、您的系統 / 應用程式資料和設 一張記憶卡,您的手機就可以用作 定,以及任何已下載的程式及 DRM 大量儲存裝置。 您可以設定僅限大 授權。 容量儲存為 USB 連接模式下的預設 重設手機並不會刪除任何您所下載... - Page 134 all-gui des.c...
-
Page 135: 語言及鍵盤
All manuals and user guides at all-guides.com 語音輸入及輸出 < SD 卡 > 檢查可用的 SD 卡總空間。 點按移 < 語音輸入 > 除 SD 卡以安全移除。 如您希望 語音識別系統設定–使用語音識別 刪除 SD 卡上的所有資料,請清除 系統設定,以設定 Android 語音輸 SD 卡。 入功能。 < 手機內置記憶體 > • Language (語言):開啟螢幕讓您設 檢查可使用空間。 定使用語音輸入文字的語言。 • SafeSearch:開啟對話方塊,可設... - Page 136 設定 All manuals and user guides at all-guides.com • Block offensive words (封鎖令人反 注意:如果您沒有安裝語音合成數據, 感的字詞):取消勾選後,當您使 那麼只有安裝語音資料可使用。 用語言輸入文字時,Google 語音 識別會辨認大部分人認為令人反 • 聆聽範例:使用您的現有設定, 感的字詞,並會譯成文字。 選擇 播放語音合成器的簡短範例。 後,語音識別於轉換時會以內有 • 永遠使用我的設定:在此螢幕勾 井號的括號 ( # ) 代替相關字詞。 選使用設定,而並非使用其他應 < 語音輸出 > 用程式中可使用的語音合成器設 定。 文字轉語音設定–使用文字轉語音 設定,為可使用 Android 文字轉語音 合成器的應用程式設定此功能。...
-
Page 137: 協助工具
All manuals and user guides at all-guides.com • 預設引擎:開啟對話方塊,從中 • 語言:開啟對話方塊,從中選擇 設定您想使用的文字轉語音應用 合成器所讀取的文字語言。 配 程式(如有安裝兩個或以上的應 合永遠使用我的設定使用尤其實 用程式)。 用,能確保在不同應用程式內也 能正確讀出文字。 • 安裝語音資料:如果手機沒有安 • Pico TTS:設定 Pico TTS 設定。 裝語音合成數據,連接至 Android Market,系統會指導您下載及安裝 協助工具 數據。 如已安裝數據,則無法選 您可使用協助工具設定,以設定已 擇此設定。 安裝到手機的可存取性外掛程式。 • 語音速率:開啟對話方塊,從中 選擇合成器發聲的速度。 注意:需要其他外掛程式。... -
Page 138: 日期及時間
設定 All manuals and user guides at all-guides.com 日期及時間 手機軟件更新 使用日期及時間設定以設定顯示日 從互聯網更新 LG 手機軟件 期的方式。 您還可以使用這些設定 要了解更多有關此功能的資訊,請 來設置您自己的時間和時區,而不 瀏覽 http://www.lg.com。 只是從流動網絡獲得當前時間。 透過此功能,您便無須親臨客戶服 務中心,就可透過互聯網更新手機 關於手機 軟體至較新版本,這非常方便。 檢視法律資訊,檢查手機狀態和軟 此更新功能只在 LG 發佈適合您的 件版本。 手機有較新軟體版本時才可使用。 手機軟體更新要求使用者必需緊密 留意整個更新過程。請確保繼續進 行前,已檢查所有在每一個步驟出... - Page 139 All manuals and user guides at all-guides.com 現的指引和備註。 請注意,更新期 合您裝置軟件的較新版本時,此功 間若移除 USB 數據線或電池,有可 能才可使用。 能對您的手機造成嚴重損害。 首先,您可以使用手機檢查軟件版 本:設定 > 關於手機 > 軟件更新 > 注意:LG 保留權利,可酌情決定只為 現在檢查更新。 選定型號提供軟件更新,並不保證所有 手機型號均有軟件的較新版本。 注意:此功能視乎網路服務供應商、地 區及國家而定。 透過空中下載 (OTA) 進行 LG 手機 軟件更新 此功能讓您輕鬆快捷地透過 OTA 將 手機軟件更新至較新版本,而無須 透過 USB 數據線連接。 LG 推出適...
- Page 140 all-gui des.c...
-
Page 141: Divx 手機
設定 All manuals and user guides at all-guides.com 註冊編碼,請在您的裝置設定功能 DivX 手機 表找出 DivX VOD 部分。 前往 vod. 關於 DIVX VIDEO:DivX ® 是由 Rovi divx.com 以獲取有關如何完成註冊的 Corporation 的子公司 DivX, LLC 所建 更多資訊。 立的數碼影片格式。 這是官方 DivX DivX Certified ® 可播放高達 640x480 Certified ®... - Page 142 All manuals and user guides at all-guides.com 注意:公開原始碼軟件 若要取得 GPL、LGPL、MPL 或其他 公開來源授權的相應原始碼,請瀏覽 http://opensource.lge.com/ 所有授權的條款、免責聲明及通知均可 連同原始碼一同下載。...
- Page 143 配件 All manuals and user guides at all-guides.com 該等配件適合配合 LG-E730 使用。 (下述配件為可選購配件。) 旅行充電器 電池 立體聲耳機 USB 線 使用手冊 了解更多有關 了解有關 LG-E730 的資 LG-E730 的更 訊。 多資訊。 注意: • 只可使用原裝 LG 配件。 • 若不使用原裝 LG 配件,則保養可能失效。 • 配件可能會視乎不同地區而有所不同。...
- Page 144 Suppliers Details Name LG Electronics Inc 最高: +55°C(放電) Address LG Twin Tower 20,Yeouido-dong, Yeongdeungpo-gu Seoul, Korea 150-721 +45°C(充電) Product Details Product Name GSM 850 / E-GSM 900 / DCS 1800 / PCS 1900 Quad Band and WCDMA Terminal Equipment 最低: –10°C...
- Page 145 疑難排解 All manuals and user guides at all-guides.com 本章會列出一些使用手機時可能遇上的問題。 您可能需要就某些問題聯絡 您的服務供應商,但多數問題均可輕易自行修正。 訊息 可能起因 可用解決方法 智能卡 手機內無智能卡,或不 確保已正確地插入智能卡。 錯誤 正確地插入智能卡。 移近窗邊或移至空曠地方。 檢查網 絡供應商的覆蓋範圍。 訊號較弱或您位於運營 無網絡連 檢查智能卡是否多於 6~12 個月。 商網絡服務範圍外。 接/失去 如是者,請前往網絡供應商的就近 網絡 網絡商套用新服務。 分店更換智能卡。 請聯絡您的服務 供應商。...
- Page 146 all-gui des.c...
- Page 147 All manuals and user guides at all-guides.com 訊息 可能起因 可用解決方法 要更改安全密碼,您需 要重新輸入以確認新的 密碼不 如您忘記密碼,請聯絡您的服務供 安全密碼。 正確 應商。 您所輸入的兩個密碼並 不相符。 無法設定 服務供應商不支援此功 無任何應 能,或需要註冊使用此 請聯絡您的服務供應商。 用程式 功能。...
-
Page 148: 疑難排解
疑難排解 A ll manuals and user guides at all-guides.com 訊息 可能起因 可用解決方法 撥號錯誤 新網絡未獲受權。 無法撥打 新智能卡已插入。 請檢查新的限制。 電話 已達預付費用上限。 聯絡您的服務供應商,或使用 PIN2 重設限額。 按開/關鍵時間太快。 按下開啟/關閉鍵至少兩秒。 手機無法 電池並無充電。 替電池充電。 檢查螢幕上的充電 啟動 指示器。 電池接觸面骯髒。 清潔電池接觸面。... - Page 149 All manuals and user guides at all-guides.com 訊息 可能起因 可用解決方法 電池並無充電 替電池充電。 外界溫度太高或太低 確保於正常溫度下為手機充電。 檢查充電器是否正常,以及是否正 接觸不良 確地連接電源至手機。 檢查電池接 觸點,如有髒污則需清潔。 充電錯誤 無電壓 將充電器插入不同的插座。 如充電器沒有變暖,則需更換充 充電器故障 電器。 使用不當充電器 請只使用原裝 LG 配件。 電池故障 更換新電池。...
- Page 150 疑難排解 All manuals and user guides at all-guides.com 訊息 可能起因 可用解決方法 不允許撥 固定撥號功能已開啟。 檢查設定功能表並關閉功能。 打號碼 無法接收 / 發送文 記憶體已滿 刪除手機的部分訊息。 字訊息和 圖片 檔案沒有 不支援的檔案格式 檢查受支援的檔案格式。 開啟 SD 卡無法 只支援 FAT 16、FAT 透過讀卡器檢查 SD 卡檔案系統, 運作 32 檔案系統 或使用手機將 SD 卡格式化。...
- Page 151 All manuals and user guides at all-guides.com 訊息 可能起因 可用解決方法 接收來電 如果您使用任何保護貼或保護套, 時,螢幕 檢查該等配件是否覆蓋感應器附近 感應器問題 並無開 的範圍。 確保感應器附近並無任何 啟。 障礙物。 檢查聲音功能表的設定狀態,確保 無聲音 震動模式 您並非使用震動或靜音模式。 請取下電池,再次插入電池並開啟 掛線或 手機。 軟件間歇性問題 凍結 透過網站嘗試進行軟件更新。...
- Page 152 all-gui des.c...
- Page 153 All manuals and user guides at all-guides.com...
- Page 154 All manuals and user guides at all-guides.com 简体中文 LG-E730 用户手册 本手册有助于您开始使用您的新手机。 • 此手册中的部份内容可能会因手机程序之改良或不同 网络商提供的服务而令实际情况有所不同,这并不会另 行通知。 • 此手机采用触摸屏键盘,不适合视障人士使用。 • 版权所有 ©2011 LG Electronics, Inc。保留所有权利。 LG 和 LG 徽标是 LG 集团及其相关实体的注册商标。 所有其他商标是其各自所有者的财产。 • Google™、Google Maps™、Gmail™、YouTube™、Google Talk™ 和 Android Market™ 是 Google, Inc. 的商标。...
- Page 155 目录 All manuals and user guides at all-guides.com 关于安全有效使用手机的准则 .... 7 返回到最近使用的应用程序 ....40 通知抽屉 ..........40 开始了解您的手机 ........ 17 查看状态栏 ..........41 设备组件 ..........26 屏上键盘 ..........44 安装 SIM 卡和电池 ....... 29 输入带注音的字母 ........ 45 充电 ............31 Google 帐户设置...
- Page 156 All manuals and user guides at all-guides.com 使用 WLAN Cast ........53 搜索联系人 ..........63 启用 WLAN Direct,通过 SmartShare 添加新联系人 ......... 63 共享 ............53 收藏夹联系人 ......... 64 使用 SmartShare ........55 将旧手机上的电话本移至新手机 ..65 通话 ............59 信息 ............66 拨打电话...
- Page 157 目录 All manuals and user guides at all-guides.com 使用帐户文件夹 ........70 摄像机 ............. 80 撰写和发送电子邮件 ......70 了解取景器 ..........80 快速摄像 ..........81 社交网络 ..........72 拍摄视频后 ..........81 将您的帐户添加到手机 ......72 使用高级设置 ......... 82 查看和更新状态 ........73 观看视频时调节音量 ......83 删除手机上的帐户...
- Page 158 all-gui des.c...
- Page 159 All manuals and user guides at all-guides.com FM 收音机 ..........88 LG 屏幕手机 2.0 ........95 搜索电台 ..........88 屏幕手机 2.0 图标........95 屏幕手机 2.0 功能........95 实用工具 ..........90 如果在 PC 上安装屏幕手机 ....97 设置闹钟 ..........90 如何将手机连接至 PC ......97 使用计算器...
- Page 160 目录 All manuals and user guides at all-guides.com 位置和安全 ........... 106 配件 ............117 应用程序 ..........107 技术参数 ..........118 数据同步 ..........108 隐私 ............109 故障排除 ..........119 存储 ............109 区域和文本 ........... 110 语音输入与输出 ........110 辅助功能 ..........112 日期和时间...
- Page 161 All manuals and user guides at all-guides.com 请阅读以下简单的准则。 违反这些 单位。 SAR 测试是在所有用到的 准则可能造成危险或者触犯法律。 频带中以手机的最高认可功率电 平进行发射时使用标准化方法执 暴露在射频能量之下 行的。 无线电波暴露和“特定吸收 • 不同的 LG 手机型号可能有不同的 率”(SAR) 信息。此款 LG-E730 型手 SAR 能级,但它们均符合相关的 机已设计为遵守有关适用的无线电 无线电波暴露准则。 波暴露安全要求。 此要求基于相关 • 国际非游离辐射防护委员会 的科学准则,其中包括为确保所有 (ICNIRP) 建议的 SAR 上限值为: 人员(无论年龄和健康状况)安全 每 10g 重的人体组织吸收的能量...
-
Page 162: 关于安全有效使用手机的准则
关于安全有效使用手机的准则 All manuals and user guides at all-guides.com • 由 DASY4 对该型号手机进行的测 产品保养和维护 试,人耳能够承受的 SAR 最大值 警告 为 0.690 W/kg(10 克),戴在身 体上时,其值为 0.757 W/kg(10 仅使用经核准为用于此特定手机型号的 电池、充电器和配件。 使用任何其它 克)。 类型可能导致适用于此手机的许可或保 • 电气电子工程师协会 (IEEE) 建议 修失效,并可能造成危险。 的 SAR 上限值为 1.6 W/Kg,平均 值超过 1 克薄纸,此 SAR 数据适 • 不要拆解本机。... - Page 163 All manuals and user guides at all-guides.com • 保修(由 LG 决定)可能包括使用 • 在任何有特殊条例要求的区域关 新的或返修的更换部件或板,只 闭手机。 例如,请勿在医院使用 要其功能与更换的部件等效。 手机,因为它可能影响敏感的医 疗装置。 • 远离诸如电视、收音机或个人计 • 手机充电时,请勿用湿手操作手 算机之类的电器。 机。 这可能会导致电击或手机严 • 远离诸如暖气片或厨灶之类的热 重受损。 源。 • 请勿在靠近易燃物体的位置充 • 小心不要让手机摔落。 电,因为手机可能因加热而引发 • 不要让手机受到机械振动或撞 火灾。 击。...
- Page 164 all-gui des.c...
- Page 165 关于安全有效使用手机的准则 All manuals and user guides at all-guides.com • 使用干布清洁手机外壳(不要使 • 不要用尖锐物体敲击屏幕,这可 用如苯、稀释剂或酒精之类的溶 能会损坏手机。 剂)。 • 不要将手机暴露在液体或潮气 • 如果手机置于柔软物体之上,请 中。 不要充电。 • 谨慎使用诸如耳机之类的配件。 • 应将手机放在完全通风的位置充 在不必要的情况下,不要触摸天 电。 线。 • 不要在烟雾或灰尘过多的环境中 • 请勿使用、触摸或试图取下或修 使用或存放手机。 复破碎或破裂的玻璃。 由于滥用 • 不要将手机放在信用卡或卡式车 或误用造成的玻璃显示屏损坏不 在保修范围内。 票旁边,它可能会影响磁条上的 信息。...
- Page 166 All manuals and user guides at all-guides.com • 作为电子设备,您的手机在正常 • 在未经允许的情况下,不得在医 操作下会发热。 空气不流通情况 疗装置附近使用手机。 不要将手 下,长时间与皮肤直接接触可能 机放在心脏起搏点上,即胸前的 会导致不适或轻微灼伤。 因此, 口袋内。 在手机使用中或刚使用完后,请 • 手机可能会对某些助听器造成干 小心接触。 扰。 • 微弱的干扰可能会影响电视、收 有效的手机操作 音机、个人计算机等。 电子设备 行车安全 所有手机都可能受到干扰,这种干 扰会对性能造成影响。 查阅有关在驾驶时使用手机的本地 法律法规。...
- Page 167 关于安全有效使用手机的准则 All manuals and user guides at all-guides.com • 不要在驾驶时使用手持式手机。 • 如果您在外出时使用耳机收听音 乐,请确保将音量设置为合理的 • 将注意力完全集中在驾驶上。 音量级别,以便注意周围的情 • 如果行驶条件需要,请在拨打或 况。 在靠近马路时,尤其要注意 接听电话之前将车辆驶离道路并 这一点。 停车。 • 射频能量可能影响车辆内的电子 防止损伤您的听力 系统,例如立体声音响、安全设 如果您长时间置于高音环境中,那 备等。 么您的听力可能会遭到伤害。 因 • 当车辆配备气囊时,不要让安装 此,我们建议您在开机或关机时不 的便携式的无线设备阻挡气囊。 要将手机置于耳边。 同时,我们还 这样做可能因性能不当而导致气 建议您将音乐和通话音量设置为合 囊无法释放或导致严重受伤。 理的音量级别。...
- Page 168 All manuals and user guides at all-guides.com • 使用耳机时,如果您不能听到附 玻璃部件 近的人说话,或者坐在您旁边的 手机某些部件用玻璃制成。 如果 人能听到您在听的内容,则将音 手机摔落到坚硬表面或受到强烈撞 量调低。 击,玻璃会破碎。 如果玻璃破碎, 请勿触摸或尝试取出玻璃碎片。 停 备注:耳机声音和压力过度可能导致 止使用手机,在授权的服务提供商 听觉受损。 处更换玻璃。 爆破区域 不要在正进行爆破的地区使用手 机。 请依照有关限制,并遵守任何 规章或规定。...
- Page 169 关于安全有效使用手机的准则 All manuals and user guides at all-guides.com • 未经机务人员允许,不得在地面 易爆环境 上使用手机。 • 不要在加油站内使用手机。 • 不要在靠近燃料或化学制品处使 儿童 用手机。 将手机放在儿童接触不到的安全地 • 不要在放有手机和配件的车厢内 方。 手机中包含细小零件,如果脱 运输或存放可燃气体、液体或爆 落可能导致窒息危险。 炸品。 紧急电话 在飞机上 并非在所有手机网络中均可使用紧 无线设备可能对飞机造成干扰。 急电话。 因此,您不应仅依赖于手 • 登机前,请关机。 机的紧急呼叫功能。 请向本地的服 务提供商核准。...
- Page 170 all-gui des.c...
- Page 171 All manuals and user guides at all-guides.com • 当电池不再提供合乎要求的性能 电池信息及保养 时,请更换电池。 在需要更换 • 您无需在再次充电前对电池进行 之前,电池组可以反复充电数百 完全放电。 与其它电池系统不 次。 同,本机电池不具有可能影响电 • 如果很长一段时间都没用过电 池性能的记忆效应。 池,请将电池再次进行充电以保 • 只能使用 LG 电池和充电器。 LG 持最佳使用状态。 充电器设计为最大程度地延长电 • 不要将电池充电器暴露在直射阳 池使用寿命。 光下,也不要在诸如浴室之类的 • 不要拆解电池或将其短路。 高湿环境中使用。 • 保持电池的金属触点清洁。 • 不要将电池存放在过热或过冷的 地方,这可能损害电池的性能。...
- Page 172 关于安全有效使用手机的准则 All manuals and user guides at all-guides.com • 如果用不适当的电池进行替换, • 实际的电池寿命将取决于网络配 可能会有爆炸危险。 置、产品设置、使用方式、电池 和环境条件。 • 请按制造商的说明处置用过的电 池。 如果可能,请循环使用电 池。 不要象处理家用废物一样处 理电池。 • 如果要更换电池,请将其携带至 LG Electronics 授权服务点或经销 商处以寻求帮助。 • 手机充好电后,请务必将充电器 从墙上插座拔下,以避免不必要 的耗电。...
-
Page 173: 开始了解您的手机
All manuals and user guides at all-guides.com 开始了解您的手机 开始使用手机前,请阅读此内容! 请检查以查看本节是否介绍了您手 卸载应用程序: 机遇到的任何问题,然后再将手机 应用程序 > 设置 > 应用程序 > 管 拿去维修或者致电给服务代表。 理应用程序 所有应用程序都显示后,请滚动 1. 手机内存 并选择要卸载的应用程序。 当手机内存可用空间小于 10% 时, 点触卸载。 您的手机无法收到新信息。 您需要 检查手机内存并删除一些数据(如 应用程序或信息),以有更多内存 可用。... - Page 174 开始了解您的手机 All manuals and user guides at all-guides.com • 关闭 Google Mail™、日历、联系 2. 优化电池使用寿命 人及其他应用程序的自动同步。 可以通过禁用无需在后台持续运行 • 您下载的一些应用程序可能会消 的功能来延长电池的使用寿命。 您 耗电池电量。 可以监视应用程序和系统资源如何 消耗电池电量。 检查电池电量水平: • 应用程序 > 设置 > 关于手机 > 状 延长手机电池的使用寿命: • 关闭未使用的无线电通信。 如果 态 不使用 WLAN、蓝牙或 GPS,请 电池状态(正在充电、未在充电) 将其关闭。 和电量(充电百分比)显示在屏幕 • 调低屏幕亮度,设置较短的屏幕 顶部。...
- Page 175 All manuals and user guides at all-guides.com 3. 安装开源应用程序和操作系统 监视并控制电池电量的使用情况: • 应用程序 > 设置 > 关于手机 > 电 之前 池使用 警告 电池使用时间显示在屏幕顶部。 它 如果安装并使用非制造商提供的操作系 告诉您自上次将手机连接到电源以 统,可能导致手机无法正常工作。 此 来的时间,或者手机连接到电源后 外,您的手机也不再享受保修。 在电池电源上运行的时间。 屏幕显 示了正在使用电池电源的应用程序 或服务,按最大量到最小量的顺序 列出。...
- Page 176 all-gui des.c...
- Page 177 调低键 + 电源键。 为保护您的手机和个人数据,请只从信 2. 当手机底部的 LED 指示灯亮起 任的来源(如 Android Market™)下载 时,用右手点触并按住菜单键 + 应用程序。 如果手机上存在未正确安 装的应用程序,您的手机可能无法正常 后退键。 您需要立即执行此操 工作,甚至可能发生严重错误。 您必 作,在屏幕显示 LG 徽标之前。 须从手机中卸载那些应用程序及其所有 确保左手仍按住音量调低键和电 关联的数据和设置。 源键。 3. 当屏幕上显示 LG 徽标时,继续按 4. 使用硬重置(恢复出厂设置) 住这两个键大约 2 秒,在 LG 徽 如果手机需要恢复到它的原始条 标消失前同时松开。 件,请使用硬重置来重新启动手 机。...
- Page 178 All manuals and user guides at all-guides.com 在执行硬重置时,至少在 1 分钟内 如果未插入存储卡,您将无法保存 不要对手机执行任何操作。 然后, 使用相机拍摄的照片和视频。 您可以再次打开手机。 6. 打开和切换应用程序 注意:如果执行硬重置,所有用户 多任务可在 Android 中轻松实现, 应用程序和用户数据将被删除。 此 因为您可同时运行多个应用程序。 操作无法撤消。 在执行硬重置之 打开其他应用程序之前无需退出当 前,记得备份任何重要数据。 前应用程序。 使用多个打开的应 5. 使用 microSD 卡 用程序,并在这些应用程序之间切 换。 Android 管理各个应用程序、根 图片、音乐和视频文件只能保存到 据需要停止和启动应用程序,从而 外部存储器。...
- Page 179 开始了解您的手机 All manuals and user guides at all-guides.com 7. 安装 LG PC Suite 停止应用程序: 应用程序 > 设置 > 应用程序 > 管 LG PC Suite IV 是一种可帮助您使用 理应用程序 USB 数据通信电缆将手机连接到 PC 的程序。 连接后,您可以在 PC 上 滚动到所需应用程序,然后点触 使用手机的功能。 停止以停止该应用程序。 LG PC Suite IV 的主要功能...
- Page 180 用资讯。 件(照片、视频和音乐) • 将短信从手机传输到 PC 8. 通过 USB 同步手机与电脑 • 软件更新而不丢失任何数据 备注:要使用 USB 数据线将手机与 PC LG-E730 不支持以下功能: 同步,需要在 PC 上安装 LG PC Suite。 – LG Air Sync(Web Sync、右键 请参阅前几页安装 LG PC Suite。 单击) –日历中的待办事项 使用 USB 数据线将手机连接到计 –备忘录 算机上的 USB 端口。 连接后,您...
- Page 181 开始了解您的手机 All manuals and user guides at all-guides.com 打开通知抽屉,并点触 USB 已 提示! 要再次在手机上使用 microSD 连接。 卡,您需要打开通知抽屉,然后点触关 点触打开 USB 存储设备,选择“ 闭 USB 存储设备。 确定”确认要在手机的 microSD 卡和计算机之间传输文件。 在此期间,无法从手机访问 microSD 卡,因此也不能使用依赖 microSD 当手机作为 USB 存储设备进行连接 卡的应用程序(如相机、图片库和 时,您会收到通知。 现在,您可以 音乐)。 将文件复制到 microSD 卡,也可以 从 microSD 卡中复制文件。 断开手机与电脑的连接:...
- Page 182 all-gui des.c...
- Page 183 All manuals and user guides at all-guides.com 9. 向上持握手机 10. 屏幕冻结时 将手机向普通手机一样竖直持握。 如果屏幕冻结或您尝试操作时手机 LG-E730 具有内置天线。 请注意不 无响应: 要刮伤或损坏手机背面,这可能影 卸下电池,将它重新插入,然后打 响性能。 开手机。 拨打/接听电话或发送/接收数据时, 或者 避免持握天线所处的手机下部。 这 按住电源/锁定键 10 秒可关机。 样做可能会影响通话质量。 如果这仍不起作用,请联系服务中 心。...
-
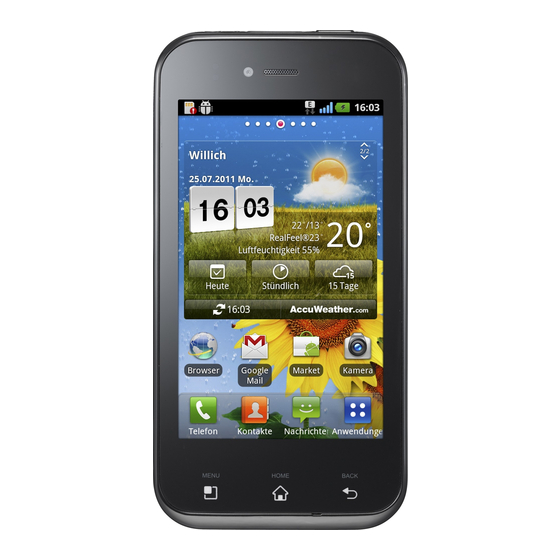
Page 184: 设备组件
开始了解您的手机 All manuals and user guides at all-guides.com 设备组件 电源/锁定键 听筒 • 按住此键可开/关机。 近程传感器 • 短按可锁定和解锁屏幕。 相机镜头 主屏键 从任何屏幕返回到主屏。 返回键 菜单键 返回上一个屏幕。 • 检查可用的选项。 • 按住此键可转到 Google Search™。 麦克风... - Page 185 All manuals and user guides at all-guides.com 注意:近程传感器 警告 在接听及拨打电话时,若手机位于耳 在手机上放置重物或坐在手机上可能 旁,一旦感应到物体,此近程传感器将 会损坏手机的 LCD 屏幕及触摸屏的 自动关闭背景灯并锁定触摸屏。 这样 功能。 不要在 LCD 近程传感器上使 有助于延长电池寿命,并避免在通话期 用保护膜。 这可能会影响传感器的感 间无意中激活触摸屏。 应度。...
- Page 186 开始了解您的手机 All manuals and user guides at all-guides.com 耳机插孔 相机镜头 SIM 卡插槽 充电器/USB 端口 后盖 电源/锁定键 音量键 • 在主屏中:控制铃声音 量。 • 在通话过程中:控制听筒 音量。 microSD • 播放曲目时:连续控制 卡插槽 音量。 电池 扬声器...
-
Page 187: 安装 Sim 卡和电池
All manuals and user guides at all-guides.com 安装 SIM 卡和电池 在开始浏览新手机之前,您需要先 进行设置。 插入 SIM 卡和电池: 要卸下后盖,请用手抓紧手机。 用另一只手的拇指用力按后盖。 利用指尖开口,用食指将后盖 拉开。... - Page 188 all-gui des.c...
- Page 189 开始了解您的手机 All manuals and user guides at all-guides.com 将 SIM 卡滑进 SIM 卡插槽中。 确 对齐手机与电池 (1) 上的金色接触 保卡的金色接触区域面朝下。 区域,向下按电池直到卡入到位 (2),以插入电池。...
- Page 190 All manuals and user guides at all-guides.com 充电 在电池仓 (1) 上对齐后盖,向下按 直到其卡入到位 (2)。 打开顶部的充电器连接器盖。 插入 充电器并插入电流插座。 备注:第一次充电时必须为电池完全充 电,这样可以延长电池使用寿命。...
-
Page 191: 使用存储卡
开始了解您的手机 All manuals and user guides at all-guides.com 使用存储卡 插入存储卡: 将存储卡插入插槽。 确保金色接触 区域面朝下。 安全地取出存储卡: 应用程序 > 设置 > 存储 > 卸载 SD 卡。... - Page 192 All manuals and user guides at all-guides.com 备注:格式化卡时,卡上的所有文件 警告 将被删除。 请勿在手机开机时插入或取出存储卡。 这样做可能会损坏存储卡以及手机,并 在主屏上,点触应用程序选项卡 且存储卡上存储的数据也可能会损坏。 以打开应用程序菜单。 滚动并点触设置 > 存储。 格式化存储卡: 点触卸载 SD 卡,并点触“确 如果已格式化存储卡,您可以开始 定”以确认。 使用。 如果没有,您必须先对其进 点触格式化 SD 卡 > 格式化 SD 行格式化才能使用。 卡 > 清除全部内容,然后确认您 的选择。...
-
Page 193: 屏幕锁定和解锁
开始了解您的手机 All manuals and user guides at all-guides.com 如果设置了图样锁定,请输入 不使用 LG-E730 时,按电源/锁定键 图样锁定,然后选择清除全部 可锁定手机。 内容。 如果在您设置锁定屏幕时有程序正 在运行,它们可能在锁定模式下继 备注:如果存储卡中包含内容,由于格 续运行。 建议在进入锁定模式前退 式化后将删除所有文件,所以文件夹结 出所有程序以避免不必要的费用( 构会有所不同。 例如,打电话、网络访问和数据通 信)。 屏幕锁定和解锁 要唤醒手机,请按电源/锁定键。 锁 如果您在一段时间内未使用手机, 定屏幕将会显示。 触摸并向上滑动 屏幕将关闭并自动锁定。 这有助于 锁定屏幕即可解锁主屏。 您最后查 防止意外点触,节省电池电量。 看的屏幕将会打开。... - Page 194 all-gui des.c...
-
Page 195: 保护您的锁定屏幕
All manuals and user guides at all-guides.com 保护您的锁定屏幕 备注: 您可以锁定屏幕,以便只有您可以 使用图样锁定时的预防措施。 将它解锁以访问您的手机。 请务必记住您设置的解锁图样。 如果 有 5 次使用不正确的图样,您将无法访 第一次设置解锁图案、PIN 或密码: 问您的手机。 您有 5 次机会输入解锁 • 应用程序 > 设置 > 位置和安全 > 图样、PIN 或密码。 如果您用完 5 次机 设置屏幕锁定 > 图样、PIN 码或 会,需等待 30 秒方可再次尝试。 密码... - Page 196 开始了解您的手机 All manuals and user guides at all-guides.com 在无法调用解锁图样时: 如果您在手机上登录 Google 帐户并 尝试输入正确图样 5 次均失败,请 轻触“忘记图样”按钮。 随后,您 需要使用 Google 帐户登录才能将手 机解锁。 如果未在手机上创建Google 帐户或 者忘记了该帐户,则需要执行恢复 出厂设置。...
-
Page 197: 触摸屏提示
All manuals and user guides at all-guides.com 主屏 触摸屏提示 轻弹–要滚动浏览列表或快速移 动,请在触摸屏上轻弹(快速拖动 以下是关于如何浏览手机的一些提 然后释放)。 示。 点触–要选择菜单/选项或打开应用 备注: 程序,请点触它。 • 要选择项目,请点触图标中心位置。 点触并按住–要打开选项菜单或选 • 无需大力按,触摸屏非常敏感,仅需 中要移动的对象,请点触并按住 点触即可。 它。 • 使用指尖点触所需选项。 请注意不要 拖动–要滚动浏览列表或慢慢移 触碰到其它键。 动,请在触摸屏上拖动。... - Page 198 主屏 All manuals and user guides at all-guides.com 主页 点触手机图标可打开触摸屏拨号 键盘,以拨打电话。 向左或向右轻轻滑动手指以查看面 板。 您可以使用小工具、快捷方式 点触联系人图标可打开联系人。 (用于您喜爱的应用程序)、文件 点触信息图标以访问信息菜单。 夹和墙纸自定义每个面板。 您可以在此处创建新信息。 点触屏幕底部的应用程序选项 备注:一些屏幕图像可能因手机提供 卡。 然后,您可以查看安装的所 商而不同。 有应用程序。 要打开所需应用程 序,从应用程序列表中点触相应图 在主屏中,您可以查看屏幕底部的 标即可。 快速键。 通过快速键,您点触一次 即可轻松进入经常使用的功能。...
-
Page 199: 自定义主屏
All manuals and user guides at all-guides.com 自定义主屏 在添加模式菜单中,选择您要添 加的项目。 您会在主屏上看到一 您可以通过添加小工具、快捷方 个新项目。 式、文件夹或壁纸来自定义主屏。 将它拖到您想要的位置,然后抬 为更方便地使用手机,请在主屏上 起手指。 添加您喜爱的小工具。 从主屏中移除项目: 在主屏上添加项目: • 主屏 > 点触并按住您要移除的图 主屏 > 菜单 > 添加 标 > 将其拖到 或 点触并按住主屏的空白部分。 提示! 要将应用程序图标添加到主 屏,请在应用程序菜单上点触并按住要 添加的应用程序。... - Page 200 all-gui des.c...
-
Page 201: 返回到最近使用的应用程序
主屏 All manuals and user guides at all-guides.com 返回到最近使用的应用程序 通知抽屉 点触并按住主页键。 屏幕将显示 通知抽屉在屏幕顶部运行。 一个弹出窗口,其中列出了您最 近使用的应用程序图标。 点触某个图标以打开其应用程 序。 或者,点触返回键以返回到 当前应用程序。 铃声 - 振动 WLAN 蓝牙 数据连接... -
Page 202: 查看状态栏
All manuals and user guides at all-guides.com 请使用手指点触并滑动通知抽屉。 下表说明了您可能在状态栏中看到 的不同图标的涵义。 或者,在主屏中按菜单键,然后选 择通知。 您可以在此处检查和管理 图标 说明 声音、WLAN、蓝牙和 GPS 以及其 无 SIM 卡 他通知。 无信号 查看状态栏 飞行模式 状态栏使用不同的图标显示手机信 息,例如信号强度、新信息、电池 已连接到 Wi-Fi 网络 使用寿命以及活动的蓝牙和数据连 Wi-Fi Direct 已开启。 接。 有线耳机... - Page 203 主屏 All manuals and user guides at all-guides.com 图标 说明 图标 说明 正在通话 系统警告 呼叫保持 已设置闹钟 扬声器 新语音邮件 手机麦克风静音 铃声静音 未接来电 振动模式 蓝牙开启 电池已充满电 已连接到蓝牙设备 电池正在充电...
- Page 204 All manuals and user guides at all-guides.com 图标 说明 图标 说明 数据传进和传出 还有 3 个通知未显示 手机已通过 USB 数据线与 数据正在同步 PC 连接 下载完成 正在下载数据 新 Gmail 正在上载数据 新 Google Talk 信息 GPS 正在采集 新信息 正在从 GPS 接收位置数据 正在播放歌曲 屏幕手机已连接...
-
Page 205: 屏上键盘
主屏 All manuals and user guides at all-guides.com 屏上键盘 图标 说明 您可以使用屏上键盘输入文本。 屏 近期事件 上键盘在您需要输入文本时自动在 在后台打开 FM 收音机 屏幕上显示。 要手动显示键盘,只 需点触要输入文本的文本字段。 USB 绑定已激活 使用键盘并输入文本 便携式 WLan 热点已激活 轻触一次以使键入的下一字母变 为大写字母。 轻触两次表示全部为 USB 绑定和便携式热点均 已激活 大写字母。... - Page 206 all-gui des.c...
-
Page 207: 输入带注音的字母
All manuals and user guides at all-guides.com 输入带注音的字母 轻触以切换为数字和符号键 当选择法语或西班牙语作为文本输 盘。 您也可以点触并按住此选项卡 入语言时,您可以输入特殊的法语 以查看“设置”菜单。 或西班牙语字符(如“á”)。 轻触以查看,或按住以更改编写 例如,要输入“á”,请点触并按 语言。 住“a”键,直到放大键变大并显示 轻触以在写信息时插入图释。 其他语言的字符。 轻触以输入空格。 然后,选择所需特殊字符。 轻触以在信息字段新建一行。 轻触以删除上一字符。 轻触以隐藏屏上键盘。... -
Page 208: Google 帐户设置
All manuals and user guides at all-guides.com Google 帐户设置 首次打开手机时,您有机会激活移 登录。 动网络,登录到 Google 帐户,并决 一旦在手机上设置了 Google 帐户, 定要如何使用某些 Google 服务。 您的手机将自动与网络上的 Google 帐户同步。 设置您的 Google 帐户: • 从提示的设置屏幕登录到 Google 您的联系人、Gmail 信息、日历事件 帐户。 和来自网络上这些应用程序和服务 或者 的其他信息将与您的手机同步。 ( 具体取决于您的同步设置) • 应用程序 > 选择 Google 应用程序 (如... -
Page 209: 连接到网络和设备
All manuals and user guides at all-guides.com 连接到网络和设备 WLAN 禁用不使用的 WLAN,以延长电池 使用寿命。 使用 Wi-Fi,您可在无线接入点 (AP) 覆盖区内高速访问 Internet。 使用 备注:如果您在 Wi-Fi 区域之外,或者 WLAN 尽情享受无线互联网,而且 将 Wi-Fi 设为关闭,则您的移动运营商 无需额外付费。 可能为移动数据使用收取额外的费用。 连接 WLAN 网络 打开 WLAN 并连接 WLAN 网络 要在手机上使用 Wi-Fi,您需要访 应用程序 > 设置 > 无线和网络 > 问无线接入点或“热点”。... - Page 210 连接到网络和设备 All manuals and user guides at all-guides.com • 将显示可用的 WLAN 网络列表。 蓝牙 锁图标表示受到安全保护的网 与大多数手机不同,您可以通过运 络。 行对应的应用程序而不是通过蓝牙 点触某个网络进行连接。 菜单,来使用蓝牙发送数据。 • 如果网络已打开,系统会要求您 提示! 使用 LG-E730,您可以体验到高 点触连接确认连接到该网络。 速的蓝牙功能。 • 如果网络受到安全保护,您会收 如果您要与其共享文件的设备也支持高 到提示,要求输入密码或其他凭 速蓝牙,文件将通过高速网络自动传输。 若要使用蓝牙高速数据传输,在使用之 据。 (请咨询网络管理员获取详 前,请确保设备上的 Wi-Fi 设为“关闭” 细信息) 。 蓝牙高速的设置可能因设备而异。 请 状态栏显示了可指明 WLAN 状态...
- Page 211 All manuals and user guides at all-guides.com 打开蓝牙,将手机与蓝牙设备配对 使用蓝牙发送图片 应用程序 > 设置 > 无线和网络 > 选择一张图片 > 菜单 > 共享 > 蓝牙 > 开启 蓝牙 转到蓝牙设置 > 扫描查找设备 检查蓝牙是否开启,然后选择扫 描查找设备。 从列表中选择您要配对的设备。 从列表中选择您要向其发送数据 一旦配对成功,您的设备将连接到 的设备。 该设备。 如果要配对的设备不在列表上,请 确保目标设备已设为可检测,然后 再次扫描。...
- Page 212 all-gui des.c...
-
Page 213: 共享手机的数据连接
连接到网络和设备 All manuals and user guides at all-guides.com 共享手机的数据连接 有关绑定和便携式热点的信息,包 括支持的操作系统及其他详细信 在没有无线连接可用时,USB 绑 息,请访问 http://www.android.com/ 定和便携式 WLan 热点功能非常有 tether。 用。 您可以通过 USB 数据线(USB 绑定)将您手机的移动数据连接与 更改 USB 绑定和便携式 Wi-Fi 热点 一台电脑共享。 通过将手机变为便 设置: 携式 Wi-Fi 热点,您可以一次与多个 • 应用程序 > 设置 > 无线和网络 > 设备共享手机的数据连接。... -
Page 214: 重命名或确保您的便携式热点安全
All manuals and user guides at all-guides.com 重命名或确保您的便携式热点 提示! 安全 如果您的电脑运行 Windows 7 或部分 您可以更改手机 Wi-Fi 网络名称 Linux 风格的最新分发(例如 Ubuntu) (SSID) 的名称并确保其 Wi-Fi 网络 ,通常无需准备电脑进行绑定。 但是 如果运行的是较早版本的 Windows 或其 的安全。 他操作系统,则可能先准备您的电脑, 在主屏上点触应用程序选项卡 才能通过 USB 建立网络连接。 如需获 ,然后选择设置。 得有关哪种操作系统支持 USB 绑定以 点触无线和网络,然后选择绑定... - Page 215 连接到网络和设备 All manuals and user guides at all-guides.com 点触便携式 Wi-Fi 热点设置。 与电脑或其他设备连接时输入密 码。 您可以在安全性菜单中点触 • 将会打开配置 Wi-Fi 热点对话框。 打开,以从 Wi-Fi 网络中删除安 • 您可以更改网络 SSID(名称), 全性。 这将是其他电脑在扫描 WLAN 网 络时看到的名称。 注意! • 您也可以点触安全性菜单来为网 如果将安全性选项设为开放,则不可避 络配置 Wi-Fi 保护访问 2 (WPA2) 免其他人在未经授权的情况下使用在线 安全性以及预共享密钥 (PSK)。 服务并可能产生额外收费。 为避免未 授权使用,最好保持激活安全性选项。...
-
Page 216: 使用 Wlan Cast
All manuals and user guides at all-guides.com 使用 WLAN Cast 在扫描到的设备列表中选择要连 接的设备。 您可在使用 Android 手机并通过相 点触连接。 同 Wi-Fi & Wi-Fi Directed 网络连接 的用户之间共享音乐、图片和视频 启用 WLAN Direct,通过 内容。 SmartShare 共享 提前检查您的 Wi-Fi & Wi-Fi Directed Wi-Fi Direct 自动扫描附近的 Wi-Fi 网络,确保用户已连接到相同的网 Direct 设备,搜索到的设备将按找 络。... - Page 217 连接到网络和设备 All manuals and user guides at all-guides.com 应用程序 > 设置 > 无线和网络 > 备注:当手机成为群组所有者时,将 Wi-Fi Direct 设置 比用作客户端时消耗更多电池电量。 确保 Wi-Fi Direct 设为开启。 WLAN Direct 连接不提供互联网服务。 备连接并使用在线服务时可能要花费 在扫描到的设备列表中选择要连 额外的费用。 查看网络提供商要求的 接的设备。 数据付费。 强制群组所有者模式–点触以激活 群组所有者模式,该模式允许您通 过扫描手机连接合法的 Wi-Fi 设备。 在这种情况下,您必须输入密码, 可通过以下流程设置:菜单 > 高级 >...
- Page 218 all-gui des.c...
-
Page 219: 使用 Smartshare
All manuals and user guides at all-guides.com • 如果要自动接受来自其他设备的 使用 SmartShare 共享请求,请点触自动接受请 SmartShare 使用 DLNA(数字生活网 求。 络联盟)技术,通过无线网络共享 • 如果要自动允许从其他设备上传 数字内容。 文件到我的手机,请点触接收文 要支持此功能,双方设备都必须经 件。 过 DLNA 认证。 在“共享内容”部分,点触以勾 打开 SmartShare 并允许共享内容 选您要共享的内容类型。 从图 点触应用程序选项卡 ,然后选 片、视频和音乐中进行选择。 择 SmartShare。 SmartShare 目前已激活,可以开始 按菜单键,然后选择设置。 共享内容。 点触“可检测性”复选框以打 开。... - Page 220 连接到网络和设备 All manuals and user guides at all-guides.com 要从远程内容库向其他设备共享 点触左上角的按钮,选择远程内 内容 容库中的设备。 允许您的图像生成设备(如 TV)播 您可以浏览远程内容库。 放来自远程内容库(如 PC)的多媒 点触内容缩略图或按菜单键,然 体内容。 后选择“播放”按钮。 共享手机或图像生成设备(如电 备注:请确保已正确配置您的设备(例 如,TV 和 PC)的 DLNA 功能。 视)中的内容 备注:请确保已正确配置您的图像生 点触右上角的按钮,或从图像生 成设备。 成设备列表中选择所需设备。...
- Page 221 All manuals and user guides at all-guides.com 使用图片库应用程序浏览您的图 备注:遵循类似步骤使用音乐播放器、 片或视频时,请点触并按住以选 机机和视频播放器来共享内容。 择文件。 随后,您可以选择要共 享的多个文件。 注意:要使用此应用程序,请检查您的设 备已通过 Wi-Fi 连接到主网络。 部分启用 点触菜单中的共享,选择 了 DLNA 的设备(如 TV)仅支持 DLNA 的 SmartShare。 DMP 功能,将不会显示在图像生成设备列 SmartShare 将自动启动以共享选 表中。 您的设备可能无法播放某些内容。 定文件。 从远程内容库下载内容 从图像生成设备列表中选择设备 点触应用程序选项卡 ,然后选 以播放文件。 择 SmartShare。...
- Page 222 连接到网络和设备 All manuals and user guides at all-guides.com 点触左上角的按钮,选择远程内 点触应用程序选项卡 ,然后选 容库中的设备。 择 SmartShare。 您可以浏览远程内容库。 点触左上角的按钮,然后选择“ 我的手机”。 点触内容缩略图,然后点触下载 菜单键。 您可以浏览远程内容库。 注意:有几种类型的内容不受支持。 点触并按住内容缩略图,然后点 触上传菜单键。 从手机上传内容到远程内容库 选择要上传的远程内容库的设 备注:确保 SD 卡已正确安装,并且选 置。 中了设置菜单中的“接收文件”。 注意:有些已启用 DLNA 的设备不支持 DMS 上传功能,将不会上传。 有几种类型 的内容不受支持。...
-
Page 223: 拨打电话
All manuals and user guides at all-guides.com 通话 拨打电话 呼叫联系人 点触 以打开键盘。 点触 可以打开电话本。 使用键盘输入号码。 要删除一个 滚动浏览联系人列表,或点触搜 数字,请点触 。 索输入您要呼叫的联系人的前几 个字母。 点触 以拨打电话。 在列表中,点触您要呼叫的联 要结束通话,请点触结束图标 系人。 。 提示! 要输入“+”以拨打国际电话, 请点触并按住 。... - Page 224 all-gui des.c...
-
Page 225: 接听和拒绝电话
通话 All manuals and user guides at all-guides.com 接听和拒绝电话 调节音量 当您在锁定状态收到呼叫时,向右 要在通话期间调节通话音量,请使 拖动 可接听来电。 用手机左侧的音量调高和调低键。 向左拖动 则拒绝来电。 拨打第二个电话 如果要发送借口信息,请从底部拖 在初始呼叫中,点触拨号盘 动借口信息栏。 然后拨号。 您可以通过点触“电 话本”来搜索联系人, 也可以 提示! 借口信息 选择要拨打的号码。 您可以使用此功能快速发送信息。 此 选项有助于在会议时回复信息。 点触 拨打电话。... -
Page 226: 查看通话记录
All manuals and user guides at all-guides.com 查看通话记录 此时呼叫屏幕上显示两个呼叫。 初始呼叫被锁定,通话方进入保 在主屏上,点触 并选择通话记 持状态。 录选项卡。 点触显示的数字可在不同的通话 查看所有已拨电话、已接来电和未 间切换。 或点触 合并通话进 接语音电话的完整列表。 行多方通话。 提示! 点触任意通话记录条目,以查 要结束当前通话,请点触结束, 看通话日期、时间和时长。 或者按主屏键,向下滑动通知 栏,然后选择结束通话。 提示! 按菜单键,然后点触全部删除以 删除所有记录条目。 备注:您需要对每通电话付费。... -
Page 227: 通话设置
通话 All manuals and user guides at all-guides.com 通话设置 您可以配置通话设置(例如呼叫转 移)以及运营商提供的其他特殊功 能。 在主屏上,点触应用程序选项卡 以打开应用程序菜单。 滚动并点触设置。 轻触通话设置,然后选择要调整 的选项。... -
Page 228: 联系人
All manuals and user guides at all-guides.com 联系人 添加新联系人 在手机上添加联系人,并将其与 Google 帐户或其他支持联系人同步 点触 ,输入新联系人的号码, 的帐户中的联系人同步。 然后按菜单键。 点触添加至联系 人,然后点触新建联系人。 搜索联系人 如果要为新联系人添加图片,请 在主屏中 点触图像区域。 点触 可以打开电话本。 从拍照或从图片库中选取。 点触搜索,使用键盘输入联系人 点触 以选择联系人类型。 姓名。 点触联系人信息类别,并输入有 关联系人的详细信息。 点触保存。... -
Page 229: 收藏夹联系人
联系人 All manuals and user guides at all-guides.com 收藏夹联系人 从收藏夹列表中删除联系人 点触 可以打开电话本。 您可以按收藏夹归类经常呼叫的联 系人。 点触群组选项卡,选择列表顶部 的收藏夹,然后选择要查看其详 将联系人添加到收藏夹 细信息的联系人。 点触 可以打开电话本。 点触联系人姓名右侧的蓝色星 点触联系人以查看详细信息。 号。 星号变为灰色,联系人已从 点触联系人姓名右侧的星号。 星 收藏夹中删除。 号变为蓝色。... - Page 230 all-gui des.c...
-
Page 231: 将旧手机上的电话本移至新手机
要映射字段。 在映射字段后,单 文件从旧手机导出到 PC。 击“确定”。 随后,电话本将被 首先在电脑上安装 PC Suite IV。 添加到 PC Suite IV 中。 运行程序,并使用 USB 数据线将 如果 PC Suite IV 检测到 LG-E730 您的 Android 手机连接到 PC。 手机的连接(使用 USB 数据线) 选择 。 转到文件 > 导出,然 ,请单击“同步”或“同步联系 后选择在 PC 上保存的 CSV 文... -
Page 232: 发送信息
All manuals and user guides at all-guides.com 信息 LG-E730 将短信和彩信结合到一个 备注:您将按每个收件人每条文本信 直观易使用的菜单中。 息付费。 发送信息 点触“写信息”字段,然后开始 点触主屏上的 图标,然后点 撰写信息。 触新信息打开空白信息。 按菜单键打开“选项”菜单。 从 以下选项中选择:添加主题、附 在收件人字段中输入联系人姓名 加、发送和更多。 或电话号码。 随着您输入联系人 点触发送发送信息。 姓名,匹配的联系人将会显示。 您可以点触建议的收件人。 您可 信息屏幕将会打开,您的信息显 示在收件人姓名/号码后面。 屏幕 以添加多个联系人。 上会显示回复。 当您查看并发送 附加信息时,将创建信息会话。... -
Page 233: 线程框
All manuals and user guides at all-guides.com 使用笑脸 警告:160 个字符的限制在不同国 使用笑脸让您的信息更具趣味性。 家/地区有所不同,具体取决于语言和 写新信息时,按菜单键,然后选择 短信编码方式。 插入表情符号。 警告:如果在短信中添加图像、视 更改信息设置 频或音频文件,则短信将自动转换为彩 LG-E730 已预定义信息设置,因 信,您需要支付相应费用。 此,您可以立即发送信息。 您可以 根据喜好更改设置。 线程框 与另一方交换的信息(短信、彩 信)将以时间顺序显示,以便您方 便查看对话概述。... -
Page 234: 电子邮件
All manuals and user guides at all-guides.com 电子邮件 您可以使用电子邮件应用程序读 添加另一个电子邮件帐户: 取 Google Mail 外其他服务的电子邮 • 应用程序 > 电子邮件 > 在帐户屏 件。 电子邮件应用程序支持以下帐 幕中,点触菜单 > 添加帐户 户类型:POP3、IMAP 和 Exchange。 在初始设置后,电子邮件显示收件 您的服务提供商或系统管理员可提 箱的内容。 如果添加了多个帐户, 供您需要的帐户设置。 您可以在帐户之间切换。 更改电子邮件帐户的设置: 管理电子邮件帐户 • 应用程序 > 电子邮件 > 在帐户屏 首次打开电子邮件应用程序时,将... -
Page 235: 电子邮件帐户屏幕
All manuals and user guides at all-guides.com 删除电子邮件帐户: –点触以打开您的“合并的收件 • 应用程序 > 电子邮件 > 在帐户屏 箱”,此处将包含发送到您所有帐 幕中,点触菜单 > 设置 > 触按您 户的信息。 要删除的帐户 > 删除帐户 合并的收件箱将按帐户在左侧采取 颜色编码的方式区分消息,每个帐 电子邮件帐户屏幕 户使用的颜色与您在帐户屏幕中使 您可以点触帐户以查看其收件箱。 用的颜色完全一样。 您用于发送电子邮件的默认帐户将 –点触文件夹图标以打开帐户文 以勾选符号表示。 件夹。... - Page 236 all-gui des.c...
-
Page 237: 使用帐户文件夹
电子邮件 All manuals and user guides at all-guides.com 撰写和发送电子邮件 只会将帐户中最近的电子邮件下载 到手机。 要下载更多(更早的)电 要撰写和发送邮件 子邮件,请点触电子邮件列表底部 在电子邮件应用程序中,点触菜 的载入更多邮件。 单键,然后点触撰写。 使用帐户文件夹 输入邮件目标收件人的地址。 输 入文字时,匹配的地址从您的联 每个帐户均具有收件箱、发件箱、 系人中提供。 用分号分隔多个 已发送和草稿箱文件夹。 取决于您 地址。 帐户的服务提供商支持的功能,您 可能具有其他文件夹。 添加抄送/密送地址,需要时还添 加附件。... - Page 238 All manuals and user guides at all-guides.com 输入邮件的正文。 点触发送按钮。 如果未连接至网络,例如如果您 以飞行模式工作,您发送的邮件 将存储到您的发件箱文件夹中, 直到重新连接至网络。 如果包括 任何未发送的邮件,发件箱就会 显示在帐户屏幕上。 提示! 当新电子邮件到达“收件箱” 时,您将收到声音或振动通知。 轻触 电子邮件通知可停止通知。...
-
Page 239: 社交网络
All manuals and user guides at all-guides.com 社交网络 将您的帐户添加到手机 通过手机,您可以体验社交网络并 管理联机社区中的微博。 您可以更 点触并按住主屏。 当多种 Widgets 新您的当前状态,上载照片,并查 出现时,选择社交+ ,然后轻 看朋友的状态更新。 触 设置按钮。 您也可以选择 如果没有帐户,您可以访问其网站 其他方式。 在主屏上,选择应用 进行设置。 程序 > 设置 > 帐户和同步 > “社 交+”设置。 备注:连接并使用在线服务时可能要花 选择您要使用的社交网络客户端 费额外的费用。 查看网络提供商要求 应用程序:Facebook、Twitter 和 的数据付费。... -
Page 240: 查看和更新状态
All manuals and user guides at all-guides.com 正在确认您的社区的详细信息, 当您点触输入框时,屏幕将会切 请稍候。 换,并用评论或上传照片更新您 目前的状态。 如果轻触您的社区,您可以看到 社区的当前状态。 提示! 您可以更新状态并通过选择 复选框同时将照片上传到 Facebook for 查看和更新状态 LG、Twitter for LG 和 MySpace for LG。 您可以使用社交+ 小工具随时 查看和更新社区内容。 备注:具体取决于网络服务。 在社交+ 小工具上,选择您登 录的社交网络服务, 随后便能看 到您自己的状态和内容。... -
Page 241: 删除手机上的帐户
社交网络 All manuals and user guides at all-guides.com Facebook 和 Twitter 提示! 您可以使您的朋友联系人与您 在主屏上,点触应用程序选项卡 的联系人列表同步。 以打开应用程序菜单。 选择您要使用的社交网络客户端 删除手机上的帐户 应用程序:Facebook 和 Twitter。 选择应用程序 > 设置 > 帐户和 输入您在社区上设置的电子邮件 同步。 地址和密码,然后轻触登录。 选择要删除的帐户,然后点触删 正在与您的社区确认您的详细信 除帐户。 息,请稍候。 如果轻触您的社区,您可以看到 社区的当前状态。... - Page 242 all-gui des.c...
-
Page 243: 了解取景器
All manuals and user guides at all-guides.com 相机 了解取景器 切换镜头–在后置相机镜机与前置相机镜头 之间切换。 缩放–放大或缩小。 或者,您可以使用侧 音量键。 亮度–此选项定义并控制进入图像的光量。 场景模式–从以下选项中选择:自动、肖 像、风景、运动、夜间和日落。 设置–点触此图标可以打开“设置”菜单。 视频模式–向下滑动此图标可切换到视频 模式。 拍照 图片库–点触以查看最近拍摄的照片。 您 可以访问图片库并查看相机模式下保存的 照片。... -
Page 244: 快速拍照
相机 All manuals and user guides at all-guides.com 快速拍照 拍照后 打开相机应用程序。 拍摄的照片将显示在屏幕上。 拿稳手机,将镜头对准您要拍摄 点触以通过 SmartShare、 共享 的对象。 蓝牙、电子邮 件、Facebook、Gmail、 点触并轻按 ,取景器屏幕的中 信息、Picasa、Social+ 间会出现一个对焦框。 、Twitter 或 Wi-Fi Cast 分 对焦框变绿时,表示相机已对 享您的照片。 好焦。 松开按住 的手指。 提示! 如果有 SNS 帐户并在手机上设 置了该帐户,您可以向 SNS 社区共享 您的照片。... -
Page 245: 使用高级设置
All manuals and user guides at all-guides.com 使用高级设置 点触以将图像用作联系人 设定为 图像或壁纸。 在取景器中点触 以打开所有高 级选项。 点触以编辑选定图片的 重命名 名称。 –恢复所有相机默认设置。 点触可以删除图像。 –无论您何时想要了解此功能如 点触可以立即拍摄其他照片。 何操作,均可点触该选项。 这将为 这将保存您的当前照片。 您提供快速指南。 通过滚动列表,更改相机设置。 选 择选项后,点触返回键。... - Page 246 相机 All manuals and user guides at all-guides.com –对焦特定的身体部位。 –提高不同光照条件下的颜色 质量。 –选择图像分辨率。 如果您选 择高分辨率,文件大小会增大,这 –对图片应用艺术效果。 意味着内存中可存放的照片数量会 –设置按下拍摄按钮后的延迟。 减少。 如果要为自己拍摄照片,此功能是 –ISO 评级确定相机的光照传 理想之选。 感器的感光性。 ISO 越高,相机感 –选择各种拍摄模式。 光性能越好。 在您无法使用闪光 –自动向您显示刚刚拍摄的照 灯而光线较差的条件下,此功能很 片。 有用。...
- Page 247 All manuals and user guides at all-guides.com –激活以使用手机基于位置的服 提示! 退出相机时,部分设置将返回 务。 拍照并添加所在位置以对其进 默认值,如白平衡、色调、计时器和 场景模式。 拍摄下一张照片之前,请 行标记。 如果将标记过的图片上传 先查看。 到支持相片定位功能的博客,您可 以在地图上看到此照片。 提示! 设置菜单层叠在取景器之上, 因此,当您更改图像颜色或质量时, 备注:此功能仅在激活了 GPS 时可 您将在“设置”菜单下预览到图像更 用。 改效果。...
- Page 248 all-gui des.c...
-
Page 249: 摄像机
All manuals and user guides at all-guides.com 摄像机 了解取景器 切换镜头–在后置相机镜机与前置相机镜头 之间切换。 缩放–放大或缩小。 或者,您可以使用侧 音量键。 亮度–此选项定义并控制进入视频的光量。 视频大小–点触可设置录制的视频的大小( 以像素为单位)。 设置–点触此图标可以打开设置菜单。 相机模式–向上滑动此图标以切换到相机 模式。 开始录制 图片库–点触以查看最近录制的视频。 您可 以访问“我的文档”并查看摄像机模式下保 存的视频。... -
Page 250: 快速摄像
All manuals and user guides at all-guides.com 快速摄像 拍摄视频后 向下滑动相机模式按钮,图标将 屏幕上将显示所拍摄视频的静态图 更改为 。 像。 屏幕上将显示摄像机的取景器。 点触以播放视频。 播放 拿稳手机,将镜头对准您要摄像 点触以通过 SmartShare、 共享 的物体。 蓝牙、电子邮 件、Facebook、Gmail、信 点触录制 按钮一次以开始录 息、Wi-Fi Cast 或 Youtube 制。 分享您的照片。 REC 将显示在取景器底部,计时 点触以编辑选定视频的 重命名 器将显示视频长度。 名称。 点触屏幕上的 停止录制。... -
Page 251: 使用高级设置
摄像机 All manuals and user guides at all-guides.com 点触可以立即拍摄另一段视频。 –如果要了解此功能如何操作, 这将保存您的当前视频。 请点触该选项。 这将为您提供快速 点触可删除刚拍摄的视频。 点 指南。 触确定确认。 取景器将重新出 滚动列表以调节摄像机设置。 选择 现。 选项后,点触返回键。 使用高级设置 –提高不同光照条件下的颜色 质量。 从取景器中点触 以打开所有高 级选项。 –选择要对新视图使用的色调。 –恢复所有摄像机默认设置。 –设置视频的长度限制。 从标 准和彩信中选择,以限制彩信最大 大小。... -
Page 252: 观看视频时调节音量
All manuals and user guides at all-guides.com –选择静音,录制视频而不录 制声音。 –自动查看自动将向您显示刚录 制的视频。 观看视频时调节音量 要在播放视频时调节音量,请使用 手机左侧的音量键。... -
Page 253: 多媒体
All manuals and user guides at all-guides.com 多媒体 您可以将多媒体文件保存在存储卡 备注:请确保在手机上安装一个存储 中,以便轻松访问所有图像和视频 卡,以便保存照片和访问您的所有图 文件。 片。 如果没有存储卡,手机不会显示 任何照片或视频,并且您的 Picasa 相册 图片库 中也不会有任何 Picasa 图像。 点触应用程序选项卡 ,然后选择 图片库。 打开存储所有多媒体文件 的目录栏列表。... - Page 254 all-gui des.c...
-
Page 255: 时间线视图
All manuals and user guides at all-guides.com 时间线视图 使用 USB 大容量存储设备传输音 乐文件 LG-E730 图片库提供了照片和视频的 时间线视图。 在网格视图模式中, 使用 USB 数据线将 LG-E730 连接 向右拖动 将显示您拍摄 到 PC。 的照片的日期,其中从最新的照片 如果您未在 PC 上安装 LG Android 开始。 如果选择特定日期,在该日 平台驱动程序,则需要手动更改 拍摄的所有照片将分组显示。 设置。 选择设置 > 存储,然后选 择仅大容量存储。... -
Page 256: 播放歌曲
多媒体 All manuals and user guides at all-guides.com 选择您要播放的歌曲。 备注:您需要首先安装 SD 卡。 没有 SD 卡,您不能使用 USB 大容量存储。 点触可暂停播放。 点触可恢复播放。 注意:如果安装了 LG Android 平台驱动 程序,将立即看到含“打开 USB 存储 点触可跳到专辑、播放列表或随 设备”的弹出窗口。 机曲目中的下一曲目。 点触可跳到专辑、播放列表或随 机曲目中的上一曲目。 播放歌曲 点触以查看音乐库屏幕。 在主屏中点触应用程序选项卡 ,然后选择音乐。 点触以设置重复模式。 点触歌曲。 点触以随机播放模式播放当前的 播放列表。... - Page 257 All manuals and user guides at all-guides.com 备注:音乐文件的版权可能受国际条约 点触以查看当前的播放列表。 和国家版权法保护。 点触以查看歌词。 此选项仅在 因此,可能需要获得许可或许可证才能 歌曲包括歌词时可用。 复制音乐。 要在聆听音乐时更改音量,请按手 在某些国家,国际法禁止私人复制版 机左侧的上下音量键。 权所有的材料。 在下载或复制文件之 前,请检查相应国家/地区关于使用此 点触并按住列表中的任何歌曲。 它 类材料的国家/地区立法。 将显示播放、添加到播放列表、用 作手机铃声、删除、共享、搜索和 详细信息选项。...
-
Page 258: Fm 收音机
多媒体 All manuals and user guides at all-guides.com FM 收音机 搜索电台 LG-E730 内置了 FM 收音机,因此您 您可以手动或自动微调收音机电 在路上也能转到喜爱的电台并收听 台。 它们将保存为特定频道编号, 无线广播。 这样,您就不用再次查找。 您可以在手机中最多保存 48 个频 备注:要收听收音机,您需要插入耳 道。 机。 将耳机插入耳机插孔。 自动微调 在主屏上点触应用程序选项卡 ,然后选择 FM 收音机。 按菜单键,然后点触自动扫描。... - Page 259 All manuals and user guides at all-guides.com 如果有预设频道,您将看到一个 提示! 要提高收音机接收质量,请伸 显示“重置所有频道并开始自动 展耳机线,它具有收音机天线的功能。 扫描?”的弹出窗口。 如果选 如果连接的耳机不是专门面向收音机 择“确定”,将删除所有预设频 接收设计的,则收音机接收质量可能 较差。 道并启动自动扫描。 在自动扫描期间,若要停止扫 描,请点触停止。 停止扫描前, 仅保存已扫描的频道。 备注:您还可以使用屏幕上的转盘手动 微调电台。...
- Page 260 all-gui des.c...
-
Page 261: 实用工具
All manuals and user guides at all-guides.com 实用工具 设置闹钟 对于简单的计算,请点触所需的 功能(+、-、x 或 ÷),然后点 应用程序 > 闹钟/时钟 > > 新 触 =。 闹钟 对于更复杂的计算,请按菜 在设置时间后,LG-E730 将让您 单键,点触高级面板然后选择 得知闹钟响铃之前的剩余时间。 Sin、Cos、Tan、Log 等等。 设置再响间隔、振动、闹钟提示 音和 Puzzle 锁定,然后添加一个 将事件添加到日历中 标签来命名闹钟。 点触保存。 应用程序 > 日历 使用计算器... -
Page 262: 更改日历视图
All manuals and user guides at all-guides.com 更改日历视图 点触内容,然后输入事件名称。 查看日期并输入活动开始和结束 应用程序 > 日历 的时间。 在屏幕顶部,您可以发现日历的 也可以点触位置,然后输入位 不同视图类型(日、周、月、议 置。 程)。 如果您要为事件添加备注,请点 Polaris Office 触说明,然后输入详细信息。 Polaris Office 是专业的移动办公解 如果要重复闹钟,请设置重复, 决方案,让用户可使用移动设备随 必要时设置提醒。 时随地方便地查看各种类型的办公 点触保存以在日历中保存事件。 文档,如 Word、Excel 和 PowerPoint 文件。... - Page 263 实用工具 All manuals and user guides at all-guides.com 管理文件 Polaris Office 可向移动用户提供方 便的文件管理功能,包括在设备上 复制、剪切和粘贴以及删除文件和 文件夹。 查看文件 现在,移动用户可在移动设备上 轻松查看各种文件类型,包括 Microsoft Office 文档和 Adobe PDF。 使用 Polaris Office 查看文档时,对象 和布局与原始文档相同。...
-
Page 264: 浏览器
All manuals and user guides at all-guides.com 网络 浏览器 使用 Web 工具栏 浏览器为您提供了一个涵盖游戏、 点触可返回到上一页。 音乐、新闻、体育、娱乐等更多内 点触可前进到当前页之后的下 容的缤纷世界,您可以快速、直接 一页。 这正好与按返回键的效 地通过手机访问。 随时随地、不受 果相反,按“返回”键将转到 限制。 上一页。 点触可显示所有打开的窗口。 备注:连接这些服务并下载内容时,可 点触可添加新窗口。 能会产生额外费用。 查看网络提供商 要求的数据付费。 点触可更改 Web 浏览器设置。... -
Page 265: 使用选项
网络 All manuals and user guides at all-guides.com 使用选项 更多 按菜单键可查看选项。 • 在网页上查找:您可以在当前网 页中查找字母或词语。 书签–查看当前书签和添加新 • 选择文本:您可以复制网页中的 书签。 您也可以查看浏览器历 史记录。 任意文本。 • 向主屏幕添加快捷方式:将当 添加书签–将当前网页设为书签。 前网页的快捷方式添加到主屏幕 稍后再读–添加至稍后再读。 上。 添加 RSS 源–将当前网页添加 • 网页信息:显示网页信息。 到 RSS 源。 • 下载:显示下载历史记录。 分享网页–您可以与其他人分 享网页。... - Page 266 all-gui des.c...
-
Page 267: Lg 屏幕手机 2.0
All manuals and user guides at all-guides.com LG 屏幕手机 2.0 LG 屏幕手机 2.0 使您可以通过 退出屏幕手机程序。 USB、蓝牙或 Wi-Fi 连接从电脑中查 最大化屏幕手机窗口。 看手机屏幕。 最小化屏幕手机窗口。 您也可以使用鼠标或键盘从您的 PC 控制手机。 屏幕手机 2.0 功能 • 实时传输和控制:在连接至 PC 时 屏幕手机 2.0 图标 显示并控制您的手机屏幕。 将手机连接至 PC 或断开连接。 • 鼠标控制:允许您使用鼠标在 PC 旋转屏幕手机窗口(仅在应用程... - Page 268 LG 屏幕手机 2.0 All manuals and user guides at all-guides.com • 文件传输(手机到 PC):从手机 • 实时事件通知:以弹出窗口提示 发送文件(例如照片、视频、音 的方式通知您有来电或短信,以 乐和 Polaris Viewer 文件)到 PC。 及闹钟和事件通知。 只需右键单击并拖动即可将文件 • LG 主屏全景:显示 LG 主屏的 发送到 PC。 整个工作区。 通过单击该快捷方 • 文件传输(PC 到手机):从 PC 式,您可以轻松地组织图标或小 发送文件到手机。 只需选择您要 工具,以及执行应用程序。 传输的文件并将其拖放到屏幕手 备注:请确保 LG 主屏是默认的启动...
-
Page 269: 如果在 Pc 上安装屏幕手机
All manuals and user guides at all-guides.com 如果在 PC 上安装屏幕手机 备注:请确保选中了设置 > 无线和网 如果安装 LG PC Suite IV,则屏幕手 络 > 屏幕手机设置中的“屏幕手机” 机程序也会下载到 PC 上。 随后您 复选框。 便可在 PC 上安装屏幕手机。 请注意,如果通过 Wi-Fi 连接屏幕手 机,因为电流消耗,电池电量会消耗 如何将手机连接至 PC 的更快。 屏幕手机 2.0 提供了 USB、蓝牙和... -
Page 270: 断开手机与 Pc 的连接
LG 屏幕手机 2.0 All manuals and user guides at all-guides.com 断开手机与 PC 的连接 单击“屏幕手机”窗口左上角的 。 或者,将主屏上方的通知栏向 下拖动,然后选择“屏幕手机已连 接”。 在断开连接对话框中点触“ 确定”。... -
Page 271: 无线和网络
All manuals and user guides at all-guides.com 设置 在“您也可以设置移动网络和主 Wi-Fi–打开 Wi-Fi 以连接到可用的 屏”屏幕中,点触应用程序选项卡 Wi-Fi 网络。 ,然后滚动到并点触设置。 Wi-Fi 设置–允许您设置和管理无 线接入点。 设置网络通知,或添加 无线和网络 Wi-Fi 网络。 从 Wi-Fi 设置屏幕可访 在这里,您可以管理 WLAN 和蓝 问高级 Wi-Fi 设置屏幕。 按菜单键 牙。 您也可以设置移动网络以及切 然后点触高级。 换为飞行模式。 WLAN Direct 设置–设置 WLAN 飞行模式–切换为飞行模式之后,... - Page 272 all-gui des.c...
- Page 273 蓝牙–打开蓝牙以连接蓝牙设备。 提示! 如何获取 MAC 地址 蓝牙设置–设置设备名称和可见模 要使用 MAC 筛选器在某些无线网络 式,扫描其他设备。 或者,检查您 中建立连接,您需要在路由器中输入 之前配置的蓝牙设备以及手机上次 LG-E730 的 MAC 地址。 扫描蓝牙设备时检测到的那些设备 您可以在以下用户界面中找到 MAC 地 的列表。 址:点触应用程序 > 设置 > 无线和网络 > Wi-Fi 设置,然后按菜单键。 然后, 绑定与便携式热点–您可以配置 选择高级 > MAC 地址。 USB 绑定与便携式 Wi-Fi 热点的设...
-
Page 274: 通话设置
All manuals and user guides at all-guides.com 通话设置 VPN 设置–显示您之前配置的虚拟 专用网 (VPN) 的列表。 允许您添加 <固定拨号> 不同类型的 VPN。 选择固定拨号打开并汇集一个号码 移动网络–为数据漫游、网络模式 列表,可从手机拨打此列表中的号 和运营商、接入点名称 (APN) 等项 码。 您需要提供 PIN2 码,此密码 设置选项。 由运营商提供。 仅可以使用手机拨 屏幕手机设置–允许您打开屏幕手 打此号码列表中的号码。 机,更改屏幕手机密码(默认密码 <语音信箱> 为“0000”)。 音信箱服务–允许您选择运营商的 语音信箱服务。... - Page 275 设置 All manuals and user guides at all-guides.com 语音信箱设置–如果当前在使用运 借口信息–当您要拒绝通话时,您 营商的语音信箱服务,此选项使您 可使用此功能快速发送一条信息。 可以输入用于收听和管理语音信箱 此选项可用于在会议时拒接来电。 的号码。 视频通话设置–更改您的视频通话 设置。 <其他通话设置> 呼叫转接–选择是转接所有通话、 呼叫限制–选择何时限制呼叫。 输 线路忙时转接、无人接听时转接, 入呼叫限制密码。 请与您的网络 或无信号时转接。 运营商联系,了解有关此服务的信 息。 通话时间–查看“所有通话”、“ 已拨电话”、“已接来电”和“上 拒接来电–允许您设置拒接来电功 次通话”的通话时间。 能。 从以下选项选择:关闭、拒接 来电列表或拒接所有来电。...
- Page 276 All manuals and user guides at all-guides.com 声音 通话费用–查看通话的相关费用。 (此服务取决于网络;某些运营商 <常规> 不支持此功能) 静音模式–允许您将所有声音(包 其他设置–此菜单允许您更改以下 括通话和通知铃声)静音,音乐、 设置: 视频和已设置的闹钟的声音除外。 • 本机号码:选择是否要在拨出电 媒体和闹钟静声必须分别在各自应 话时显示您的号码。 用程序中操作。 • 来电等待:如果激活了来电等待 振动–允许您将手机设置为在接到 功能,在通话过程中,手机将 来电时振动。 提醒您有新来电(取决于网络提 供商)。...
- Page 277 设置 All manuals and user guides at all-guides.com 音量–允许您为铃声、媒体和闹钟 <反馈> 设置音量。 如果取消选择“为通知 屏幕按键音–允许您将手机设置为 使用来电音量”选项,您可以分别 在使用拨号盘拨号时播放音调。 为来电和通知设置各自的音量。 操作音选择–允许您将手机设置为 在点触按钮、图标和其他可响应点 <来电> 触的屏上项目时播放声音。 手机铃声–允许您设置默认来电铃 屏幕锁定提示音–允许您将手机设 声。 置为在锁定和解锁屏幕时播放声 <通知> 音。 通知铃声–允许您设置默认通知铃 触觉反馈–允许您将手机设置为在 声。 点触软键和执行其他操作时短时振 动。...
- Page 278 all-gui des.c...
- Page 279 All manuals and user guides at all-guides.com 显示 手势 亮度–调整屏幕亮度。 使用动作手势–调整文本输入字 段、来电、闹钟、图片库和视频播 自动旋转屏幕–设置为在旋转手机 放器的手势设置。 时自动切换方向。 重置手势传感器–将手机放置在平 动画–设置为显示动画。 坦表面上,并校准动作传感器。 屏幕超时–设置屏幕超时的时间。 显示字体–更改显示字体。...
-
Page 280: 位置和安全
设置 All manuals and user guides at all-guides.com 位置和安全 您可设置 PIN 或密码,而不要使用 图案或保持其值为无。 使用无线网络–如果选择使用无线 在您打开手机或唤醒屏幕时,系统 网络,您的手机将使用 Wi-Fi 和移动 将要求您画出解锁图样以解除屏幕 网络确定您的大概位置。 选择此选 锁定。 项时,您将被询问在提供这些服务 时是否允许 Google 使用您的位置。 设置 SIM/RUIM 卡锁定–设置 SIM/ RUIM 卡锁定或更改 SIM/RUIM 使用 GPS 卫星–如果选择使用 GPS PIN。 卫星,您的手机将确定您的位置并 精确到街道级别。 可见的密码–选择该选项可在您键... -
Page 281: 应用程序
All manuals and user guides at all-guides.com 应用程序 选择设备管理员–添加一个或多个 管理员。 您可以查看和管理应用程序。 使用安全凭据–允许您访问安全证 未知源–安装非 Market 应用程序的 书。 默认设置。 从 SD 卡安装–选择从 SD 卡安装加 警告 密的证书。 手机可能无法正常运行,并可能会被非 设置密码–设置或更改凭据存储密 法用于建立您的位置,并能通过互联 码。 网访问个人信息,具体取决于您所安装 清除存储–清除所有内容的凭据并 的应用程序。 为保护您的手机和个人 重置密码。 数据,请只从信任的来源(如 Android Market)下载应用程序。... -
Page 282: 数据同步
设置 All manuals and user guides at all-guides.com 数据同步 管理应用程序–管理和删除安装的 应用程序。 <常规同步设置> 正在运行的服务–检查当前正在运 背景数据–允许应用程序在后台同 行的服务。 步数据,无论您当前是否正在操作 存储空间使用情况–查看应用程序 它们。 取消选择此设置可节省电 所用的存储空间。 池电量并减少(而非消除)数据使 电池使用情况–查看耗电情况。 用。 开发 – 设置应用程序开发选项。 自动同步–允许应用程序根据自己 的计划同步、发送和接收数据。... - Page 283 All manuals and user guides at all-guides.com <管理帐户> 重置手机不会擦除您已下载的任何 系统软件更新或 microSD 卡上的任 所有 Google 帐户及已添加到手机的 何文件,如音乐或照片。 如果以此 其他帐户的列表。 方式重置手机,将提示您重新输入 如果点触此屏幕中的某个帐户,将 与首次启动 Android 时输入的相同 会打开其帐户屏幕。 信息。 隐私 存储 重设出厂数据–如果选择“重设出 厂数据”,将清除手机内部存储的 <USB 连接模式> 所有个人数据,包括有关 Google 帐 仅大容量存储 - 插入存储卡时,您 户及其它帐户的信息、您的系统/应 的手机可用作大容量存储设备。 您 用程序数据和设置,以及下载的应...
- Page 284 all-gui des.c...
-
Page 285: 区域和文本
设置 All manuals and user guides at all-guides.com 语音输入与输出 <存储卡> 检查 SD 卡总可用空间。 点触删除 <语音输入> 存储卡以安全移除。 如果要删除 SD 语音识别设置 - 使用语音识别设置 卡上的所有数据,请清除 SD 卡。 配置 Android 语音输入功能。 <内部存储> • 语言:打开一个屏幕,在此可以 选择可用空间。 设置您在通过讲话的方式输入文 字时使用的语言。 区域和文本 • SafeSearch:打开一个对话框,在 使用区域和文本设置为手机上的 此,您可以设置是否需要 Google 文本以及屏上键盘配置选择语言 SafeSearch 筛选器屏蔽某些搜索 和区域(包括已添加到词典中的文... - Page 286 All manuals and user guides at all-guides.com • 屏蔽攻击性言论:取消选择 备注:如果未安装语音合成器数据,则 时,Google 语音识别将在您以口 只有安装语音数据设置可用。 头方式输入文本时识别和抄写许 多人认为具有攻击性的言论。 选 • 聆听示例:使用您的当前设置播 择时,Google 语音识别将用由井 放语音合成器的简短示例。 号 (#) 组成的占位符替代文字记录 • 总是使用我的设置:选中以使用 中的那些字眼。 该屏幕上的设置替代其他应用程 <语音输出> 序中提供的语音合成器设置。 文字转语音设置 - 您可以使用文字 • 默认引擎:如果安装了多个文本 转语音设置来配置 Android 文本转语 至语音应用程序,则会打开一个 音合成器,通过该应用程序来时用 对话框,在此可以设置您要使用 此功能。 的文本至语音应用程序。...
-
Page 287: 辅助功能
设置 All manuals and user guides at all-guides.com • 安装语音数据:如果您的手机未 设置一起使用时尤为有用,这样 安装语音合成器数据,请连接至 可以确保文本在不同的应用程序 Android Market,系统将引导您完 中均可正确发音。 成下载和安装数据的过程。 如 • Pico TTS:配置 Pico TTS 设置。 果数据已经安装,则此设置不可 辅助功能 用。 • 语速:打开一个对话框,在此可 使用辅助功能可配置您在手机上安 装的辅助功能插件。 以选择您希望合成器发音的速 率。 备注:需要额外的插件。 • 语言:打开一个对话框,在此可 以选择您希望合成器读出的语 言。 该选项在结合总是使用我的... -
Page 288: 日期和时间
All manuals and user guides at all-guides.com 日期和时间 手机软件更新 使用日期和时间设置可设置日期的 从互联网的 LG 手机软件更新 显示方式。 您还可使用这些设置来 有关使用此功能的详细信息,请访 设置自己的时间和时区,而非从移 问 http://www.lg.com。 动网络获取当前时间。 此功能帮助您方便地从互联网将手 机固件更新为最新版本,而无需访 关于手机 问服务中心。 只有当 LG 为您的设 查看法律信息,检查手机状态和软 备提供了更新的固件版本时,此功 件版本。 能才可用。... - Page 289 设置 All manuals and user guides at all-guides.com 由于手机固件更新要求用户在更新 通过空中下载 (OTA) 的 LG 手机软 过程期间保持全部注意力,因此, 件更新 在继续执行操作之前,请确保留意 此功能使您可以通过 OTA 方便地将 每一个步骤中出现的所有说明和提 手机的软件更新为较新的版本。 只 示。 请注意,在升级过程中移除 有当 LG 为您的设备提供了更新的 USB 数据线或取出电池将严重损坏 固件版本时,此功能才可用。 您的手机。 首先,您可以在手机上检查软件版 本:设置 > 关于手机 > 软件更新 > 备注:LG 保留根据自行判断决定固件...
- Page 290 all-gui des.c...
-
Page 291: Divx 移动
All manuals and user guides at all-guides.com 码,请在设备安装目录下找到 DivX DivX 移动 VOD 部分。 转到 vod.divx.com 以获 关于 DIVX 视频:DivX ® 是由 DivX, 取有关如何完成注册的详细信息。 LLC(Rovi Corporation 的子公司)开 DivX Certified ® 可播放高达 640x480 发的一种数码视频格式。 本手机是 的 DivX ® 视频,包括额外付费内 播放 DivX 视频的 DivX Certified ®... - Page 292 设置 All manuals and user guides at all-guides.com 注意:开源软件 要获取 GPL、LGPL、MPL 及其他开 源证书下的相应源代码,请访问 http:// opensource.lge.com/ 可使用源代码下载所有相关许可条款、 声明和通知。...
- Page 293 配件 All manuals and user guides at all-guides.com 以下配件可与 LG-E730 一起使用。 (以下配件为可选配件。) 旅行适配器 电池 立体声耳机 数据线 用户手册 连接 LG-E730 了解更多关于 和 PC。 LG-E730 的信 息。 备注: • 务必使用正品 LG 配件。 • 否则可能导致保修失效。 • 配件可能根据国家/地区有所不同。...
- Page 294 Suppliers Details Name LG Electronics Inc 最高温度: +55°C(放电), Address LG Twin Tower 20,Yeouido-dong, Yeongdeungpo-gu Seoul, Korea 150-721 +45°C(充电) Product Details Product Name GSM 850 / E-GSM 900 / DCS 1800 / PCS 1900 Quad Band and WCDMA Terminal Equipment 最低温度:-10°C...
- Page 295 故障排除 All manuals and user guides at all-guides.com 本章列出了您在使用手机过程中可能遇到的一些问题。 有些问题可能需要 您致电服务提供商,但大多数问题您可自行解决。 信息 可能原因 可行解决措施 SIM 卡 手机中没有安装 SIM 卡 请确保正确插入 SIM 卡。 错误 或 SIM 卡插入不正确。 将手机移到窗边或开放的区域中。 检查网络运营商覆盖地图。 信号弱,或者您在运营 没有网络 检查 SIM 卡使用时间是否超过 商网络范围之外。 连接/网络 6~12 个月。 如果超过,请在最近 断开 运营商应用了新服务。 的网络提供商处更换...
- Page 296 all-gui des.c...
-
Page 297: 故障排除
故障排除 A ll manuals and user guides at all-guides.com 信息 可能原因 可行解决措施 要更改安全码,您需 要在此输入以确认新 代码不 如果忘记代码,请联系您的服务 代码。 匹配 提供商。 两次输入的代码不匹 配。 任何应用 服务提供商不支持或需 程序均无 请与服务提供商联系。 要注册。 法设置... - Page 298 All manuals and user guides at all-guides.com 信息 可能原因 可行解决措施 拨号错误 新网络未获得授权。 无法拨打 已插入新 SIM 卡。 查看新的限制。 电话 达到预付费上限。 与服务提供商联系或重新设置 PIN 2 的限制。 按开/关键时间过短。 请按开/关键至少两秒钟。 手机无法 电池未充电。 为电池充电。 检查显示屏上的充 打开 电指示灯。 电池触点脏。 清洁电池触点。...
- Page 299 故障排除 All manuals and user guides at all-guides.com 信息 可能原因 可行解决措施 电池未充电 为电池充电。 外部温度太热或太冷 确保手机在正常温度下充电。 检查充电器以及到手机的连接。 触点问题 检查电池触点,如果需要,请清 洁。 充电错误 无电压 将充电器插入其它插座。 充电器故障 如果充电器不发热,请替换。 错误充电器 请仅使用原装 LG 配件。 电池故障 替换电池。...
- Page 300 All manuals and user guides at all-guides.com 信息 可能原因 可行解决措施 不允许输 检查“设置”功能表并关闭该功 已打开固定拨号功能。 入号码 能。 无法接收/ 发送短信 内存已满 删除手机中的部分信息。 和图片 未打开的 不受支持的文件格式 检查支持的文件格式。 文件 存储卡不 仅支持 FAT 16、FAT32 通过读卡器检查 SD 卡文件系统, 起作用 文件格式 或使用手机格式化 SD 卡。...
- Page 301 故障排除 All manuals and user guides at all-guides.com 信息 可能原因 可行解决措施 我收到来 如果使用任何保护带或保护套,请 电时, 检查其是否盖住近程传感器周围的 近程传感器问题 屏幕未打 区域。 确保近程传感器周围的区 开。 域干净。 检查声音菜单的设置状态以确保您 无声音 振动模式 不处于振动或静音模式下。 卸下电池,将它再次插入并将手 挂机或 机开机。 间歇性软件问题 死机 尝试通过网站执行软件更新。...
- Page 302 all-gui des.c...
- Page 303 All manuals and user guides at all-guides.com 日本語 LG-E730 ユーザー ガイ ド このガイ ドでは、 電話機の使い方について説明します。 • マニュアルに記載されている内容の一部は、 ソフ トウェアおよびサービ ス プロバイダによって、 お使いの電話機に該当しない場合があります。 • このハン ドセッ トはタッチ スクリーン キーボー ドが搭載されているた め、 目の不自由な方のご使用には適していません。 • Copyright ©2011 LG Electronics, Inc. All rights reserved. LGおよびLGロゴは、 LG Groupとその関連会社の登録商標です。 そ の他の商標は各所有者の所有物です。 • Google™、 Google Maps™、 Gmail™、 YouTube™、 Google Talk™、 およびAndroid Market™は、 Google, Inc.の商標です。...
- Page 304 目次 All manuals and user guides at all-guides.com 安全かつ効率的にご使用いただくための 最近使用したアプリケーションに戻るには ..51 ガイ ドライン ............7 通知 ドロワー ...........52 状態バーの表示 ..........53 電話の基本説明..........20 オンスクリーン キーボー ド ......57 装置のコンポーネン ト........34 アクセン ト付きの文字の入力 ......58 SIMカー ドおよび電地の取り付け ....37 Googleアカウン トのセッ トアップ ....59 電話の充電............39 メモリ カー ドの使用 ........40 ネッ...
- Page 305 All manuals and user guides at all-guides.com Wi-Fi Castの使用 .........71 連絡先の検索 ..........86 SmartShareを介したWi-Fi Directでの 新しい連絡先の追加 ........86 共有の有効化 ..........72 お気に入りの連絡先 ........87 SmartShareの使用 ........74 古い電話機から新しい電話機への 連絡先の移動 ..........88 通話 ............... 81 メッセージの送受信 ........90 通話 ..............81 連絡先への発信 ..........81 メッセージの送信 ..........90 着信の応答と拒否 ..........82 スレッ...
- Page 306 目次 All manuals and user guides at all-guides.com マルチメディア .......... 110 アカウン ト フォルダの操作 ......97 電子メールの作成と送信 .......97 ギャラリー ............ 110 タイムライン表示 ........110 カメラ ............99 音楽 .............. 111 ビューファインダの画面構成......99 USB大容量ス トレージ 装置を使用した 簡単な写真の撮影 ........100 音楽ファイルの転送........111 写真の撮影後 ..........100 曲の再生 ............112 詳細設定の使用 .
- Page 307 ブラウザ ............122 通話設定 ............134 Webツールバーの使用 ....... 122 音響 .............. 137 オプションの使用 ......... 123 ディスプレイ ..........140 LG On-Screen Phone 2.0 ....125 Gesture (ジェスチャ) ......... 140 On-Screen Phone 2.0アイコン .... 125 Location & security ( ロケーション On-Screen Phone 2.0の機能 ....126 およびセキュリティ) ........141 PCへのOn-Screen Phoneのインス ト...
- Page 308 all-gui des.c...
- Page 309 目次 All manuals and user guides at all-guides.com Storage (ス トレージ) ......... 148 Language & keyboard (言語& キーボー ド) ..........149 Voice input & output ( 音声の入出力) . 149 Accessibility ( ユーザー補助) ....153 Date & time (日付/時刻) ......153 About phone (バージョン情報) ....153 Phone software update (電話ソフ...
-
Page 310: ガイ ドライン
All manuals and user guides at all-guides.com 次の簡単なガイ ドラインをよくお読み これらの要件は、 年齢や健康状態に関 ください。 ここに記載されているガイ 係なく、 すべての人々の安全の確保を ドラインに従わないと、 危険な状態に 目的とするもので、 安全域などの特定 さらされたり、 不正な使用につながる のガイ ドラインに基づいています。 場合があります。 • 電波の暴露のガイ ドラインでは、 比吸 収率 (SAR) と呼ばれる測定単位を 高周波エネルギーへの暴露 採用しています。 SARの検査は、 使 電波への暴露および比吸収率 (SAR) 用される全周波数帯域内の最大認定 に関する情報: 電力で電波を送出する電話を対象に このLG-E730モデルの携帯電話は、 標準的な方法で実施されます。 電波の暴露について適用される安全 要件を満たすよう設計されています。... - Page 311 安全かつ効率的にご使用いただくためのガイ ドライン All manuals and user guides at all-guides.com • LGの電話はモデルごとにSAR値が • DASY4で検査したこのモデルの電 異なることもありますが、 どの機種も 話の最大SAR値は、 耳に当てて使 電波の暴露に関連するガイ ドライン 用した場合が0.690W/kg(10g) に準拠するよう設計されています。 、 身体に装着した場合が0.757W/ kg(10g)です。 • 国際非電離放射線防護委員会 (ICNIRP) が推奨するSARの上 • 電気電子技術者協会 (IEEE) が推奨 限は、 生体組織10g当たり、 平均で するSARの上限を採択している国 2W/kgです。 や地域の居住者のSARのデータ情 報では、 生体組織1g当たり、 平均で 1.6W/kgとなっています。...
- Page 312 All manuals and user guides at all-guides.com 製品のお手入れと保守について • 保証期間中の修理では、 LG独自の 判断により、 部品またはボー ドを新 警告 品、 または交換される部品と同等の このモデルの電話で使用が認められて 機能を持つ再生品と交換することが いる電地、 充電器、 および付属品のみを あります。 使用してください。 他の種類を使用した • テレビ、 ラジオ、 パソコンなどの家電 場合、 この電話に適用される認定や保証 製品のそばに置かないでください。 が無効になったり、 危険が生じる可能性 があります。 • 本製品をラジエータや調理器などの 火気に近づけないでください。 • 本製品を分解しないでください。 修 • 落とさないようにしてください。 理が必要な場合は、 適格なサービス...
- Page 313 安全かつ効率的にご使用いただくためのガイ ドライン All manuals and user guides at all-guides.com • 特別な規制によって使用が禁止され • 引火性溶剤の近くでハン ドセッ トを充 ている場所では、 電話機の電源をお 電しないでください。 ハン ドセッ トが 切りください。 たとえば、 病院では、 高温になり、 火災の原因になることが 感度の高い医療機器に影響を及ぼす あります。 可能性があるため、 電話を使用しな • 本製品の外装の清掃には乾いた布を いでください。 使用してください (ベンジン、 シンナ • 充電中に濡れた手で電話機を取り扱 ー、 アルコールなどの溶剤は使用し わないでください。 濡れた手で触れ ないでください) 。 ると、...
- Page 314 all-gui des.c...
- Page 315 All manuals and user guides at all-guides.com • 電話は十分に通気されている場所で • 電話を液体や湿気にさらないでく 充電してください。 ださい。 • 本製品を過度の煙やほこりにさらさ • イヤフォンなど付属品の取り扱いに ないでください。 ご注意ください。 必要な場合を除い てアンテナには触れないでください。 • 電話をクレジッ トカー ドや旅行チケッ トの近くに置かないでください。 磁 • ガラスが割れた、 欠けた、 またはひび 気ス トリ ップの情報に影響を及ぼすこ が入った場合に、 そのガラスを使用し とがあります。 たり、 触れたり、 取り除こうとしたり、 修理しようとしないでください。 乱暴 • 先の尖ったもので画面をタップしな な使用や誤った使用に起因するガラ いでください。 電話機が傷つく場合 ス製ディスプレイの損傷は、...
- Page 316 安全かつ効率的にご使用いただくためのガイ ドライン All manuals and user guides at all-guides.com 電話の効率的な操作 • 電話機は電子機器であるため、 正常 に動作していても熱が発生します。 電子機器 十分に通気されていない状態で極め どの携帯電話も電波干渉を受ける可 て長い間直接皮膚に触れていると、 能性があり、 これが性能に影響を及ぼ 不快感を感じたり、 軽いやけどが生じ すことがあります。 ることがあります。 したがって、 操作 • 携帯電話を医療機器の近くで使用す 中または操作直後に電話を取り扱う る場合は、 必ず許可を求めてくださ ときは十分に注意してください。 い。 たとえば、 ペースメーカーを使用 している場合は、 電話を胸ポケッ トに 入れないようにしてください。...
- Page 317 All manuals and user guides at all-guides.com • 補聴器の中には、 携帯電話によって • 運転に意識を集中してください。 機能が妨げられるものがあります。 • 運転中に電話をかけたり電話に出た • わずかな電波干渉によって、 テレビ、 りする必要があるときは、 車を路肩に ラジオ、 パソコンなどに影響が及ぶこ 寄せて停止してください。 とがあります。 • 高周波エネルギーが、 カーステレオ や安全装置など車両の電子系統に影 安全運転 響を及ぼすことがあります。 運転する地域における携帯電話の使用 • 車両にエアバッグが装備されている に関する法規を確認してください。 場合は、 固定式または可搬式の無線 • 運転中は手で持つタイプの電話は使 装置がエアバックの邪魔にならない 用しないでください。 ようにしてください。 エアバッグが ふさがれていると、 正常に作動しな...
- Page 318 安全かつ効率的にご使用いただくためのガイ ドライン All manuals and user guides at all-guides.com くなったり、 重傷を負う危険性があ ます。 また、 音楽および通話の音量を ります。 適切なレベルに設定することをお勧 めします。 • 戸外で音楽を聴いているときは、 適 切な音量であることを確認し、 周囲に • ヘッ ドフォンを使用する場合、 付近の 気を配るようにしてください。 車道 人の話し声が聞こえなかったり、 隣に の近くでは、 特に注意してください。 座った人に通話相手の話し声が聞こ えるようなときは、 音量を下げるよう 聴覚障害の防止 にしてください。 大音量に長時間さらされると聴力に 注 : イヤフォンの音圧レベルが極端に高 障害が生じるおそれがあります。 そ いと、...
- Page 319 All manuals and user guides at all-guides.com ガラス部品 発破作業の現場 モバイル 装置の一部の部品はガラス 発破作業を行っている場所では、 電 製です。 モバイル 装置を硬い面に落 話機を使用しないでください。 制限 としたり、 相当な衝撃を与えたりする 事項に従い、 法規や規則に準拠してく と、 このガラスが割れることがありま ださい。 す。 ガラスが破損した場合は、 触れた 爆発の危険がある場所 り、 取り除こうとしないでください。 メ • 給油地点では電話を使用しないでく ーカー認定のサービス プロバイダが ださい。 ガラスを交換するまで、 モバイル装置 の使用を中止してください。 • 燃料や化学物質の近くでも使用しな いでください。...
- Page 320 all-gui des.c...
- Page 321 安全かつ効率的にご使用いただくためのガイ ドライン All manuals and user guides at all-guides.com お子様 • 携帯電話や付属品と一緒に可燃性の ガス、 液体、 爆発物を移動したり、 保管 電話機は、 小さなお子様の手が届かな したり しないでください。 い安全な場所に保管してください。 電 話には小さな部品も含まれており、 外 飛行中 れた場合に窒息の原因となることが ワイヤレス 装置は、 飛行中に電波干渉 あります。 を起こすことがあります。 緊急通話 • 機内に搭乗する前に、 携帯電話の電 源はお切りください。 モバイル ネッ トワークによっては緊急 通話を利用できないことがあります。 • 地上で乗務員の許可なく携帯電話を このため、 緊急時の連絡には、 携帯電 使用しないでください。...
- Page 322 All manuals and user guides at all-guides.com 最寄りのサービス プロバイダにご確 • LGの電地および充電器以外は使用 認ください。 しないでください。 LGの充電器は 電地寿命が最長になるよう設計され 電地とそのお手入れ方法について ています。 • 電地を充電する前に、 完全に放電す • 電地を分解したり、 ショー トさせたり る必要はありません。 他の電地シス しないでください。 テムとは異なり、 メモリによって電地 • 電地の金属接触面は清潔に保つよう の性能が低下することはありません。 にしてください。...
- Page 323 安全かつ効率的にご使用いただくためのガイ ドライン All manuals and user guides at all-guides.com • 電地の性能が劣化したら交換してく • 電地を暑い場所や寒い場所に放置し ださい。 電地パックは、 数百回充電す ないでください。 電地の性能が低下 るまで交換の必要はありません。 する場合があります。 • 電地を長期間使用していなかったと • 不適切なタイプの電地と交換した場 きは、 使用効率を最大限にするため 合、 爆発するおそれがあります。 に充電し直してください。 • 使用済みの電地は製造元の指示に従 • 電地充電器を直射日光に当てたり、 って処分してください。 可能な限り 浴室など湿度の高い場所で使用した リサイクルしてください。 家庭ごみと り しないでください。 して処分しないでください。...
- Page 324 All manuals and user guides at all-guides.com • 電地の交換が必要な場合は、 最寄り のLG Electronics認定サービス拠 点または販売店にお持ちいただき、 ご相談ください。 • 電話が完全に充電されたら、 充電器 の不要な電力消費を防ぐため、 電器 を壁コンセン トから抜くようにしてく ださい。 • 実際の電地寿命は、 ネッ トワークの構 成、 製品の設定、 使用形態、 電地、 お よび環境条件により異なります。...
-
Page 325: 電話の基本説明
電話の基本説明 All manuals and user guides at all-guides.com 電話をお使いになる前に、 この注意書きをお読みください ! 電話に問題が発生したときは、 修理に ジなどの一部のデータを削除し、 利用 出したり、 サービス担当者に電話したり 可能なメモリを増やしてください。 する前に、 その問題についての説明が アプリケーションをアンインス トール このセクションに記載されていないか するには どうか確認してください。 [Applications (アプリケー ション) ] > [Settings (設 1. 電話のメモリ 定) ] > [Applications (アプ 電話のメモリの空き容量が10%未満 リケーション) ] > [Manage になると、 電話で新しいメッセージを受 applications (アプリケーション... - Page 326 all-gui des.c...
- Page 327 All manuals and user guides at all-guides.com すべてのアプリケーションが表示さ スがどの程度電地電力を消費するかを れたら、 アンインス トールするアプ 監視できます。 リケーションまでスクロールして選 電話の電地を長持ちさせるには 択します。 • 使用していない無線通信をオフに [Uninstall (アンインス トール) ]を します。 Wi-Fi、 Bluetooth、 または タッチします。 GPSを使用していない場合はオフ にします。 2. 電地寿命の最適化 • 画面の輝度を下げ、 画面のタイムア 充電後の電地を長持ちさせるために、 ウ トの設定を短く します。 バックグラウン ドで継続的に実行させ る必要のない機能をオフにします。 ま た、...
- Page 328 電話の基本説明 All manuals and user guides at all-guides.com • Gmail™、 カレンダー、 ア ドレス帳、 お 電地の状態 (充電中または非充電中) よびその他のアプリケーションの自 と残量 (充電率) が画面の上部に示さ 動同期をオフにします。 れます。 • ダウンロー ドしたアプリケーションの 電地電力の使用状況を監視して制御 中に電地残量を低下させるものがあ するには る可能性があります。 • [Applications (アプリケーション) ] 電地残量を確認するには > [Settings (設定) ] > [About About phone (電話の概要) ] > • [Applications (アプリケーション) ] [Battery use (電地の使用)...
- Page 329 All manuals and user guides at all-guides.com 3. オープンソースのアプリケーシ 電地の使用時間が画面の上部に示さ れます。 電話を前回電源に接続してか ョンおよびOSをインス トール らどのくらいの時間が経過しているか する前に が分かります。 また、 現在接続されて いる場合は、 前回の電地電力量で電話 警告 がどのくらいの時間動作したかが分か メーカーが提供するもの以外のOSをイ ンス トールして使用すると、 電話に不具 ります。 画面に、 電地電力を使用する 合が生じることがあります。 また、 電話 アプリケーションやサービスが、 使用量 が保証の対象ではなくなります。 が最大のものから最小のもの順に一 覧表示されます。...
- Page 330 電話の基本説明 All manuals and user guides at all-guides.com 4. ハード リセッ トの実施 (工場出 警告 荷状態へのリセッ ト) 電話や個人のデータを保護するため 電話を最初の状態に復元する必要が に、 Android Market™など、 信頼できる ある場合は、 ハー ド リセッ トを実施して ソースのみからアプリケーションをダウ ンロー ドしてください。 電話の上に不適 電話を再起動してください。 切にインス トールされたアプリケーショ 1. 電 話をオフにして、 左手でVolume ンがあると、 正常に動作しないことや、 深 down (音量を下げる) キー + 刻なエラーが生じることがあります。...
- Page 331 す。 この操作は、 画面にLGロゴが 以上経過したら、 電話を再びオンにで 表示される前に素早く行う必要が きます。 あります。 左手でVolume down ( 注意 : ハー ド リセッ トを実施すると、 ユ 音量を下げる) キー + Power (電 ーザー アプリケーションおよびユーザ 源) キーを押し続ける点に注意し ー データがすべて削除されます。 削 ます。 除されたものを元に戻すことはできま 3. 画 面にLGロゴが表示されたら、 こ せん。 ハー ド リセッ トを実施する場合 れらのキーを約2秒間押し続けた は、 事前に重要なデータをバックアップ 後、 LGロゴが消える前にすべての するようにしてください。...
- Page 332 all-gui des.c...
- Page 333 電話の基本説明 All manuals and user guides at all-guides.com 5. microSDカードの使用 6. アプリケーションの開閉および 切り替え 画像、 音楽、 およびビデオのファイル は、 外付けメモリにのみ保存できます。 Androidでは一度に2つ以上のアプリ ケーションを実行させることができる 内蔵カメラを使用する場合、 電話に ため、 マルチタスクを簡単に行うことが microSD メモリ カー ドを挿入してお できます。 アプリケーションを開くため く必要があります。 に、 別のアプリケーションを閉じる必要 メモリ カー ドを挿入していないと、 カ がありません。 いくつかのアプリケー メラで撮影する画像やビデオを保存で ションを開いたまま、 使用したり切り替 きません。 えたりできます。...
- Page 334 ヒン ト : 最近使用したアプリケーションに ように管理します。 戻るには、 Home (ホーム) キーを長押し します。 画面に最近使用したアプリケー アプリケーションを停止するには ションが一覧表示されます。 [Applications (アプリケー ション) ] > [Settings (設 7. LG PC Suiteのインス トール 定) ] > [Applications (アプ リケーション) ] > [Manage LG PC Suite IVは、 USBデータ通信 applications (アプリケーション ケーブルを使用して携帯電話からPC の管理) ] に接続するためのプログラムです。 こ の方法で接続すると、 携帯電話の機能 対象のアプリケーションまでスクロ...
- Page 335 電話の基本説明 All manuals and user guides at all-guides.com • SMSメッセージを電話からPC LG PC Suite IVの主な機能 に転送 • 電話のデータを簡単に作成、 編 集、 削除 • データを損なうことなくソフ トウェ アを更新 • 携帯電話のデータをPCのデー タと同期 (ア ドレス帳、 カレンダ LG-E730では、 次の機能はサポート ー、 SMSメッセージ、 ブックマーク、 されません。 通話ログ) – L G無線同期 (ウェブ同期、 Rクリック) • マルチメディア ファイル (写真、 ビ...
- Page 336 All manuals and user guides at all-guides.com microSDからLG PC Suiteのイン し、 [Mass storage only (大容 ス トール 量ス トレージのみ) ]チェ ック ボック スをオンにします) 。 microSDメモリ カー ドを電話機に 挿入します (既に挿入されている場 USBデータ ケーブルを使用して、 合もあります) 。 電話機をPCに接続します。 USBデータ ケーブルに接続す 状態 バーで、 [USB]アイコンを ドラ る前に、 電話の[Mass storage ッグします。 [USB connected (...
- Page 337 電話の基本説明 All manuals and user guides at all-guides.com できます。 または、 LGのWebサイ ト (www. lg.com) からプログラムをダウンロー LG PC Suite IVフォルダをマス ドします。 www.lg.comにアクセスし ス トレージからPCにコピーします。 て、 お住まいの地域、 国、 および言語を LGInstaller.exeファイルをPC 選択します。 で実行し、 表示される指示に従い ます。 注記 : メモリ カー ドにインス トールされて LG PC Suite IVのインス トール いる他のプログラム ファイルを削除し ないでください。 削除すると、 事前にイ...
- Page 338 all-gui des.c...
- Page 339 All manuals and user guides at all-guides.com 8. USB経由の電話とコンピュー USBケーブルを使用して、 電話を タの同期 コンピュータのUSBポー トに接続 します。 接続すると、 USB接続が 注記 : USBケーブルを使用して電話を 確立したことを知らせる通知が送 PCと同期するには、 LG PC Suiteを 信されます。 PCにインス トールする必要があります。 通知 ドロワーを開いて、 接続中の LG PC Suiteのインス トールについて USBをタッチします。 は、 前の数ページを参照してください。 [Turn on USB storage (USB ス トレージをオン) ]をタッチして...
- Page 340 電話の基本説明 All manuals and user guides at all-guides.com 電話がUSBス トレージとして接続され この間は電話からmicroSDカー ドに ると、 通知が送信されます。 これで、 フ アクセスできないため、 カメラ、 ギャ ァイルをmicroSDカー ドとの間でコピ ラリー、 音楽など、 microSDカー ドに ーできます。 依存するアプリケーションは使用でき ません。 ヒン ト : microSDカー ドを再度電話 電話からコンピュータへの接続を切断 で使用するには、 通知 ドロワーを開い するには て、 [Turn off USB storage (USBス トレージをオフ)...
- Page 341 All manuals and user guides at all-guides.com 9. 電話を垂直に保つ 10. 画面がフリーズした場合 この携帯電話は、 通常の電話のように 画面がフリーズしたときや、 操作しよう 垂直にして使用します。 LG-E730に としても電話が反応しないときは、 は内部アンテナが搭載されています。 電地を取り外して入れ直した後、 電話 電話の裏面を傷つけたり破損したり し をオンにします。 ないように注意してください。 損傷する または と性能に影響する可能性があります。 Power/Lock (電源/ロック) キーを 通話やデータを送受信するときは、 ア 10秒間長押してオフにします。 ンテナのある電話の下部を持たないよ 問題が解決しない場合は、 サービス セ うにしてください。 下部を持つと、 通話...
-
Page 342: 装置のコンポーネン ト
電話の基本説明 All manuals and user guides at all-guides.com 装置のコンポーネン ト Power/Lock (電源/ロック) スピーカ キー 近接センサ • こ のキーを長押しすると、 電 カメラ レンズ 話のオン/オフが切り替わり ます。 Home (ホーム) キー • 短 く押すと、 画面がロックまた すべての画面から[Home (ホー はロック解除されます。 ム) ]画面に戻ります。 Menu (メニュー) キー Back (戻る) キー 前の画面に戻ります。... - Page 343 All manuals and user guides at all-guides.com 注記 : 近接センサ 警告 通話を受送信するときは、 電話が耳のそ 電話の上に重たいものを置いたり座った ばにあることを近接センサが感知して、 りすると、 LCDやタッチ スクリーンの機 自動的にバックライ トをオフにし、 タッチ 能を損なう可能性があります。 LCD近 スクリーンをロックします。 この機能に 接センサを保護フィルムで覆わないでく よって電地が長持ちするほか、 通話中に ださい。 フィルムで覆うと、 センサが正 誤ってタッチ スクリーンをアクティブに 常に機能しないことがあります。 することがなくなります。...
- Page 344 all-gui des.c...
- Page 345 電話の基本説明 All manuals and user guides at all-guides.com イヤフォン ジャ ック カメラ レンズ SIMカード スロッ ト 充電器/USBポート 背面カバー Power/Lock (電 源/ロック) キー Volume (音量) キー • [ Home (ホーム) ]画面 : 着信音 の音量を制御します。 • 通 話中 : イヤホンの音量を制 御します。 microSDカ • ト...
-
Page 346: Simカードおよび電地の取り付け
All manuals and user guides at all-guides.com SIMカードおよび電地の取り付け 新しい電話を試してみる前に、 電話を セッ トアップする必要があります。 SIM カー ドと電地を取り付けるには: 背面カバーを取り外すために、 電 話を片手でしっかりと握ります。 も う片方の手の親指で背面カバーを 強く押します。 凹みに人差し指の 先をひっかけて、 背面カバーを引っ 張ります。... - Page 347 電話の基本説明 All manuals and user guides at all-guides.com SIMカー ドをSIMカー ド スロッ トに 電話の金色の接触面と電地が重 差し込みます。 カー ドの金色の接 なるようにして電地を差し込み (1 触面が下向きになっていることを ) 、 カチッと音がするまで押し込み 確認します。 ます (2) 。...
-
Page 348: 電話の充電
All manuals and user guides at all-guides.com 電話の充電 背面カバーを電地 コンパー トメン トに載せ (1) 、 カチッと音がするま 上面にある充電器コネクタのカバーを で押し込みます (2) 。 開きます。 充電器を挿入し、 プラグを コンセン トに差し込みます。... -
Page 349: メモリ カードの使用
電話の基本説明 All manuals and user guides at all-guides.com メモリ カードの使用 注記 : 電地を長持ちさせるために、 初 回は電地を完全に充電する必要があ メモリ カードを挿入するには ります。 メモリ カー ドをスロッ トに挿入します。 金色の接触面が下向きになっているこ とを確認します。 メモリ カードを安全に取り出すには [Applications (アプリケーション) ] > [Settings (設定) ] > [Storage (ス トレージ) ] > [Unmount SD card (SDカードのアンマウン ト) ]... - Page 350 all-gui des.c...
- Page 351 All manuals and user guides at all-guides.com 注記 : LG-E730では、 最大32 GBのメ モリ カー ドをサポー トします。 警告 電話がオンの間はメモリ カー ドを出し 入れしないでください。 カー ドを出し 入れすると、 メモリ カー ドおよび電話 が損傷することや、 メモリ カー ドに保存 されているデータが損なわれることが あります。...
- Page 352 電話の基本説明 All manuals and user guides at all-guides.com メモリ カードを初期化するには [Home (ホーム) ]画面で [Applications (アプリケーショ メモリ カー ドは既に初期化されている ン) ]タブ をタッチして、 アプリ ことがあります。 初期化されていない ケーション メニューを開きます。 場合は、 使用する前に初期化する必要 があります。 スクロールして[Settings (設定) ] > [Storage (ス トレージ) ]をタッ 注記 : 初期化するとメモリ カー ド上のす チします。 べてのファイルが削除されます。 [Unmount SD card (SDカード...
-
Page 353: 画面のロックおよびロック解除
All manuals and user guides at all-guides.com [Erase SD card (SDカードの 注記 : メモリ カー ドにコンテンツがある 消去) ] > [Erase SD card (SD 場合、 初期化によってすべてのファイル カードの消去) ] > [Erase が削除されているため、 フォルダ構造が everything (すべて消去) ]をタ 異なることがあります。 ッチしてから、 選択する項目を確認 します。 画面のロックおよびロック解除 パターン ロックを設定している場 電話をしばらく使用しないと、 画面が自 合は、 パターン ロックを入力してか 動的にオフになりロックされます。 こ ら[Erase everything (すべて消... -
Page 354: ロック画面のセキュリティ保護
電話の基本説明 All manuals and user guides at all-guides.com LG-E730を使用していないとき 電話のスリープを解除するに は、 Power/Lock ( 電源/ロック) キ は、 Power/Lock ( 電源/ロック) キー ー を押して電話をロックし を押します。 ロック画面が表示されま ます。 す。 ロック画面をタッチして上方にス ライ ドすると、 ホーム画面のロックが解 画面のロックを設定したときに実行 除されます。 最後に表示していた画面 中のプログラムがあると、 設定後も が開きます。 [Lock ( ロック) ]モー ドで実行されて... - Page 355 All manuals and user guides at all-guides.com ロック解除のパターン、 PIN、 パスワー 注 : ドを初めて設定するには パターン ロックを使用する場合の注 • [Applications (アプリケーショ 意事項 ン) ] > [Settings (設定) ] > 設定したロック解除のパターンを覚え [Location & security (場所&セ ておくことは非常に重要です。 間違っ たパターンを5回実行すると、 電話にア キュリティ) ] > [Set up screen クセスできなくなります。 ロック解除の lock (画面ロックのセッ トアップ) ] > パターン、...
- Page 356 all-gui des.c...
- Page 357 電話の基本説明 All manuals and user guides at all-guides.com ロック解除のパターンを思い出せな い場合 電話上でGoogleアカウン トにログ インし、 5回とも正しいパターンを入 力できなかったときは、 [Forgotten pattern (パターンを忘れた場合) ]ボ タンをタップします。 次に、 Googleア カウン トを使ってログインし、 電話のロ ックを解除する必要があります。 電話上でGoogleアカウン トを作成し ていない場合やアカウン トを忘れた場 合は、 ハー ド リセッ トを実行する必要 があります。...
-
Page 358: ホーム画面
ホーム画面 All manuals and user guides at all-guides.com タッチ スクリーンのヒン ト ドラッグする – リス ト全体をスクロー ルするときやゆっくりと移動させると 電話をナビゲー トする方法について、 きに、 タッチ スクリーン上を ドラッグ いくつかのヒン トをご紹介します。 します。 タッチする – メニューやオプションを フリ ックする – リス ト全体をスクロー 選択するときやアプリケーションを開く ルするときや素早く移動させるときに、 ときに、 その対象をタッチします。 タッチ スクリーン上をフリ ックします タッチし続ける – オプション メニュー (素早くクリ ックして指を放す) 。 を開くときや移動させるオブジェク ト を取得するときに、 その対象をタッチ し続けます。... -
Page 359: Home (ホーム
ホーム画面 All manuals and user guides at all-guides.com Home (ホーム) 注 : 指を左右に滑らせるだけで、 パネルが • ア イテムを選択するには、 そのアイコ 表示されます。 各パネルは、 ウィジェ ッ ンの中央をタッチします。 ト、 ( お気に入りのアプリケーションへ • 強 く押しすぎないようにしてくださ の) ショー トカッ ト、 フォルダ、 壁紙など い。 タッチ スクリーンは感度が高いた め、 軽く しっかりタッチするだけで感 でカスタマイズできます。... - Page 360 All manuals and user guides at all-guides.com [Home (ホーム) ]画面では、 画面の下 [Messaging (メッセージング) ] 部にクイック キーを表示できます。 ク アイコンをタッチすると、 メッセージン イック キーを使うと、 頻繁に使用する グ メニューにアクセスできます。 この 機能にワンタッチで簡単にアクセスで メニューから新しいメッセージを作成 きます。 できます。 [Phone (電話) ]アイコンをタッチ 画面の下部にある すると、 タッチ スクリーンのダイヤルパ [Applications (アプリケーション) ]タ ッ ドが表示され、 電話をかけられるよう ブをタッチします。 インス トールされ になります。...
-
Page 361: [Home (ホーム) ]画面のカスタマイズ
ホーム画面 All manuals and user guides at all-guides.com [Home (ホーム) ]画面のカスタ [Home (ホーム) ]画面にアイテムを追 マイズ 加するには [Home (ホーム) ]画面 > [Home (ホーム) ]画面は、 ウィジェ ッ ト、 [Menu (メニュー) ] > [Add (追 ショー トカッ ト、 フォルダ、 壁紙などを追 加) ] 加してカスタマイズできます。 電話を 使用すると、 お気に入りのウィジェ ッ ト または、... - Page 362 all-gui des.c...
-
Page 363: 最近使用したアプリケーションに戻るには
All manuals and user guides at all-guides.com 最近使用したアプリケーションに そのアイテムを希望の場所まで ド ラッグして指を放します。 戻るには Home (ホーム) キーをタッチし続 アイテムを[Home (ホーム) ]画面から けます。 画面に最近使用したアプ 削除するには リケーションのアイコンを示すポッ • [Home (ホーム) ]画面 > 削除する プアップが表示されます。 アイコンをタッチし続ける > に ドラ アイコンをタッチしてアプリケーシ ッグ ョンを開きます。 または、 Back (戻 ヒン ト : アプリケーション アイコンをアプ る) キーをタッチして現在のアプリ リケーション メニューから[Home (ホー... -
Page 364: 通知ドロワー
ホーム画面 All manuals and user guides at all-guides.com 通知ドロワー 通知 ドロワーを指でタッチしてスライ ド させます。 通知 ドロワーは、 画面の上部に帯状に または、 [Home (ホーム) ]画面 表示されます。 で、 Menu (メニュー) キーを押して [Notifications (通知) ]を選択し ます。 この ドロワーでは、 音声、 Wi- Fi、 Bluetooth、 GPSをはじめとする 通知をチェ ックして管理できます。 着信音 – Wi-Fi Bluetooth データ... -
Page 365: 状態バーの表示
All manuals and user guides at all-guides.com 状態バーの表示 次の表に、 通常状態バーに表示される アイコンの意味を示します。 状態バーでは、 アイコンごとに、 シグナ ルの強度、 新しいメッセージ、 電地寿 アイコン 説明 命、 アクティブなBluetooth、 データ接 SIMカー ドなし 続などの電話情報が表示されます。 シグナルなし 飛行機モー ド Wi-Fiネッ トワークに接 続中 Wi-Fiダイレク トがオン... - Page 366 ホーム画面 All manuals and user guides at all-guides.com アイコン 説明 アイコン 説明 有線接続のヘッ ドセッ ト Bluetooth装置に接続中 通話中 システム警告 通話保留中 アラームを設定済み スピーカフォン 新規ボイスメール 着信音がサイレン ト モ 電話のマイクがミュー ト ー ド 不在着信 バイブ モー ド Bluetoothがオン...
- Page 367 All manuals and user guides at all-guides.com アイコン 説明 アイコン 説明 電地を完全充電済み GPSで取得中 GPSから場所データを 電地を充電中 受信中 データを送受信 接続中のOn-Screen USBケーブル経由で電 フォン 話をPCに接続中 未表示の通知3件 データをダウンロー ド中 データを同期中 データをアップロー ド中 ダウンロー ド完了...
- Page 368 all-gui des.c...
- Page 369 ホーム画面 All manuals and user guides at all-guides.com アイコン 説明 アイコン 説明 USBテザリングがアク 新規Gmail ティブ 新規Google Talkメッ ポータブルWi-Fiホッ トス セージ ポッ トがアクティブ 新規メッセージ USBテザリングとポータ ブル ホッ トスポッ トの両方 曲を再生中 がアクティブ 今後のイベン ト バックグラウン ドでFMラ ジオをオン...
-
Page 370: オンスクリーン キーボード
All manuals and user guides at all-guides.com オンスクリーン キーボード キーパッ ドの使用とテキス トの入力 一度タップすると、 次に入力する テキス トはオンスクリーン キーボー ド 文字が大文字になります。 ダブルタッ を使用して入力できます。 オンスクリ プすると、 すべての文字が大文字にな ーン キーボー ドは、 テキス ト入力が必 ります。 要な画面で自動的に表示されます。 キ ーボー ドは、 テキス トを入力するテキス タップすると、 数字および ト フィール ドをタッチするだけで手動 記号のキーボー ドに切り替わりま で表示できます。... -
Page 371: アクセン ト付きの文字の入力
ホーム画面 All manuals and user guides at all-guides.com アクセン ト付きの文字の入力 タップすると、 記述中のメッセージに 絵文字が挿入されます。 入力言語にフランス語またはスペイン 語を選択すると、 フランス語またはス タップすると、 スペースが挿入 ペイン語の特殊文字 (例 : 「á」 ) を入力 されます。 できます。 タップすると、 メッセージ フィール たとえば、 「 á」 を入力する場合、 "a"キー ドに新しい行が作成されます。 をタッチし続けると、 ズームイン キー タップすると、 前の文字が削除さ が拡大表示され、 異なる言語の文字が れます。... -
Page 372: Googleアカウン トのセッ トアップ
Googleアカウン トのセッ トアップ All manuals and user guides at all-guides.com 電話を始めてオンにしたときに、 ネッ ト または ワークをアクティブにし、 Googleアカ • [Applications (アプリケーション) ] ウン トにサインインし、 一部のGoogle > GmailなどのGoogleアプリケー サービスを設定できます。 ションを選択 > [Create (作成) ]を 選択強調された文字を標準アカウン Googleアカウン トをセッ トアップす トを作成します。 るには Googleアカウン トを持っている場合 • プロンプ トが表示されたセッ トアップ は、 電子メール ア ドレスとパスワー ドを 画面からGoogleアカウン... - Page 373 Googleアカウン トのセッ トアップ All manuals and user guides at all-guides.com 電話上にGoogleアカウン トをセッ トア サインイン後は、 電話上でGmailを使 ップすると、 電話がWeb上のGoogle 用したり、 Googleのサービスを活用し アカウン トと自動的に同期します。 たりすることができます。 Web上のアプリケーションやサービス の連絡先、 Gmailのメッセージ、 カレン ダーのイベン ト、 およびその他の情報 が電話上の情報と同期されます (この 動作は各自の同期設定によって異な ります) 。...
- Page 374 all-gui des.c...
-
Page 375: ネッ トワークおよび装置への接続
ネッ トワークおよび装置への接続 All manuals and user guides at all-guides.com Wi-Fi Wi-Fiネッ トワークへの接続 Wi-Fiを使用すると、 ワイヤレス アク 電話でWi-Fiを使用するには、 ワイヤレ セス ポイン ト (AP) の通信範囲内で ス アクセス ポイン トまたは 「ホッ トスポ 高速インターネッ ト アクセスを使用で ッ ト」 にアクセスする必要があります。 きます。 追加料金なしで、 Wi-Fi経由 アクセス ポイン トの中にはオープンな のワイヤレス インターネッ トを利用で ものがあり、 簡単に接続できます。 一 きます。 方、... - Page 376 ネッ トワークおよび装置への接続 All manuals and user guides at all-guides.com 電地を長持ちさせるために、 使用して Wi-FiをオンにしてWi-Fiネッ トワーク いないときはWi-Fiをオフにします。 に接続するには [Applications (アプリケーショ 注記 : Wi-Fiの範囲外にいるときや、 Wi-Fi ン) ] > [Settings (設定) ] > を[OFF (オフ) ]に設定しているときに [Wireless & Networks (ワイ は、 携帯電話事業者からモバイル デー ヤレス&ネッ トワーク) ] > [Wi-Fi タの使用に対して追加料金が課されるこ とがあります。 settings (Wi-Fi設定) ] [Wi-Fi]をタッチしてオンにし、...
- Page 377 All manuals and user guides at all-guides.com • 利用可能なWi-Fiネッ トワークが一覧 • ネッ トワークがセキュリティ保護さ 表示されます。 セキュリティ保護さ れている場合は、 パスワー ドその他 れたネッ トワークにはロック アイコン の認証情報の入力を求めるプロン が付いています。 プ トが表示されます (詳しくは、 ネッ トワーク管理者にお問い合わせく ネッ トワークをタッチして接続し ださい) 。 ます。 状態バーに、 Wi-Fiの状態を示すア • ネッ トワークがオープンであれ イコンが表示されます。 ば、 [Connect ( 接続) ]をタッチして、 そのネッ...
-
Page 378: Bluetooth
ネッ トワークおよび装置への接続 All manuals and user guides at all-guides.com Bluetooth ヒン ト : LG-E730では、 Bluetoothを Bluetoothを使用してデータを送信で 高速でお楽しみいただけます。 きます。 この場合、 他の多くの携帯電 ファイルを共有する装置も高速 Bluetoothをサポー トしている場合は、 話のようにBluetoothメニューからで 自動的に高速ネッ トワーク経由でファイ はなく、 対応するアプリケーションを実 ルが転送されます。 Bluetoothの高速 行して送信します。 データ転送を使用する場合は、 事前に装 置のWi-Fiが[OFF]になっていることを 確認してください。 Bluetoothの高速 設定は、 装置によって異なります。 装置 の設定については、 サービス プロバイダ... - Page 379 All manuals and user guides at all-guides.com Bluetoothをオンにして電話を ペアリングする装置をリス トから選 Bluetooth装置とペアリングするには 択します。 [Applications (アプリケーショ ペアリングが正常に終了すると、 ご使用 ン) ] > [Settings (設定) ] > の装置がペアの装置に接続されます。 [Wireless & Networks ペアリングする装置がリス トにない場 (ワイヤレス&ネッ トワーク) ] > 合は、 対象の装置が[Discoverable [Bluetooth] > [ON] (検出可能) ]に設定されていることを [Bluetooth settings 確認してから、 再度スキャンします。 (Bluetooth設定) ] > [Scan for devices (装置のスキャン)...
- Page 380 all-gui des.c...
-
Page 381: 電話のデータ接続の共有
ネッ トワークおよび装置への接続 All manuals and user guides at all-guides.com 電話のデータ接続の共有 Bluetoothを使用した画像の送信 [Select a picture (画像の選 USBテザリングおよびポータブル 択) ] > [Menu (メニュー) ] > Wi-Fiホッ トスポッ トは、 利用できるワイ [Share (共有) ] > [Bluetooth] ヤレス接続がない場合に非常に役立ち ます。 電話のモバイル データ接続を [Bluetooth]が[ON]であることを USBケーブル経由で1台のコンピュー 確認した後、 [Scan for devices タと共有できます (USBテザリング) 。 (装置のスキャン) ]を選択します。 また、... - Page 382 All manuals and user guides at all-guides.com 電話がデータ接続を共有しているとき USBテザリングおよびポータブル は、 状態バーおよび通知 ドロワー (続 Wi-Fiホッ トスポッ トの設定を変更す 行中の通知として) にアイコンが表示 るには されます。 • [Applications (アプリケーショ ン) ] > [Settings (設定) ] > サポー トされている運営システムや [Wireless & Networks (ワイヤレ その他の詳細など、 テザリングおよ ス&ネッ トワーク) ] > [Tethering びポータブル ホッ トスポッ トに関する &...
-
Page 383: ポータブル ホッ トスポッ トの名前変更 またはセキュリティ保護
ネッ トワークおよび装置への接続 All manuals and user guides at all-guides.com ポータブル ホッ トスポッ トの名前 ヒン ト : 変更またはセキュリティ保護 コンピュータでWindows 7またはLinux が最近配信した一定のフレーバ (Ubuntu 電話機のWi-Fiネッ トワーク名 (SSID) など) を実行している場合は、 テザリング を変更したり、 Wi-Fiネッ トワークをセキ のためにコンピュータを準備する必要は ュリティで保護したりできます。 ありません。 ただし、 以前のバージョンの Windowsまたはその他の運営システムを [Home (ホーム) ]画面で 実行している場合、 USB経由でネッ トワー [Applications (アプリケ... - Page 384 All manuals and user guides at all-guides.com [Wireless & Networks (ワ [Configure Wi-Fi hotspot ( Wi- イヤレス&ネッ トワーク) ]をタッ Fiホッ トスポッ トを設定) ]をタッチ チし、 [Tethering & Portable します。 hotspot ( テザリング&ポータブル • [Configure Wi-Fi hotspot ( Wi-Fi ホッ トスポッ ト) ]を選択します。 ホッ...
- Page 385 ネッ トワークおよび装置への接続 All manuals and user guides at all-guides.com • また、 [Security (セキュリティ) ]メ ュータまたはその他の装置で電話機 ニューをタッチして、 事前共有キー のホッ トスポッ トに接続する際、 パス (PSK) を使用するWPA2 (Wi-Fi ワー ドを入力する必要があります。 Protected Access 2) セキュリテ [Security (セキュリティ) ]メニュー ィで、 ネッ トワークを設定することが の[Open (公開) ]をタッチして、 Wi- できます。 Fiネッ トワークのセキュリティを解除 することができます。...
- Page 386 all-gui des.c...
-
Page 387: Wi-Fi Castの使用
All manuals and user guides at all-guides.com Wi-Fi Castの使用 注意 ! Android搭載の電話機を使用して セキュリティ オプションを[Open (公 いるユーザーが、 同じWi-Fi/Wi-Fi 開) ]に設定すると、 他人によるオンライ ン サービスの不正利用を防止できなく Directedネッ トワーク経由で接続して なり、 追加的な料金が発生する可能性が いる場合、 音楽、 画像、 およびビデオ コ あります。 不正利用を防止するには、 セ ンテンツを共有できます。 キュリティ オプションを有効にしておく 事前にWi-Fi/Wi-Fi Directedネッ ト ことをお勧めします。 ワークを調べて、 ユーザーが同じネッ ト ワークに接続していることを確認して [Save (保存)... -
Page 388: Smartshareを介したWi-Fi Directでの共有の有効化
ネッ トワークおよび装置への接続 All manuals and user guides at all-guides.com SmartShareを介したWi-Fi [Applications (アプリケーショ ン) ]タブ > [Settings (設定) ] > Directでの共有の有効化 [Wireless & Networks (ワイ Wi-Fi Directは、 近くにあるWi-Fi ヤレス&ネッ トワーク) ] > [Wi-Fi Direct装置を自動的にスキャンしま Direct Settings (Wi-Fi Direct す。 装置が検出されるとリス トに表示 の設定) ] > [Wi-Fi Direct] > されます。... - Page 389 All manuals and user guides at all-guides.com [Applications (アプリケーショ [Forced Group owner mode (強 ン) ]タブ > [Settings (設定) ] > 制グループ オーナー モード) ] – タ [Wireless & Networks (ワイ ッチすると、 グループ オーナー モー ヤレス&ネッ トワーク) ] > [Wi-Fi ドが有効になります。 このモー ドで Direct Settings(Wi-Fi ダイレク は、 旧型のWi-Fi装置でも、 お使いの トの設定)...
-
Page 390: Smartshareの使用
ネッ トワークおよび装置への接続 All manuals and user guides at all-guides.com SmartShareの使用 メモ : お使いの電話機がグループ オー ワイヤレス ネッ トワーク経由 ナーになると、 クライアン トの場合より も、 電地の電力消費量が多くなります。 でデジタル コンテンツを共有 Wi-Fi Direct接続では、 インターネッ ト するために、 SmartShareで サービスは提供されません。 オンライン は、 DLNA (Digital Living Network サービスに接続してサービスを利用する Alliance) 技術が採用されています。 と、 追加料金が発生することがあります。 この機能をサポー トするには、 両方の ネッ トワーク プロバイダのデータ通信料 を確認してください。... - Page 391 All manuals and user guides at all-guides.com SmartShareをオンにしてコンテンツ • 他の装置からの共有要求を自動 の共有を可能にする方法 的に受け入れる場合は、 [Always accept request ( 要求を常に受け [Applications (アプリケー 入れる) ]をタッチします。 ション) ]タブ をタッチして [SmartShare]を選択します。 • 他の装置からお使いの電話機にファ イルを自動的にダウンロー ドする場 Menu (メニュー) キーを押して 合は、 [Receive files (ファイルを受 [Settings (設定) ]を選択します。 信) ]をタッチします。 [Discoverable (検出可能) ]チェ ックボックスをタッチしてオンにし...
- Page 392 all-gui des.c...
- Page 393 ネッ トワークおよび装置への接続 All manuals and user guides at all-guides.com [Sharing contents (コンテンツ リモート コンテンツ ライブラリのコン の共有) ]セクションで、 共有するコ テンツを他の装置と共有する方法 ンテンツ タイプのチェ ックマーク リモー ト コンテンツ ライブラリ (PC をタッチします。 [Pictures (画 など) のマルチメディア コンテンツを、 像) ]、 [Videos (ビデオ) ]、 および レンダラ 装置 (テレビなど) で再生で [Music (音楽) ]から選択します。 きます。...
- Page 394 All manuals and user guides at all-guides.com 右上のボタンをタッチするか、 レン 電話機のコンテンツをレンダラ 装置 ダラ リス トから装置を選択します。 (TVなど) で共有する方法 左上のボタンをタッチするか、 リモ メモ : レンダラ 装置が適切に設定されて ー ト コンテンツ ライブラリの装置 いることを確認してください。 を選択します。 コンテンツ ライブラリを参照する ギャラリー アプリケーションを使用 ことができます。 して画像またはビデオを閲覧して コンテンツのサムネイルをタッチ いる場合は、 ファイルをタッチし続 するか、 Menu (メニュー) キーを けてファイルを選択します。 これに 押して[Play ( 再生) ]ボタンを選択 より、...
- Page 395 ネッ トワークおよび装置への接続 All manuals and user guides at all-guides.com メニューの[Share (共有) ]をタ 注意 : このアプリケーションを使用するには、 装置がWi-Fi接続を使用してホーム ネッ トワ ッチして、 [SmartShare]を選択 ークと接続されていることを確認します。 一 します。 部のDLNA対応装置 (TVなど) は、 DLNAの SmartShareは、 ファイルが選択 DMP機能のみをサポー トしており、 レンダラ された状態で自動的に起動され 装置 リス トに表示されません。 お使いの装 ます。 置が、 一部のコンテンツを再生できない可能 性もあります。 ファイルを再生する装置を、 レンダ リモート...
- Page 396 All manuals and user guides at all-guides.com 左上のボタンをタッチするか、 リモ 電話機からリモート コンテンツ ライ ー ト コンテンツ ライブラリの装置 ブラリへコンテンツをアップロードす を選択します。 る方法 コンテンツ ライブラリを参照する メモ : SDカー ドが正しく取り付けられて ことができます。 おり、 設定メニューで[Receive files (フ コンテンツのサムネイルをタッチ ァイルを受信) ]がオンになっていること を確認します。 し、 [Download (ダウンロード) ] Menu (メニュー) キーをタッチし [Applications (アプリケー ます。 ション)...
- Page 397 ネッ トワークおよび装置への接続 All manuals and user guides at all-guides.com 左上のボタンをタッチして、 [My 注意 : 一部のDLNA対応装置は、 DMSアップ ロー ド機能をサポー トしていないため、 コン phone (本機) ]を選択します。 テンツがアップロー ドされません。 一部のコ コンテンツ ライブラリを参照する ンテンツ タイプはサポー トされていません。 ことができます。 コンテンツのサムネイルをタッチ し続けて、 [Upload (アップロー ド) ]Menu (メニュー) キーをタッ チします。 アップロー ドするリモー ト コンテ ンツ ライブラリがある装置を選択...
- Page 398 all-gui des.c...
-
Page 399: 連絡先への発信
通話 All manuals and user guides at all-guides.com 通話 ヒン ト : 国際電話を発信するために 「+ をタッチして、 キーパッ ドを開 をタッチし続 」 を入力するには、 けます。 きます。 キーパッ ドを使用して数字を入力 します。 数字を削除するには、 連絡先への発信 をタッチします。 をタッチして、 連絡先を開き 発信するには、 をタッチし ます。 ます。 連絡先リス トをスクロールする 通話を終了するには、 End (終了) ア か、... -
Page 400: 着信の応答と拒否
通話 All manuals and user guides at all-guides.com リス トで、 発信する連絡先をタッチ 留守番電話メッセージを送信する します。 場合は、 一番下にある[Excuse messages (拒否理由メッセージ) ]バ 着信の応答と拒否 ーを ドラッグします。 ロックされた状態で着信した場合、 ヒン ト : Excuse messages (拒否理 を右に ドラッグして、 着信に応答し 由メッセージ ます。 この機能を使用すると、 すぐにメッセー 着信を拒否するには、 を左に ドラッ ジを送信できます。 会議中に着信に応 グします。... -
Page 401: 通話音量の調整
All manuals and user guides at all-guides.com 通話音量の調整 発信するには、 をタッチします。 通話中に音量を調整するには、 電話機 両方の通話が、 通話画面に表示さ の左側にある音量を上げる/下げるキ れます。 最初の通話はロックされ、 ーを使用します。 保留になります。 通話を切り替えるには、 表示された 第2の通話の発信 番号をタッチします。 また、 会議通 最初の通話の途中でダイヤルパッ 話するには、 Merge calls (通話統 ド をタッチして番号をダイヤル 合) をタッチします。 します。 また連絡先 をタッチし て連絡先を検索し、 発信する番号を 選択できます。... -
Page 402: 通話ログの表示
通話 All manuals and user guides at all-guides.com 通話ログの表示 通話中の通話を終了するに は、 [End (終了) ]をタッチする [Home (ホーム) ]画面で をタッ か、 Home (ホーム) キーを押して チし、 [Call log (通話ログ) ]タブを選 通知バーを下にスライ ドし、 [End 択します。 call (通話を終了) ]を選択します。 発信通話、 着信通話、 不在着信を含め て、 すべての通話の完全なリス トが表 メモ... -
Page 403: 通話設定
All manuals and user guides at all-guides.com [Home (ホーム) ]画面で ヒン ト : 記録された項目をすべて削除 [Applications (アプリケーショ するには、 Menu (メニュー) キーを押し ン) ]タブ をタッチし、 アプリケ て、 [Delete all (すべて削除) ]をタッ ーション メニューを開きます。 チします。 スクロールして、 [Settings (設 定) ]をタッチします。 通話設定 [Call settings (通話の設定) ]を 通話の転送や通信事業者が提供する... - Page 404 all-gui des.c...
-
Page 405: 連絡先
連絡先 All manuals and user guides at all-guides.com 電話機に連絡先を追加します。 また、 こ [Search (検索) ]をタッチして、 れらの連絡先を、 Googleアカウン トの キーボー ドで連絡先の名前を入力 連絡先、 あるいは連絡先の同期をサポ します。 ー トするその他のアカウン トの連絡先 新しい連絡先の追加 と同期します。 をタッチして、 新しい連絡先 連絡先の検索 の番号を入力し、 Menu (メニュ ー) キーを押します。 [Add to [Home (ホーム) ]画面での操作 contacts (連絡先に追加)... -
Page 406: お気に入りの連絡先
All manuals and user guides at all-guides.com お気に入りの連絡先 新しい連絡先に画像を追加する場 合は、 画像領域をタッチします。 よく電話をかける連絡先は、 お気に入 [Capture picture (画像をキ りに分類できます。 ャプチャ) ]または[Pick from お気に入りへの連絡先の追加 Gallery (ギャラリーから取得) ]の をタッチして、 連絡先を開き どちらかを選択します。 ます。 をタッチして、 連絡先の種類を 詳細を表示するには、 連絡先をタッ 選択します。 チします。 連絡先情報のカテゴリをタッチし 連絡先名の右側にある星をタッチ て、 連絡先の詳細情報を入力し します。 星の色が青に変わります。 ます。... -
Page 407: 連絡先の移動
連絡先 All manuals and user guides at all-guides.com 古い電話機から新しい電話機への お気に入りリス トからの連絡先の削除 連絡先の移動 をタッチして、 連絡先を開き ます。 PCの同期プログラムを使用して、 連 詳細を表示するには、 [Groups ( 絡先をCSV形式で古い電話機から グループ) ]タブをタッチして、 リス PCにエクスポートします。 トの一番上にある[Favourites ( まず、 PC Suite IVをPCにイン お気に入り) ]を選択し、 連絡先を選 ス トールします。 プログラムを実 択します。 行し、 USBケーブルを使用して 連絡先名の右側にある青い星をタ Android携帯電話とPCを接続し ッチします。... - Page 408 All manuals and user guides at all-guides.com を選択します。 [File (ファイ PC Suite IVで電話機LG-E730 ル) ] > [Import ( インポート) ]を の (USBケーブルによる) 接続が 選択し、 PCに保存されているCSV 検出されたら、 [Sync (同期) ]また ファイルを選択します。 は[Sync contacts (連絡先を同 期) ]をクリ ックして、 PCに保存され インポー トされたCSVファイルの た連絡先と電話機を同期します。 フィール ドがPC Suite IVのフィ ール ドと異なる場合、 フィール ドの...
-
Page 409: メッセージの送受信
メッセージの送受信 All manuals and user guides at all-guides.com LG-E730では、 SMSとMMSが直感 連絡先名または連絡先番号を[To 的な使いやすいメニューに統合され (宛先) ]フィール ドに入力します。 ています。 連絡先名を入力すると、 一致する 連絡先が表示されます。 表示さ メッセージの送信 れた受信者をタッチすることがで [Home (ホーム) ]画面で きます。 複数の連絡先を追加で アイコンをタッチし、 [New きます。 message (新規メッセージ) ]を メモ : メッセージの送信先ごとに、 テキス タッチして空白のメッセージを開 ト メッセージの送信料が課金されます。 きます。... - Page 410 all-gui des.c...
- Page 411 All manuals and user guides at all-guides.com [Enter message (メッセージを メッセージを送信するに 入力) ]フィール ドをタッチして、 メッ は、 [Send (送信) ]をタッチします。 セージの作成を開始します。 メッセージ画面が開 Menu (メニュー) キーを押し き、 [Recipient Name/Number て、 [Options (オプション) ]メニュ (受信者名/番号) ]の後にメッセー ーを開きます。 [Add subject ジが表示されます。 返信が画面に (件名を追加) ]、 [Attach (添付) ] 表示されます。...
-
Page 412: スレッ ド化されるボックス
メッセージの送受信 All manuals and user guides at all-guides.com スレッ ド化されるボックス 警告 : 言語やSMSのコーディング方 他のユーザーとの間で送受信したメ 式によって、 160文字の制限は国ごとに ッセージ (SMS、 MMS) は、 時系列に 異なる場合があります。 沿って表示できます。 したがって、 会 話の概要を簡単に確認することがで 警告 : 画像、 ビデオ、 またはオーディ きます。 オ ファイルをSMSメッセージに追加す ると、 メッセージは自動的にMMSに変換 され、 それに応じた料金が課されます。... -
Page 413: Smiley(スマイリ)の使用
All manuals and user guides at all-guides.com Smiley(スマイリ)の使用 メッセージ設定の変更 スマイリを使用して、 楽しいメッセージ LG-E730のメッセージ設定は事前に を送信できます。 設定されているため、 メッセージをすぐ に送信できます。 この設定は、 必要に 新規メッセージの作成中に、 Menu 応じて変更することができます。 (メニュー) キーを押して、 [Insert Smiley (スマイリを挿入) ]を選択し [Home (ホーム) ]画面で ます。 [Messaging (メッセージング) ]アイ コンをタッチし、 Menu (メニュー) キー をタッチして[Settings (設定) ]をタ... -
Page 414: 電子メール
電子メール All manuals and user guides at all-guides.com 電子メール アカウン トの管理 電子メール アプリケーションを使用し て、 Gmail以外のサービスから受信し 電子メール アプリケーションを初めて た電子メールを読むことができます。 起動すると、 電子メール アカウン トの 電子メール アプリケーションは、 アカ 設定を支援する、 セッ トアップ ウィザー ウン ト タイプとして、 POP3、 IMAP、 ドが開かれます。 およびExchangeをサポー トします。 別の電子メール アカウン トを追加す 必要なアカウン ト設定は、 サービス プ る方法 : ロバイダまたはシステム管理者から入 • [Applications (アプリケーション)... - Page 415 All manuals and user guides at all-guides.com 最初のセッ トアップの後、 電子メール 電子メール アカウン トを削除する アプリケーションには、 受信ボックスの 方法 : 内容が表示されます。 複数のアカウン • [Applications (アプリケーション) ] トを追加した場合、 アカウン トを切り替 タブ > [Email (電子メール) ] > ア えることができます。 カウン ト画面でMenu (メニュー) キ ーをタッチ > [Settings (設定) ] 電子メール アカウン トの設定を変更 > 削除するアカウン トをタッチ > する方法...
- Page 416 all-gui des.c...
-
Page 417: 電子メール アカウン ト画面
電子メール All manuals and user guides at all-guides.com 電子メール アカウン ト画面 は、 [Accounts (アカウン ト) ]画面で アカウン トに使用されている色と同じ アカウン トをタッチして、 受信ボックス です。 を表示できます。 電子メールの送信に – フォルダ アイコンをタッチする 基本的で使用されるアカウン トには、 チ と、 アカウン ト フォルダが開きます。 ェ ックマークが示されます。 アカウン トの最新の電子メールのみ – タッチすると、 [Combined が電話機にダウンロー ドされます。 電 Inbox (... -
Page 418: アカウン ト フォルダの操作
All manuals and user guides at all-guides.com アカウン ト フォルダの操作 電子メールの作成と送信 各アカウン トには、 [Inbox ( 受信ボッ メッセージの作成と送信の方法 クス) ]、 [Outbox ( 送信ボックス) ] 電子メール アプリケーションで 、 [Sent ( 送信済み) ]、 および[Drafts ( Menu (メニュー) キーをタッチ 下書き) ]フォルダがあります。 アカウ し、 [Compose (メールの作成) ]を ン... - Page 419 電子メール All manuals and user guides at all-guides.com 必要に応じてCc/Bccにア ドレス に格納されます。 保留中のメッセ を追加し、 添付ファイルを追加し ージがある場合、 送信ボックスが ます。 [Accounts (アカウン ト) ]画面に表 示されます。 メッセージのテキス トを入力しま す。 ヒン ト : [Inbox ( 受信ボックス) ]で新し [Send (送信) ]ボタンをタッチし い電子メールを受信すると、 音またはバ ます。 イブレーションで通知されます。 通知を 停止するには、...
-
Page 420: カメラ
カメラ All manuals and user guides at all-guides.com ビューファインダの画面構成 S witch lenses (レンズの切り替え) – 背面のカメラ レンズと前面のカメ ラ レンズを切り替えます。 Zoom (ズーム) – ズーム インまたはズーム アウ トを実行します。 または、 側面のVolume (音量) キーを使用することもできます。 Brightness (明るさ) – このボタンでは、 画像に入る日光の量を制御 します。 Scene mode (被写体モード) – [Auto (自動) ]、 [Portrait ( ポートレー ト) ]、 [Landscape (ランドスケープ) ]、 [Sports (スポーツ) ]、 [Night ( 夜 間)... -
Page 421: 簡単な写真の撮影
カメラ All manuals and user guides at all-guides.com 簡単な写真の撮影 から指を離します。 カメラ アプリケーションを起動し 写真の撮影後 ます。 撮影した写真が画面に表示されます。 電話機を持って被写体にレンズを S martShare、 Bluetooth、 Share 向けます。 (共有) 電子メール、 Facebook、 を軽くタッチし続けると、 フォー Gmail、 メッセージ アプリ カス ボックスがビューファインダ画 ケーション、 Picasa、 面の中央に表示されます。 Social+、 Twitter、 また カメラの焦点が被写体に合うと、 はWi-Fi Castを使用して フォーカス ボックスが緑色になり 写真を共有できます。 ます。... - Page 422 all-gui des.c...
-
Page 423: 詳細設定の使用
All manuals and user guides at all-guides.com 画 像を削除します。 ヒン ト : SNSアカウン トを持っており、 続 けて別の写真を撮影します。 現 電話機にアカウン トが設定されている 場合、 SNSコミュニティで写真を共有 在の写真は保存されます。 できます。 詳細設定の使用 連 絡先のアイコンまたは Set as ビューファインダで をタッチする (用途の設定) 壁紙として画像を利用し と、 すべての詳細オプションが表示さ ます。 れます。 Rename 選 択した画像の名前を編 – カメラの設定をすべて基本的に (名前の変更)... - Page 424 カメラ All manuals and user guides at all-guides.com – いつでもその機能の操作方法に – 画像の解像度を選択します。 高 ついて確認できます。 タッチすると、 簡 い解像度を選択すると、 ファイル サイ 単なガイ ドが表示されます。 ズが大きくなります。 つまり、 メモリに 保存できる写真が少なくなります。 リス トをスクロールして、 カメラの設 定を変更します。 オプションを選択し – ISO感度は、 カメラの光センサ た後で、 Back (戻る) キーをタッチし の感度を決定します。 ISOの値が高く ます。 なると、 カメラの感度も高くなります。 暗い環境でフラッシュを使用できない – 特定の領域に焦点を合わせま 場合にこの機能が役立ちます。...
- Page 425 All manuals and user guides at all-guides.com – 写真に芸術的な効果を適用し – 電話機の位置情報ベースのサ ます。 ービスを有効にします。 どこで写真を 撮影しても、 その場所の位置情報がタ – 撮影ボタンを押した後の遅延時 グとして付けられます。 位置情報タグ 間を設定します。 写真にユーザー自身 をサポー トするブログにタグ付きの写 が入る場合に便利です。 真をアップロー ドすると、 写真を地図上 – さまざまな撮影モー ドを選択し に表示して閲覧できます。 ます。 – 直前に撮影した写真が自動的に メモ : この機能は、 GPSが有効な場合に 表示されます。 のみ利用できます。...
- Page 426 カメラ All manuals and user guides at all-guides.com ヒン ト : カメラを終了すると、 ホワイ ト バ ランス、 色調、 タイマー、 被写体モー ドな ど、 一部の設定が基本的に戻されます。 次の写真を撮影する前に、 これらの設定 を確認してください。 ヒン ト : [Settings (設定) ]メニューは、 ビューファインダの上に重ねて表示され ます。 したがって、 画像の色要素や画質 などを変更すると、 [Settings (設定) ]メ ニューの背後で、 画像が変化することを 確認できます。...
-
Page 427: ビデオ カメラ
ビデオ カメラ All manuals and user guides at all-guides.com ビューファインダの画面構成 S witch lenses (レンズの切り替え) – 背面のカメラ レンズと前面のカメ ラ レンズを切り替えます。 Z oom (ズーム) – ズーム インまたはズーム アウ トを実行します。 また は、 側面のVolume (音量) キーを使用することもできます。 Brightness (明るさ) – このボタンでは、 ビデオに入る日光の量を制 御します。 Video size (ビデオ サイズ) – 録画するビデオのサイズ (ピクセル単位) を設定します。 Settings (設定) – このアイコンをタッチして、 [Settings (設定) ]メニ ューを開きます。... - Page 428 all-gui des.c...
-
Page 429: 簡単なビデオの撮影
ビデオ カメラ All manuals and user guides at all-guides.com 簡単なビデオの撮影 録画 ボタンを一度押して録画 を開始します。 カメラ モー ド ボタンを下にスラ ビューファインダの一番下に、 ビデ イ ドして、 アイコンを に変更し オの撮影時間を示すタイマとREC ます。 という文字が表示されます。 ビデオ カメラのビューファインダ 録画を停止するには、 画面で を が画面に表示されます。 タッチします。 電話機を持って、 ビデオの被写体に レンズを向けます。... -
Page 430: ビデオの撮影後
All manuals and user guides at all-guides.com ビデオの撮影後 選 択したビデオの名前を Rename (名前の変更) 編集します。 ビデオを表す静止画像が画面に表示 されます。 続 けて別のビデオを撮影します。 現在のビデオは保存されます。 ビ デオを再生します。 Play (再生) 直 前に撮影したビデオを削除しま S martShare、 Bluetooth、 Share す。 実行時には、 [OK]をタッチし 電子メール、 Facebook、 (共有) て確認します。 ビューファインダ Gmail、 メッセージング、 が再表示されます。 Wi-Fi Cast、 または Youtubeを使用して写真... -
Page 431: 詳細設定の使用
ビデオ カメラ All manuals and user guides at all-guides.com 詳細設定の使用 選択した後で、 Back (戻る) キーをタ ッチします。 ビューファインダで をタッチする – さまざまな明るさの状況で、 色 と、 すべての詳細オプションが表示さ の品質を改善します。 れます。 – 新しい画面に使用する色調を選 – ビデオ カメラの設定をすべて基 択します。 本的に戻します。 – ビデオの撮影時間の制限を設 – いつでもその機能の操作方法に 定します。 [Normal (標準) ]を選択す ついて確認できます。 タッチすると、 簡 るか、 最大サイズを制限してMMSメ 単なガイ ドが表示されます。 ッセージとして送信する[MMS]を選... -
Page 432: ビデオ再生時の音量調整
All manuals and user guides at all-guides.com – 音なしでビデオを録画するに は、 [Mute (ミュート) ]を選択します。 – 自動レビューでは、 直前に録画し たビデオが自動的に表示されます。 ビデオ再生時の音量調整 再生時にビデオの音量を調整するに は、 電話機の左側にあるVolume (音 量) キーを使用します。... -
Page 433: マルチメディア
にアクセスできるように、 メモリ カー クセスできるようにするには、 電話機に ドにマルチメディア ファイルを保存 メモリ カー ドが取り付けられていること できます。 を確認してください。 メモリ カー ドがな い場合、 Picasaアルバムに保存されて ギャラリー いるPicasa画像を除いて、 写真または ビデオが電話機に表示されません。 Applications (アプリケーション) タ ブ をタッチして、 [Gallery (ギャラ リー) ]を選択します。 マルチメディア タイムライン表示 ファイルがすべて保存されたカタログ LG-E730ギャラリーでは、 写真とビデ バーのリス トが開きます。 オをタイムライン表示できます。 グリ ッ ド表示モー ドで を右に ド... - Page 434 all-gui des.c...
-
Page 435: Usb大容量ス トレージ 装置を使用した 音楽ファイルの転送
写真の撮影日が表示されます。 特定 用した音楽ファイルの転送 の日付を選択すると、 その日に撮影し USBケーブルを使用して た写真がまとめて表示されます。 LG-E730をPCに接続します。 PCにLG Android Platform 音楽 Driverがインス トールされていな LG-E730には、 音楽プレーヤが搭載 い場合は、 設定を手動で変更する されており、 お気に入りの音楽をすべ 必要があります。 [Settings (設 て再生できます。 音楽プレーヤにアク 定) ] > [Storage (ス トレージ) ] セスするには、 [Music (音楽) ]をタッ を選択して、 [Mass storage チします。 only (大容量ス トレージ専用) ]を... -
Page 436: 曲の再生
マルチメディア All manuals and user guides at all-guides.com [Turn on USB storage (USB メモ : LG Android Platform Driverを ス トレージをオンにする) ]をタッ インス トールすると、 USBス トレージを チします。 オンにするように指示するポップアップ がすぐに表示されます。 PCで大容量ス トレージの内容を確 認して、 ファイルを転送できます。 曲の再生 メモ : SDカー ドを最初に取り付ける必要 [Home (ホーム) ]画面で があります。 SDカー ドがないと、 USB 大容量ス... - Page 437 All manuals and user guides at all-guides.com 再生する曲を選択します。 音楽ライブラリ画面を表示し ます。 再生を一時停止します。 繰り返しモー ドに切り替えま 再生を再開します。 す。 アルバム、 プレイリス ト、 または 現在のプレイリス トをシャフル シャ ッフルの曲順で、 次の曲に モー ドで再生します。 スキップします。 現在のプレイリス トを表示し アルバム、 プレイリス ト、 または ます。 シャ ッフルの曲順で、 前の曲に 歌詞を表示します。 このオプシ スキップします。 ョンは、...
- Page 438 マルチメディア All manuals and user guides at all-guides.com 音楽の再生中に音量を調節するには、 メモ : 音楽ファイルの著作権は、 国際条約 電話機の左側にある音量を上げる/下 と各国の著作権法によって保護されて げるキーを押します。 いることがあります。 リス ト内の任意の曲をタッチし続けま したがって、 音楽の再生またはコピーの 際に、 許可やライセンスの取得が必要に す。 オプションとして、 [Play (再生) ] なる場合があります。 、 [Add to playlist ( プレイリス トに追 一部の国では、 著作権がある作品の個人 加) ]、 [Use as ringtone (着信音とし 的なコピーが国内法により禁止されて...
-
Page 439: Fmラジオ
All manuals and user guides at all-guides.com FMラジオ ラジオ局の検索 LG-E730には、 FMラジオが搭載され 手動または自動でラジオ局を探して、 ているので、 お気に入りのラジオ局に ラジオ局の周波数に合わせることが 周波数を合わせて、 どこででも音楽を できます。 検索されたラジオ局は、 特 聴くことができます。 定のチャンネル番号に保存されるた め、 次回からは自分で探す必要はあり メモ : ラジオを聴くには、 ヘッ ドフォンを ません。 使用する必要があります。 ヘッ ドフォン お使いの電話機では、 最大48チャンネ は、 ヘッ ドホン ジャ ックに差し込んでく ルを保存できます。... - Page 440 all-gui des.c...
- Page 441 マルチメディア All manuals and user guides at all-guides.com 自動的な検索 を開始しますか?) 」 と質問するポッ プアップが表示されます。 [OK]を [Home (ホーム) ]画面で 選択すると、 設定済みのチャンネル [Applications (アプリケーシ はすべて削除され、 [Auto scan ( ョン) ]タブ をタッチし、 [FM 自動スキャン) ]が開始されます。 Radio (FMラジオ) ]を選択します。 自動スキャンの実行時にスキャン Menu (メニュー) キーを押して を停止する場合は、 [Stop (停止) ] [Auto scan (自動スキャン)...
- Page 442 All manuals and user guides at all-guides.com メモ : オンスクリーン ホイールを使用し て、 手動でラジオ局の周波数に合わせる こともできます。 ヒン ト : ヘッ ドセッ ト コー ドにはラジオ ア ンテナの役割もあるため、 ラジオの受信 感度を改善する場合は、 ヘッ ドセッ ト コー ドを伸ばしてください。 ラジオの受信用ではないヘッ ドセッ トを 接続すると、 受信感度が損なわれること があります。...
-
Page 443: ユーティリティ
ル ロック) ]を設定し、 ラベルを追 Applications (アプリケーショ 加してアラームに名前を付けます。 ン) タブ > [Alarm/Clock (ア [Save (保存) ]をタッチします。 ラーム/時計) ] > > [New alarm (新しいアラーム) ] 計算機の使用 時刻を設定すると、 LG-E730で Applications (アプリケーション) は、 アラームが鳴るまでどのくら タブ > [Calculator ( 計算機) ] いの時間が残っているのか表示さ 数字キーをタッチして数字を入力 れます。 します。 [Snooze duration (スヌーズ時 間) ]、 [Vibration (バイブレーシ... -
Page 444: カレンダへの予定の追加
All manuals and user guides at all-guides.com カレンダへの予定の追加 単純な計算の場合は、 演算記号 ([+]、 [-]、 [x]、 または[÷]) をタッチ Applications (アプリケーション) し、 続けて[=]をタッチします。 タブ > [Calendar ( カレンダ) ] 複雑な計算の場合は、 Menu (メニ 予定を確認するには、 日付をタッチ ュー) キーを押して[Advanced します。 新しい予定を追加する場 panel (詳細パネル) ]をタッチ 合は、 Menu (メニュー) キーをタッ し、 [sin (サイン) ]、 [cos (コサイ チします。... -
Page 445: カレンダの表示の変更
ユーティ リティ All manuals and user guides at all-guides.com カレンダの表示の変更 また[Where (場所) ]をタッチして、 場所を入力します。 Applications (アプリケーション) 予定にメモを追加する場合 タブ > [Calendar ( カレンダ) ] は、 [Description (説明) ]をタッチ 画面の一番上には、 さまざまな種類 して詳細を入力します。 のカレンダ表示 ([Day ( 日付) ]、 アラームを繰り返す場合は、 必要に [Week ( 週) ]、 [Month (月) ]、 応じて[Repetition (繰り返し)... - Page 446 all-gui des.c...
-
Page 447: Polaris Office
All manuals and user guides at all-guides.com Polaris Office ス ト、 削除など、 便利なファイル管理機 能をモバイル ユーザーに提供します。 Polaris Officeは、 プロフェ ッショナル なモバイル オフィス ソリューションで ファイルの表示 す。 ユーザーはモバイル 装置を使用し 現在、 モバイル ユーザーは、 モバイル て、 Word、 Excel、 PowerPointファイ 装置で、 Microsoft Office ドキュメン ルなど、 さまざまな種類のオフィス ド トやAdobe PDFなど、 さまざまな種 キュメン トをいつでもどこでも簡単に 類のファイルを簡単に表示できます。 表示できます。 Polaris Officeを使用して ドキュメン トを表示する場合、... -
Page 448: Web
All manuals and user guides at all-guides.com ブラウザ Webツールバーの使用 ブラウザを使用すると、 携帯電話でゲ 前 のページに戻ります。 ーム、 音楽、 ニュース、 スポーツ、 エンタ 次 のページ (現在のページの後 ーテイメン トなどの世界をスピーディ にあり、 既にアクセスしていたペ にフルカラーで楽しむことができます。 ージ) に進みます。 このアイコン どこにいても、 楽しみが尽きることはあ では、 Back (戻る) キーを押した りません。 場合とは逆の操作が実行されま す。 Back ( 戻る) キーでは、 前の メモ... -
Page 449: オプションの使用
All manuals and user guides at all-guides.com 新 しいウィン ドウを追加します。 A dd bookmark (ブックマークの 追加) – 現在のWebページをブッ W ebブラウザの設定を変更し クマークとして追加します。 ます。 Read it later ( 後で読む) – オプションの使用 [Read it later ( 後で読む) ]に追 オプションを表示するには、 Menu (メ 加されます。 ニュー) キーを押します。 Add RSS Feed (RSSフィード B ookmarks (ブックマーク)... - Page 450 All manuals and user guides at all-guides.com • Page info (ページ情報) : Webペー More (その他) ジの情報を表示します。 • Find on page (ページ内の検索) : • Downloads (ダウンロード) : ダウン 現在のWebページで文字または語 ロー ドの履歴を表示します。 句を検索します。 • Select text ( テキス トを選択) : Webページ内のテキス トをコピー します。 • Add shortcut to Home (ホーム にショートカッ...
-
Page 451: Lg On-Screen Phone 2.0
LG On-Screen Phone 2.0 All manuals and user guides at all-guides.com LG On-Screen Phone 2.0で [ On-Screen Phone (オンスクリ は、 USB、 Bluetooth、 またはWi-Fi接 ーン電話]ウィン ドウを回転します ( 続を経由して、 携帯電話の画面をPC 回転をサポー トするアプリケーショ 上に表示できます。 ンでのみ利用可能) 。 またマウスやキーボー ドを使用し L G Home Panoramaを起動 て、 PCから携帯電話を制御できます。 するか、 [On-Screen Phone (オ ンスクリーン電話) ]の設定を変更... - Page 452 all-gui des.c...
-
Page 453: On-Screen Phone 2.0の機能
LG On-Screen Phone 2.0 All manuals and user guides at all-guides.com • キーボードからのテキス ト入力 : コン O n-Screen Phoneウィン ドウを ピュータのキーボー ドを使用して、 テ 最大化します。 キス ト メッセージまたはメモを作成 O n-Screen Phoneウィン ドウを できます。 最小化します。 • ファイル転送 (携帯電話からPCへ) : On-Screen Phone 2.0の機能 ファイル (ギャラリー、 ビデオ プレー • リアルタイムの転送と制御 : PC接続... - Page 454 All manuals and user guides at all-guides.com • ファイル転送 (PCから携帯電話へ) : • LG Home Panorama : LG Home PCから携帯電話にファイルを送信 の全作業領域を表示します。 アイ します。 転送するファイルを選択し コンやウィジェ ッ トを簡単に分類した て、 [On-Screen Phone]ウィン ド り、 ショー トカッ トをダブルクリ ックし ウにファイルを ドラッグ アン ド ドロ てアプリケーションを実行したりで ップするだけで送信できます。 送信 きます。 ファイルは、 OSPフォルダに保存さ...
-
Page 455: PcへのOn-Screen Phoneのインス ト ール
LG On-Screen Phone 2.0 All manuals and user guides at all-guides.com PCへのOn-Screen Phoneのイ 電話機のPCへの接続 ンス トール On-Screen Phone 2.0で は、 USB、 Bluetooth、 およびWi-Fiで LG PC Suite IVをインス トールする の接続が可能です。 場合、 On-Screen Phoneプログラム OSPプログラムの接続ウィザー ドの手 もPCにダウンロー ドされます。 ダウ 順に従ってください。 ンロー ドされたら、 PCにOn-Screen Phoneをインス トールします。... -
Page 456: On-Screen Phoneの接続の確認
All manuals and user guides at all-guides.com On-Screen Phoneの接続の メモ : [Settings (設定) ] > [Wireless 確認 & network (ワイヤレス&ネッ トワ ーク) ] > [On-Screen Phone 装置を接続したら、 [Home (ホーム) ] settings (オンスクリーン電話設定) ] 画面の一番上にある状態バーを下に ド で、 [On-Screen Phone (オンスクリー ラッグして、 On-Screen Phoneの接 ン電話) ]チェ ック ボックスがオンになっ 続状態を確認します。... -
Page 457: Pcと電話機との接続の切断
LG On-Screen Phone 2.0 All manuals and user guides at all-guides.com PCと電話機との接続の切断 [On-Screen Phone]ウィン ドウの左 上にある をクリ ックします。 また は[Home (ホーム) ]画面の一番上に ある通知バーを下に ドラッグして、 [On- Screen Phone connected (オン スクリーン電話接続中) ]を選択しま す。 接続切断のダイアログ ボックスで [OK]をタッチします。... - Page 458 all-gui des.c...
-
Page 459: Wireless & Networks (ワイヤレス& ネッ トワーク
設定 All manuals and user guides at all-guides.com [Home (ホーム) ]画面で Airplane mode (機内モード) – 機内 Applications (アプリケーション) モー ドに切り替えると、 すべてのワイヤ タブ をタッチし、 スクロールして レス接続が無効になります。 [Settings (設定) ]をタッチします。 Wi-Fi – 利用可能なWi-Fiネッ トワー クに接続するためにWi-Fiをオンにし Wireless & Networks (ワイヤ ます。 レス&ネッ トワーク) Wi-Fi settings (Wi-Fi設定) – ワイ このオプションでは、... - Page 460 設定 All manuals and user guides at all-guides.com にアクセスします。 Menu (メニュー) ヒント : MACアドレスの取得方法 キーを押して[Advanced (詳細) ]を MACフィルタがある一部のワイヤレス ネッ ト タッチします。 ワークで接続を設定する場合、 LG-E730の MACア ドレスをルーターに入力する必要があ Wi-Fi Direct Settings (Wi-Fi る場合があります。 Directの設定 – Wi-Fi Directの装 MACア ドレスは、 次のユーザー インターフェ 置名を設定して、 他の装置をスキャン イスで確認できます。 [Application (アプリ します。 ケーション) ]タブ > [Settings (設定) ] >...
- Page 461 All manuals and user guides at all-guides.com Bluetooth – Bluetooth装置に接 Tethering & portable hotspot ( 続するためにBluetoothをオンにし テザリング&ポータブル ホッ トスポッ ます。 ト) – USBテザリングとポータブル Wi-Fiホッ トスポッ トの設定を指定で Bluetooth settings (Bluetooth設 きます。 定) – 装置名と検出可能モー ドを設定 し、 他の装置をスキャンします。 また、 VPN settings (VPN設定) – 設定 電話機が最後にBluetooth装置をス 済みの仮想プライベー ト ネッ トワーク キャンしたときの検出装置に加えて、...
-
Page 462: 通話設定
設定 All manuals and user guides at all-guides.com 通話設定 Mobile networks (モバイル ネッ ト ワーク) – データ ローミング、 ネッ トワ <Fixed Dialing Numbers (固定電 ーク モー ド/通信事業者、 アクセス ポ 話番号) > イン ト名 (APN) などのオプションを設 [Fixed Dialing Numbers (固定電 定します。 話番号) ]を選択してオンにし、 電話機 On-Screen Phone settings (オ からダイヤルできる番号のリス... - Page 463 All manuals and user guides at all-guides.com <Voicemail (ボイスメール) > <Other call settings (その他の通 話設定) > Voicemail service (ボイスメール サービス) – 通信事業者のボイスメー Call barring (通話制限) – 通話を制 ル サービスを選択できます。 限したい場合に選択します。 通話制限 のパスワー ドを入力してください。 サ Voicemail settings (ボイスメール ービスの詳細については、 通信事業者 設定) – 通信事業者のボイスメール にお問い合わせください。 サービスを利用している場合は、 この オプションを使用して、...
- Page 464 all-gui des.c...
- Page 465 設定 All manuals and user guides at all-guides.com れかを選択します。 Call forwarding (着信転送) – 話 し中、 無応答、 または信号なしの場合 Excuse messages (拒否理由メッ に、 着信を転送するかどうかを選択し セージ) – 着信を拒否したい場合に、 ます。 この機能を使用して短いメッセージを 送信できます。 会議中、 着信の拒否が Call duration (通話時間) – すべて 必要な場合に便利です。 の通話、 発信、 着信と、 最後の通話の通 話時間を表示します。 Video call settings (ビデオ通話 設定)...
- Page 466 All manuals and user guides at all-guides.com 音響 Additional settings (その他の設 定) – 次の設定を変更できます。 <General (全般) > • Caller ID (発信者番号) : 発信時に Silent mode (サイレン ト モード) – 自分の電話番号を表示するかどう (着信音や通知音を含む) すべての音 かを選択します。 を消すことができます。 ただし、 音楽や • Call waiting (割り込み通話) : 割り ビデオのオーディオと設定されている 込み通話を有効にした場合、...
- Page 467 設定 All manuals and user guides at all-guides.com Vibrate (バイブ モード) – コールの <Incoming calls (着信コール) > 着信時に、 電話機が振動するように設 Phone ringtone (電話の着信音) 定できます。 – 基本的のコール着信音を設定でき ます。 Volume (音量) – 着信音、 メディア、 およびアラームの音量を設定できま <Notifications (通知) > す。 [use incoming call volume Notification ringtone (通知の着 for notifications (着信音と通知音の 信音) – 基本的の通知着信音を設定 音量を同じにする)...
- Page 468 All manuals and user guides at all-guides.com <Feedback (フィードバック) > Screen lock sounds (ディスプレイ のロック音) – ディスプレイをロック/ Audible touch tones (タッチ トー ロック解除したとき、 音を鳴らすよう設 ン音) – ダイヤルパッ ドを使って電話 定できます。 番号を入力するとき、 音を鳴らすよう 設定できます。 Haptic feedback ( 触覚フィー ドバッ ク) – ソフ ト キーにタッチしてその他 Audible selection (音の選択) – ボ の操作を実行するとき、...
-
Page 469: ディスプレイ
設定 All manuals and user guides at all-guides.com ディスプレイ Screen timeout ( 画面タイムアウ ト) – 画面表示のタイムアウ ト時間を Brightness (明るさ) – 画面の明る 設定します。 さを調整します。 Display font ( 表示フォン ト) – 表示 Auto-rotate screen (画面の自動 フォン トを変更します。 回転) – 電話機を回転したとき、 自動 的に画面の表示方向を変えるよう設 Gesture (ジェスチャ) 定します。 Use motion gestures (モーション Animation (アニメーション)... - Page 470 all-gui des.c...
-
Page 471: Location & Security ( ロケーション およびセキュリティ
All manuals and user guides at all-guides.com Reset gesture sensor ( ジェスチ できる近隣の場所が検出されます。 こ ャ センサのリセッ ト) – 電話機を平ら のオプションを選択すると、 現在の位 な場所に置いてモーション センサを 置情報を使用したサービスの提供を 調整します。 Googleに許可するかどうかをたずね るメッセージが表示されます。 Location & security (ロケーシ Use GPS satellites (GPSの使 ョンおよびセキュリティ) 用) – [Use GPS satellites (GPS Use wireless networks (ワイヤ の使用)... - Page 472 設定 All manuals and user guides at all-guides.com Set up screen lock (ディスプレイ 電話機の電源をオンにするか、 ディス のロック設定) – 電話機を安全な状態 プレイがスリープ モー ドから回復する にするロック解除パターンを設定しま と、 ディスプレイのロックを解除するロ す。 ディスプレイのロック解除パター ック解除パターンの入力を要求するメ ンの設定手順を示す画面が開きます。 ッセージが表示されます。 [PIN]または[Password (パスワー Set up SIM/RUIM card ド) ]を[Pattern (パターン) ]の代わり lock (SIM/RUIMカードのロック設 に指定するか、 [None (なし) ]のままに 定)...
- Page 473 All manuals and user guides at all-guides.com Visible passwords (パスワードの Install from SD card (SDカードか 表示) – オンにするとパスワー ドの入 らインス トール) – SDカー ドから暗号 力時にパスワー ドが表示され、 オフにす 化された証明書をインス トールするよ るとパスワー ドは表示されません。 う選択します。 Select device administrators ( Set password (パスワードの設定) 装置管理者の選択) – 1人または複数 – 認証情報の保管用パスワー ドを設定 の管理者を追加します。...
-
Page 474: Applications (アプリケーション
設定 All manuals and user guides at all-guides.com Applications (アプリケーション) 警告 アプリケーションを表示および管理で インス トールするアプリケーションによっ きます。 ては、 携帯電話が正しく動作しなくなる ことがあります。 また、 現在の位置情報 Unknown sources (提供元不 が不正に使用され、 インターネッ トを通 明) – 市販されていないアプリケーシ じて個人情報に外部からアクセスされる ョンをインス トールします。 基本的の おそれがあります。 設定です。 電話機および個人データを保護するた めに、 Android Marketなどの信頼でき る提供元からのアプリケーションだけを ダウンロー ドするようにしてください。... - Page 475 All manuals and user guides at all-guides.com Manage applications (アプリケー Storage use (ス トレージの使用 ションの管理) – インス トール済みの 率) – アプリケーションが使用してい アプリケーションを管理および削除し るス トレージの容量を表示します。 ます。 Battery usage (電地の使用率) – Running services (実行中のサー 電地の使用量を表示します。 ビス) – 現在実行中のサービスを確 Development ( 開発) – アプリケーシ 認します。 ョン開発のオプションを設定します。...
- Page 476 all-gui des.c...
-
Page 477: Accounts & Sync (アカウン トおよび 同期
設定 All manuals and user guides at all-guides.com Accounts & sync (アカウン ト できません) 。 および同期) Auto-sync (自動同期) – アプリケー ションによる自動的なデータの同期、 <General sync settings (一般同 送信、 および受信を許可します。 期設定) > <Manage accounts (アカウン ト Background data (バックグラウン の管理) > ド データ) – アプリケーションの使用 中であるかどうかに関係なく、... -
Page 478: Privacy (プライバシー
All manuals and user guides at all-guides.com Privacy (プライバシー) 電話機をリセッ トしても、 ダウンロー ド 済みのシステム ソフ トウェア更新プロ Factory data reset ( 工場出荷時の グラムや、 microSDに保存された音 状態へデータをリセッ ト) – [Factory 楽/写真などのファイルは消去されま data reset ( 工場出荷時に設定され せん。 この方法で電話機をリセッ トす たデータのリセッ ト) ]を選択すると、 電 ると、 Androidの初回起動時と同じ情 話機の内部記憶領域から (Googleア 報を再入力するようにメッセージが表... -
Page 479: Storage (ス トレージ
設定 All manuals and user guides at all-guides.com Storage (ス トレージ) <SD card (SDカード) > 利用可能なSDカー ドの空き容量 <USB connection mode (USB接 を確認します。 安全に取り外すに 続モード) > は、 [Unmount SD card (SDカード Mass storage only (大容量ス トレ のアンマウン ト) ]をタッチします。 SD ージのみ) – メモリ カー ドが挿入さ カー... -
Page 480: Language & Keyboard (言語& キーボー ド
All manuals and user guides at all-guides.com Language & keyboard (言 Voice input & output ( 音声の 語&キーボード) 入出力) [Language & keyboard (言語&キ <Voice input ( 音声入力) > ーボー ド) ]設定を使用して、 電話機に Voice recognition settings (音 表示するテキス ト&オンスクリーン キ 声認識設定) - [Voice recognition ーボー ドで使用する言語/地域を選択 settings (音声認識設定)... - Page 481 設定 All manuals and user guides at all-guides.com • Language (言語) : テキス ト入力 • Block offensive words (不快な に使用する言語の設定画面が開き 言葉のブロック) : このオプションをオ ます。 フにすると、 音声入力されたテキス ト は、 Googleの音声認識機能によって • SafeSearch : Google 認識され、 一般に不快とされている SafeSearchフィルタを使用して特 言葉であってもそのままテキス トに 定の検索結果をブロックするかどう 変換されます。 このオプションをオン かを設定するダイアログ ボックスが にすると、 音声認識機能によって不快 開きます。...
- Page 482 all-gui des.c...
- Page 483 All manuals and user guides at all-guides.com <Voice input ( 音声入力) > • Listen to an example (サンプル の試聴) : 現在の設定を使用して、 音 Text-to-speech settings (音 声シンセサイザの短いサンプルを再 声変換設定) – [Text-to-speech 生します。 settings (音声変換設定) ]を使用し て、 この機能を使用できるアプリケーシ • Always use my settings (常に ョンのAndroid音声変換シンセサイザ 自分の設定を使用する) : このオプシ を設定します。...
- Page 484 設定 All manuals and user guides at all-guides.com • Default Engine (基本的のエンジ トールされている場合、 この設定は ン) : 複数の音声変換アプリケーショ 使用できません。 ンがインス トールされている場合に、 • Speech rate (スピーチ速度) : シン 使用するアプリケーションを設定する セサイザの再生速度を選択するダイ ダイアログが開きます。 アログが開きます。 • Install voice data (音声データの • Language (言語) : シンセサイザ インス トール) : 音声シンセサイザ デ が読み上げるテキス...
-
Page 485: Accessibility (ユーザー補助
All manuals and user guides at all-guides.com Date & time (日付/時刻) 場合に特に便利です。 • Pico TTS (ピコTTS) : ピコTTSの [Date & time (日付/時刻) ]設定を 設定を行います。 使用して、 日付の表示形式を設定しま す。 また、 これらの設定を使用して、 モ Accessibility (ユーザー補助) バイル ネッ トワークから現在の時刻を [Accessibility (ユーザー補助) ]設 取得する代わりに、 時刻とタイムゾーン 定を使用して、 電話機にインス トール を独自に設定することもできます。... -
Page 486: Phone Software Update (電話ソフ ト ウェア アップデー ト
設定 All manuals and user guides at all-guides.com Phone software update (電話 を使用して、 電話機のファームウェアを ソフ トウェア アップデート) 最新バージョンに更新できます。 この 機能は、 LGがお使いの装置用に新しい LG携帯電話ソフ トウェアを、 インター バージョンのファームウェアを開発した ネッ トを使用して更新します。 場合のみ使用可能です。 この機能の使用方法について 携帯電話のファームウェア アップデー は、 http://update.lgmobile. トを実行する場合は、 アップデー ト プ comまたはhttp://www.lg.com/ ロセスの実行中、 常にユーザー入力が common/index.jspにアクセスして、 必要になるため、 ステップごとに表示さ... - Page 487 LG Mobile Phone software を取り外すと、 携帯電話に深刻な損傷 update via Over-the-Air ( OTA) を与える場合がありますので、 ご注意 (LG携帯電話のソフ トウェア アップ ください。 デートをOTAで実行する) この機能を使用すると、 USBデータ 注 : LGは、 その自由裁量により、 一部のモ ケーブルを接続しなくても、 OTA (無 デルのみを対象にファームウェア アップ 線) で携帯電話のソフ トウェアを最新 デー トを公開する権利を留保しており、 バージョンに更新できます。 この機能 すべてのハン ドセッ ト モデルについて最 新バージョンのファームウェアを公開す...
- Page 488 all-gui des.c...
-
Page 489: Divxモバイル
設定 All manuals and user guides at all-guides.com まず、 携帯電話のソフ トウェア バー 変更することも可能です。 ジョンを確認します ([Settings (設 注 : この機能は、 ネッ トワーク通信事業 定) ] > [About phone (バージョン 者、 地域、 および国によって異なります。 情報) ] > [Software update (ソフ トウェア アップデート) ] > [Check DivXモバイル now for update (今すぐアップデー トを確認) ]) DivXビデオについて... - Page 490 All manuals and user guides at all-guides.com DivXビデオに変換するソフ トウェア ツ プレミアム コンテンツを含め、 640 ールについては、 divx.comにアクセス x 480までのDivX ビデオを再生で ® してください。 きる、 DivX Certified を取得済み ® です。 DivXオンデマン ド動画について : 購入 したDivXオンデマン ド動画 (VOD) の DivX 、 DivX Certified 、 および関 ® ®...
- Page 491 設定 All manuals and user guides at all-guides.com 通知 : オープンソース ソフ トウェア GPL、 LGPL、 MPL、 その他のオープン ソース ライセンスで該当のソース コー ドを取得する方法については、 http:// opensource.lge.com/をご覧くだ さい。 ソース コー ドをダウンロー ドすると、 関 連するライセンス条件、 免責条項、 およ び通知事項のすべてを参照できます。...
-
Page 492: 付属品
付属品 All manuals and user guides at all-guides.com LG-E730では、 次の付属品を使用できます (一部の付属品はオプションです) 。 旅行用アダプタ 電地 ステレオ イヤホン データ ケーブル ユーザー ガイ ド LG-E730とPC LG-E730の使 の接続に使用し い方が記載され ます。 ています。 注 : • L Gの正規付属品を必ずご使用ください。 • そ の他の製品をご使用になると、 保証が無効になる場合があります。 • 付 属品は地域によって異なる場合があります。... - Page 493 Name 最高 : + 55° C (放電中) 、 LG Electronics Inc Address LG Twin Tower 20,Yeouido-dong, Yeongdeungpo-gu Seoul, Korea 150-721 +45° C (充電中) Product Details Product Name GSM 850 / E-GSM 900 / DCS 1800 / PCS 1900 Quad Band and WCDMA Terminal Equipment 最低...
- Page 494 all-gui des.c...
-
Page 495: トラブルシューティング
トラブルシューティング All manuals and user guides at all-guides.com この章では、 電話機の使用時に発生する可能性がある、 いくつかの問題について 説明します。 一部の問題では、 サービス プロバイダへの連絡が必要になります が、 ほとんどの場合はご自分で簡単に解決できます。 メッセージ 考えられる原因 対処法 SIM SIMカー ドが電話機に入って SIMカー ドが正しく挿入されているこ error (SIMエ いないか、 正しく挿入されてい とを確認してください。 ラー) ません。... - Page 496 トラブルシューティング All manuals and user guides at all-guides.com メッセージ 考えられる原因 対処法 窓際または屋外に移動します。 通信 No network 事業者の受信可能地域を確認して connection/ ください。 信号強度が弱いか、 通信事業者 Losing SIMカー ドを使用してから6~12か のネッ トワーク圏外です。 network ( ネッ 月以上経っていないか確認してくだ トワークに接続 通信事業者が新しいサービスを さい。 6~12か月以上経っている場 されていない 適用しました。 合は、 通信事業者の最寄りの支店で か、 接続が切断 SIMを交換します。 サービス プロバ されています)...
- Page 497 All manuals and user guides at all-guides.com メッセージ 考えられる原因 対処法 セキュリティ コー ドを変更する Codes do には、 新しいコー ドを再入力して not match (コ コー ドを忘れた場合は、 サービス プ 確定する必要があります。 ー ドが一致しま ロバイダにお問い合わせください。 入力された2つのコー ドが一致 せん) しません。 Any application サービス プロバイダがサポー ト cannot be サービス プロバイダに連絡してく していないか、 登録する必要が set ( アプリケ ださい。...
- Page 498 トラブルシューティング All manuals and user guides at all-guides.com メッセージ 考えられる原因 対処法 おかけになった電話番号が間違 新しいネッ トワークの使用が承認さ っています。 れていません。 Calls not 新しいSIMカー ドが挿入され 新しいネッ トワークの制限事項を確認 available (電 ました。 してください。 話が繋がりま プリペイ ド カー ドの上限金額に サービス プロバイダに問い合わせる せん) 達しました。 か、 PIN2を使用して上限額をリセッ ト してください。...
- Page 499 All manuals and user guides at all-guides.com メッセージ 考えられる原因 対処法 オン/オフ キーを押す時間が短 オン/オフ キーを2秒以上押し続 Phone すぎます。 けます。 cannot be switched on ( 電地が充電されていません。 電地を充電します。 ディスプレイ 電話機の電源 の充電インジケータを確認してく をオンできま ださい。 せん) 電地の接続部が汚れています。 電地の接続部をきれいにします。...
- Page 500 all-gui des.c...
- Page 501 トラブルシューティング All manuals and user guides at all-guides.com メッセージ 考えられる原因 対処法 電地が充電されていません。 電地を充電します。 通常の温度で充電していることを確認し 外部温度が高すぎるか、 低すぎます。 てください。 充電器と接続の状態を確認してください。 接続に問題があります。 電地の接続部を確認し、 必要に応じてきれ Charging いにしてください。 error (充電エ 電圧がありません。 充電器を別のコンセン トに差します。 ラー) 充電器が温かくならない場合は、 充電器を 充電器に不具合があります。 交換してください。 LGの正規付属品を必ず使用してくだ 充電器のタイプが異なります。 さい。 電地に不具合があります。 電地を交換します。...
- Page 502 All manuals and user guides at all-guides.com メッセージ 考えられる原因 対処法 Number not permitted (こ 固定電話番号機能がオンになっ [Settings (設定) ]メニューを確認し の番号への通 ています。 て、 この機能をオフにしてください。 話は許可され ていません) Impossible to receive / send SMS & picture (SMS メモリがいっぱいです。 メッセージを削除します。 メッセージおよ び画像を送受 信できません)...
- Page 503 トラブルシューティング All manuals and user guides at all-guides.com メッセージ 考えられる原因 対処法 Files not opening (ファ サポー トされていないファイル サポー トされているファイル形式を イルを開くこと 形式です。 確認してください。 ができません) SD card not SDカー ドのファイル システムをカー working (SD FAT16、 FAT32ファイル シス ド リーダーで確認するか、 電話機を カー ドが機能し テムがサポー トされています。 使用してSDカー ドをフォーマッ トし ていません) てください。...
- Page 504 All manuals and user guides at all-guides.com メッセージ 考えられる原因 対処法 The screen does not 電話機に保護テープを貼っていたり、 turn on when 電話機をケースに入れている場合 I receive a は、 近接センサの周囲が覆われてい 近接センサに問題があります。 call. (電話を受 ないか確認してください。 近接セン けても画面が サの周囲に汚れがないことを確認し 表示されませ てください。 ん。 ) サウン ド メニューの設定でバイブ No sound ( モー ドまたはサイレン ト モー ドがオ 音が聞こえま バイブ モー ドになっています。 ンになっていないことを確認してく...
- Page 505 トラブルシューティング All manuals and user guides at all-guides.com メッセージ 考えられる原因 対処法 電地を取り外して、 もう一度挿入し直 Hang up or し、 電話の電源をオンにします。 freeze (電話が 断続的なソフ トウェアの問題 Webサイ トからソフ トウェア アップ 切れるか、 フリ です。 デー トを入手して、 インス トールして ーズします) みます。...
- Page 506 all-gui des.c...
- Page 507 All manuals and user guides at all-guides.com ENGLISH LG-E730 User Guide This guide helps you to get started using your phone. • Some of the contents of this manual may not apply to your phone, depending on the software and your service provider. • This handset is not suitable for people who have a visual impairment due to the touch screen keyboard. • Copyright ©2011 LG Electronics, Inc. All rights reserved. LG and the LG logo are registered trademarks of LG Group and its related entities. All other trademarks are the property of their respective owners. • Google™, Google Maps™, Gmail™, YouTube™, Google Talk™ and Android Market™ are trademarks of Google, Inc.
- Page 508 Contents All manuals and user guides at all-guides.com Guidelines for safe and efficient use ..7 Notification drawer ........43 Viewing the status bar ......43 Getting to know your phone ....17 Onscreen keyboard .........47 Device components .........28 Entering accented letters ......48 Installing the SIM card and battery ...31 Google account set up ......49 Charging your phone .
- Page 509 All manuals and user guides at all-guides.com Enabling Wi-Fi Direct to share through Adding a new contact......67 SmartShare ..........57 Favourite contacts ........68 Using SmartShare ........58 Moving contacts from your old phone to your new phone ........69 Calls ............63 Messaging ..........70 Making a call ..........63 Calling your contacts .......63 Sending a message ........70 Answering and rejecting a call ....63 Threaded box ........71 Adjusting call volume ......64 Using Smilies ..........72 Making a second call ......64 Changing your message settings .....72 Viewing your call logs ......65 Email ............73 Call settings ...........66 Managing an email account .
- Page 510 Contents All manuals and user guides at all-guides.com Composing and sending email ....75 Getting to know the viewfinder ....85 Shooting a quick video ......86 Social networking ........77 After shooting a video ......86 Adding your account to your phone ..77 Using the advanced settings ....87 Viewing and updating your status.....78 Adjusting the volume when viewing Removing accounts from your phone ..79 a video ...........88 Facebook and Twitter ......79 Multimedia ..........89 Camera ............80 Gallery ...........89 Getting to know the viewfinder ....80 Timeline view ..........90 Taking a quick photo ......81 Music .
- Page 511 Setting your alarm........95 Connecting your phone to your PC ..102 Using your calculator .......95 Checking the On-Screen Phone Adding an event to your calendar .....96 connection ...........103 Changing your calendar view ....97 Disconnecting your phone from Polaris Office ..........97 your PC ..........104 The web ...........98 Settings ..........105 Browser ..........98 Wireless & networks ......105 Using the web toolbar ......98 Call settings .........107 Using options ..........99 Sound ..........109 Display ..........111 LG On-Screen Phone 2.0 ......100 Gesture ..........111...
- Page 512 all-gui des.c...
- Page 513 Contents All manuals and user guides at all-guides.com Accessories ...........124 Location & security .......112 Applications ..........113 Technical data........125 Accounts & sync ........114 Privacy ..........115 Troubleshooting ........126 Storage ..........116 Language & keyboard ......116 Voice input & output ......117 Accessibility .........119 Date & time ..........119 About phone .........120 Phone software update ......120 DivX Mobile ......122...
- Page 514 Guidelines for safe and efficient use All manuals and user guides at all-guides.com Please read these simple guidelines. Not designed to assure the safety of all persons, following these guidelines may be dangerous regardless of age and health. or illegal. • The radio wave exposure guidelines employ a unit of measurement known as Exposure to radio frequency the Specific Absorption Rate, or SAR. Tests energy for SAR are conducted using standardised methods with the phone transmitting at Radio wave exposure and Specific its highest certified power level in all used Absorption Rate (SAR) information. frequency bands. This mobile phone model LG-E730 has been • While there may be differences between designed to comply with applicable safety the SAR levels of various LG phone requirements for exposure to radio waves. models, they are all designed to meet the These requirements are based on scientific relevant guidelines for exposure to radio guidelines that include safety margins waves.
- Page 515 Guidelines for safe and efficient use All manuals and user guides at all-guides.com Product care and maintenance • The SAR limit recommended by the International Commission on Non-Ionizing Radiation Protection (ICNIRP) is 2 W/kg WARNING averaged over 10g of tissue. Only use batteries, chargers and • The highest SAR value for this model accessories approved for use with this phone tested by DASY4 for use at the ear particular phone model. The use of any other types may invalidate any approval is 0.690 W/kg (10g) and when worn on or warranty applying to the phone and the body is 0.757 W/Kg (10g). may be dangerous. • SAR data information for residents in countries/regions that have adopted the • Do not disassemble this unit. Take it to a SAR limit recommended by the Institute qualified service technician when repair of Electrical and Electronics Engineers work is required. (IEEE), which is 1.6 W/kg averaged over 1g of tissue.
- Page 516 All manuals and user guides at all-guides.com • Repairs under warranty, at LG's discretion, • Switch off the phone in any area where may include replacement parts or boards you are required to by special regulations. that are either new or reconditioned, For example, do not use your phone in provided that they have functionality equal hospitals as it may affect sensitive medical to that of the parts being replaced. equipment. • Keep away from electrical appliances such • Do not handle the phone with wet hands as TVs, radios and personal computers. while it is being charged. It may cause an electric shock and can seriously damage • The unit should be kept away from heat your phone. sources such as radiators or cookers. • Do not charge a handset near flammable • Do not drop. material as the handset can become hot • Do not subject this unit to mechanical and create a fire hazard. vibration or shock.
- Page 517 Guidelines for safe and efficient use All manuals and user guides at all-guides.com • Use a dry cloth to clean the exterior of the • Do not tap the screen with a sharp object unit (do not use solvents such as benzene, as it may damage the phone. thinner or alcohol). • Do not expose the phone to liquid or • Do not charge the phone when it is on soft moisture. furnishings. • Use accessories like earphones cautiously. • The phone should be charged in a well Do not touch the antenna unnecessarily. ventilated area. • Do not use, touch or attempt to remove • Do not subject this unit to excessive or fix broken, chipped or cracked glass. smoke or dust. Damage to the glass display due to abuse or misuse is not covered under the • Do not keep the phone next to credit warranty. cards or transport tickets; it can affect the information on the magnetic strips. • Your phone is an electronic device that generates heat during normal operation.
- Page 518 all-gui des.c...
- Page 519 All manuals and user guides at all-guides.com Extremely prolonged, direct skin contact permission. Avoid placing the phone over in the absence of adequate ventilation pacemakers, for example, in your breast may result in discomfort or minor burns. pocket. Therefore, use care when handling • Some hearing aids might be disturbed by your phone during or immediately after mobile phones. operation. • Minor interference may affect TVs, radios, PCs etc. Efficient phone operation Road safety Electronics devices All mobile phones may receive interference, Check the laws and regulations on the use which could affect performance. of mobile phones in the area when you drive. • Do not use your mobile phone near • Do not use a hand-held phone while medical equipment without requesting driving.
- Page 520 Guidelines for safe and efficient use All manuals and user guides at all-guides.com • Give full attention to driving. • If you are listening to music whilst out and about, please ensure that the volume is at • Pull off the road and park before making a reasonable level so that you are aware or answering a call if driving conditions of your surroundings. This is of particular so require. importance when near roads. • RF energy may affect some electronic systems in your vehicle such as car Avoid damage to your hearing stereos and safety equipment. Damage to your hearing can occur if you are • When your vehicle is equipped with an exposed to loud sound for long periods of air bag, do not obstruct with installed or time. We therefore recommend that you do portable wireless equipment. It can cause not turn on or off the handset close to your the air bag to fail or cause serious injury ear. We also recommend that music and call due to improper performance. volumes are set to a reasonable level.
- Page 521 All manuals and user guides at all-guides.com Glass Parts • When using headphones, turn the volume down if you cannot hear the people Some parts of your mobile device are made speaking near you, or if the person of glass. This glass could break if your sitting next to you can hear what you are mobile device is dropped on a hard surface listening to. or receives a substantial impact. If the glass breaks, do not touch or attempt to remove it. NOTE: Excessive sound pressure from Stop using your mobile device until the glass earphones can cause hearing loss. is replaced by an authorised service provider. Blasting area Do not use the phone where blasting is in progress. Observe restrictions and follow any regulations or rules.
- Page 522 Guidelines for safe and efficient use All manuals and user guides at all-guides.com Potentially explosive In aircraft atmospheres Wireless devices can cause interference in aircraft. • Do not use your phone at a refuelling point. • Turn your mobile phone off before boarding any aircraft. • Do not use near fuel or chemicals. • Do not use it on the ground without • Do not transport or store flammable permission from the crew. gas, liquid or explosives in the same compartment of your vehicle as your Children mobile phone or accessories. Keep the phone in a safe place out of the reach of small children. It includes small parts which may cause a choking hazard if detached.
- Page 523 All manuals and user guides at all-guides.com Emergency calls • Use only LG batteries and chargers. LG chargers are designed to maximise the Emergency calls may not be available on all battery life. mobile networks. Therefore you should never • Do not disassemble or short-circuit the depend solely on your phone for emergency battery. calls. Check with your local service provider. • Keep the metal contacts of the battery Battery information and care clean. • You do not need to completely discharge • Replace the battery when it no longer the battery before recharging. Unlike other provides acceptable performance. The battery systems, there is no memory battery pack may be recharged hundreds effect that could compromise the battery's of times before it needs replacing. performance. • Recharge the battery if it has not been used for a long time to maximise usability.
- Page 524 all-gui des.c...
- Page 525 Guidelines for safe and efficient use All manuals and user guides at all-guides.com • Do not expose the battery charger to direct • If you need to replace the battery, take it sunlight or use it in high humidity, such as to the nearest authorised LG Electronics in the bathroom. service point or dealer for assistance. • Do not leave the battery in hot or cold • Always unplug the charger from the wall places, as this may deteriorate battery socket after the phone is fully charged to performance. save unnecessary power consumption of the charger. • There is risk of explosion if the battery is replaced with an incorrect type. • Actual battery life will depend on network configuration, product settings, usage • Dispose of used batteries according to patterns, battery and environmental the manufacturer's instructions. Please conditions. recycle when possible. Do not dispose as household waste.
-
Page 526: Getting To Know Your Phone
Getting to know your phone All manuals and user guides at all-guides.com Before you start using the phone, please read this! Please check to see whether any problems data, such as applications or messages, to you encountered with your phone are make more memory available. described in this section before taking the To uninstall applications: phone in for service or calling a service Applications > Settings > Applications representative. > Manage applications 1. Phone memory Once all applications appear, scroll to and select the application you want to When there is less than 10% of space uninstall. - Page 527 Getting to know your phone All manuals and user guides at all-guides.com 2. Optimising battery life • Turn off automatic syncing for Google Mail™, Calendar, Contacts and other Extend your battery's life between charges applications. by turning off features that you don't need to • Some applications you have downloaded having running constantly in the background. may reduce battery power. You can monitor how applications and system resources consume battery power. To check the battery power level: Extending your phone's battery life: • Applications > Settings > About phone > Status • Turn off radio communications you are not using. If you are not using Wi-Fi, Bluetooth...
- Page 528 All manuals and user guides at all-guides.com 3. Before installing an open To monitor and control how battery power is being used: source application and OS • Applications > Settings > About phone WARNING > Battery use If you install and use an OS other than Battery usage time is displayed at the top of the one provided by the manufacturer it the screen. It tells you how long it has been may cause your phone to malfunction. since you last connected your phone to a In addition, your phone will no longer be power source or, if currently connected, how...
- Page 529 Getting to know your phone All manuals and user guides at all-guides.com 4. Using the hard reset WARNING (Factory reset) To protect your phone and personal If your phone needs to be restored to its data, only download applications from original condition, use hard reset to reboot trusted sources, such as Android your phone. Market™. If there are improperly installed applications on your phone, 1. W hen the phone is switched off, press it may not work normally or a serious and hold the Volume down key + Power error may occur. You must uninstall key with your left hand. those applications and all associated data and settings from the phone.
- Page 530 all-gui des.c...
- Page 531 All manuals and user guides at all-guides.com 2. W hen the LED on the bottom of the phone Leave your phone for at least a minute while lights up, touch and hold the Menu key + the hard reset is carried out. You will then be Back key with your right hand. You need able to switch your phone back on. to do this immediately, before the screen Caution: If you perform a hard reset, all user displays the LG logo. Make sure your left applications and user data will be deleted. hand is still holding the Volume down and This cannot be reversed. Remember to back Power keys. up any important data before performing a 3. W hen the LG logo is displayed on the hard reset. screen, continue to hold the keys for around 2 seconds, and then release all them at the same time, before the LG logo disappears.
- Page 532 Getting to know your phone All manuals and user guides at all-guides.com 5. Using a microSD card 6. Opening and switching applications Pictures, music and video files, can only be saved to external memory. Multitasking is easy with Android because you can keep more than one application Before using the built-in camera, you will running at the same time. There's no need to insert a microSD memory card into need to quit an application before opening your phone. another. Use and switch between several If you don't insert a memory card, you open applications. Android manages each cannot save the pictures or videos you take application, stopping and starting them as with the camera. needed to ensure that idle applications don't consume resources unnecessarily.
- Page 533 All manuals and user guides at all-guides.com 7. Installing LG PC Suite To stop applications: Applications > Settings > Applications LG PC Suite IV is a program that helps you > Manage applications connect your mobile phone to a PC using a USB data communication cable. Once Scroll to the desired application and touch connected, you can use the functions of your Stop to stop it. mobile phone on your PC. TIP! To return to recent apps Press and hold the Home key. The screen then displays a list of applications you have recently used.
- Page 534 Getting to know your phone All manuals and user guides at all-guides.com Major functions of LG PC Suite IV • Transfer SMS messages from your phone to a PC • Easily create, edit and delete phone • Software update without losing your data data • Synchronise mobile phone data with LG-E730 does not support the PC data (contacts, calendar, SMS following functions: messages and bookmarks) – L G Air Sync (Web Sync, R-Click) • Easily transfer multimedia files (photos, videos, music) by simply dragging – To-do in Calendar and dropping between a PC and your – Memo...
- Page 535 All manuals and user guides at all-guides.com You can download the program the LG web Use the USB cable to connect your phone site. Visit http://www.lg.com site to get the to a USB port on your computer. Once installer of your phone and user information. connected, you will receive a notification that a USB connection has been made. 8. Synchronising your phone to Open the notification drawer and touch a computer via USB USB connected. Touch Turn on USB storage and select NOTE: To synchronise your phone with "Ok" to confirm that you want to transfer your PC using the USB cable, you need to install LG PC Suite onto your PC. files between your phone's microSD card and the computer. Please refer to previous pages to install LG PC Suite.
- Page 536 all-gui des.c...
- Page 537 Getting to know your phone All manuals and user guides at all-guides.com You will receive a notification when the During this time, you can't access the phone connects as USB storage. You can microSD card from your phone, so you can't now copy files to and from the microSD use applications that rely on the microSD card. card, such as Camera, Gallery and Music. To disconnect your phone from the TIP! To use the microSD card on your computer: phone again, you need to open the Open the notification drawer and touch Turn notification drawer and touch Turn off Off USB Storage to disconnect your phone USB storage. from the computer safely.
- Page 538 All manuals and user guides at all-guides.com 9. Hold your phone upright 10. When the screen freezes Hold your mobile phone vertically, as you If the screen freezes or the phone does would a regular phone. The LG-E730 has an not respond when you try to operate it: internal antenna. Be careful not to scratch or Remove the battery, reinsert it, then turn the damage the back of the phone, as this may phone on. affect performance.
-
Page 539: Device Components
Getting to know your phone All manuals and user guides at all-guides.com Device components Power/Lock key Earpiece • S witch your phone on/off by Proximity sensor pressing and holding this key. • S hort press to lock/unlock the Camera lens screen. Home key Return to the Home screen from any screen. Back key Return to the previous screen. Menu key • C heck what options are available. • G o to Google Search™ by Microphone pressing and holding this key. - Page 540 All manuals and user guides at all-guides.com NOTE: Proximity sensor WARNING When receiving and making calls, the Placing a heavy object on the phone proximity sensor automatically turns or sitting on it can damage the LCD the backlight off and locks the touch and touch screen functions. Do not screen by sensing when the phone is cover the LCD proximity sensor with near your ear. This extends battery life protective film. This could cause the and prevents you from unintentionally sensor to malfunction. activating the touch screen during calls.
- Page 541 Getting to know your phone All manuals and user guides at all-guides.com Earphone Jack Camera lens SIM card slot Charger/USB port Back cover Power/Lock key Volume keys • I n the Home screen: Control ringer volume. • D uring a call: Control your earpiece volume. microSD • W hen playing a track: Control Card slot volume continuously.
- Page 542 all-gui des.c...
-
Page 543: Installing The Sim Card And Battery
All manuals and user guides at all-guides.com Installing the SIM card and battery Before you can start exploring your new phone, you'll need to set it up. To insert the SIM card and battery: To remove the back cover, hold the phone firmly in one hand. With your other hand, firmly press your thumb on the back cover. Use the fingertip cutout to pull off the back cover with your forefinger. - Page 544 Getting to know your phone All manuals and user guides at all-guides.com Slide the SIM card into the SIM card slot. Insert the battery into place by aligning Make sure the gold contact area on the the gold contacts on the phone and the card is facing downwards. battery (1) and pressing it down until it clicks into place (2).
-
Page 545: Charging Your Phone
All manuals and user guides at all-guides.com Charging your phone Align the back cover over the battery compartment (1) and press it down until it Open the cover of the charger connector on clicks into place (2). the top. Insert the charger and plug it into an electrical outlet. -
Page 546: Using The Memory Card
Getting to know your phone All manuals and user guides at all-guides.com To remove the memory card safely: NOTE: The battery must be fully Applications > Settings > Storage > charged initially to improve battery Unmount SD card. lifetime. Using the memory card To insert a memory card: Insert the memory card into the slot. Make sure the gold contact area is facing downwards. - Page 547 All manuals and user guides at all-guides.com NOTE: All files on your memory card WARNING are deleted when it is formatted. Do not insert or remove the memory card when the phone is on. Doing so On the Home screen, touch the may damage the memory card as well Applications tab to open the as your phone, and the data stored on applications menu. the memory card may be corrupted. Scroll and touch Settings > Storage. To format the memory card: Touch Unmount SD card and touch OK to confirm it. Your memory card may already be formatted. If it isn't, you must format it Touch Erase SD card > Erase SD card before you can use it. > Erase everything, then confirm your choice.
- Page 548 all-gui des.c...
-
Page 549: Locking And Unlocking The Screen
Getting to know your phone All manuals and user guides at all-guides.com If you have set a pattern lock, input the When you are not using the LG-E730, press the Power/Lock key to lock your pattern lock then select Erase Everything. phone. NOTE: If there is content on your If there are any programs running when you memory card, the folder structure may set lock screen, they may be still running in be different after formatting as all the Lock mode. It is recommended that you exit files will have been deleted. all programs before entering Lock mode to avoid unnecessary charges (e.g. phone calls, web access and data communications). Locking and unlocking the screen To wake up your phone, press the Power/ If you do not use the phone for a while, the Lock key. The lock screen will appear. Touch screen is turned off and locked automatically. and slide the lock screen upwards to unlock This helps to prevent accidental touches and your home screen. The last screen you... -
Page 550: Secure Your Lock Screen
All manuals and user guides at all-guides.com Secure your lock screen NOTE: You can lock your screen so that only you Precautions to take when using can unlock it to access your phone. pattern lock. It is very important to remember the To set an Unlock Pattern, PIN or unlock pattern you set. You will not be Password for the first time: able to access your phone if you use • Applications > Settings > Location an incorrect pattern 5 times. You have &... - Page 551 Getting to know your phone All manuals and user guides at all-guides.com When you cannot recall your unlock pattern: If you logged in to your Google account on the phone but failed to enter the correct pattern 5 times, tab the Forgotten pattern button. You are then required to log in with your Google account to unlock your phone. If you have not created a Google account on the phone or you forgot it, you have to perform a hard reset.
-
Page 552: Your Home Screen
Your Home screen All manuals and user guides at all-guides.com Touch screen tips Flick – To scroll through a list or move quickly, flick across the touch screen (drag Here are some tips on how to navigate quickly and release). around your phone. Touch – To choose a menu/option or open NOTE: an application, touch it. • T o select an item, touch the centre of Touch and hold – To open an options menu the icon. or grab an object you want to move, touch • D o not press too hard; the touch and hold it. screen is sensitive enough to pick up a light, firm touch. Drag – To scroll through a list or move slowly, drag across the touch screen. • U se the tip of your finger to touch the option you want. Be careful not to touch any other keys. -
Page 553: Home
Your Home screen All manuals and user guides at all-guides.com Home On your Home screen, you can view quick keys at the bottom of the screen. Quick Simply swipe your finger to the left or right keys provide easy, one-touch access to the to view the panels. You can customise functions you use the most. each panel with widgets, shortcuts (to your Touch the Phone icon to bring up the favourite applications), folders and wallpaper. touch screen dialpad to make a call. NOTE: Some screen images may be Touch the Contacts icon to open your different depending on your phone contacts. provider. Touch the Messaging icon to access the messaging menu. This is where you can create a new message. - Page 554 all-gui des.c...
-
Page 555: Customising The Home Screen
All manuals and user guides at all-guides.com To add items on your Home screen: Touch the Applications tab at the Home screen > Menu > Add bottom of the screen. You can then view all your installed applications. To open any application, simply touch the icon in the Touch and hold the empty part of the applications list. Home screen. In the Add Mode menu, select items Customising the Home screen you want to add. You will then see added You can customise your Home screen items on the Home screen. by adding widgets, shortcuts, folders or Drag it to the location you want and lift wallpapers. For more convenience using your finger. your phone, add your favourite widgets to the Home screen. -
Page 556: Returning To Recently-Used Applications
Your Home screen All manuals and user guides at all-guides.com Returning to recently-used To remove an item from the Home screen: applications • Home screen > touch and hold the icon Touch and hold the Home key. The you want to remove > drag it to screen displays a pop-up with icons of applications you used recently. TIP! To add an application icon to the Touch an icon to open the application. Home screen from the Applications Or touch the Back key to return to your menu, touch and hold the application current application. you want to add. -
Page 557: Notification Drawer
All manuals and user guides at all-guides.com Notification drawer Touch and slide the notification drawer down with your finger. The notification drawer runs across the top Or, on the Home screen, press the Menu of your screen. key and select Notifications. Here you can check and manage sound, Wi-Fi, Bluetooth and GPS as well as other notifications. Viewing the status bar The status bar uses different icons to display phone information such as signal strength, new messages, battery life, active Bluetooth Ring - Wi-Fi Bluetooth Data and data connections. Vibration Connectivity... - Page 558 Your Home screen All manuals and user guides at all-guides.com Below is a table explaining the meaning of Icon Description icons you're likely to see in the status bar. Call in progress Icon Description Call hold No SIM card Speakerphone No signal Phone microphone is muted Airplane mode Missed call Connected to a Wi-Fi network Bluetooth is on Wi-Fi Direct is on Connected to a Bluetooth device Wired headset...
- Page 559 All manuals and user guides at all-guides.com Icon Description Icon Description System warning Data in and out Phone is connected to PC via USB Alarm is set cable New voicemail Downloading data Ringer is silenced Uploading data Vibrate mode GPS is acquiring Battery fully charged Receiving location data from GPS Battery is charging On-Screen Phone connected...
- Page 560 all-gui des.c...
- Page 561 Your Home screen All manuals and user guides at all-guides.com Icon Description Icon Description 3 more notifications not displayed Upcoming event FM radio turned on in the Data is syncing background Download finished USB tethering is active New Gmail Portable Wi-Fi hotspot is active New Google Talk message Both USB tethering and portable New message hotspot are active Song is playing...
-
Page 562: Onscreen Keyboard
All manuals and user guides at all-guides.com Onscreen keyboard Tap to switch to the numbers and symbols keyboard. You can also touch and You can enter text using the onscreen keyboard. The onscreen keyboard appears hold this tab to view the Settings menu. automatically on the screen when you Tap to view or press and hold to change need to enter text. To manually display the the writing language. keyboard, simply touch a text field where Tap to insert an emoticon when writing you want to enter text. a message. Using the keypad & entering text Tap to enter a space. Tap once to capitalise the next letter you type. Double-tap for all caps. Tap to create a new line in the message field. -
Page 563: Entering Accented Letters
Your Home screen All manuals and user guides at all-guides.com Tap to delete the previous character. Tap to hide the onscreen keyboard. Entering accented letters When you select French or Spanish as the text entry language, you can enter special French or Spanish characters (e.g. "á"). For example, to input "á", touch and hold the "a" key until the zoom-in key grows bigger and displays characters from different languages. Then select the special character you want. -
Page 564: Google Account Set Up
Google account set up All manuals and user guides at all-guides.com When you first turn on your phone, you have Once you have set up your Google account the opportunity to activate the network, to on your phone, your phone automatically sign into your Google Account and how you synchronises with your Google account on want to use some Google services. the web. To set up your Google account: Your contacts, Gmail messages, Calendar • Sign into a Google Account from the events and other information from these prompted set up screen. applications and services on the web are OR synchronised with your phone. (This depends • Applications > select a Google on your synchronisation settings) application, such as Gmail > select After signing in, you can use Gmail™ and Create to create a new account. take advantage of Google services on your If you have a Google account, enter your email phone. address and password, then touch Sign in. -
Page 565: Connecting To Networks And Devices
Connecting to Networks and Devices All manuals and user guides at all-guides.com Wi-Fi Turn off Wi-Fi when you're not using it to extend the life of your battery. With Wi-Fi, you can use highspeed Internet access within the coverage of the wireless NOTE: If you are out of the Wi-Fi zone access point (AP). Enjoy wireless Internet or set Wi-Fi to OFF, additional charges using Wi-Fi, without extra charges. may be applied by your mobile operator for mobile data use. Connecting to Wi-Fi networks To use Wi-Fi on your phone, you need to Turning Wi-Fi on and connecting to a access a wireless access point or "hotspot". Wi-Fi network Some access points are open and you can Applications > Settings > Wireless & simply connect to them. Others are hidden networks > Wi-Fi settings. - Page 566 all-gui des.c...
-
Page 567: Bluetooth
All manuals and user guides at all-guides.com Touch Wi-Fi to turn it on and start • If the network is secured, you are scanning for available Wi-Fi networks. prompted to enter a password or other credentials. (Ask your network • A list of available Wi-Fi networks is administrator for details) displayed. Secured networks are indicated by a lock icon. The status bar displays icon that indicate Wi-Fi status. Touch a network to connect to it. • If the network is open, you are asked to Bluetooth confirm that you want to connect to that You can use Bluetooth to send data by network by touching Connect. running a corresponding application, not from the Bluetooth menu as on most other mobile phones. - Page 568 Connecting to Networks and Devices All manuals and user guides at all-guides.com Turning on Bluetooth and pairing up your TIP! With LG-E730, you can enjoy phone with a Bluetooth device Bluetooth high speed. Applications > Settings > Wireless & If the device you want to share files with networks > Bluetooth > ON also supports high speed Bluetooth, the files will automatically be transferred Go to Bluetooth settings > Scan for via the high-speed network. To use devices Bluetooth high speed data transfer, Choose the device you want to pair up please make sure the Wi-Fi is OFF on with from the list.
-
Page 569: Sharing Your Phone's Data Connection
All manuals and user guides at all-guides.com Sharing your phone's data If the device you want to pair up with is not on the list, make sure that target device is connection set to be Discoverable, then scan again. USB tethering and portable Wi-Fi hotspot are Sending pictures using Bluetooth great features when there are no wireless connections available. You can share your Select a picture > Menu > Share > phone's mobile data connection with a Bluetooth single computer via a USB cable (USB Check whether Bluetooth is ON, then tethering). You can also share your phone's select Scan for devices. data connection with more than a single Choose the device you want to send data device at a time by turning your phone into a to from the list. portable Wi-Fi hotspot. When your phone is sharing its data connection, an icon appears in the status... - Page 570 Connecting to Networks and Devices All manuals and user guides at all-guides.com bar and as an ongoing notification in the TIP! notifications drawer. If your computer is running Windows 7 For the latest information about tethering or a recent distribution of some flavours and portable hotspots, including supported of Linux (such as Ubuntu), you don't usually need to prepare your computer operating systems and other details, visit for tethering. But if you're running an http://www.android.com/tether. earlier version of Windows or another To change USB tethering & portable Wi-Fi operating system, you may need to prepare your computer to establish hotspot settings: a network connection via USB. For • Applications > Settings > Wireless the most current information about & networks > Tethering & portable which operating systems support USB hotspot > Choose options that you want tethering and how to configure them,...
-
Page 571: To Rename Or Secure Your Portable Hotspot
All manuals and user guides at all-guides.com To rename or secure your Touch Configure Wi-Fi hotspot. portable hotspot • The Configure Wi-Fi hotspot dialog box will open. You can change the name of your phone's Wi-Fi network name (SSID) and secure its • You can change the network SSID (name) Wi-Fi network. that other computers see when scanning for Wi-Fi networks. On the Home screen, touch the Applications tab and select Settings. • You can also touch the Security menu to configure the network with Wi-Fi Protected Touch Wireless & networks and select Access 2 (WPA2) security using a pre- Tethering & Portable hotspot. shared key (PSK). - Page 572 all-gui des.c...
- Page 573 Connecting to Networks and Devices All manuals and user guides at all-guides.com • If you touch the WPA2 PSK security ATTENTION! option, a password field is added to the If you set the security option as Open, Configure Wi-Fi hotspot dialog. If you you cannot prevent unauthorised usage enter a password, you will need to enter of online services by other people and that password when you connect to the additional charges can be incurred. phone's hotspot with a computer or To avoid unauthorised usage, you are other device. You can touch Open in the advised to keep the security option active. Security menu to remove security from your Wi-Fi network. Touch Save.
-
Page 574: Using The Wi-Fi Cast
All manuals and user guides at all-guides.com Using the Wi-Fi Cast Select a device to connect from the scanned device list. You can share your music, picture and video Touch Connect. content between users who use Android Phones connected via the same Wi-Fi & Enabling Wi-Fi Direct to share Wi-Fi Directed network. through SmartShare Check your Wi-Fi & Wi-Fi Directed network Wi-Fi Direct automatically scans nearby in advance and make sure the users are Wi-Fi Direct devices and the searched connected to the same network. devices are listed as they are found and Applications > Settings > Wireless & you can select a specific device to share networks > Wi-Fi Direct Settings > multimedia data through Smart Share. -
Page 575: Using Smartshare
Connecting to Networks and Devices All manuals and user guides at all-guides.com Applications > Settings > Wireless & NOTE: When your phone becomes networks > Wi-Fi Direct Settings a group owner, it will consume more Ensure Wi-Fi Direct is ON. battery power than when it is a client. Wi-Fi Direct connection does not Select a device to connect from the provide Internet service. Additional scanned device list. costs may be incurred when connecting Forced Group owner mode – Touch to and using online services. Check data activate group owner mode, which enables charges with your network provider. the legacy Wi-Fi devices to connect by scanning your phone. In this case you must Using SmartShare enter the password that is set in the Menu > Advanced > Password. SmartShare uses DLNA (Digital Living Network Alliance) technology to share digital content through a wireless network. - Page 576 All manuals and user guides at all-guides.com Both devices must be DLNA certified to automatically allow upload files to my support this feature. phone from other devices. Under the Sharing contents section, To turn SmartShare on and allow sharing touch to checkmark the types of content contents you would like to share. Choose from Touch Applications tab and select Pictures, Videos and Music. SmartShare. SmartShare is now activated and ready Press the Menu key and select Settings. to share contents. Touch Discoverable checkbox to turn on. To share contents from remote content • Touch Always accept request if you library to other devices would like to automatically accept sharing Let your renderer device (e.g. TV) play requests from other devices.
- Page 577 Connecting to Networks and Devices All manuals and user guides at all-guides.com To share contents from your phone to NOTE: Make sure that the DLNA your renderer device(e.g. TV) functionality of your devices is properly configured (e.g. TV and PC). NOTE: Make sure that your renderer device is properly configured. Touch the top right button to or select the device from renderer lists. While browsing your pictures or videos Touch the top left button and select the using the Gallery application, touch and device of the remote content library. hold to select files. Then you will be able You can browse the content library. to select multiple files to be shared. Touch a content thumbnail or press the Touch Share on the menu and select the Menu key and select Play button. SmartShare.
- Page 578 all-gui des.c...
- Page 579 All manuals and user guides at all-guides.com SmartShare is automatically launched will not appear in the renderer device list. Your device might not be able to play some with the selected files. contents. Select the device from renderer lists to To download contents from remote play the files. content library NOTE: Follow the similar steps to use Touch Applications tab and select the Music player, Camera and Video SmartShare. player to share contents. Touch the top left button and select the device of the remote content library. Notice: Check that your device is You can browse the content library. connected with your home network using Wi-Fi connection to use this application. Touch a content thumbnail then touch Some DLNA enabled devices (e.g. TV) Download menu key. support only the DMP feature of DLNA and...
- Page 580 Connecting to Networks and Devices All manuals and user guides at all-guides.com Notice: A few types of contents are not You can browse the content library. supported. Touch and hold a content thumbnail and To upload contents from my phone to then touch the Upload menu key. remote content library Select a device of remote content library to be uploaded. NOTE: Mare sure that SD card is Notice: Some DLNA enabled devices correctly mounted and the Receive files do not support DMS upload functionality in settings menu is checked. and will not be uploaded. A few types of contents are not supported. Touch Applications tab and select SmartShare.
-
Page 581: Calls
Calls All manuals and user guides at all-guides.com Making a call Calling your contacts Touch to open the keypad. Touch to open your contacts. Enter the number using the keypad. To Scroll through the contact list or enter the delete a digit, touch the first few letters of the contact you want to call by touching Search. Touch the to make a call. In the list, touch the contact you want To end a call, touch the End icon to call. TIP! To enter "+" to make international Answering and rejecting a call calls, touch and hold When you receive a call in Lock state, drag the to the right to answer incoming call. -
Page 582: Adjusting Call Volume
Calls All manuals and user guides at all-guides.com Adjusting call volume Drag the to the left to reject an incoming call. To adjust the in-call volume during a call, use the Volume up and down keys on the Drag the Excuse messages bar from the left-hand side of the phone. bottom if you want to send one. Making a second call TIP! Excuse messages During your first call, touch Dialpad You can send a message quickly using this function. This is useful if you need and dial the number. Also, you can search to reply the message during a meeting. your contacts by touching Contacts and select the number you want to call. Touch the to make the call. -
Page 583: Viewing Your Call Logs
All manuals and user guides at all-guides.com Viewing your call logs Both calls are displayed on the call screen. Your initial call is locked and put On the Home screen, touch and choose on hold. the Call log tab. Touch the displayed number to toggle View a complete list of all dialled, received Merge calls between calls. Or touch and missed voice calls. to make a conference call. TIP! Touch any call log entry to view the To end active calls, touch End or press date, time and duration of the call. Home Key and slide the notification bar down and select End call. TIP! Press the Menu key, then touch Delete all to delete all the recorded NOTE: You are charged for each call items. you make. - Page 584 all-gui des.c...
-
Page 585: Call Settings
Calls All manuals and user guides at all-guides.com Call settings You can configure phone call settings such as call forwarding and other special features offered by your carrier. On the Home screen, touch the Applications tab to open the applications menu. Scroll and touch Settings. Tap Call settings and choose the options that you want to adjust. -
Page 586: Contacts
Contacts All manuals and user guides at all-guides.com Adding a new contact Add contacts to your phone and synchronise them with the contacts in your Google Touch , enter the new contact's account or other accounts that support number, then press the Menu key. Touch contact syncing. Add to contacts and then Create new contact. Searching for a contact If you want to add a picture to the new In the Home screen contact, touch the image area. Choose from Capture picture or Pick Touch to open your contacts. from Gallery. Touch Search and enter the contact Select the contact type by touching name using the keyboard. -
Page 587: Favourite Contacts
Contacts All manuals and user guides at all-guides.com Favourite contacts Removing a contact from your favourites list You can classify frequently called contacts Touch to open your contacts. as favourites. Touch the Groups tab, select Favourites Adding a contact to your favourites at the top of the list and choose a contact Touch to open your contacts. to view its details. Touch a contact to view their details. Touch the blue star to the right of the Touch the star to the right of the contact's contact's name. The star turns grey name. The star turns blue. and the contact is removed from your favourites. -
Page 588: Moving Contacts From Your Old Phone To Your New Phone
If the fields in the imported CSV file are phone to your new phone different from those in PC Suite IV, you need to map the fields. After mapping Export your contacts as a CSV file from the fields, click OK. The contacts are then your old phone to your PC using a PC added to PC Suite IV. sync program. If PC Suite IV detects the connection Install PC Suite IV on the PC first. Run the of your LG-E730 phone (using the USB program and connect your Android mobile cable), click Sync or Sync contacts to phone to the PC using a USB cable. synchronise the contacts saved on your Select the . Go to File > Import and PC with your phone. select the CSV file saved on your PC. -
Page 589: Messaging
Messaging All manuals and user guides at all-guides.com Your LG-E730 combines SMS and MMS into NOTE: You will be charged for a text one intuitive, easy-to-use menu. message for every person you send the message to. Sending a message Touch icon on the home screen, and Touch Enter message field and start to touch New message to open a blank compose your message. message. Press the Menu key to open the Options Enter a contact name or contact number menu. Choose from Add subject, Attach, in the To field. As you enter the contact Send and More. name, matching contacts appear. You can Touch Send to send your message. touch a suggested recipient. You can add multiple contacts. - Page 590 all-gui des.c...
-
Page 591: Threaded Box
All manuals and user guides at all-guides.com The message screen opens, with your WARNING: If an image, video or message after Recipient Name/Number. audio file is added to an SMS message, Responses appear on the screen. As you it is automatically converted into an view and send additional messages, a MMS message and you are charged message thread is created. accordingly. WARNING: The 160-character Threaded box limit may vary from country to country depending on the language and how Messages (SMS, MMS) exchanged the SMS is coded. with another party can be displayed in chronological order so that you can conveniently see an overview of your conversation. -
Page 592: Using Smilies
Messaging All manuals and user guides at all-guides.com Using Smilies Liven up your messages using Smilies. When writing a new message, press the Menu key, then choose Insert smiley. Changing your message settings Your LG-E730 message settings are predefined, so you can send messages immediately. You can change the settings based on your preferences. Touch Messaging icon on the home screen and touch the Menu key, then tap Settings. -
Page 593: Email
Email All manuals and user guides at all-guides.com You can use the Email application to read To add another email account: emails from services other than Google Mail. • Applications > Email > in the account The Email application supports the following screen, touch Menu > Add account account types: POP3, IMAP and Exchange. After the initial setup, Email displays the Your service provider or system administrator contents of your inbox. If you have added can provide the account settings you need. more than one account, you can switch among accounts. Managing an email account To change an email account's setting: The first time you open the Email • Applications > Email > in the account application, a setup wizard opens to help you screen, touch Menu > Settings to set up an email account. -
Page 594: Email Account Screen
Email All manuals and user guides at all-guides.com To delete an email account: coded on the left, by account, using the same colours used for your accounts in the • Applications > Email > in the account Accounts screen. screen, touch Menu > Settings > touch an account you want to delete > Remove – Touch the folder icon to open the account account folders. Only the most recent emails in your account Email account screen are downloaded to your phone. To download You can touch an account to view its Inbox. more (earlier) email messages, touch Load The account from which you send email by more emails at the bottom of the emails default is indicated with a tick. list. – Touch to open your Combined Inbox, with messages sent to all of your accounts. Messages in the Combined Inbox are colour... -
Page 595: Working With Account Folders
All manuals and user guides at all-guides.com Working with account folders Enter an address for the message's intended recipient. As you enter text, Each account has an Inbox, Outbox, Sent matching addresses are offered from your and Drafts folder. Depending on the features Contacts. Separate multiple addresses supported by your account's service provider, with semicolon. you may have additional folders. Add Cc/Bcc and add attachment files if Composing and sending email required. Enter the text of the message. To compose and send a message While in the Email application, touch the Menu key, then touch Compose. - Page 596 all-gui des.c...
- Page 597 Email All manuals and user guides at all-guides.com Touch the Send button. TIP! When a new email arrives in the If you aren't connected to a network, for inbox, you will receive a notification example, if you're working in airplane by sound or vibration. Tap the email mode, the messages that you send notification to stop notifications. are stored in your Outbox folder until you're connected to a network again. If it contains any pending messages, the Outbox is displayed on the Accounts screen.
-
Page 598: Social Networking
Social networking All manuals and user guides at all-guides.com Adding your account to your You can use your phone for social networking and to manage your micro-blog phone in on-line communities. You can update your Touch and hold the home screen. When current status, upload photos and view your various Widgets appear, choose Social+ friend's status updates. and tap the Setting button. You If you don’t have an account, you can visit can also access in a different way. On the website to set one up. the home screen, choose Applications > Settings > Accounts & sync > Social+ NOTE: Additional costs may be settings. incurred when connecting to and using Choose the social networking client online services. Check data charges application you want to use from with your network provider. Facebook for LG, Twitter for LG and MySpace for LG. -
Page 599: Viewing And Updating Your Status
Social networking All manuals and user guides at all-guides.com Enter your community email address and On the Social+ widget, choose the password, then tap Log in. Social Networking service which you want to log in. You will then see your status Wait while your details are confirmed with and contents. your community. When you touch the input box, the screen If you tap your community, you can see will switch to update your current status the its current status. with comments or upload photos. Viewing and updating your TIP! You can update your status status and upload photos simultaneously You can view and update social to Facebook for LG,Twitter for LG community content using the Social+ and MySpace for LG by selecting the widget at any time. checkbox. -
Page 600: Removing Accounts From Your Phone
All manuals and user guides at all-guides.com Facebook and Twitter NOTE: This depends on network On the home screen, touch the Applications services. tab to open the applications menu. Choose any social networking client TIP! You can synchronise your friend contact to your contact list. application you want to use among Facebook and Twitter Enter your email address and the password Removing accounts from your that you set up on your community, then phone tap Log in. Choose Applications > Settings > Wait while your details are checked with Accounts & sync. your community. Choose the account you want to delete, If you tap your community, you can see the then touch Remove account. current status of your social community. -
Page 601: Camera
Camera All manuals and user guides at all-guides.com Getting to know the viewfinder S witch lenses – Switch between the rear–facing camera lens and the front–facing camera lens. Zoom – Zoom in or zoom out. Alternatively you can use the side volume keys. Brightness – This defines and controls the amount of sunlight entering the image. Scene mode – Choose from Auto, Portrait, Landscape, Sports, Night and Sunset. Settings – Touch this icon to open the Settings menu. Video mode – Slide this icon down to switch to video mode. Taking a photo Gallery – Touch to view the last photo you captured. This enables you to access your gallery and view saved photos within camera mode. - Page 602 all-gui des.c...
-
Page 603: Taking A Quick Photo
All manuals and user guides at all-guides.com Taking a quick photo Once you've taken the photo Open the Camera application. Your captured photo appears on the screen. Hold the phone, point the lens towards T ouch to share your photo using Share the subject you want to photograph. SmartShare, Bluetooth, E-mail, Touch and hold the lightly and a Facebook, Gmail, Messaging, focus box will appear in the centre of the Picasa, Social+, Twitter or Wi-Fi viewfinder screen. Cast. When the focus box turns green, the TIP! If you have an SNS account and camera has focused on your subject. set it up on your phone, you can share Take your finger off the your photo with the SNS community. -
Page 604: Using The Advanced Settings
Camera All manuals and user guides at all-guides.com Using the advanced settings T ouch to use the image as a Set as Contact icon or wallpaper. In the viewfinder, touch to open all advanced options. T ouch to edit the name of the Rename selected picture. – Restore all camera default settings. T ouch to delete the image. – Touch whenever you want to know how this function operates. This provides you T ouch to take another photo with a quick guide. immediately. Your current photo is saved. Change camera settings by scrolling through the list. After selecting the option, touch the Back key. – Focuses on the specific spot. - Page 605 All manuals and user guides at all-guides.com – Select the image resolution. If you – Set a delay after the capture button choose the high resolution, the file size will is pressed. This is ideal if you want to be in increase, which means you will be able to the photo. store fewer photos in the memory. – Select various shot modes. – The ISO rating determines the – It automatically shows you the picture sensitivity of the camera's light sensor. you just took. The higher the ISO, the more sensitive the – Activate to use your phone's location- camera is. This is useful in darker conditions based services. Take pictures wherever when you cannot use the flash. you are and tag them with the location. – Improves colour qualities in different If you upload tagged pictures to a blog lighting conditions. that supports geotagging, you can see the – Applies artistic effects to the pictures. pictures displayed on a map.
- Page 606 Camera All manuals and user guides at all-guides.com NOTE: This function is only available TIP! The Settings menu is when GPS is active. superimposed over the viewfinder so, when you change elements of the image colour or quality, you see a TIP! When you exit the camera, some preview of the image change behind the settings return to their defaults, such as Settings menu. white balance, colour tone, timer and scene mode. Check these before you take your next photo.
-
Page 607: Video Camera
Video camera All manuals and user guides at all-guides.com Getting to know the viewfinder S witch lenses – Switch between the rear–facing camera lens and the front-facing camera lens. Z oom – Zoom in or zoom out. Alternatively you can use the side volume keys. Brightness – This defines and controls the amount of sunlight entering the video. Video size – Touch to set the size (in pixels) of the video you record. Settings – Touch this icon to open the settings menu. Camera mode – Slide this icon up to switch to camera mode. Start recording Gallery – Touch to view the last video you recorded. This enables you to access your gallery and view your saved videos from within video mode. - Page 608 all-gui des.c...
-
Page 609: Shooting A Quick Video
Video camera All manuals and user guides at all-guides.com Shooting a quick video Touch on the screen to stop recording. Slide the Camera mode button down and the icon changes to . After shooting a video The video camera viewfinder appears on A still image representing your video will the screen. appear on the screen. Holding the phone, point the lens towards T ouch to play the video. the subject you want to capture in your Play video. T ouch to share your video using Share Press the Record button once to start SmartShare, Bluetooth, E-mail, recording. Facebook, Gmail, Messaging, Wi-Fi Cast or Youtube. -
Page 610: Using The Advanced Settings
All manuals and user guides at all-guides.com T ouch to shoot another video straight – Touch if you want to know how this away. Your current video is saved. function operates. This provides you with a quick guide. T ouch to delete the video you just made. Confirm by touching OK. The Adjust the video camera setting by scrolling viewfinder reappears. through the list. After selecting the option, touch the Back key. Using the advanced settings – Improves colour qualities in different Using the viewfinder, touch to open all lighting conditions. the advanced options. – Choose a colour tone to use for your – Restore all video camera default new view. settings. -
Page 611: Adjusting The Volume When Viewing A Video
Video camera All manuals and user guides at all-guides.com Adjusting the volume when – Set a duration limit for your video. viewing a video Choose between Normal and MMS to limit the maximum size to send as an MMS To adjust the volume of a video while it is message. playing, use the volume keys on the left- hand side of the phone. – Choose Mute to record a video without sound. – Auto review automatically shows you the video you just recorded. -
Page 612: Multimedia
Multimedia All manuals and user guides at all-guides.com You can store multimedia files on a memory NOTE: Make sure you install a memory card for easy access to all your image and card in the phone to save photos and video files. access all your pictures. Without a memory card, the phone does not Gallery display photos or videos without Picasa images, which are in your Picasa album. Touch the Applications tab , then select Gallery. Open a list of catalogue bars that store all your multimedia files. -
Page 613: Timeline View
Multimedia All manuals and user guides at all-guides.com Timeline view Transferring music files using USB mass storage devices LG-E730 Gallery provides a timeline view of your photos and videos. In grid view mode, Connect the LG-E730 to a PC using a drag to the right and the date USB cable. you took your photos is displayed, starting If you haven't installed LG Android with the most recent. If you select a specific Platform Driver on your PC, you need to date, all the photos you took on that day are change the settings manually. Choose grouped. Settings > Storage, then select Mass storage only. Music Touch Turn on USB storage. Your LG-E730 has a built-in music player You can view the mass storage content that lets you play all your favourite tracks. To... - Page 614 all-gui des.c...
-
Page 615: Playing A Song
All manuals and user guides at all-guides.com Select the song you want to play. NOTE: You need to install an SD card first. Without an SD card, you cannot Touch to pause playback. use USB mass storage. Touch to resume playback. Touch to skip to the next track in the NOTE: If you installed LG Android album, playlist or shuffle. Platform Driver, you will immediately see Touch to skip to the previous track in a pop-up saying Turn on USB storage. the album, playlist or shuffle. Touch to see music library screen. Playing a song Touch to set repeat mode. In the Home screen, touch the Touch to play the current playlist in Applications tab and select Music. shuffle mode. Touch Songs. Touch to see the current playlist. - Page 616 Multimedia All manuals and user guides at all-guides.com Touch to see lyrics. This option is on NOTE: Music file copyrights may be only if the song includes the lyrics. protected by international treaties and national copyright laws. To change the volume while listening to Therefore, it may be necessary to obtain music, press the up and down volume keys permission or a licence to reproduce or on the left-hand side of the phone. copy music. Touch and hold any song in the list. It In some countries, national laws prohibit displays Play, Add to playlist, Use as private copying of copyrighted material. ringtone, Delete, Share, Search and Before downloading or copying the file, Details as options. check the national laws of the relevant country concerning the use of such material.
-
Page 617: Fm Radio
All manuals and user guides at all-guides.com FM Radio Searching for stations Your LG-E730 has a built-in FM radio so you You can tune in to radio stations can tune in to your favourite stations and by searching for them manually or listen it. automatically. They are then saved to specific channel numbers, so you don't have NOTE: You need to use your to find them again. headphones to listen to the radio. Insert You can store up to 48 channels on your them into the headphone jack. phone. Tuning in automatically In the Home screen, touch the Applications tab and select FM Radio. - Page 618 Multimedia All manuals and user guides at all-guides.com Press the Menu key, then touch Auto NOTE: You can also manually tune in to scan. a station using the on-screen wheel. If there are preset channels, you will see a pop-up asking "Reset all channels and TIP! To improve radio reception, extend start auto scan?". If you choose OK, all the headset cord as this also functions as the radio antenna. the preset channels are deleted and Auto scan starts. If you connect a headset not specifically made for radio reception, radio During auto scanning, touch Stop if you reception may be poor. want to stop scanning. Only scanned channels are saved before you stop scanning.
-
Page 619: Utilities
Utilities All manuals and user guides at all-guides.com Setting your alarm Using your calculator Applications > Alarm/Clock > > Applications > Calculator New alarm Touch the number keys to enter numbers. After you set the time, the LG-E730 lets For simple calculations, touch the you know how much time is left before function you want (+, –, x or ÷) followed the alarm will sound. by =. Set Snooze duration, Vibration, Alarm For more complex calculations, press the tone and Puzzle lock then add a label to Menu key, touch the Advanced panel, name the alarm. Touch Save. then choose sin, cos, tan, log and so on. - Page 620 all-gui des.c...
-
Page 621: Adding An Event To Your Calendar
Utilities All manuals and user guides at all-guides.com Adding an event to your If you want to add a note to your event, calendar touch Description and enter the details. If you want to repeat the alarm, set Applications > Calendar Repetition, and set Reminders, if To check the event, touch the date. Touch necessary. the Menu key if you want to add a new Touch Save to save the event in the event. Touch New event. calendar. Touch What then enter the event name. Check the date and enter the time you want your event to start and finish. Also touch Where then enter the location. -
Page 622: Changing Your Calendar View
All manuals and user guides at all-guides.com Changing your calendar view Managing files Polaris Office provides mobile users with Applications > Calendar convenient file management features, On the top of the screen, you can find the including copying, cutting and pasting, and different view types of the Calendar (Day, deleting files and folders right on the device. Week, Month, Agenda). Viewing files Polaris Office Mobile users can now easily view a wide Polaris Office is a professional mobile office variety of file types, including Microsoft solution that lets users conveniently view Office documents and Adobe PDF, right various types of office documents, including on their mobile devices. When viewing Word, Excel and PowerPoint files, anywhere, documents using Polaris Office, the objects anytime, using their mobile devices. and layout remain the same as in their original documents. -
Page 623: The Web
The web All manuals and user guides at all-guides.com Browser Using the web toolbar Browser gives you a fast, full-colour world T ouch to go back a page. of games, music, news, sport, entertainment T ouch to go forwards a page, to the and much more, right on your mobile phone. page you connected to after the current Wherever you are and whatever you enjoy. one. This is the opposite of what happens when you press the Back key, NOTE: Additional charges apply when which goes to the previous page. connecting to these services and T ouch to show all your open windows. downloading content. Check data charges with your network provider. T ouch to add a new window. T ouch to change web browser settings. -
Page 624: Using Options
All manuals and user guides at all-guides.com Using options More Press the Menu key to view options. • Find on page: Allows you to find letters or words on the current web page. B ookmarks – View your current bookmarks and add a new bookmark. • Select text: Allows you to copy any text You can also view your browser history. from the web page. • Add shortcut to Home: Add the shortcut A dd bookmark – Add the current web for the current web page to the Home page as a bookmark. screen. Read it later – Added in Read it later. • Page info: Displays the web page Add RSS Feed – Add the current web information. -
Page 625: Lg On-Screen Phone 2.0
LG On-Screen Phone 2.0 All manuals and user guides at all-guides.com LG On-Screen Phone 2.0 allows you to view L aunches LG Home Panorama or your mobile phone screen from a PC via a changes the On-Screen Phone USB, Bluetooth, or Wi-Fi connection. preferences. You can also control your mobile phone from E xits the On-Screen Phone program. your PC using the mouse or keyboard. M aximises the On-Screen Phone window. On-Screen Phone 2.0 icons M inimises the On-Screen Phone C onnects your mobile phone to your PC, window. or disconnects it. R otates the On-Screen Phone window On-Screen Phone 2.0 features (only available at applications that • Real-time transfer and control: Displays... - Page 626 all-gui des.c...
- Page 627 All manuals and user guides at all-guides.com • Mouse control: Allows you to control your • File transfer (PC to mobile phone): mobile phone by using the mouse to click Sends files from your PC to your mobile and drag on your PC screen. phone. Simply select the files you wish to transfer and drag and drop into the • Text input with keyboard: Allows you to On-Screen Phone window. The files you compose a text message or note using send are stored on OSP folder. your computer keyboard. • Real-time event notifications: Prompts • File transfer (mobile phone to PC): a pop-up to inform you of any incoming Sends a file from your mobile phone (e.g. calls or text, as well as alarm and event Gallery, Video Player, Music and Polaris notifications.
-
Page 628: Installing On-Screen Phone On Your Pc
LG On-Screen Phone 2.0 All manuals and user guides at all-guides.com Installing On-Screen Phone on • LG Home Panorama: Shows the whole workspaces of LG Home. You can easily your PC organise icons or widgets and run an If you install LG PC Suite IV, the On-Screen application by double-clicking the shortcut. Phone program will also be downloaded on your PC. Then you can install the On-Screen Please make sure LG Home is a NOTE: Phone on your PC. default launcher. Connecting your phone to your On-Screen Phone 2.0 provides USB, Bluetooth and Wi-Fi connection. Please follow the instruction on Connection Wizard of OSP program. -
Page 629: Checking The On-Screen Phone Connection
All manuals and user guides at all-guides.com Checking the On-Screen Phone NOTE: Please make sure that connection On-Screen Phone check box in Settings > Wireless & network Once the devices have been connected, > On-Screen Phone settings is drag down the status bar at the top of the selected. home screen to check the On-Screen Phone Please make sure that the battery may connection status. run out more quickly due to the current consumption if On-Screen Phone is connected via Wi-Fi. -
Page 630: Disconnecting Your Phone From Your Pc
LG On-Screen Phone 2.0 All manuals and user guides at all-guides.com Disconnecting your phone from your PC Click in the top left of the On- Screen Phone window. Or drag down the notification bar at the top of the home screen and select "On-Screen Phone connected". Touch "Ok" in the disconnect dialog. -
Page 631: Settings
Settings All manuals and user guides at all-guides.com In the Home screen, touch the Applications Wi-Fi settings – Allows you to set up and tab then scroll to and touch Settings. manage wireless access points. Set network notification or add a Wi-Fi network. The Wireless & networks advanced Wi-Fi settings screen is accessed Here, you can manage Wi-Fi and Bluetooth. from the Wi-Fi settings screen. Press the You can also set up mobile networks and Menu key and touch Advanced. switch to airplane mode. Wi-Fi Direct Settings – Set Wi-Fi Direct Airplane mode – After switching to airplane device name and scan for other devices. mode, all wireless connections are disabled. Wi-Fi – Turns on Wi-Fi to connect to available Wi-Fi networks. - Page 632 all-gui des.c...
- Page 633 Settings All manuals and user guides at all-guides.com Bluetooth – Turns on Bluetooth to connect TIP! How to obtain the MAC address to Bluetooth devices. To set up a connection in some wireless Bluetooth settings – Set device name & networks with MAC filters, you may discoverable mode, scan for other devices. need to enter the MAC address of your Alternatively, check a list of Bluetooth LG-E730 into the router. devices that you've previously configured as You can find the MAC address in the following user interface: Touch well as those detected when the phone last Application > Settings > Wireless & scanned for Bluetooth devices. networks > Wi-Fi settings and press Tethering & portable hotspot – You can the Menu key. Then select Advanced > configure the USB tethering and portable MAC Address.
-
Page 634: Call Settings
All manuals and user guides at all-guides.com Call settings VPN settings – Displays the list of Virtual Private Networks (VPNs) that you've < Fixed Dialing Numbers > previously configured. Allows you to add Select Fixed Dialing Numbers to turn on different types of VPN. and compile a list of numbers that can be Mobile networks – Set options for data called from your phone. You'll need your roaming, network mode & operators, access PIN2, which is available from your operator. point names (APNs) and so on. Only numbers within the fixed dial list can be On-Screen Phone settings – Allows you called from your phone. to turn on On-Screen Phone and to change the On-Screen Phone password (the default password is "0000"). - Page 635 Settings All manuals and user guides at all-guides.com < Voicemail > Call reject – Allows you to set the call reject function. Choose from Off, Reject on list or Voicemail service – Allows you to select Reject all calls. your carrier's voicemail service. Excuse messages – When you want to Voicemail settings – If you are using your reject a call, you can send a quick message carrier's voicemail service, this option allows using this function. This is useful if you need you to enter the phone number to use for to reject a call during a meeting. listening to and managing your voicemail. Video call settings – Change your video < Other call settings > call settings.
-
Page 636: Sound
All manuals and user guides at all-guides.com Call duration – View the duration of calls • Call waiting: If call waiting is activated, including all calls, dialled calls, received calls the handset will notify you of an and last call. incoming call while you are on the phone (depending on your network provider). Call costs – View the charges applied to your calls. (This service is network Sound dependent; some operators do not support this function) < General > Additional settings – This lets you change Silent mode – Allows you to silence all the following settings: sounds (including call and notification ringtones) except the audio from music and • Caller ID: Choose whether to display videos and any alarms you have set. Media your number on an outgoing call. and alarms must be silenced in their own applications. - Page 637 Settings All manuals and user guides at all-guides.com Vibrate – Allows you to set your phone to < Notifications > vibrate when you receive an incoming call. Notification ringtone – Allows you to set your default notification ringtone. Volume – allows you to set the volume for ringtones, media and alarms. If you uncheck < Feedback > the option "use incoming call volume for Audible touch tones – Allows you to set the notifications" you can set the volume for phone to play tones when using the dialpad incoming calls and notifications separately. to dial numbers. < Incoming calls > Audible selection – Allows you to set your Phone ringtone – Allows you to set your phone to play a sound when you touch default incoming call ringtone. buttons, icons and other onscreen items that react to your touch.
- Page 638 all-gui des.c...
-
Page 639: Display
All manuals and user guides at all-guides.com Screen lock sounds – Allows you to set Animation – Set to display an animation. your phone to play a sound when locking Screen timeout – Set the time for screen and unlocking the screen. timeout. Haptic feedback – Allows you to set your Display font – Change the display font. phone to vibrate briefly when you touch the Gesture soft keys and carry out other actions. Use motion gestures – Adjust the gesture Display settings for the text input field,incoming Brightness – Adjust the screen brightness. call,alarm,gallery and video player. Auto-rotate screen – Set to switch Reset gesture sensor – Calibrate the orientation automatically when you rotate motion sensor with the phone placed on a the phone. flat surface. -
Page 640: Location & Security
Settings All manuals and user guides at all-guides.com Location & security a screen unlock pattern. You can set a PIN or Password instead of a Pattern or leave Use wireless networks – If you select Use it as None. wireless networks, your phone determines When you turn on your phone or wake up your approximate location using Wi-Fi and the screen, you're asked to draw your unlock mobile networks. When you select this pattern to unlock the screen. option, you're asked whether you consent to allowing Google to use your location when Set up SIM/RUIM card lock – Set up SIM/ providing these services. RUIM card lock or change the SIM/RUIM PIN. Use GPS satellites – If you select Use Visible passwords – Select to show GPS satellites, your phone determines your passwords as you type them or deselect to location to street level accuracy. -
Page 641: Applications
All manuals and user guides at all-guides.com Use secure credentials – Allows you to WARNING access secure certificates. Depending on the applications you Install from SD card – Choose to install install, the mobile phone may not encrypted certificates from your SD card. operate correctly and could be illegally Set password – Set or change the used to establish your location and gain credential storage password. access to personal information via the Clear storage – Clear credentials for all Internet. To protect your phone and personal content and reset password. data, only download applications Applications from trusted sources such as Android Market. You can view and manage the applications. Unknown sources – Default setting to install non-Market applications. -
Page 642: Accounts & Sync
Settings All manuals and user guides at all-guides.com Accounts & sync Manage applications – Manage and remove installed applications. < General sync settings > Running services – Check services that are Background data – Permits applications to currently running. synchronise data in the background, whether Storage use – View storage used by or not you are actively working in them. applications. Deselecting this setting can save battery Battery usage – See what has been using power and lowers (but does not eliminate) the battery. data usage. Auto-sync – Permits applications to Development – Set options for application development. synchronise, send and receive data to their own schedule. -
Page 643: Privacy
All manuals and user guides at all-guides.com < Manage accounts > Resetting the phone will not erase any system software updates you have List of all Google accounts and other downloaded or any files on your microSD accounts you have added to your phone. card, such as music or photos. If you reset If you touch an account in this screen, its the phone in this way, you are prompted account screen opens. to re-enter the same information that you Privacy entered when you first started Android. Factory data reset – If you select Factory data reset, it will erase all of your personal data from the internal phone storage, including information about your Google account, any other accounts, your system/ application data and settings, any downloaded applications and your DRM licence. - Page 644 all-gui des.c...
-
Page 645: Storage
Settings All manuals and user guides at all-guides.com Storage < Internal storage > Checks the available space. < USB connection mode > Mass storage only – Your phone can be Language & keyboard used as a mass storage device if you have Use the Language & keyboard settings a memory card inserted. You can set Mass to select the language and region for the storage only as a default setting for USB text on your phone and for configuring the connection mode. on-screen keyboard, including words you've < SD card > added to its dictionary. Check total available SD card space. Touch Unmount SD card for safe removal. Erase SD card if you want to delete all data from the SD card. -
Page 646: Voice Input & Output
All manuals and user guides at all-guides.com Voice input & output • Block offensive words: When deselected, Google voice recognition will recognise < Voice input > and transcribe words many people Voice recognition settings – Use the consider offensive, when you use speech Voice recognition settings to configure the to enter text. When selected, Google Android voice input feature. voice recognition replaces those words • Language: Opens a screen where you in transcriptions with a placeholder can set the language you use speech to comprised of hash symbols ( # ). enter text. < Voice output > • SafeSearch: Opens a dialog box where Text-to-speech settings – Use the Text- you can set whether you want the Google to-speech settings to configure the Android... - Page 647 Settings All manuals and user guides at all-guides.com • Default Engine: Opens a dialog where NOTE: If you don't have speech you can set the text-to-speech application synthesiser data installed, only the you want to use, if you have more than Install voice data setting is available. one installed. • Install voice data: If your phone does • Listen to an example: Plays a brief not have speech synthesiser data sample of the speech synthesiser, using installed, this connects to Android Market your current settings. and guides you through the process • Always use my settings: Check to use of downloading and installing the data. the settings on this screen rather than the This setting is not available if the data is speech synthesiser settings available in already installed. other applications.
-
Page 648: Accessibility
All manuals and user guides at all-guides.com Accessibility • Speech rate: Opens a dialog where you can select how quickly you want the Use the Accessibility settings to configure synthesiser to speak. accessibility plug-ins you have installed on • Language: Opens a dialog where you can your phone. select the language of the text you want NOTE: Requires additional plug-ins. the synthesiser to read. This is particularly useful when combined with Always use my settings to ensure text is spoken Date & time correctly across a variety of applications. Use Date & time settings to set how dates • Pico TTS: Configure the Pico TTS are displayed. You can also use these settings. settings to set your own time and time zone rather than obtaining the current time from the mobile network. -
Page 649: About Phone
Settings All manuals and user guides at all-guides.com About phone This feature allows you to update the firmware on your phone to a newer version conveniently View legal information and check phone from the Internet without needing to visit status and software version. a service centre. This feature will only be available if and when LG makes a newer Phone software update firmware version available for your device. LG Mobile phone software update from As the mobile phone firmware update requires the Internet the user's full attention for the duration of For more information about using this the update process, please make sure you function, please visit http://update.lgmobile. check all instructions and notes that appear com or http://www.lg.com/common/index.jsp at each step before proceeding. Please note select country and language. that removing the USB data cable or battery during the upgrade may seriously damage... - Page 650 all-gui des.c...
- Page 651 All manuals and user guides at all-guides.com firmware version available for your device. NOTE: LG reserves the right to make First, you can check the software version firmware updates available only for on your mobile phone: Settings > About selected models at its own discretion and does not guarantee the availability phone > Software update > Check now of the newer version of the firmware for for update. all handset models. NOTE: This feature is dependent on your network service provider, region and LG Mobile Phone software update via country. Over-the-Air (OTA) This feature allows you to update your phone's software to a newer version conveniently via OTA, without connecting with a USB data cable. This feature will only be available if and when LG makes a newer...
-
Page 652: Divx Mobile
Settings All manuals and user guides at all-guides.com vod.divx.com for more information on how to DivX Mobile complete your registration. ABOUT DIVX VIDEO: DivX is a digital video ® DivX Certified to play DivX video up to ® ® format created by DivX, LLC, a subsidiary 640x480, including premium content of Rovi Corporation. This is an official DivX DivX , DivX Certified and associated ® ®... - Page 653 All manuals and user guides at all-guides.com Notice: Open Source Software To obtain the corresponding source code under GPL, LGPL, MPL and other open source licences, please visit http:// opensource.lge.com/ All referred licence terms, disclaimers and notices are available for download with the source code.
-
Page 654: Accessories
Accessories All manuals and user guides at all-guides.com These accessories are available for use with the LG-E730. (Items described below may be optional.) Travel adaptor Battery Stereo headset Data cable User Guide Connect your Learn more LG-E730 and PC. about your LG-E730. NOTE: • A lways use genuine LG accessories. • F ailure to do this may void your warranty. • A ccessories may vary in different regions. - Page 655 Suppliers Details Name Max: + 55°C (discharging), LG Electronics Inc Address LG Twin Tower 20,Yeouido-dong, Yeongdeungpo-gu Seoul, Korea 150-721 +45°C (charging) Product Details Product Name Min: -10°C GSM 850 / E-GSM 900 / DCS 1800 / PCS 1900 Quad Band and WCDMA Terminal Equipment...
- Page 656 all-gui des.c...
- Page 657 Troubleshooting All manuals and user guides at all-guides.com This chapter lists some problems you might encounter while using your phone. Some problems require you to call your service provider, but most are easy to fix yourself. Message Possible causes Possible corrective measures There is no SIM card in Make sure that the SIM card is correctly SIM error the phone or it is inserted inserted. incorrectly. Move towards a window or into an open area. Check the network operator coverage map. No network Signal is weak or you're outside connection/ Check whether the SIM card is more than the carrier network. Losing 6~12 months old. If so, change your SIM Operator applied new services. network at your network provider's nearest branch. Contact your service provider.
- Page 658 All manuals and user guides at all-guides.com Message Possible causes Possible corrective measures To change a security code, you will need to confirm the new Codes do not If you forget the code, contact your service code by re-entering it. match provider. The two codes you have entered do not match. Any application Not supported by service Contact your service provider. cannot be set provider or registration required.
- Page 659 Troubleshooting All manuals and user guides at all-guides.com Message Possible causes Possible corrective measures Dialling error New network not authorised. Calls not New SIM card inserted. Check for new restrictions. available Pre-paid charge limit reached. Contact service provider or reset limit with PIN2. On/Off key pressed too briefly. Press the On/Off key down for at least two seconds. Phone cannot be switched Battery is not charged. Charge battery. Check charging indicator on the display. Battery contacts are dirty. Clean the battery contacts.
- Page 660 All manuals and user guides at all-guides.com Message Possible causes Possible corrective measures Battery is not charged. Charge battery. Outside temperature is too hot Make sure phone is charging at a normal or cold. temperature. Check the charger and connection to the Contact problem phone. Check the battery contacts and clean Charging error them if necessary. No voltage Plug the charger into a different socket. Charger defective If the charger does not warm up, replace it. Wrong charger Only use original LG accessories. Battery defective Replace battery.
- Page 661 Troubleshooting All manuals and user guides at all-guides.com Message Possible causes Possible corrective measures Number not The Fixed dialling number Check the Settings menu and turn the permitted function is on. function off. Impossible to receive / send Memory full Delete some messages from the phone. SMS & picture Files not Unsupported file format Check the file formats that can be supported. opening SD card not FAT16, FAT32 file system Check SD card file system via card reader, or working supported format SD card using the phone.
- Page 662 all-gui des.c...
- Page 663 All manuals and user guides at all-guides.com Message Possible causes Possible corrective measures The screen If you use any protection tape or case, check does not to see if it has covered the area around the Proximity sensor problem turn on when proximity sensor. Make sure that the area I receive a call. around the proximity sensor is clean. Check the settings status of the sound menu No sound Vibration mode to make sure you are not in vibrate or silent mode. Remove the battery, insert it again and switch on the phone. Hang up or Intermittent software problem freeze Try to perform a software update via the website.
- Page 664 All manuals and user guides at all-guides.com...
Need help?
Do you have a question about the E730 and is the answer not in the manual?
Questions and answers