Advertisement
Release Date
March 2018
Belvedere, Satellite, Charger, Coronet
ANTIQUE AUTOMOBILE RADIO, INC.
700 TAMPA RD. Palm Harbor, FL 34683 USA (727) 785-8733
1971-74 MOPAR
AM/FM/BLUETOOTH
RADIO INSTALLATION
OPERATING INSTRUCTIONS
Model 931101BT
For HELP, Questions or Comments email:
support@radiosforoldcars.com
"B" Body
AND
AM/FM10.0
®
®
Advertisement
Table of Contents

Related Manuals for AAR 931101BT


Summary of Contents for AAR 931101BT
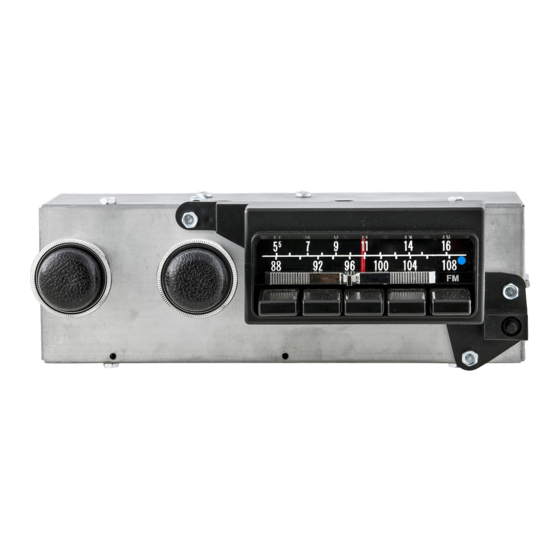
- Page 1 March 2018 1971-74 MOPAR ® “B” Body Belvedere, Satellite, Charger, Coronet AM/FM/BLUETOOTH ® RADIO INSTALLATION OPERATING INSTRUCTIONS AM/FM10.0 Model 931101BT ANTIQUE AUTOMOBILE RADIO, INC. 700 TAMPA RD. Palm Harbor, FL 34683 USA (727) 785-8733 For HELP, Questions or Comments email: support@radiosforoldcars.com...
- Page 2 CONGRATULATIONS! You have one of the most unique and sophisticated radios ever built! It is designed to preserve the original fit, functions and appearance of your radio while providing the best of the latest digital technology. The more modern features that were not available when your vehicle was new are cleverly disguised so that they are functional and easily accessible, but are not visible.
- Page 3 Your radio has a 12 pin connector for the speakers, power, and options. See inset below for more details. There is one red (fused) wire. This is the main power input. It should be connected to the 12 volt Accessory circuit. There is a green wire that is used for the dial light.
- Page 4 INSTALLATION The drawing below shows the correct mounting method for all “B” body dashes. Even though the radio is much smaller and lighter than the original, It will go into the dash the same way that the old one came out. After removing the original radio, remove the original mounting bracket and replace it with the one provided with your new radio.
Need help?
Do you have a question about the 931101BT and is the answer not in the manual?
Questions and answers