
Related Manuals for Miku Miku Life Monitor || M0101


Summary of Contents for Miku Miku Life Monitor || M0101
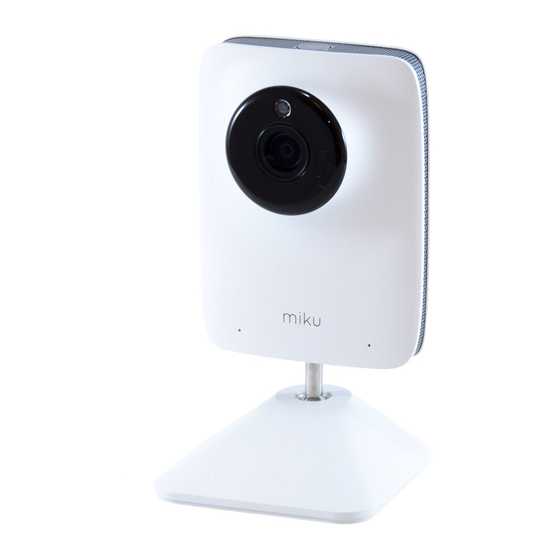
- Page 1 Let's get started Commençons Empecemos Quick Setup Guide Miku Pro Smart Baby Monitor Miku Life Monitor || M0101...
-
Page 3: Table Of Contents
Content | Contenu | Contenido Safety | English Installation for drywall | English Limited warranty & compliance | English Sécurité | Français Seguridad | Español Installation pour cloisons sèches | Français Instalación para drywall | Español Garantie limitée et conformité | Français Garantía limitada y conformidad | Español... -
Page 4: Safety | English
Immediately discontinue use if protective covering is damaged or broken. This device is designed for indoor use only. This device is designed to be used behind a standard crib and against the wall only. Use only the AC power supply included with your Miku. -
Page 5: Installation For Drywall English
Installation for drywall ENGLISH... - Page 6 In the box Pencil Measuring Tape THIS SIDE Baby Monitor Wall Mount & Level Screwdriver Cable Guides Large Drywall Screws Power Cord Power Supply Anchors Optional universal hardware Wall Guides Universal Anchors Extra Screws & Large Drywall Anchors...
- Page 7 What you’ll need WiFi Internet Smart Device Note: If you would like to avoid wall installation consider a Miku Stand. For wall installation videos visit mikucare.com/support...
- Page 8 Get the app https://mikucare.com/app Download the free Miku app from mikucare.com/app and create your user account. Open the App and follow along to pair your Miku.
- Page 9 Installation for drywall Position the crib against the preferred wall in the nursery. IMPORTANT: CRIB CENTER MUST BE IN A STUD-FREE AREA OF THE WALL. If unsure, use a stud finder. For wall surfaces other than drywall, please go to mikucare.com/support...
- Page 10 Using the Measuring Tape, find the center of the crib and mark the wall with a pencil. Note: Center of crib must be within 6 feet of an electrical outlet. Then, move the crib away from the wall. Crib Center...
- Page 11 Step on the bottom of the Measuring Tape so it aligns with the floor and your “Crib Center” mark on the wall. Lift the tape up 60 inches and mark at the “Mark Here” indicator. Mark Here 60in Crib Center...
- Page 12 Take the Wall Mount and place it over your mark at 60 inches so you can see the mark through the center hole. THIS SIDE...
- Page 13 Use the Level below the Wall Mount to verify that it is level. Mark the wall through the two holes in the Wall Mount. THIS SIDE...
- Page 14 Pull and remove the Level from the bottom of the Wall Mount.
- Page 15 Using the Screwdriver, push and twist into the two marks to create larger holes in the drywall. Only push as far as the black tip of the Screwdriver.
- Page 16 Push the Large Drywall Anchors into each hole and screw them until they are flush. Note: If the wall anchor doesn't screw into the wall easily, you may have hit a stud. In this case no wall anchor is required for that hole.
- Page 17 Position the Wall Mount over the “+” holes of the anchors. Screw the Large Screws into the “+” holes and secure the Wall Mount until flush with the wall. Note: Screw flush to the wall. Do not overtighten.
- Page 18 10 | Unroll the Power Supply and align the top rubber indicator to the center of the Wall Mount, leaving the top of the cord hanging. Using the Screwdriver, push the rubber indicator into the Wall Mount to secure the Power Supply.
- Page 19 11 | Slide the base of the Miku device into the Wall Mount until it clicks. THIS SIDE...
- Page 20 12 | Plug the Power Supply into the back of the Miku device.
- Page 21 13 | Insert the first Cable Guide into the bottom holes of the Wall Mount, making sure the Cable Guide is covering the cord.
- Page 22 14 | Remove the adhesive strips and adhere to wall. The adhesive strip needs to cure to the wall for a period of 15 minutes to take hold. Note: If you need to customize your cord path, you may need to...
- Page 23 15 | Insert each Cable Guide into the bottom holes of the previously installed section. Remove the adhesive strips and adhere to the wall.
- Page 24 16 | One by one, insert each Cable Guide into the bottom holes of the previously installed section for all six sections. Remove the adhesive strips and adhere to the wall.
- Page 25 17 | Connect the Power Cord to the Power Supply.
- Page 26 18 | Plug the Power Cord into the nearest outlet. Once the power button light turns on, you're ready to go.
-
Page 27: Limited Warranty & Compliance | English
(2) this device must accept any interference received, including interference that may cause undesired operation. This equipment has been tested and found to comply with the limits for a Class B dig- ital device, pursuant to Part 15 of the FCC Rules. These limits are designed to provide reasonable protection against harmful interference in a residential installation. - Page 28 (antennas are greater than 20cm from a person's body). 5GHZ WI-FI OPERATION The device for operation in the band 5150–5250 MHz is only for indoor use to reduce the potential for harmful interference to co-channel mobile satellite systems; RF EXPOSURE INFORMATION This device meets the EU requirements (2014/53/EU) on the limitation of exposure of the general public to electromagnetic fields by way of health protection.
- Page 29 SIMPLIFIED EU DECLARATION OF CONFORMITY Hereby, Miku, Inc., 10 Woodbridge Center Drive Suite 525, Woodbridge, NJ 07095 declares that the radio equipment type Miku Life Monitor || M0101 is in compliance with Directive 2014/53/EU. The full text of the EU declaration of conformity is available at the following internet address: mikucare.com/EU...
-
Page 30: Sécurité | Français
DESCARGO DE RESPONSABILIDAD — Miku Baby Monitor fue creado para ayudar a los papás rastrear factores que afecta el horario de sueño y el bienestar general de su hijo(a). El intento no es the curar, tratar, o prevenir cualquier enfermedad o condición de salud, incluyendo, pero no limitado a, el Síndrome de Muerte Súbita Infantil. -
Page 31: Installation Pour Cloisons Sèches Français
Installation pour cloisons sèches FRANÇAIS Instalación para drywall ESPAÑOL... - Page 32 Dans la boite | En el cuadro Crayon Lápiz Ruban à mesurer Cinta pulgada THIS SIDE Moniteur pour Bébé Support mural & niveau Tournevis Monitor de Bebé Montaje de pared y nivel Desarmador Guides de câbles Guías de cable Grands ancrages Câble...
- Page 33 Dispositivo inteligente Remarque: si vous souhaitez éviter les murs binstallation envisager un Miku Stand. Pour visionner des vidéos d'installation murale mikucare.com/support Nota: Si desea evitar la pared La instalación considera un soporte Miku. Para videos de instalación en pared visita mikucare.com/support...
- Page 34 Téléchargez gratuitement l'application Miku sur mikucare.com/app et créez votre compte utilisateur. Ouvrez l'application et suivez les instructions pour jumeler votre Miku. Descargue la aplicación gratuita Miku desde mikucare.com/app cree su cuenta de usuario. Abra la aplicación y siga los pasos para emparejar su Miku.
- Page 35 Installation pour cloisons sèches | Instalación para drywall Placez le berceau contre le mur de votre choix dans la crèche. IMPORTANT: LE CENTRE DU BERCEAU DOIT ÊTRE DANS UNE ZONE DU MUR SANS MONTANT. En cas de doute, utilisez un détecteur de montant.
- Page 36 Con la cinta métrica, encuentre el centro de la cuna y marque la pared con un lápiz. Nota: El centro de la cuna debe estar a 6 pies de una toma de corriente. Luego, aleja la cuna de la pared.
- Page 37 "FLOOR" du ruban avec le sol, et en alignement vertical avec la marque "Centre du Berceau" sur le mur. Tirez verticalement sur la bande jusqu’à 60 pouces (152.4 cm) et marquez le mur à l’indicateur "MARK HERE". Pise la parte inferior de la cinta de medición para que se alinee con el piso y su marca de "Centro de Cuna"...
- Page 38 60 pouces (152.4 cm)afin que vous puissiez voir la marque à travers le trou central. Tome el soporte de pared y colóquelo sobre su marca a 60 pulgadas para que pueda ver la marca a través del orificio central. THIS SIDE...
- Page 39 Utilisez le niveau situé sous le support mural pour vérifier qu'il est de niveau. Marquez le mur à travers les deux trous de chaque côté du support mural. Use el nivel debajo del soporte de pared para verificar que esté...
- Page 40 Tirez et retirez le niveau du bas du support mural. Tire y retire el nivel de la parte inferior del sporte de pared.
- Page 41 À l’aide du tournevis, appuyez et tournez sur les deux marques pour créer des trous dans la cloison sèche. Ne poussez que jusqu’à la pointe noire du tournevis. Usando el desarmador, empuje y de vuelta en las marcas haciendo los agujeros mas grandes en el panel de yeso.
- Page 42 Poussez les grands ancrages pour cloisons sèches dans chaque trou et vissez-les jusqu’à ce qu’ils affleurent le mur. Remarque: si l'ancrage mural ne se visse pas facilement dans le mur, vous avez peut-être heurté un poteau. Dans ce cas, aucune ancre murale n'est requise pour ce trou.
- Page 43 Coloque el soporte de pared sobre los orificios de los «+» anclajes. Atornille los Tornillos Grandes en los orificios asegure el Soporte de Pared hasta que quede al ras con la pared. Remarque: Vissez jusqu’au mur. Ne pas trop serrer.
- Page 44 Desenrolle la fuente de alimentación y alinee el indicador de goma superior con el centro del soporte de pared, dejando la parte superior del cable colgando. Con el desarmador, empuje el indicador de goma en el soporte de pared para asegurar la fuente de alimentación. THIS SIDE...
- Page 45 11 | Faites glisser la base du moniteur Miku dans le support mural jusqu'à ce que vous entendiez un clic. Deslice la base del dispositivo Miku en el monte de pared hasta que haga clic. THIS SIDE...
- Page 46 12 | Branchez l’alimentation à l’arrière du moniteur Miku. Enchufe la fuente de alimentación en la parte posterior del dispositivo Miku.
- Page 47 Insérez le premier guide-câble dans les trous inferieurs du support mural en vous assurant que le guide-câble recouvre le câble. Inserte la primera guía del cable en los orificios inferiores del soporte de pared, asegurándose de que la guía del cable cubra el cable.
- Page 48 14 | Retirez les bandes adhésives et adhérez au mur. Remarque: Si vous devez personnaliser le chemin de votre câble, vous devrez peut être utiliser notre matériel de guide de câble optionnel. Retire las tiras adhesivas y adhiera a la pared.
- Page 49 15 | Insérez chaque guide-câble dans les trous du bas de la section précédemment installée. Enlevez les bandes adhésives et adhérez au mur. Inserte cada guía de cable en los orificios inferiores de la sección previamente instalada. Retire las tiras adhesivas y...
- Page 50 16 | Répétez l’un après l’autre avec le reste des guide-câbles. Repita uno tras otro con el resto de las guías de cable.
- Page 51 17 | Connectez le câble d’alimentation au bloc d’alimentation. Conecte el cable de alimentación a la fuente de alimentación.
- Page 52 Miku. Une fois qu’il est allumé, vous êtes prêt à partir. Enchufe el cable de alimentación en el tomacorriente más cer- cano. Una vez que se enciende la luz del botón de encendido, estás listo para comenzar.
-
Page 53: Garantie Limitée Et Conformité | Français
Cependant, rien ne garantit que des interférences ne se produiront pas dans une installation particulière. Si cet équipement provoque des interférences nuisibles avec la réception de radio ou de télévision, ce qui peut être déterminé en éteignant et en rallumant l'équipement, l'utilisateur est invité à tenter de corriger l'interférence en appliquant l'une ou plusieurs des mesures suivantes: —... - Page 54 SUR LES FRÉQUENCES RADIO (RF) La puissance de sortie émise par l’appareil de sans fil est inférieure à la limite de la fréquence d’émission radio d’Industry Canada (IC). Utilisez l’appareil de sans fil de manière à...
- Page 55 Miku, Inc., 10, Woodbridge Center Drive, Suite 525, Woodbridge, NJ 07095, déclare que le type d’équipement radio Miku Life Monitor || M0101 est conforme à la Directive 2014/53 / EU. Le texte complet de la déclaration de conformité UE est disponible à...
-
Page 56: Garantía Limitada Y Conformidad | Español
Este equipo ha sido probado y cumple con los límites para un dispositivo digital de Clase B, de conformidad con la Parte 15 de las Reglas de la FCC. Estos límites están diseñados para proporcionar una protección razonable contra interferencias perju- diciales en una instalación residencial. - Page 57 ADVERTENCIA DE EXPOSICIÓN DE RF: El equipo cumple con los límites de exposición a RF de la FCC establecidos para un entorno no controlado. El equipo no debe colocarse ni funcionar conjuntamente con ninguna otra antena o transmisor.
- Page 58 Por este medio, Miku, Inc., 10 Woodbridge Center Drive Suite 525, Woodbridge, NJ 07095 declara que el equipo de radio tipo Miku Life Monitor || M0101 cumple con la Directiva 2014/53/EU. El texto completo de la declaración de conformidad de la UE está...
Need help?
Do you have a question about the Miku Life Monitor || M0101 and is the answer not in the manual?
Questions and answers