Advertisement
Advertisement

Subscribe to Our Youtube Channel
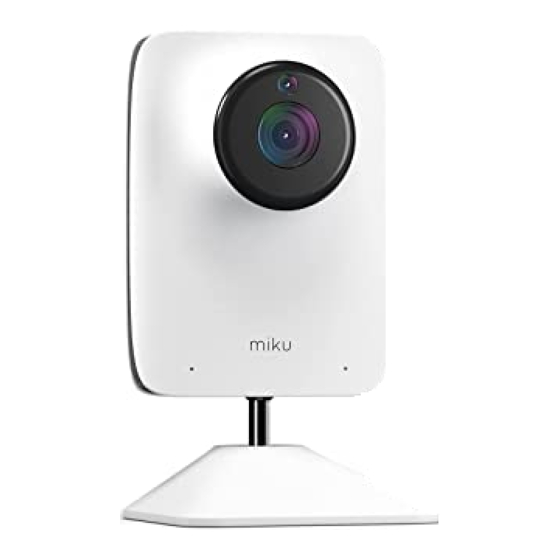
Summary of Contents for Miku Miku Life Monitor
- Page 1 Let's get started.
- Page 3 Content Safety In the box What you’ll need Get the app Installation Limited Warranty & Compliance For installation videos visit mikucare.com/support...
- Page 4 Immediately discontinue use if protective covering is damaged or broken. This device is designed for indoor use only. This device is designed to be used behind a standard crib and against the wall only. Use only the AC power supply included with your Miku. Adult assembly is required. Keep small parts away from children when assembling.
- Page 5 In the box Measuring Tape THIS SIDE Baby Monitor Screwdriver Power Cord Power Supply Wall Mount & Level Optional Cable Guide Hardware Cable Guides Large Drywall Anchors Large Screws Wall Guides Small Drywall Small Screws (two extra) (two extra) Anchors...
- Page 6 What you’ll need Smart Device WiFi Internet Pencil...
- Page 7 Get the app Now, get the app Download the free Miku app from mikucare.com/app and create your user account. Open the App and follow along to pair your Miku.
- Page 8 Installation 1. 1. Position the crib against the preferred wall in the nursery. IMPORTANT: CRIB CENTER MUST BE IN A STUD-FREE AREA OF THE WALL If unsure, use a stud finder. For wall surfaces other than drywall, please view our support page at mikucare.com/support Stud-free...
- Page 9 Using the Measuring Tape, find the center of the crib and mark the wall with a pencil. Note: Center of crib must be within 6 feet of an electrical outlet. Then, move the crib away from the wall. Crib Center...
- Page 10 Step on the bottom of the Measuring Tape so it aligns with the floor and your “Crib Center” mark on the wall. Lift the tape up 60 inches and mark at the “MARK HERE” indicator. Mark Here 60in Crib Center...
- Page 11 Take the Wall Mount and place it over your mark at 60 inches so you can see the mark through the center hole. THIS SIDE...
- Page 12 Use the Level below the Wall Mount to verify that it is level. Mark the wall through the two holes in the Wall Mount. THIS SIDE...
- Page 13 Pull and remove the Level from the bottom of the Wall Mount.
- Page 14 Using the Screwdriver, push and twist into the two marks to create larger holes in the drywall. Only push as far as the black tip of the Screwdriver.
- Page 15 Push the Large Drywall Anchors into each hole and screw them until they are flush. Note: If the wall anchor doesn't screw into the wall easily, you may have hit a stud. In this case no wall anchor is required for that hole.
- Page 16 Position the Wall Mount over the “+” holes of the anchors. Screw the Large Screws into the “+” holes and secure the Wall Mount until flush with the wall. Note: Screw flush to the wall. Do not overtighten.
- Page 17 Unroll the Power Supply and align the top rubber indicator to the center of the Wall Mount, leaving the top of the cord hanging. Using the Screwdriver, push the rubber indicator into the Wall Mount to secure the Power Supply. THIS SIDE...
- Page 18 Slide the base of the Miku device into the Wall Mount until it clicks. THIS SIDE...
- Page 19 Plug the Power Supply into the back of the Miku device.
- Page 20 (a) Insert the first Cable Guide into the bottom holes of the Wall Mount, making sure the Cable Guide is covering the cord. (b) Remove the adhesive strips and adhere to wall. Note: If you need to customize your cord path, you may need to use our Optional Cable Guide Hardware.
- Page 21 (a) Insert each Cable Guide into the bottom holes of the previously installed section. Remove the adhesive strips and adhere to the wall. (b) One by one, repeat for remaining Cable Guides.
- Page 22 Connect the Power Cord to the Power Supply.
- Page 23 Plug the Power Cord into the nearest outlet and press Miku's power button. Once it is powered, you're ready to go.
- Page 24 For information on Miku's Limited Warranty visit: mikucare.com/warranty Miku, Inc. | Miku Life Monitor | Model No: M0100 | FCC ID: 2AQM3M0100 | Contains TX FCC ID: 2AD9QX4M02 IC: 24123-M0100 | Contains TX IC ID: 22782-X4M02 | CAN ICES-3(B)/NMB-3(B) The final end product must be labeled in a visible area with the following: "Contains TX FCC ID: 2AD9QX4M02"...
- Page 25 CAUTION Any changes or modifications not expressly approved by the grantee of this device could void the user's authority to operate the equipment. RF EXPOSURE WARNING: The equipment complies with FCC RF exposure limits set forth for an uncontrolled environment. The equipment must not be co-located or operating in conjunction with any other antenna or transmitter.
- Page 26 SIMPLIFIED EU DECLARATION OF CONFORMITY Hereby, Miku, Inc., 10 Woodbridge Center Drive Suite 650, Woodbridge, NJ 07095 declares that the radio equipment type Miku Life Monitor M0100 is in compliance with Directive 2014/53/EU. The full text of the EU declaration of conformity is available at the following internet address: mikucare.com/EU...


Need help?
Do you have a question about the Miku Life Monitor and is the answer not in the manual?
Questions and answers