Table of Contents
Advertisement
Quick Links
Advertisement
Table of Contents

Related Manuals for MilDef Crete DR13


Summary of Contents for MilDef Crete DR13
- Page 1 TABLET COMPUTER DR13 USER’S GUIDE ○...
- Page 2 No part of this publication may be reproduced and modified without the written permission of MilDef Crete Inc. MilDef Crete Inc. reserves the right to make changes in the products or the product specifications without any prior notice. Customers are advised to contact MilDef Crete Inc.
- Page 3 Radiation Exposure Statement This equipment complies with FCC radiation exposure limits set forth for an uncontrolled environment. This equipment should be installed and operated with minimum distance 20cm between the radiator & your body. RF exposure warming This equipment must be installed and operated in accordance with provided instructions and antenna(s) used for this transmitter must be installed to provide a separation distance of at least 20 cm from persons and must not be co-located or operating in conjunction with any other antenna or transmitter.
- Page 4 FCC (Federal Communications Commission) regulatory compliance This device complies with part 15 of the FCC Rules. Operation is subject to the following two conditions: (1) This device may not cause harmful interference, and (2) this device must accept any interference received, including interference that may cause undesired operation.
- Page 5 CE Declaration of Conformity It is confirmed to comply with the requirements set out in the Council Directive on the approximation of the laws of the member states relating to Electromagnetic Compatibility (2004/108/EC), Low-voltage Directive (2006/95/EC), Amendment Directive (93/68/EEC), and the procedures given in European Council Directive (99/5/EC and 2004/108/EC ).
- Page 6 Power Conservation This tablet computer consumes less power compared to conventional consumer computers. The power consumption may be further reduced by properly configuring the Power Management Setup. It is recommended that the power saving features be enabled even when not running on battery power.
- Page 7 Battery Preservation Precaution Only use batteries designed for this computer. Using incompatible battery types may cause explosion, leakage or damage to the computer. Do not store your battery in high moisture condition, low temperature or high temperature. Proper storage temperature is 5~20°C and capacity is suggested to remain 50%.
- Page 8 short time. Battery protection If a battery keeps being charged with high voltage, the cell would age faster. To prevent this, once the battery is charged to 100%, the system will not keep charging it and the capacity might decrease and remain between 90~100%. Notice: For safety, recharging will stop if the internal temperature of the battery is out of range(<0°C;...
- Page 9 Environmental Information, Material Safety & Recycling All materials used in the manufacturing of this equipment are recyclable or environmentally friendly. Please recycle the packing materials in accordance with local regulations at the end of the product's service life. Notice: The equipment may contain insignificant amount of hazardous substances for health and environment below control level.
-
Page 10: Table Of Contents
TABLE OF CONTENTS CHAPTER 1 - GETTING STARTED .............. 1 ........................1 NPACKING ....................2 PPEARANCE VERVIEW CHAPTER2 - OPERATING INFORMATION ..........6 ..................6 NSTALLING PERATING YSTEM ..................7 ORKING WITH OWER UTTON ..................8 SING NDICATORS AND EYPAD ...................... - Page 11 CHAPTER 6 – SPECIFICATIONS ............... 36 ........................36 LATFORM ....................... 36 ROCESSOR ........................36 EMORY ........................36 ISPLAY ........................37 TORAGE ........................37 UDIO I/O P ........................37 ORTS ........................38 OWER ......................... 38 ......................38 NVIRONMENTAL ......................39 ERTIFICATIONS ...............
-
Page 12: Chapter 1 - Getting Started
Getting Started Chapter 1 - Getting Started Unpacking The following components come with your computer. If anything is missing or damaged, please notify the dealer immediately. Tablet omputer unit AC Adapter Quick Guide Chapter One - 1... -
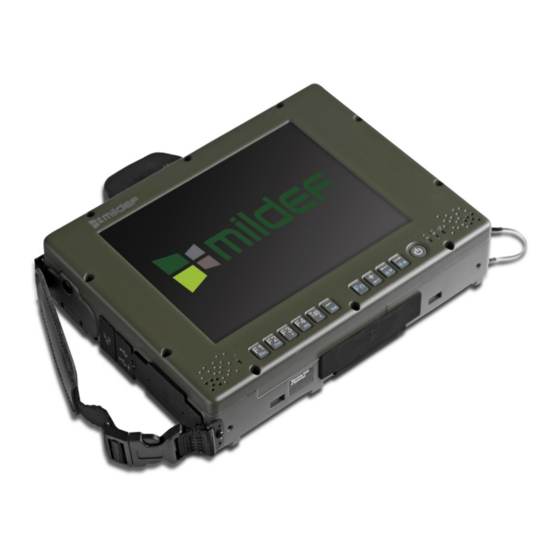
Page 13: Appearance Overview
Getting Started Appearance Overview Front Touch Screen Optional Wi-Fi/Bluetooth Antenna LED Indicators Function Keys Icon Function ↓ ↑ Ctrl Icon ← → Function Function Brightness Brightness Lock Enter Down Note: To prevent wrongly trigger, do not press any function buttons when using keyboard. - Page 14 Getting Started Rear 1. 2 Battery Connector Left 1. Battery Slot 2. GLAN x 1 3. USB 3.1 Type A x 2 4. SD Card Slot x1 5. SIM Card Slot x1 6. Express Card Slot x1 Chapter One - 3...
- Page 15 Getting Started Right 1. DC-In x 1 2. COM(RS232) x 1 1. SSD slot 2. Optional GPS Antenna 3. Optional Wi-Fi Antenna 4. Kensington Lock Slot Chapter One - 4...
- Page 16 Getting Started Bottom 1. Docket Port (120 pin) Chapter One - 5...
-
Page 17: Chapter2 - Operating Information
Operating Information Chapter2 - Operating Information Installing Operating System Your computer is designed to operate with Microsoft Windows 10 / 64-bit Operating System. Please connect your computer with an external USB-interface drive to start the OS installation. Note: A USB hub may be required during installation to connect with an external USB-interface ODD, as the System USB port may not supply enough power. -
Page 18: Working With Power Button
Operating Information Working with Power Button Always turn on your device by using the power button. Press the power button about 2 seconds and the laptop will boot up. The device is equipped with a heater kit to enable work under low temperature. -
Page 19: Using Indicators And Keypad
Operating Information Using Indicators and Keypad Your tablet computer is designed with backlight buttons for easy and quick operations. Also, each LED indicator shows different meanings. The description of each LED indicator and button functions are provided for your operational reference. LED Indicators LED Indicator Description... -
Page 20: System Manager
Operating Information System Manager System Manager is an app which allows user to access information(System, battery ),and set RF device, function keys easily. 1. System information: Chapter Two - 9... - Page 21 Operating Information 2. Battery information: 3. RF Device control panel: Chapter Two - 10...
- Page 22 Operating Information 4. Function key control panel. Available Function Items List None Open/ Execute a selected file Open URL in default browser Change display output Brightness up Brightness down Volume up Volume down Volume mute Launch on-screen keyboard Launch Windows Mobility Center Launch File Explorer Note: ...
-
Page 23: Using Kensington Lock Slot
Operating Information Using Kensington Lock Slot Loop the lock cable around a stationary object such as a table and plug the Kensington Lock into the Kensington Lock Slot to lock it. Note: Kensington Lock is a widely available 3 party product. -
Page 24: Mounting Docklight Dl10
Operating Information Mounting Docklight DL10 Docklight acts as docking unit or port enhancer. It contains more ports that are not available on system unit. To mount a Docklight DL10 Open the rubber cap on the docking connector. Align the docking connector. Attach Docklight. - Page 25 Operating Information Docklight DL10 Ports 1. Docking Connector Bottom and Left 1. Audio Jacks (Microphone/Speaker) x 2 2. RGB DB15 Port x 1 3. Optional GLAN RJ45 x 1 4. Serial Port (COM3: Default RS232) x 1 5. USB Port 1, 2 (Standard type) x 2 6.
-
Page 26: Chapter3- Managing Power
Managing Power Chapter3- Managing Power AC Adapter The AC adapter performs two functions: It powers the computer from an external AC source. It charges the computer battery. The adapter automatically detects the AC line voltage (110V or 220V) and adjusts accordingly. -
Page 27: Battery
Managing Power Battery The computer will automatically switch to battery when the external power source (AC adapter or optional vehicle adapter) is disconnected. Battery Power Saving Tips The computer comes with an intelligent power-saving feature. You may extend the battery life by: Setup power saving functions in Operating System Power Management options (e.g. - Page 28 Managing Power Battery Characteristics Battery power will decrease gradually in storage. The rate depends on “self-discharge rate” and the storage environment. Self-discharge rate of rechargeable batteries is approximately 1% per day. High humidity and high temperature accelerate discharge. Very low temperature may “freeze” the battery chemicals thus decreases the capacity. The following shows some guidelines for users to maintain the battery.
- Page 29 Managing Power Battery Level You may check battery status from Operating System. In Windows, you can click the power/battery icon to reveal the battery gauge window. The following is the illustration of Battery Gauge in Windows OS. Note: The battery gauge should only be used as a reference. Please do not expect it to show the exact amount of the power remaining.
-
Page 30: Battery Recalibration
Managing Power Battery Recalibration Battery recalibration allows a user to calibrate the GAUGE IC parameter of the battery pack. When the battery stays fully charged or in a low charge state for a long period of time, it causes the battery gauge to have some minor discrepancies. Therefore, users are recommended to carry out battery recalibration to correctly calibrate the battery GAUGE IC. -
Page 31: Acpi Support
Managing Power ACPI Support Your computer supports ACPI (Advanced Configuration and Power Interface) for power management. With ACPI and an ACPI-compliant operating system (such as Microsoft Windows), this feature will allow you to reduce the power consumption and conserve energy. By supporting ACPI, the AC adapter LED and the Power indicator LED will show in different ways. -
Page 32: Chapter 4 - Bios Setup
Optional Devices BIOS Setup Chapter 4 - BIOS Setup Press [F2] at boot up to enter BIOS setup. Use arrow keys to select options and [+/-] to modify them. When finished, move to “Exit” and press [Enter] then confirm save by pressing [Y]. -
Page 33: Advanced Menu
Optional Devices BIOS Setup Advanced Menu Aptio Setup Utility Main Advanced Chipset Security Boot Save & Exit Configure Management ► CPU Configuration Engine Technology Parameters ► PCH-FW Configuration ► Platform Settings ► Intel® Ethernet Connection I219-LM ► Trusted Computing ► RF Device Control →←: Select Screen ►... - Page 34 Optional Devices BIOS Setup Advanced Menu Selections You can make the following selections on the Advanced Menu. Feature Options Description CPU Configuration Disabled CPU Configuration Parameters Enabled PCH-FW Configuration Firmware update Configure Management Engine Configuration Technology Parameter Platform Settings Platfrom related settings Intel®...
-
Page 35: Cpu Configuration Sub-Menu
Optional Devices BIOS Setup CPU Configuration Sub-Menu Aptio Setup Utility Advanced VT-d capability CPU Configuration Intel (VMX) Virtualization [Enabled] Technology VT-d [Enabled] Intel Trusted Execution Technology [Enabled] →←: Select Screen Turbo Mode [Enabled] ↑↓: Select Item Enter: Select –/+: Change Opt. F1: General Help F2: Previous Values F3: Optimized Defaults... -
Page 36: Platform Settings Sub-Menu
Optional Devices BIOS Setup Platform Settings Sub-Menu Aptio Setup Utility Advanced related parameter based on area. Wireless Regulatory Domain Setting [EU] →←: Select Screen ↑↓: Select Item Enter: Select –/+: Change Opt. F1: General Help F2: Previous Values F3: Optimized Defaults F4: Save &... -
Page 37: Trusted Computing Sub-Menu
Optional Devices BIOS Setup Trusted Computing Sub-Menu Aptio Setup Utility Advanced Enables or Disables BIOS support security TPM20 Device Found device. O.S. will not show Vendor: IFX Security Device. TCG EFI Firmware Version: 5.61 protocol INT1A interface will Security Device Support [Enabled] available. -
Page 38: Ec Thermal Control Sub-Menu
Optional Devices BIOS Setup EC Thermal Control Sub-Menu Aptio Setup Utility Advanced Thermal Control Setting EC Thermal Control Thermal cooling trip point [75 C] →←: Select Screen ↑↓: Select Item Enter: Select –/+: Change Opt. F1: General Help F2: Previous Values F3: Optimized Defaults F4: Save &... -
Page 39: Usb Charge Control Sub-Menu
Optional Devices BIOS Setup USB charge Control Sub-Menu Aptio Setup Utility Advanced Enable/Disable Charging in mode USB charge Cintrol USB charge Enable [Disabled] →←: Select Screen ↑↓: Select Item Enter: Select –/+: Change Opt. F1: General Help F2: Previous Values F3: Optimized Defaults F4: Save &... -
Page 40: Intel ® Bios Guard Technology Sub-Menu
Optional Devices BIOS Setup Intel ® Bios Guard Technology Sub-Menu Aptio Setup Utility Advanced Enable/ Disable Intel Bios Guard Support Intel Bios Guard Support [Disabled] →←: Select Screen ↑↓: Select Item Enter: Select –/+: Change Opt. F1: General Help F2: Previous Values F3: Optimized Defaults F4: Save &... -
Page 41: Network Stack Configuration Sub-Menu
Optional Devices BIOS Setup Network Stack Configuration Sub-Menu Aptio Setup Utility Advanced Enable/Disable UEFI Network Stack Network Stack [Disabled] →←: Select Screen ↑↓: Select Item Enter: Select –/+: Change Opt. F1: General Help F2: Previous Values F3: Optimized Defaults F4: Save & Exit ESC: Exit CSM Configuration Sub-Menu Aptio Setup Utility... -
Page 42: Chipset Menu
Optional Devices BIOS Setup Chipset Menu Aptio Setup Utility Main Advanced Chipset Security Boot Save & Exit PCH Parameters ► PCH-IO Configuration →← : Select Screen ↑↓: Select Item Enter: Select –/+: Change Opt. F1: General Help F2: Previous Values F3: Optimized Defaults F4: Save &... -
Page 43: Security Menu
Optional Devices BIOS Setup Security Menu Aptio Setup Utility Main Advanced Chipset Security Boot Save & Exit Administrator Password Password Description If ONLY the Administrator’s password is set, then this only limits access to Setup and is only asked for when →←: Select Screen entering Setup. - Page 44 Optional Devices BIOS Setup Setting Password Once you set HDD passwords successfully, you must enter user password to boot in the future. The master password provides an alternative entry in case the user password is lost. Clearing the master password in BIOS setup will also clear the current user password. Master password is used as a backup key, it’s better not to be changed frequently.
-
Page 45: Boot Menu
Optional Devices BIOS Setup Boot Menu Aptio Setup Utility Main Advanced Chipset Security Boot Save & Exit Set the system boot order FIXED BOOT ORDER Priorities Boot Option #1 [UEFI Hard Disk: Windows Boot Manager (P1: XXXXXXXXXXXXXX)] Boot Option #2 [UEFI CD/DVD] →←: Select Screen Boot Option #3... -
Page 46: Chapter 5 - Drivers And Applications
Optional Devices Drivers and Applications Chapter 5 – Drivers and Applications The Utility DVD includes all the drivers for the devices installed in your tablet computer. Please consult your dealer if there are any driver missing. Also, you could update the driver or check if there any driver need to be installed by "Windows device manager". -
Page 47: Chapter 6 - Specifications
Specifications Chapter 6 – Specifications Platform Intel® Kaby Lake-U Platform Processor Intel® 7th Generation Dual Core™ i7-7600U Processor (4M Cache, up to 3.60 GHz) Memory 16GB System Memory Industrial grade DDR4 2133MHz Graphics Intel® HD Graphics 620 Display Standard: 8.4”... -
Page 48: Storage
Specifications Storage 2.5” SATAIII SSD Interface: SATAIII Height: Industrial grade Audio HD Audio and mono Speakers Embedded Digital Mic I/O Ports Left: GLAN*1 USB3.1 Gen. 1 Type A *2 Multi Bay -Express Card Slot*1 -SIM Card Slot*1 -SD Card Slot*1... -
Page 49: Power
Specifications Power AC Adapter: AC Input: AC 100 - 240V Frequency: 50/60 Hz Output Voltage: DC 19V Maximum Power: 90 Watts Dimensions: 133 mm (W) x 58mm (D) x 30mm (H) Weight: 400 g (0.88 lb.) DC-In: ... -
Page 50: Certifications
Specifications Certifications CE, FCC, WEEE, REACH, RoHS2.0, IP54 (Open Port), MIL-STD-810G, MIL-STD-461G, Optional G.A. System Unit Dimensions and Weight Dimensions (mm): 250 (L) x 190(W) x 45.2(H) Weight: 2.34 kg Note: Weight With DRAM x 1, WiFi/BT Module, GPS, 2 GLAN Card, battery x 1, SSD x 1, BVA, Invisible mode On/Off ... -
Page 51: Chapter 7 - Optional Devices
Optional Devices Chapter 7 – Optional Devices Communication WiFi/Bluetooth: Intel Dual Band wireless- AC 9260 Board Form Factor: M.2 2230 E-key Card Wi-Fi Certified: 802.11 a/b/g/n/ac Bluetooth: Supports BT 5.0 Interface: PCIe (WiFi)/USB (BT) GPS: Ublox M8N (USB interface) ... -
Page 52: Docklight Dl10
USB Ports: 2 standard and 2 proprietary environmentally sealed USB jacks. Audio Port: 3.5 mm Jack Optional Giga LAN requires 2 Giga LAN card be installed in DR13. Multi-Battery Charger MCDR MCDR provides four slots(Primary*2; Secondary*2), each slot works independently. It takes 4~5 hours to charge a primary battery while charging a secondary battery takes 6~7 hours. -
Page 53: Chapter 8 - Maintenance And Service
Optional Devices Chapter 8 – Maintenance and Service Cleaning ALWAYS turn OFF the power, unplug the power cord and remove the battery before cleaning. The exterior of the system and display may be wiped with a clean, soft, and lint-free cloth. If there is difficulty removing dirt, apply non-ammonia, non-alcohol based glass cleaner to the cloth and wipe. -
Page 54: Rma Service & E-Rma
Optional Devices RMA Service & E-RMA If troubleshooting solutions are unsuccessful, consult your dealer for RMA. Shipping instructions: 1. Remove any personal add-on devices or other media. 2. Use the original shipping container and packing materials, if possible. 3. If the original packing materials are not available, wrap the equipment with soft material (e.g. - Page 55 Optional Devices E-RMA Instructions: Contact your dealer and provide users’ names and passwords for authorization to E-RMA service. Login E-RMA service platforn Instructions : Crete’s website www.mildef.com.tw => SERVICE/SUPPORT menu => E-RMA Fill out the RMA Request Form to apply for an RMA number. *Please follow the instruction below for RMA Form Example: SERVICE/SUPPORT menu =>...
Need help?
Do you have a question about the DR13 and is the answer not in the manual?
Questions and answers