Table of Contents
Advertisement
Quick Links
7-‰˛ÈÏÓ‚˚È ‡‚ÚÓÏÓ·ËθÌ˚È ¯ËÓÍӽ͇ÌÌ˚È ˆ‚ÂÚÌÓÈ Üä-ÏÓÌËÚÓ/DVD-ÂÒË‚Â
TILT
CLOSE
ASPECT
OPEN / CLOSE
ASP
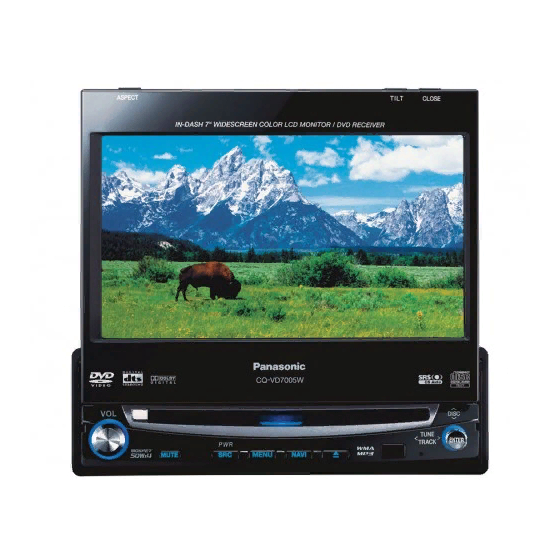
CQ-VD7005W
TILT
O / C
P·MODE
CQ-VD7001U
VOL
PWR
MUTE
SRC
MENU
NAVI
In-dash 7"Widescreen Color LCD Monitor/DVD Receiver
인대쉬 7" 와이드스크린 컬러 LCD 모니터/DVD 리시버
PWR
MUTE
SRC
VOL
ENTER / BAND
ENT
TOP MENU
TEXT
RET
RETURN
DVD MENU
CAR AV
ENTER
CQ-VD7005W
Model:
TEXT
Advertisement
Table of Contents
Troubleshooting

Related Manuals for Panasonic CQ-VD7005W2


Summary of Contents for Panasonic CQ-VD7005W2
- Page 1 In-dash 7"Widescreen Color LCD Monitor/DVD Receiver 인대쉬 7" 와이드스크린 컬러 LCD 모니터/DVD 리시버 7-‰˛ÈÏÓ‚˚È ‡‚ÚÓÏÓ·ËθÌ˚È ¯ËÓÍӽ͇ÌÌ˚È ˆ‚ÂÚÌÓÈ Üä-ÏÓÌËÚÓ/DVD-ÂÒË‚Â TILT CQ-VD7005W CLOSE Model: MUTE ENTER / BAND ASPECT OPEN / CLOSE CQ-VD7005W TILT O / C TOP MENU TEXT P·MODE CQ-VD7001U RETURN DVD MENU CAR AV...
-
Page 2: Safety Information
They contain instructions about how to use the from improper connections and operations. The meanings of system in a safe and effective manner. Panasonic assumes the pictographs are explained below. It is important that you no responsibility for any problems resulting from failure to fully understand the meanings of the pictographs in order to observe the instructions given in this manual. - Page 3 For maximum safety, have it installed by your dealer. Replace a dead battery as soon as possible. ● Panasonic is not liable for any problems resulting from Remove the battery from the remote control unit when not your own installation of the unit.
- Page 4 Safety Information (continued) Caution THIS PRODUCT IS A CLASS I LASER PRODUCT. USE OF CONTROLS OR ADJUSTMENTS OR PERFORMANCE OF PROCEDURES OTHER THAN THOSE SPECIFIED HEREIN MAY RESULT IN HAZARDOUS RADIATION EXPOSURE. DO NOT OPEN COVERS AND DO NOT REPAIR BY YOUR- SELF.
-
Page 5: Notes On Use
Before Reading These Instructions Differences among 4 Models This operating instruction manual is for 4 models CQ-VD7005W2/CQ-VD7005W3/ CQ-VD7005W4 and CQ-VD7005W5. Example: The following table shows the playable region number for each model. -
Page 6: Features
Features Panasonic welcomes you to our constantly growing family of electronic products owners. We endeavor to give you the advantages of precise electronic and mechanical engineering, manufactured with carefully selected components, and assembled by people who are proud of the reputation their work has built for our company. -
Page 7: Table Of Contents
Contents English 한국어 êÛÒÒÍËÈ ¢ Safety Information ......2 ¢ Notes on Use ........... 5 ¢ Before Reading These Instructions ....5 ¢ Components ............ 5 ¢ Features ............6 ¢ Preparation........8 First time power on, other settings, remote control unit, symbols used in this manual ¢... -
Page 8: Preparation
¡ When you connect external devices to AV1-IN/ ¡Battery Information: AV2-IN (AV1/AV2), be sure to connect the side Battery Type: Panasonic lithium battery (CR2025) brake connection lead (aInstallation Instructions). Battery Life: Approximately 6 months under normal use (at room temperature) - Page 9 Symbols used in this manual Pictographs Disc Marks The following pictographs are used for the descriptions You can perform some operations of this unit in one or of disc operation. page 17-21) more methods with the touch panel or remote control. This book explains such operations in tabular form as fol- : DVD lows.
-
Page 10: Name Of Controls And Functions
[ASP], [MENU], [u], [OPEN], [TILT] are available only on the main unit. ¡ : This book refers to connections to the Panasonic car navigation system that will come onto the market in the future. Descriptions regarding the car navigation system are boxed with a dotted line. - Page 11 Remote Control Aim the remote control at the remote control sensor of the main unit and operate it. q [SRC] (PWR) (SOURCE/POWER) [MUTE] t [+] [–] MUTE (VOL) ENTER / BAND [ ■ ] [❚❚] [ B ] [ s ] [ d ] [ } ] [ { ] TOP MENU [ ] ] [ [ ]...
-
Page 12: Touch Panel Operation Oveview
Touch Panel Operation Overview ❒ Notes on the Touch Panel Before operation ¡Do not use a pen or other sharp implements to ¡Clean the surface of the touch panel. page 47) operate the touch panel. Operation ¡Do not bump the front panel. ¡Use only your fingers to operate the touch panel. - Page 13 Switching the Display Please refer to the separate “System Upgrade Guidebook” for how to operate this unit when optional devices are connected. Touching allows users to switch between screens as follows. ❏ How to Call up Operation Screen Source Standard Screen Operation Screen Radio page 24)
-
Page 14: General
General [VOL] [OPEN] [TILT] ASPECT TILT TILT OPEN OPEN P·MODE CQ-VD7005W ENTER ENTER MUTE MUTE MENU NAVI [] ] [[ ] [MUTE] [SRC] (PWR: power) Remote Control Sensor Preparation: Turn your car’s ignition key to the ACC or ON position. General Operations Operations Power... - Page 15 [SRC] (PWR: power) [MUTE] MUTE MUTE MUTE [ + ] [ – ] (VOL) ENTER / BAND [] ] [[ ] TOP MENU RETURN DVD MENU CAR AV General Operations (continued) Operations Volume q [ + ] q Up – w [ –...
-
Page 16: Before Disc Playback
Discs that can be Played Back ❒ Disc Type Playing back a photo CD disc with this unit could ¡ damage the data that is recorded on the disc. DISC CD-R/RW CQ-VD7005W2 * CQ-VD7005W3 * CQ-VD7005W4 (Video CD) CQ-VD7005W5 Recordable Mark/logo ❒... - Page 17 Disc Insert/Eject ■ When a disc is in the player... TILT TILT CLOSE CLOSE Printed side ASPECT ASPECT OPEN / CLOSE OPEN / CLOSE CQ-VD7005W CQ-VD7005W TILT O / C TILT O / C TEXT TEXT P·MODE P·MODE CQ-VD7001U CQ-VD7001U [u] (eject) lights.
-
Page 18: Disc Player
Disc Player Source Button Disc Mode ( DVD ) Selection TILT CLOSE q Touch “Source Button”. w Touch (DVD) on the Source Selection Screen. ASPECT OPEN / CLOSE CQ-VD7005W TILT O / C TEXT P·MODE CQ-VD7001U ENTER ENTER Press [SRC] to change to the desired MUTE MENU NAVI... - Page 19 Basic Operations Operations Compatible Compatible Compatible Operations Discs Discs Discs Track/file Selection Next track/file Compatible Beginning of the current track/file Discs RADIO CH-C Previous track/file (Touch/press twice.) Note: ¡ When playing a DVD, there are cases where it is not possible to return to the start of a chapter that spans 2 titles.
- Page 20 Disc Player (continued) To switch Operation Screen ON, touch the center of touch panel or press [ENTER]. Chapter/title Selection Operations Compatible Compatible Compatible Operations Discs Discs Discs [DVD MENU] q Menu appears. Showing menu and – selecting an item Compatible [RETURN]* Discs RADIO...
- Page 21 mode display Repeat play DVD menu Return Audio Language/ Angle/ Chapter/title selection Subtitle Language Fast forward/fast reverse Play/stop/pause Useful Function Operations Compatible Compatible Compatible Operations Discs Discs Discs Subtitle Language – – ¡ Touch during playback. Compatible It is possible to change the subtitle language during play if multiple lan- Discs RADIO CH-C...
-
Page 22: Notes On Mp3/Wma
Notes on MP3/WMA What is MP3/WMA? Display Information MP3* (MPEG Audio Layer-3) and WMA (Windows Media Displayed items Audio) are the compression formats of digital audio. The ¡ CD-TEXT ¡ MP3 (ID3 tag) former is developed by MPEG (Motion Picture Experts Group), Disc title Album name and the latter is developed by Microsoft Corporation. - Page 23 Recording MP3/WMA files on a CD-media Recording MP3/WMA files on a CD-media ¡ You are recommended to minimize the chances of making ¡ You may encounter trouble in playing MP3/WMA files or a disc that contains both CD-DA files and MP3/WMA files. displaying the information of MP3/WMA files recorded with ¡...
-
Page 24: Radio
Radio Auto presetting Radio Mode Selection Source Button Frequency Preset stations q Touch “Source Button”. TILT CLOSE w Touch Band (RADIO) on the selection Source Selection Screen. ASPECT OPEN / CLOSE CQ-VD7005W TILT O / C TEXT P·MODE CQ-VD7001U Press [SRC] to change to the desired mode. - Page 25 Preset Memory Select a band and frequency. Manual Preset Memory Up to 6 stations can be – – blinks once preset in each band. ¡ Touch/press and hold for more than 2 seconds. ¡ The frequency blinks once, and a receiving station is saved in the memory. New stations overwrite existing saved stations.
-
Page 26: Av1/Av2
SOURCE SKIP ¡If no operation is performed for 10 seconds or touched, the operation buttons disappear. ¡AV terminal is not used for the Panasonic car navigation system (available in the future). Refer to for setting. System Upgrade... - Page 27 CQ-VD7005W...
-
Page 28: Settings
Settings Preparation: To display menu in Chinese, Execute (Language setting). page 31) MENU DISPLAY USER User DISPLAY UNIT Display adjustment page 30) CLOCK Clock setting page 30) ID-CODE ID Code Setting page 30) MEMORY CLEAR Memory clearance page 31) OTHER Other settings page 31) SCREEN... -
Page 29: Menu Operation
❏ MENU Operation (Example: DVD mode) Touch desired setting. Touch in Operation Screen. (Example: setting screen of “DISPLAY UNIT” page 30) Determines the setting and goes back to the pre- vious menu out of the menu. Determines the setting and gets out of the menu. Note : ¡... - Page 30 : puts forward minute. page 46).) If you forget it, you will be unable to use the unit. In case you forget the ID code, Note: please consult your nearest Panasonic Service ¡To start the clock, touch/press / [SRC]. Center.
- Page 31 MEMORY CLEAR OTHER Memory clearance Other settings The state of all of the current memories are returned to BEEP (Beep setting) default settings. Note: : operation sound (beep) ON ¡The ID code is not deleted by executing memory clear. : operation sound (beep) OFF : clears the memory to default settings.
- Page 32 Settings (continued) SCREEN AUDIO USER AUDIO INPUT/OUTPUT RADIO USER SCREEN INPUT/OUTPUT RADIO (Display) SOUND SETUP DIMMER Sound Set Up Adjusting the brightness SOUND EFFECT (Sound effect setting) AUTO : automatically adjusted according to ambient light intensity. THROUGH : no GEQ or CS Auto setting : goes to GEQ (GRAPHIC-EQ) setting Darker Brighter...
- Page 33 ¡To set the level to flat, touch and hold (flat) TruBass (TruBass Setting) for more than 2 seconds. ¡Expectable effects vary with the audio format to be FRONT TruBass (Applies to the front speakers) used, settings in the menu, and other factors. : more : less REAR TruBass...
- Page 34 Settings (continued) (AUDIO continued) PHASE (Phase setting) SP SETUP (Speaker set up) Setting the absence/presence and size of each speaker : subwoofer phase 0 degree 0° FRONT (Front speaker setting) 180° : subwoofer phase 180-degree inverted Note: SMALL : for small speakers, or when bass playback ¡...
- Page 35 Note: SOURCE LEVEL ¡While the private mode is active, only Setting the AV1/AV2 input level FRONT L Make this setting if it is not possible to adjust the volume can be FRONT R through the connected device (on the output side). adjusted.
- Page 36 Settings (continued) USER SCREEN AUDIO INPUT/OUTPUT RADIO LANGUAGE DISPLAY Language Setting Display aspect and DVD software mode MENU (DVD menu language) DVD ASPECT (Display aspect setting) NARROW : English : plays a video in 4:3 screen. : Chinese WIDE : plays a video in wide screen (16:9). : French default: WIDE...
- Page 37 INPUT/OUTPUT USER SCREEN AUDIO RADIO DVD SOUND NAVI SETUP (Navigation set up) DVD sound setting System Upgrade Guidebook) PRO LOGIC (5.1 channel listening in Dolby SOURCE SKIP surround sound) Source skip : activates Pro Logic. AV1 SKIP (AV1 skip) : inactivates Pro Logic. If AV1 is not used, the AV1 mode is skipped when chang- default: ing the mode.
- Page 38 Settings (continued) RADIO USER SCREEN AUDIO INPUT/OUTPUT FM SETUP Setting for FM stations NOISE SUPPRESSION (FM IF filter switching) AUTO : adjusted automatically NARROW : narrows the frequency bandwidth to be received to prioritize noise reduction. WIDE : widens the frequency bandwidth to be received to prioritize sound quality.
- Page 39 Other Settings [ASP] TILT CLOSE ASPECT OPEN / CLOSE CQ-VD7005W TILT O / C TEXT P·MODE CQ-VD7001U ENTER MUTE MENU NAVI ❑ Aspect Ratio Note: ¡This adjustment is common to video mode. Default: NORMAL ¡You cannot change the aspect in the menu screen and a Mode: 4 types screen in the CD, MP3/WMA, radio and CD changer mode.
- Page 40 Settings (continued) Other Settings (continued) [ASP] (P•MODE) TILT CLOSE ASPECT OPEN / CLOSE CQ-VD7005W TILT O / C TEXT P·MODE CQ-VD7001U ENTER MUTE MENU NAVI ❑ Private Mode Note: You can mute the sounds from the rear speakers if nec- ¡Be sure to set to OFF when you do not use the private mode.
-
Page 41: Troubleshooting
Please refer checking and repair to professionals. ¡Never try to repair the unit by yourself Panasonic shall not be liable for any accidents arising out of neg- because it is dangerous to do so. lect of checking the unit or your own repair after your checking. - Page 42 Troubleshooting (continued) ■ Radio Antenna installation or wiring of antenna cable is faulty. aCheck whether the antenna mounting position and its wiring are correct. In addition, check to see whether the antenna ground is securely connected to Poor reception or noise the chassis.
- Page 43 ■ MP3/WMA The disc has unplayable formatted data. No playback or disc aRefer to the description about MP3/WMA for playable sound data except CD- ejected DA (i.e. music CD). The playability of some CD-R/RWs may depend on the combination of media, The CD-R/RWs that are recording software and recorder to be used even if these CD-R/RWs are playable playable on other...
- Page 44 Troubleshooting (continued) ■ Display Settings AUTO dimmer is selected. The brightness of the aSelect one of the dimmer levels from among 1 to 4 to make the dimmer screen is not stable. adjustment become free from light intensity. The picture is dark. The picture is whitish.
- Page 45 ■ Sound Settings No sound from left, Cables are not correctly connected. right, front, or rear aConnect the cables correctly. speaker. Left and right sounds are The speaker leads are connected in reverse between right and left. aConnect the speaker wires to the correct one. reversed.
- Page 46 ❑ In case you forget the ID code... In case you forget the ID code, please consult your nearest Panasonic Service Center. ID code memo Copy the memo below, fill in the ID code, and keep it in a secure location.
-
Page 47: Maintenance
If the suggestions in the charts do not solve the problem, we recommend that you take it to your nearest authorized Reset switch Panasonic Service Center. The product should be serviced Insert a hard, slender stick into the hole and push the only by a qualified technician. -
Page 48: Notes On Discs
Notes on Discs How to hold the disc Disc insert ¡ Do not touch the underside of the disc. The surfaces of new discs tend to be slippery. Therefore, ¡ Do not scratch the disc. when using such a disc for the first time, it may not load ¡... -
Page 49: Language Code List
Language Code List In “OTHER” cases... page 36) Input the four digit language code pressing the buttons Touch to determine. Note: ¡Setting is finished and the display returns to the main menu. ¡For retrying selection during number entry, touch/press /[RETURN]. DVD language menu page 36) Code... -
Page 50: Definition Of Terms
Definition of Terms Dolby Digital Playback control (VCD (Video CD)) This fully discrete format divides the music signals If the VCD (Video CD) has “With Playback Control” into 5.1 channels: Front Left (L), Front Right (R), or others written on the disc surface or on the jacket, Center (C), Left Surround (LS), Right Surround (RS) the scenes or information to be viewed (or listened and Subwoofer (SW: 0.1 channel) for recording and... -
Page 51: Specifications
¡Specifications and the design are subject to modification without notice due to improvements in technology. ¡Some figures and illustrations on this manual may be different from your product. Playable region number This operating instruction manual is for 4 models CQ-VD7005W2/CQ-VD7005W3/CQ-VD7005W4 and CQ-VD7005W5. The following table shows the playable region number for each model. Model... - Page 52 CQ-VD7005W Matsushita Electric Industrial Co., Ltd. Web Site : http://panasonic.net YFM284C675CA PTW0107-1027 Printed in China...
- Page 53 Installation Instructions àÌÒÚÛ͈Ëfl ÔÓ ÏÓÌÚ‡ÊÛ CQ-VD7005W Model: TEXT...
- Page 54 Safety Information CAUTION: • PLEASE FOLLOW THE LAWS AND REGULATIONS OF YOUR STATE, PROVINCE OR COUNTRY FOR INSTALLATION OF THE UNIT. • TO REDUCE THE RISK OF FIRE OR ELECTRIC SHOCK OR PRODUCT DAMAGE, DO NOT EXPOSE THIS APPLIANCE TO RAIN, SPLASHING, DRIP- PING OR MOISTURE.
- Page 55 Upgrade Options Main Unit Rear Monitor CQ-VD7005W TV Tuner (CY-TUP133W/CY-TUN133W, option) iPod ® Hands-Free Kit featuring Bluetooth technology ® (CY-BT100N, option) Expansion Module (CY-EM100N, option) CD Changer (CX-DP880, option) DVD Changer (CX-DH801W, option) Contents Safety Information..........2 Upgrade Options ..........3 Installation ............4 Electrical Connections ........10 CQ-VD7005W...
- Page 56 30°. In case of difficulty, please consult your nearest author- ized Panasonic Service Center. 1. This system is to be used only in a 12 V DC battery system (car) with negative ground.
- Page 57 ❏ Installation Hardware ❏ Installation Hardware (For Installation) (For Wiring ) Item Diagram Qty. Item Diagram Qty. Trim Plate Power Connector <YFC054C087CA> Clip Connector Mounting Collar <YAJ024C117ZA> <YFX214C433CA> Reverse Extension Cord Mounting Spring <YEAJ012897> <YFX054C077CA> Note: Mounting Bolt (5 mmø) ¡The number in parenthesis underneath each accessory Tapping Screw part name is the part number for maintenance and serv-...
- Page 58 Installation (continued) Mounting the Main Unit ❏ Installation Procedures (When using Mounting Collar w) Note: Insert the Mounting Collar w into the dashboard, and ¡The car model, installation condi- bend the mounting tabs out with a screwdriver. tions and combination of the units used may impose some restric- Fastening the Mounting Collar tions on opening and closing the...
- Page 59 Method for Fixing the Mounting Spring Two holes of the mounting spring allow you to select between two mounting types as shown below. (A) Regular installation method (B) Deeper installation method A few millimeters of Less projecting console projecting o Flat-Head Screw o Flat-Head Screw o Flat-Head Screw o Flat-Head Screw...
- Page 60 Installation (continued) ❏ Installation Procedures (When not using Mounting Collar w) Use the brackets supplied with your car when mounting this unit. The bracket shape and mounting method vary with car manufacturers, car types and manufacturing year. Please consult your nearest dealer or installer. Select mounting screws according to the hole positions and hole shape of the bracket.
- Page 61 Connecting the Side Brake (Parking Brake) Connection Lead Caution ¡For safety, be sure to ask your nearest professional installer to do this connection. Hand brake Foot brake Side brake (parking brake) switch The side brake (parking brake) switch position varies with car model. For details on the exact location of the side brake (parking brake) switch in your car, contact your dealer.
- Page 62 ¡Run the cords avoiding the spots where the temperature can be extremely high. Navi Mute Lead (Orange) Power Connector Connect to the Navi Mute Lead of the Panasonic car navigation system. (available in future) NAVI MUTE ANT-CONT MAX 0.1A Motor Antenna Relay Control Lead (Blue) (To motor antenna) (Max.
- Page 63 : This book refers to connections to the Panasonic car navigation system that will come onto the market in the future. Descriptions regarding the car navigation system are boxed with a dotted line.
- Page 64 Electrical Connections (continued) Connection with DVD Changer (CX-DH801W) Note: ¡ Refer to the operating instructions for the connected devices, in addition. DVD Changer CX-DH801W (option) Ground Lead (Black) To a clean, bare metallic part of the car chassis Power Connector Battery Lead (Supplied with CX-DH801W) BATTERY 5 A...
- Page 65 Connection with CD Changer (CX-DP880) Note: ¡ Refer to the operating instructions for the connected devices, in addition. CD Changer CX-DP880 (option) Ground Lead (Black) To a clean, bare metallic part of the car Power Connector (Supplied with CX-DP880) chassis Battery Lead (Yellow) To the car battery, continuous +12 V DC...
- Page 66 Electrical Connections (continued) Connection with Expansion Module (CY-EM100N) Note: ¡ Refer to the operating instructions for the connected devices, in addition. Head unit/Expansion Module Connecting cable (Supplied with CY-EM100N) (Video) (Yellow) (L) (White) System-up Connector (Red) (R) (Red) (L) (White) VIDEO OUT AUDIO OUT Camcorder...
- Page 67 Connection with Rear View Camera Note: ¡ Refer to the operating instructions for the connected devices, in addition. Rear View Camera Control Unit (option) CQ-VD7005W (Rear) Camera Input Rear View Camera (Video) (CY-RC50KW) (option) (Yellow) RCA Cord (option) CAMERA-IN Camera Input Terminal (Video) (Yellow) (Yellow)
- Page 68 Caution Rear Monitor STAND BY (R) COLOR LCD MONITOR ON (G) ¡For people sitting in the front seats, please enjoy only audio during driving. Panasonic VM1500 Audio Right Audio Left Example: Video Input (R) (Red) (Video) (Yellow)
- Page 69 Connection with TV Tuner Note: ¡ Refer to the operating instructions for the connected devices, in addition. External Amplifier Control Power Lead Note: ¡Connect both the power control lead of the TV tuner and the amplifier control connector of the external amplifier when the TV tuner and external amplifier are connected at the same time.
- Page 70 Matsushita Electric Industrial Co., Ltd. Web Site : http://panasonic.net YFM294C099CA PTW0107-1027 Printed in China...
- Page 71 System Upgrade Guidebook àÌÒÚÛ͈Ëfl ÔÓ ‡Ò¯ËÂÌ˲ ÒËÒÚÂÏ˚ CQ-VD7005W Model:...
- Page 72 They contain instructions about how to use the from improper connections and operations. The meanings of system in a safe and effective manner. Panasonic assumes the pictographs are explained below. It is important that you no responsibility for any problems resulting from failure to fully understand the meanings of the pictographs in order to observe the instructions given in this manual.
- Page 73 For maximum safety, have it installed by your dealer. Replace a dead battery as soon as possible. ● Panasonic is not liable for any problems resulting from Remove the battery from the remote control unit when not your own installation of the unit.
- Page 74 Before Reading These Instructions Panasonic welcomes you to our constantly growing family of electronic products owners. We endeavor to give you the advantages of precise electronic and mechanical engineering, manufactured with carefully selected components, and assembled by people who are proud of the reputation their work has built for our company.
- Page 75 Controllable iPod/software version dealer. ¡ 3rd generation iPod/ver. 2.3 ¡If a non-Panasonic product is connected to this unit, we do ¡ 4th generation iPod/ver. 3.1.1 not guarantee the operations of the product. 5th generation iPod/ver. 1.2 (Refer to “Precautions in ¡...
- Page 76 Before Reading These Instructions (continued) System upgrade sample ■ Simultaneous Multi-Device Connection CQ-VD7005W CD Changer (CX-DP880, option) DVD Changer (CX-DH801W, option) System-up Connector Only 1 unit Conversion Cable for DVD/CD Changer (CA-CC30N, option) iPod Up to 4 units Direct cable for iPod (CA-DC300N, option) Expansion Module (CY-EM100N, option)
- Page 77 ¡ Even if you are using this unit without installing a center speaker, surround speakers, or a subwoofer, it is still neces- sary to make the speaker settings in order to adjust the sound balance. Center Speaker: EAB-CF2 Panasonic Power amplifier CQ-VD7005W Front Speakers:...
-
Page 78: Touch Panel Operation Overview
Touch Panel Operation Overview ❒ Notes on the Touch Panel Before operation ¡Do not use a pen or other sharp implements to ¡Clean the surface of the touch panel. Operating operate the touch panel. Instructions) ¡Do not bump the front panel. Operation Failure to observe the above may damage or ¡Use only your fingers to operate the touch panel. - Page 79 Switching the Display Touching allows users to switch between screens as follows. ❏ How to Call up Operation Screen Source Standard Screen Operation Screen CD Changer page 12) iPod page 18) ❏ How to Cancel OSD (On Screen Display) Source Standard Screen OSD OFF * TV tuner...
-
Page 80: Tv Tuner Control
TV Tuner Control Preparation: ¡ Connect a TV tuner (CY-TUP133W/CY-TUN133W, ¡For receiving TV broadcasts, stop your car where option) to the unit. there is no obstacle to broadcast reception around. ¡It is required to install the TV antenna to receive TV broadcasts. - Page 81 Preset Memory Operations 12 channels with first to 12th highest in signal strength will be preset to each band. Auto Preset Memory [BAND] [ENTER] Select a band. RADIO CH-C ¡ Touch/press and hold for more than 2 seconds. ¡ “–” appears if the number of receivable channels is less than 12. New channels overwrite existing saved channels.
-
Page 82: Cd Changer Control
CD Changer Control ¡CD changer functions are designed for optional Preparation: Panasonic CD changer unit. (CX-DP880) ¡Connect the CD changer, and load a magazine (discs). CD Changer Mode Selection Source Button Current track q Touch “Source Button”. TILT CLOSE Disc number... -
Page 83: Dvd Changer Control
NAVI Note: [SRC] [ENTER] ¡Be sure to connect RCA cord (video)(yellow) of the Panasonic DVD Changer to AV2-IN and set [] ] [[ ] page 20). Otherwise the CH VIDEO INPUT changer cannot be controlled through this unit. [}] [{] ¡Refer to the operating instructions and installation... - Page 84 DVD Changer Control (continued) Basic Operations (continued) Slow Playback ¡Touch/press and hold in the pause mode. – Playback is at about 1/4 normal speed. To resume normal playback, touch/press / [5]. Note: ¡Reverse slow playback is not possible. – – Next disc Disc Selection –...
- Page 85 CQ-VD7005W...
-
Page 86: Bluetooth Hands-Free Kit
Bluetooth Hands-Free Kit Connection of the optional Bluetooth hands-free kit Preparation: allows users to talk on a handsfree cellular phone in a ¡Connect the Bluetooth hands-free kit (CY-BT100N) car. and establish the pairing. Refer to the instruction Note: manual for the Bluetooth hands-free kit for further ¡... - Page 87 Useful Function Operations Adjustment of Ring Adjust the volume when a call is coming in. Volume RADIO CH-C – down [–] When the ringtone is the same as that of the cellu- [VOL] lar phone, – [VOL] When the ringtone is not Adjust the volume when a call is coming in.
-
Page 88: Ipod Control
iPod Control Preparation: ¡Connect the iPod through connecting cable (CA-DC300N, option). iPod Mode Selection Source Button Information of current track/file q Touch “Source Button”. TILT CLOSE w Touch (iPod) on the text/title scroll Source Selection Screen. (Content varies with operation buttons connected devices) OPEN / CLOSE ASPECT... - Page 89 Useful Function Shuffle Songs To cancel, touch again. – – Shuffle Albums To cancel, touch and hold again. – – Note: ¡The shuffle function of iPod corresponds to the RANDOM function of this unit. Repeat Play To cancel, touch again. –...
-
Page 90: Settings
Setting range: 0 to 40 default: 20 Connection with Panasonic car navigation system : This book refers to connections to the Panasonic car navigation system that will come onto the mar- ket in the future. Descriptions regarding the car navigation system are boxed with a dotted line. - Page 91 Note: OUTPUT SELECT Output Selection REAR MONITOR (Rear Monitor Set up) You can have different picture and sound on the front and rear monitors at the same time. Preparation: Connect another optional rear monitor. ¡The screen above shows the case that no device is Installation Instruction) connected to the Expansion Module.
-
Page 92: Troubleshooting
Please refer checking and repair to professionals. ¡Never try to repair the unit by yourself Panasonic shall not be liable for any accidents arising out of neg- because it is dangerous to do so. lect of checking the unit or your own repair after your checking. - Page 93 [ u ]. If failure persists, press the reset switch. (Press the reset switch in MECHANISM ERROR the CD changer). If normal operation is not restored, call the store where you purchased the unit or the nearest Panasonic Service Center. The type of the file that is selected is not supported. FILE ERROR aCheck disc.
- Page 94 Matsushita Electric Industrial Co., Ltd. Web Site : http://panasonic.net YFM284C676CA PTW0107-2037 Printed in China...
Need help?
Do you have a question about the CQ-VD7005W2 and is the answer not in the manual?
Questions and answers