Table of Contents
Advertisement
Quick Links
Advertisement
Table of Contents

Related Manuals for Acer DME110


Summary of Contents for Acer DME110
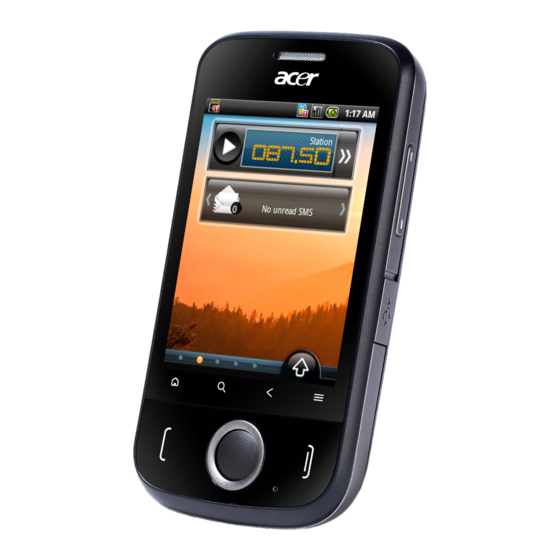
- Page 1 Acer E110 User Guide...
- Page 2 © 2010 All Rights Reserved Acer E110 Smartphone User Guide First issue: 02/2010 Acer E110 Smartphone Model number: __________________________________ Serial number: ___________________________________ Date of purchase: ________________________________ Place of purchase: ________________________________...
- Page 3 Sublicense or otherwise make the Software available to third parties, except that you may, after prior written notification to Acer, transfer the Software as a whole to a third party so long as you do not retain any copies of the Software and such third party accepts the terms of this Agreement.
- Page 4 Acer is not obligated to provide technical or other support for the Software. ACER LIVE UPDATE Certain of the software contains elements that enable the use of the Acer Live Update service, which allows for updates for such software to be automatically downloaded and installed on your phone.
- Page 5 CONNECTION WITH ANY PROVISION OF THIS AGREEMENT, EVEN IN THE EVENT OF THE FAULT, TORT (INCLUDING NEGLIGENCE), STRICT LIABILITY, BREACH OF CONTRACT OR BREACH OF WARRANTY OF ACER OR ITS SUPPLIERS OR LICENSORS, AND EVEN IF ACER AND ITS SUPPLIERS AND LICENSORS HAVE BEEN ADVISED OF THE POSSIBILITY OF SUCH DAMAGES.
- Page 6 Third Party Services, or the services and products of Acer's licensors' or suppliers' third party licensors. Your use of the Third Party Software and Third Party Services is also subject to additional terms and conditions and policies which can be accessed through our global website.
-
Page 7: Table Of Contents
Table of Contents End User Licence Agreement Getting to know your smartphone Features and functions ......9 Product registration . - Page 8 Putting your smartphone in airplane mode ..39 Acer Settings ....... 40 Sound and display .
-
Page 9: Getting To Know Your Smartphone
This will give you access to some useful benefits, such as: • Faster service from our trained representatives • Membership in the Acer community: receive promotions and participate in customer surveys • The latest news from Acer... - Page 10 How to register To register your Acer product, visit our website at registration.acer.com. Choose your country and follow the simple instructions. You can also register directly from your smartphone by tapping the Registration icon. After we receive your product registration, you will be sent a confirmation email with important data that you should keep in a safe place.
-
Page 11: Chapter 1: Setting Up
Your new smartphone comes packed in a protective box. Carefully unpack the box and remove the contents. If any of the following items is missing or damaged, contact your dealer immediately: • Acer E110 Smartphone • Battery • Quick Guide • Companion CD •... -
Page 12: Getting To Know Your Smartphone
Getting to know your smartphone Views No. Item Description microSD Card slot Expansion slot for microSD Card. Touchscreen 2.8-inch, 240 x 320 pixel resistive touchscreen to display data, phone content and enter information. Home button Return to the home screen. Search button Open the Google search function. - Page 13 No. Item Description Microphone Internal microphone. Power/End button Press to turn the screen on/off or enter sleep mode; press and hold for more than three seconds to turn the smartphone off. Press to end a call. Menu button Opens the option menu. Back button Go back one menu step.
-
Page 14: Installing Or Removing The Battery
Installing or removing the battery Your smartphone uses a replaceable battery to provide power. It is packed separately from your smartphone and needs to be inserted and charged before you can use the smartphone. Installing the battery Insert your fingernail into the cutout between the battery cover and the phone. - Page 15 CAUTION: RISK OF EXPLOSION IF BATTERY IS REPLACED BY AN INCORRECT TYPE. DISPOSE OF USED BATTERIES ACCORDING TO THE INSTRUCTIONS. Charging the battery For initial use, you need to charge your smartphone for eight hours. After that you can charge it each day to recharge the battery to full capacity.
-
Page 16: Installing A Sim Or Microsd Card
Installing a SIM or microSD Card To take full advantage of your smartphone’s telephony capabilities, you must install a SIM card. The SIM card holder is located in the battery bay. Additionally, you may wish to increase your smartphone’s storage by inserting a microSD Card into the slot provided. The slot is located on the left side of the phone. -
Page 17: Turning On For The First Time
SIM card lock Your smartphone may come with a SIM card lock, i.e., you will only be able to use the SIM card provided by your network operator. To cancel the SIM lock, contact your network provider. Turning on for the first time To turn on your smartphone for the first time, press and hold the power button until the system bootup screen appears. -
Page 18: Using The Touchscreen
Using the touchscreen Your smartphone uses a touchscreen for selecting items and entering information. Use your finger to tap the screen. Tap: Touch the screen once to open items and select options. Drag: Hold your finger on the screen and drag across the screen to select text and images. -
Page 19: The Home Screen
The home screen After rebooting, your smartphone will display the home screen. This screen gives you quick, icon-based access to many of the frequently-used features of your smartphone. The first time you start your smartphone, you will see some icons on the screen. At the bottom of the screen is the Applications tab which lists all the applications you have installed. - Page 20 Personalizing the home screen You may personalize your home screen by adding or removing icons, shortcuts or widgets, or changing the wallpaper. Adding or removing icons You can set icons for installed applications on the home screen. Tap and hold an icon in the Applications tab to copy it to the home screen.
- Page 21 You can also add folders to your home screen. There are some pre-defined folders available or you can add a New folder. This will be placed on your home screen and named Folder. Notification area At the top of the screen is the Notification area. This contains a variety of icons to inform you of your phone’s status.
- Page 22 Icon Description Connected to the 2G data network. Airplane mode: Wireless connectivity disconnected. Please disable airplane mode before trying to make a call. Incoming call or active call. Charging has temporarily stopped to prevent overheating/ overcharging.
-
Page 23: Chapter 2: Making Calls
Chapter 2: Making Calls This chapter shows you how to make phone calls, and the various options available to you during your call. Before making a call Check that the phone function is on before you make a call. You can confirm the phone status from the icon on the right- hand side of the Notification area. - Page 24 Dialing a number from call log Your call history can be viewed by tapping the Call Log tab. It displays recent received, dialed, and missed calls. Tap a number to view the call details. To redial any number in the call history, select the number and tap Return call. You may also select Send SMS/MMS or Add to contacts.
-
Page 25: The Voice Call Screen
Warning: International call rates can vary greatly depending on the country you are calling and your network provider. We suggest you check all call rates with your network provider, to avoid excessive phone bills. If you are using your smartphone abroad, roaming charges will apply. - Page 26 Muting a call To mute a call, tap Menu, then tap Mute on the voice call screen to switch off the microphone. Tap Mute again to switch the microphone back on. Saving a dialed or received call number to contacts You can save a number you have dialed to your contacts for future use.
- Page 27 Conference calls If you have one or more calls on hold and another online, you can combine all calls to create a conference call. After the first call is established, press the Menu button to bring up the dialog box. Tap Add call to add the second call. Tap Merge calls to start the conference call.
-
Page 29: Chapter 3: Messaging
Chapter 3: Messaging This chapter shows you how to set up and use the SMS and MMS functions of your smartphone. All SMS and MMS messages are accessed via Messaging. Messaging automatically arranges received and sent messages into threads. To access messaging, tap Messaging on the home screen. Creating a new message You can use your phone to compose SMS or MMS messages. -
Page 30: Replying To A Message
Press the Menu button to see what options are available when creating a new message. The options change depending on the status of the message. Icon Description Convert the SMS to an MMS, allowing you to add a subject to the message. -
Page 31: Mms Messages
To reply to an SMS or MMS message, open the message from the message list. Enter your text in the text box labeled Type to compose. Press the Menu button to see available options. Icon Description Convert the SMS to an MMS, allowing you to add a subject to the message. - Page 32 Receiving MMS messages When a new MMS message arrives, a message icon appears at the top of the screen and a notification message is displayed. 1. Open Messaging to view a summary of the message. 2. Tap Download to download the message content. Note: Downloads can take a long time, depending on your connection quality.
-
Page 33: Setting Up Email
Setting up email Your smartphone enables you to access your email. Most popular providers can be set up in two steps. Tap the Applications tab and then Email to start setting up your email access. To manually set up your email, tap Other. 1. -
Page 35: Chapter 4: Using The Camera
Chapter 4: Using the Camera Your smartphone features a 3-megapixel EDOF digital camera mounted on the rear. This section will take you through all the steps in taking photos and videos with your smartphone. Note: You need to have a microSD Card inserted into the microSD slot before you can use the camera. - Page 36 • Tap the camera icon to take a picture. To adjust the settings, press the Menu button and select Settings. The Settings options are: Settings Description Jpeg Quality Set the JPG quality: • Best • Better • Good White Balance/ Adjust the white balance: Lighting •...
-
Page 37: Taking A Photo
Settings Description Prompt After Set review time after picture capture: Capture • No preview • 3 seconds • 5 seconds • 10 seconds Grid Show grid in preview. Shutter Sound Play shutter sound. Prefix Set default file name prefix. Counter Reset the counter back to 1. -
Page 38: Viewing Photos And Videos
Supported formats The following file formats are supported: Type Formats Image JPEG, BMP, PNG, GIF, DRM, WBMP Video 3GP, MPEG-4 Viewing photos and videos After you have taken your photo or video, it is automatically saved. Once you have taken a photo or video, you can view the it in Gallery by tapping Gallery in the menu. -
Page 39: Chapter 5: Advanced Settings Putting Your Smartphone In Airplane Mode
Chapter 5: Advanced Settings Putting your smartphone in airplane mode You can enter airplane mode (also known as flight mode) to turn off telephone and Bluetooth and use your smartphone as a handheld device during a flight. Check with your airline to make sure this is permitted onboard. -
Page 40: Acer Settings
Acer Settings Acer Settings is a convenient all-in-one place for you to adjust commonly-used settings on your phone. Open the Applications tab and tap Acer Settings. From this screen you can turn Bluetooth on or off or adjust their settings by tapping... - Page 41 You can use Bluetooth to exchange information between your smartphone and other mobile devices. Bluetooth connections For all Bluetooth settings, open the Applications tab and tap Settings > Wireless controls > Bluetooth settings. Here you can switch Bluetooth on or off, set a device name and Acer Settings...
-
Page 42: Sound And Display
discoverability. Tap Scan for devices to scan for available devices. To connect to a device, tap the device in the list of available devices. You may be asked to enter a PIN on both devices to establish the connection. Sound and display Adjust the volume of your phone using the volume button on the side of the phone. -
Page 43: Setting The Date And Time
Setting the date and time Set the date and time by opening the Applications tab and going to Settings > Date & time. Tip: If you travel frequently or live in an area that uses daylight saving time, activate Automatic from this menu. This will enable your smartphone to set the date and time based on information it receives from the network. -
Page 44: Managing Your Contacts
Tap Select Locale to set the language you would like to use the phone in. Tap TouchPal to set text input preferences. Under basic settings you may: • Turn on word prediction. • Turn on key press sound. • Turn on key press vibration. •... - Page 45 Icon Description Search for a contact. Add a new contact. Display the contacts you have assigned to a group. Export to SD card. Import from SD card. Import contacts from SIM. Delete contacts from phone. Adding a contact Tap New contact to add a new contact. You will be asked if you want to create a SIM contact or a Phone contact.
-
Page 46: Managing Your Calendar
Importing / exporting SIM contacts You may import all SIM contacts, export contacts to the SIM card, or delete multiple contacts. 1. Open Contacts from the home screen or from the Dialer. 2. Press the Menu button and tap Import. Tap a contact in the SIM to import to the phone, or press the Menu button and tap Import all to import all SIM contacts to the phone. -
Page 47: Connecting To A Pc
• Lunar Calendar • Festival • Hide Declined Events • Hide Completed Tasks • Event/List View Settings • Reminder Settings • Import/Export • Delete Settings Adding a new event or task To add a new event, tap Menu and tap New event. To add a new task, tap Menu and tap New task. - Page 48 your smartphone. Plug the USB client connector into an available USB port on your computer. Using mass storage Open the Applications tab and tap USB Mode Switcher. Once in USB Mode Switcher, select mass storage by sliding the ball to the right.
-
Page 49: Social Networking
Note: Additional help is available by swiping the screen from right to left. Browsing the Internet In order to browse the Internet with your smartphone, you must be connected to a data network. Please see “Phone network settings“ on page 40 for more information. Tap Browser on the home screen to start browsing. - Page 50 Creating your urFooz avatar If you have not yet set up an account to urFooz, tap the Get Started button. If you have an existing urFooz account, select Sign in and login with your email and password. To start creating your avatar, select your Gender, Ethnicity, Zodiac Sign, Relationship Status and Areas of Interest.
- Page 51 Managing your avatar Now that you have created your Fooz avatar, go to Fooz World and personalize your Fooz card, or your portable profile. Select Profile/Apps to fill in your profile and other information such as bookmarks of your social network profiles and favorite websites.
-
Page 52: Multimedia Playback
Note: Fuhu, Spinlets, Spinlet, urFooz, Fooz Avatars, Fooz Creator, Fooz Card, and Fooz World are trademarks or registered trademarks of Fuhu, Inc. in the U.S. and/or other countries. Multimedia playback Your smartphone comes supplied with a variety of programs that you can use to enjoy multimedia content. nemoPlayer Open nemoPlayer from the Applications tab to play media you have stored on your phone. - Page 53 Launching Spinlets To launch the Spinlets application, tap Spinlets in the Applications tab. Browsing Spinlets gallery You can sort or search your media content by albums or genres. Browsing albums Once Spinlets is opened, you will see a display of featured albums. Browse this display by sliding your finger horizontally (left or right), and select an album by tapping it.
- Page 54 Search To search the Gallery for a specific name, select the Search button at the bottom right corner of the screen. Type the name of an artist in the search box and find potential matches. Exploring Spinlets widgets When you select an album, you will see a Spinlet.
-
Page 55: Gps Tracker
Another way you can share Spinlets is through email. Tap Share It at the top right corner of the Spinlet, select Send it, and enter your name and your friend’s email address. Note: Fuhu, Spinlets, Spinlet, urFooz, Fooz Avatars, Fooz Creator, Fooz Card, and Fooz World are trademarks or registered trademarks of Fuhu, Inc. -
Page 56: Fm Radio
• Car - 2-second intervals FM radio The FM radio allows you to listen to your favorite stations while on the move. Headphones must be inserted to the 3.5 mm jack as it functions as an antenna. You can access the radio by tapping Radio from the Applications tab. -
Page 57: Managing Applications
Managing applications Warning! Make sure you trust the source of any program you install. If you are not sure of the source, do not install a program. Installing programs from unknown sources increases your risk of virus attacks and theft of personal and private data. You can remove programs installed on your smartphone to free up extra storage memory. - Page 58 A clean boot will restore your smartphone to the factory settings. Warning! This will erase all your personal information, any contacts stored on your phone and any programs you installed. 1. Open the Applications tab and go to Settings > SD card & Phone storage >...
-
Page 59: Appendix
Appendix FAQ and troubleshooting This section lists frequently asked questions that may arise during the use of your smartphone, and gives easy answers and solutions to these questions. Aspect Question Answer Audio Why is there no If the headset is plugged into the sound coming device, the speaker is automatically from the device? -
Page 60: Other Sources Of Help
It is also normal for the phone to heat up during long periods of use, such as watching a video or a long phone conversation. All Acer phones are factory tested before release. Other sources of help For information on:... -
Page 61: Specifications
Specifications Performance • STE PNX6715, 416 MHz • System memory: • 256 MB of SDRAM • 256 MB of Flash ROM • Google Android operating system Display • 2.8” QVGA TFT, Resistive Touch Panel • 320 x 240 resolution • 65K colors support Multimedia •... -
Page 62: Warnings And Precautions
Connectivity • Bluetooth 2.0+EDR • GSM 850 / 900 / 1800 / 1900 • UMTS 850 / 1900 • HSDPA / EDGE / GPRS Camera • 3-megapixel EDOF • Auto-focus Expansion • microSD memory card (up to 32 GB) Battery •... - Page 63 • Do not place this product on an unstable cart, stand or table. If the product falls, it could be seriously damaged. • Never push objects of any kind into this product through slots as they may touch dangerous voltage points or short-out parts that could result in a fire or electric shock.
- Page 64 When the talk and standby times are noticeably shorter than normal, buy a new battery. Use only Acer approved batteries, and recharge your battery only with Acer approved chargers designated for this device. Unplug the charger from the electrical plug and the device when not in use.
- Page 65 Leaving the battery in hot or cold places, such as in a closed car in summer or winter conditions, will reduce the capacity and lifetime of the battery. Always try to keep the battery between 15 °C and 25 °C (59 °F and 77 °F). A device with a hot or cold battery may not work temporarily, even when the battery is fully charged.
- Page 66 Remember to follow any special regulations in force in any area, and always switch off your device when its use is prohibited or when it may cause interference or danger. Use the device only in its normal operating positions. Do not cover the antenna with metal and you should position the device at the above-stated distance from your body.
- Page 67 • Always keep the device more than 15.3 cm (6") from the pacemaker. • Not carry the device near your pacemaker when the device is switched on. If you suspect interference, switch off your device, and move it. Hearing aids. Some digital wireless devices may interfere with some hearing aids.
-
Page 68: Emergency Calls
Potentially explosive environments Switch off your device when in any area with a potentially explosive atmosphere and obey all signs and instructions. Potentially explosive atmospheres include areas where you would normally be advised to turn off your vehicle engine. Sparks in such areas could cause an explosion or fire resulting in bodily injury or even death. -
Page 69: Disposal And Recycling Information
To minimize pollution and ensure utmost protection of the global environment, please recycle. For more information on the Waste from Electrical and Electronics Equipment (WEEE) regulations, visit www.acer-group.com/public/Sustainability/ sustainability01.htm Mercury advisory For projectors or electronic products containing an LCD/CRT monitor or display:... -
Page 70: Taking Care Of Your Smartphone
Taking care of your smartphone 1. DO take care not to scratch the screen of your smartphone. Keep the screen clean. When working with your smart- phone, use your finger or fingernail. Never use an actual pen or pencil or other sharp object on the screen surface. 2. -
Page 71: Safety Regulations
Safety regulations LCD pixel statement The LCD unit is produced with high-precision manufacturing techniques. Nevertheless, some pixels may occasionally misfire or appear as black or red dots. This has no effect on the recorded image and does not constitute a malfunction. FCC regulations This mobile phone complies with part 15 of the FCC Rules. - Page 72 • Consult the dealer or an experienced radio/TV technician for help. Changes or modifications not expressly approved by the party responsible for compliance could void the user's authority to operate the equipment. The antenna(s) used for this transmitter must not be co- located or operating in conjunction with any other antenna or transmitter.
- Page 73 Important: Body-worn measurements differ among phone models, depending upon available enhancements and FCC requirements. While there may be differences between the SAR levels of various phones and at various positions, they all meet the government requirements. The FCC has granted an Equipment Authorization for this model phone with all reported SAR levels evaluated as in compliance with the FCC RF exposure guidelines.
- Page 74 Lithium-ion battery warning ATTENZIONE! Rischio di esplosione della batteria se sostituita in modo errato. Sostituire la batteria con un una di tipo uguale o equivalente consigliata dalla fabbrica. Non disperdere le batterie nell’ambiente. VORSICHT! Explosionsgefahr bei unsachgemäßen Austausch der Batterie. Ersatz nur durch denselben oder einem vom Hersteller empfohlenem ähnlichen Typ.
- Page 75 .....24 battery international numbers ......15 charging ....... 62 information ......13 LED indicators Bluetooth ....... 41 connections ..46 managing your calandar ..... 49 browsing the internet .......31 MMS messages ......48 modem sharing ......24 call history calls ....18 onscreen keyboard ......
Need help?
Do you have a question about the DME110 and is the answer not in the manual?
Questions and answers