Table of Contents
Advertisement
Advertisement
Table of Contents

Subscribe to Our Youtube Channel
Related Manuals for Valley-Dynamo Jet-Pong Coin JP100

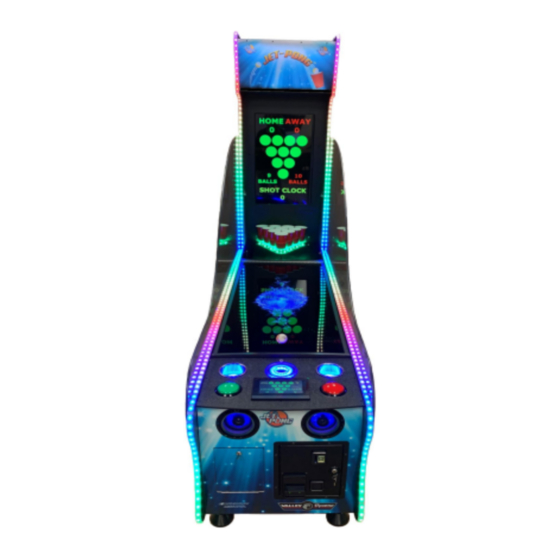
Summary of Contents for Valley-Dynamo Jet-Pong Coin JP100
- Page 2 Jet-Pong Coin JP100 User’s Manual Preface...
- Page 3 All rights reserved. No Part of this work covered by the copyright hereon may be reproduced or used in any form or by any means—graphic, electronic, or mechanical, including photocopying, recording, taping, music, video, software or information storage and retrieval systems without express written permission of Valley-Dynamo and Aerr Technologies.
-
Page 4: Table Of Contents
Jet-Pong Coin JP100 User’s Manual Table of Contents Table of Contents Section 1 - Warranty ..............................1 Section 2 - Declaration of Conformity ........................3 Section 3 – Warnings & Notices ..........................5 Section 4 – Quick Set-Up ............................7 Quick Set-Up: ..............................7 Test Run: ................................ -
Page 5: Section 1 - Warranty
One year on Jet-Pong tables. 90 days on Replacement Parts. WARRANTY SERVICE Valley-Dynamo will, at its sole option, repair, upgrade or replace this product in the event of any defect in materials or workmanship during the warranty period. This shall be Valley-Dynamo's sole obligation, and the customer's sole remedy, for any warranty claim. - Page 6 9) Damage from fire, flood, lightning or other acts of nature. EXCLUSION OF DAMAGES Valley-Dynamo’s sole obligation and liability under this warranty is limited to the repair or replacement of a defective product at our option. Valley-Dynamo shall not, in any event, be liable for any incidental or consequential damages resulting from interruption of service, loss of business or revenue, or for liability in tort relating to this product or resulting from its use or possession.
-
Page 7: Section 2 - Declaration Of Conformity
Jet-Pong Coin JP100 User’s Manual Declaration of Conformity Section 2 - Declaration of Conformity Jet-Pong is available with CE certification to be compliant with CE directives and standards. Many products require CE marking before they can be sold in the EU. CE marking indicates that a product has been assessed by the manufacturer and deemed to meet EU safety, health and environmental protection requirements. -
Page 8: Section 3 - Warnings & Notices
Do not use the power cord if damaged. Information in this manual is subject to change without notice. Valley-Dynamo reserves the right to make improvements in the equipment function, design or components as engineering or manufacturing methods may warrant. - Page 9 Jet-Pong can be used by children aged 8 years and above and persons with reduced physical, sensory or mental capabilities or lack of experience and knowledge with proper supervision and instruction. Children under the age of 8 shall not play with the appliance. ...
-
Page 10: Section 4 - Quick Set-Up
Section 4 – Quick Set-Up Quick Set-Up: Note: This section can be performed by children aged 8 years and above and persons with reduced physical, sensory or mental capabilities or lack of experience and knowledge with proper supervision and instruction. 1) Remove all packaging. - Page 11 4) Remove the Triangle Cup Tray Assembly, Black Ball Return shelf, Power cord and Ball Shield from the inside of the cabinet and set aside. 5) Mount the Back Box Marquee on the rear of the cabinet, using (6) 3/8” x 2 ½” Steel Dowels, (2) Mending Plates, and (4) 3/8-16 x ¾”...
- Page 12 6) Connect the 12Vdc Power and HDMI Cable into the back of the monitor. 7) Connect the LED Strips to the Led Strip Cables connected to the SP901E Video Controller. Make sure they run through the black raceway and then close the tray covers. 8) Place the black Ball Return shelf in place so that the grey ribbon cable and 12Vdc cable (black &...
- Page 13 CAUTION: Place the excess ribbon and 12 Vdc cable down the black plastic pipe so it doesn’t interfere with the balls. 10) Insert the (10) Red Solo Cups into the Cup Holders without breaking or loosening the Cup Holder Fingers. The Cup Holder fingers reduce the amount of time a ball spins inside the cup. 11) Connect the 12Vdc Back Box Marquee power supply cable at the top back and push the connector into the top hole.
- Page 14 12) Connect the 110Vac power cable into the rear of the cabinet and into a wall plug rated for at least 5 amps. Notice the fuse holder beside the On/Off switch. CAUTION: For locations using 220V, the (2) Power Supplies inside the cabinet must be switched to 220V, before making the wall connection.
- Page 15 16) Once everything is working install the Ball Shield by removing the Protective Film and inserting it into the rear slot near the cups. 17) Remove the Protective Coating from the Side Shields. Using a 4mm or 5/32” hex Allen-key install the Side Shields using the screws provided in the Cash Box.
-
Page 16: Test Run
Set-up Parts Listing Quantity per Part Number Description Game NI20300890 1/2-13 LEG LEVELER HEX NUT JP-20510030 16 OZ RED SOLO CUP - STANDARD DISPOSABLE JP-21710170 40mm PING PONG BALL 20515140 C/T LEG LEVELER NI870007405 CORNER CASTING BOLT 3/8-16 x 3/4" JP-20100130 DEC HEAD BOLT, 1/4-20 X .984 JP-20600060... - Page 17 4) Grab the ball in the air when it launches. 5) Throw the ball into one of the Red Solo cups lit up by the Green LEDs. 6) The Green LEDs under this cup should go out, cheering should occur and the Video Display should show a message for example GOAL!!! The Video Display and the HMI Touch Screen will then display which cup was made.
- Page 18 7) Repeat steps 3-6 above for the Red Pushbutton. 8) Repeat above until the game is finished. Each player gets 10 balls. 15 | P a g e...
-
Page 20: Section 5 - Rules Of Play
Jet-Pong Coin JP100 User’s Manual Rules of Play Section 5 – Rules of Play Jet-Pong Regular Play: 1) Both Players (Home Green & Away Red) stand at the front of the Jet-Pong table to pick and throw their balls. 2) Players can throw overhand or underhand and can bounce the ball from any surface. -
Page 22: Section 6 - Routine Maintenance
Cup Finger Inspection: Inspect Cup Fingers for damage or loss. Repair where needed. You can order more from Valley-Dynamo if required. The purpose of these fingers is to reduce the amount of spinning when the ball enters the cup thus speeding up the game. - Page 23 Ball Return Inspection: CAUTION: Please remove power by turning the ON/OFF switch at the rear to the OFF position and unplug the power cord before lifting the Table Lid unless you absolutely must have power on for viewing balls in “Free Play” or “Auto Cycle”. Properly insert the Prop Stick (*CE tables only) when lifting the table Lid.
- Page 24 Pushbutton Inspection: CAUTION: This procedure requires the power to be on and the lid closed during inspection. The Pushbutton lights and switches on the Control Panel Console can be tested using the Troubleshooting screen on the HMI Touch Screen. Refer to Section 9 – Troubleshooting for details. Open the Ticket Dispenser door and press the Service Button to make sure the HMI Touch Screen changes accordingly.
- Page 25 CAUTION: This procedure requires the power to be on and the lid opened during inspection. Make sure there is nothing restricting the Table Lid Supports. Make sure all lid support screws are secure. If the table lid is having trouble staying open then please order new supports from Valley-Dynamo. Blower Fan Inspection:...
- Page 26 CAUTION: This procedure requires the power to be on and the lid closed during inspection. Using the Troubleshooting screen on the HMI Touch Screen, turn on and off the Blower Fan manually to make sure it functions correctly. Make sure the capacitor on the 2 pin connector is secure. Refer to Section 9 – Troubleshooting for details.
-
Page 28: Section 7 - Power Up, Configuration & Operation
Section 7 – Power Up, Configuration & Operation Power Up: CAUTION: Lid shall be kept closed during power up. Turn power on the game by pressing the toggle switch at the rear of the table. The LED indicator on the toggle switch should turn on. -
Page 29: Configuration
Configuration: The HMI Touch Screen allows the owner to configure the game using a “Configuration” screen. Open the Ticket Dispenser Door and press the “Service” button. The “Configuration” screen will display like this: 26 | P a g e... - Page 30 Hour/Day/Month/Year: This allows you to adjust these for your time zone. Simply touch the number you want to change and use the pop-up keypad to enter the new number and then press Enter. You will notice in the top left a Minimum and Maximum range for each number.
- Page 31 Last Shot: This is the amount of time allowed on a player’s very last shot (ball #10). This gets added to the Shot Clock time on the HMI and rear Scoreboard Video Display. Green Tickets Enabled: Pressing this button will turn green and will enable the left Green Ticket dispenser and all of its associated HMI screens.
- Page 32 # of Credits for 1 Person to Play: You can enter a number from 1-20 in this field by pressing the field and entering in your number. If you were to enter 7 then both players would each need to insert 7 coins for a total of 14 coins.
- Page 33 Install the EA9 “C-More” software from the Valley-Dynamo website. www.valley-dynamoparts.com Set the ethernet port on your laptop to 192. 168. 1.50 with a subnet mask of 255.255.255.0. Download the EA9 program called “Jet-Pong EA9 Program” from the Valley-Dynamo website. Double click this program once it’s downloaded. 30 |...
- Page 34 Place your .bmp ads on Screens 21 – 28: Then press “Send” Then click Ethernet. Then press Browse. Select 192.168.1.207. Press Transfer. mTV-100 Procedure: Turn the power off on the game. Remove the USB stick from the mTV-100. Install it in your computer’s USB port. Place your photos into each of these 8 folders.
-
Page 35: Operation
Remove the USB stick from the D15. Install it in your computer’s USB port. Load the videos .mP4 files and .jpg images onto the USB Stick. Remove the USB Stick from the computer and install it back into the USB port on the D15. - Page 36 Any credits paid beyond the required amount get added to the Extra Credits field. The Green player presses the flashing Green Pushbutton to start the game. If someone wishes to play by themselves they would simply insert the number of credits required and then press the flashing Green pushbutton to get started.
- Page 37 The following screen displays on the rear Video Display. The SHOT CLOCK will time down. 4) The Green player grabs the ball that is floating in the air after it exits the Ball Exhaust Chute and throws the ball overhand or underhand into one of the cups lit up by the Green LEDs. They can bounce the ball off any surface if they wish.
- Page 38 The rear Video Display will then show a similar screen to the HMI indicating what cups have been made, number of balls left and the score. 6) The Red player can now press the flashing Red pushbutton and the cycle repeats until both players have thrown 10 balls each.
- Page 39 If ticket dispensers are empty or jammed a message screen like this will display: 10) The following HMI and rear Video Display screen will appear once all of the tickets have dispensed: 36 | P a g e...
- Page 40 11) After a few seconds the rear Video Display will display advertising. Refer to the “Configuration” section on previous pages for more details on how to load your own ads. 12) To attract customers LED Displays on the table lid provide video animations and more advertising. Refer to “Configuration”...
- Page 41 Also the T-Molding LED lights will light up in various colors and strobe if configured to do so. See “Configuration” section on previous pages for more details on how to change this. 38 | P a g e...
-
Page 42: Section 8 - Electrical Drawings & Replacement Parts List
Jet-Pong Coin JP100 User’s Manual Electrical Drawings & Replacement Parts List Section 8 – Electrical Drawings & Replacement Parts List Electrical Drawings: The purpose of including electrical drawings is to assist you with identifying each of the replacement components and also for troubleshooting in the next section 9. Drawings ending with E relate to electrical wiring and H relate to wire harnesses. - Page 43 40 | P a g e...
- Page 44 41 | P a g e...
- Page 45 42 | P a g e...
- Page 46 43 | P a g e...
- Page 47 44 | P a g e...
- Page 48 45 | P a g e...
- Page 49 46 | P a g e...
- Page 50 47 | P a g e...
- Page 51 48 | P a g e...
- Page 52 49 | P a g e...
- Page 53 50 | P a g e...
- Page 54 51 | P a g e...
- Page 55 52 | P a g e...
- Page 56 53 | P a g e...
- Page 57 54 | P a g e...
- Page 58 55 | P a g e...
- Page 59 56 | P a g e...
- Page 60 57 | P a g e...
- Page 61 58 | P a g e...
- Page 62 59 | P a g e...
- Page 63 60 | P a g e...
- Page 64 61 | P a g e...
-
Page 65: Replacement Parts List
Replacement Parts List: The following is a Replacement Parts List. Please use the Valley-Dynamo part numbers on this list when ordering from our parts department: www.valley-dynamoparts.com. 62 | P a g e... -
Page 66: Section 9 - Troubleshooting
Jet-Pong Coin JP100 User’s Manual Troubleshooting Section 9 – Troubleshooting CAUTION: Some of these troubleshooting procedures will require power on the table while the lid is open. Do not touch any live exposed screw terminals, connections, etc. that are powered. - Page 67 Cup Sensors: CAUTION: This procedure requires the power to be on and the lid closed. The Triangle Cup Assembly circuit board comes with 2 sets of sensors on each cup. Both sensors are used to detect that a ball has landed in the cup. If one sensor fails it will indicate in green “On”. With no balls entering the cups all of these sensors S1A, S1B to S10A, S10B should indicate red “Off”.
- Page 68 Ticket Pulse: CAUTION: This procedure requires the power to be on and the lid closed. To test your ticket dispenser you can enter a number from 0-999 under the “Ticket Pulse” light. Then press “Dispense” to turn the button green. If you press “Dispense” again it will stop dispensing and return to red. If you leave the “Dispense”...
- Page 69 Test Red Cups: CAUTION: This procedure requires the power to be on and the lid closed. The Triangle Cup Assembly circuit board also has 2 sets of Red LEDs. If 1 set burns out you still have another Red set as a back-up. To make sure all Red LEDs are working you press the “Test Red Cups” button. To turn these LEDs off you simply press the button again.
- Page 70 Test Sol1 Retract Cylinder: CAUTION: This procedure requires the power to be on and the lid opened. To test the 1 electric solenoid cylinder that the balls see first (the one holding back many balls under the table lid) you press “Test Sol1 Retract Cylinder”. NOTE: To shut off or extend the solenoid cylinder you simply press the button again or let it time out.
- Page 71 Test Video 3: CAUTION: This procedure requires the power to be on and the lid closed. To test Video 3 on the rear Video Display press “Test Video 3”. You will see the 3rd Video (MP4 file in Folder 03 stored on the USB stick) get played on the rear Video Display complete with music.
-
Page 72: Troubleshooting Symptoms & Related Drawings
Return to Main Screen: CAUTION: This procedure requires the power to be on and the lid closed. To return to the Main Screen simply press the “Next Screen” button to get to the “Configuration” screen and then press “Return to Main Screen”. Troubleshooting Symptoms &... - Page 73 Symptom #2: Rear Video Display Faulty CAUTION: This procedure requires the power to be on and the lid opened. When lifting the lid attach the Prop Stick as a safety measure. (*CE Tables only) 1) Check the 12 Vdc cord that plugs into the left side of the Video Display. Check the other end of this cord to make sure it is plugged in properly.
- Page 74 4) Lift the Table Lid. Insert the Prop Stick. Make sure the ribbon cable connector is secure on the PLC Expansion board. 5) Check the 12Vdc connector on the PLC Expansion board to make sure it is secure and that there is 12Vdc power on it.
- Page 75 3) Lift the Black Cable Tray cover mounted on the inside wall of the rear of the table (one on each side). Check to make sure all LED strip connectors are plugged in and secure. 4) If the above does not work then replace the defective LED stripping in the T-Molding. 5) If the above does not work then replace the defective controller SP901E.
- Page 76 Symptom #13: Credit Counter Faulty CAUTION: This procedure requires the power to be on and the lid opened. When lifting the lid attach the Prop Stick as a safety measure. (*CE Tables only) 1) Open the Coin Mech Door. Check the wiring connections and harness from the mechanical counter to the PLC Carrier Board.
- Page 77 Symptom #15: Pushbutton LEDs Faulty CAUTION: This procedure requires the power to be on and the lid opened. When lifting the lid attach the Prop Stick as a safety measure. (*CE Tables only) 1) Make sure 12Vdc output wiring is secure at the rear of the Pushbutton Light. You will need to remove the Control Console by removing the screws around the perimeter of the black plastic.
- Page 78 Symptom #19: Ball Delivery Faulty CAUTION: This procedure requires the power to be on and the lid opened. When lifting the lid attach the Prop Stick as a safety measure. (*CE Tables only) 1) Press the next flashing button to see if a ball arrives. If a ball does not arrive then press the next flashing button while watching the 2 solenoid cylinders to see what the problem is.
- Page 79 Symptom #21: Abnormal Noise Issues CAUTION: This procedure requires the power to be on and the lid opened. When lifting the lid attach the Prop Stick as a safety measure. (*CE Tables only) 1) Open the table lid and listen for the source of the noise. 2) If the source of the noise is the Blower Fan then shut off the power and unplug the power cord.
- Page 80 77 | P a g e...
Need help?
Do you have a question about the Jet-Pong Coin JP100 and is the answer not in the manual?
Questions and answers