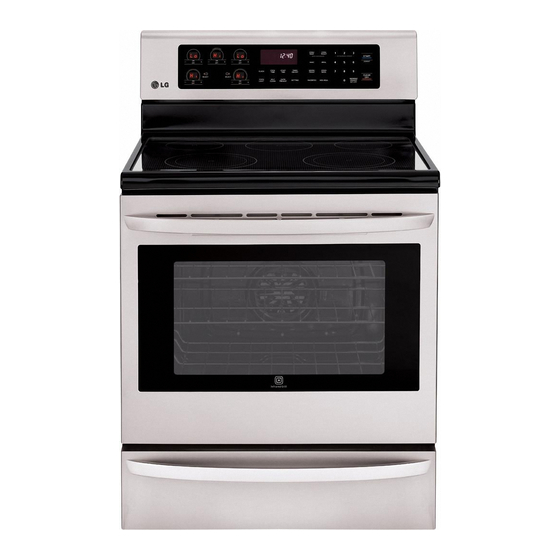
LG LRE3025ST Owner's Manual
Large capacity freestanding electric oven with infrared grill technology
Hide thumbs
Also See for LRE3025ST:
- Owner's manual (89 pages) ,
- Installation manual (13 pages) ,
- Specification (2 pages)

Subscribe to Our Youtube Channel
Related Manuals for LG LRE3025ST


Summary of Contents for LG LRE3025ST
- Page 1 OWNER’S MANUAL ELECTRIC RANGE Please read this owner's manual thoroughly before operating and keep it handy for reference at all times. LRE3025ST Printed on 100% Recycled Paper P/NO : MFL57206007 www.lg.com...
-
Page 2: Table Of Contents
TABLE OF CONTENTS TABLE OF CONTENTS IMPORTANT SAFETY INSTRUCTIONS OVERVIEW Range overview Control panel overview FEATURES Settings Clock Timer on/off Rapid preheat Convection auto conversion Thermostat Language Preheating alarm light Beeper volume Fahrenheit of Celsius Oven light Lockout Start time Cook time USING THE COOKTOP Cooking areas... -
Page 3: Important Safety Instructions
Always contact your service agent or manufac- turer about problems that you do not understand. Download this owner's manual at: http://www.lg.com. This is the safety alert symbol. This symbol alerts you to potential hazards that can result in property damage and/or serious bodily harm or death. -
Page 4: Safety Precautions
IMPORTANT SAFETY INSTRUCTIONS • To check that the anti-tip brackets are properly installed, remove any items on the cook- top. Grasp the top rear edge of the range back guard and carefully attempt to tilt it forward. Verify that the anti-tip devices are engaged. •... -
Page 5: Electrical Safety
CAUTION • DO NOT line the oven walls, racks, bottom, or any other part of the oven with aluminum foil or any other material. Doing so will disrupt heat distribution, pro- duce poor baking results and cause permanent damage to the oven interior (alumi- num foil will melt to the interior surface of the oven). -
Page 6: Pan Placement
IMPORTANT SAFETY INSTRUCTIONS WARNING • Turn the POWER OFF before removing the warming oven drawer. - Failure to do so can result in severe personal injury, death, or electrical shock. PAN PLACEMENT • Do not place food or cookware on the bottom of the oven cavity. Doing so will •... -
Page 7: Child Safety
• • DO NOT use the broiler pan without the grid. DO NOT cover the grid with alu- minum foil. • Do not use plastic to cover food. Use foil or oven resistant lids only. • If the oven is heavily soiled with oil, self clean the oven before using the oven •... - Page 8 IMPORTANT SAFETY INSTRUCTIONS • Children should not be allowed to play with controls or other parts of the ap- pliance. GLASS/CERAMIC COOKING SURFACES Stand to the side of the range when opening the oven door. The hot air and steam that escape can cause burns to hands, face and eyes.
-
Page 9: Safety When Cleaning
- It will scratch the surface. • DO NOT use scrub pads or abrasive cleaning pads. - They may damage your glass cooktop surface. • Cookware with rough or bottoms can mark or scratch the cooktop surface. • Do not slide anything metal or glass across the cooktop. •... -
Page 10: Overview
OVERVIEW OVERVIEW RANGE OVERVIEW Control panel Oven vent Single element Dual element Anti-tip bracket Rating label Accessories for installation Template Anti-tip (2ea) Accessories for cooking Standard rack (2ea) Owner’s manual Installation manual Warming zone element Dual element Automatic oven light switch Self clean latch Standard rack Gasket... -
Page 11: 1 Control Panel Overview
CONTROL PANEL OVERVIEW Cooktop Element Control Dual Elements NOTE Cooktop Element Controls are set up in the same order as the corresponding elements. HS (Hot Surface) Indicator stay on until the surface has cooled to approximately 150˚F/66˚C or when the self clean cycle ends. PF (Power Failure) Indicator The PF indicator will appear in the display if there has been a power interruption to the appliance. -
Page 12: Features
FEATURES FEATURES SETTINGS Use the SETTING button to set Convection Auto Conversion, Thermostat, Language, Preheating Alarm Light, Beeper Volume and to switch temperature scale between Fahrenheit and Celsius. CLOCK The clock must be set to the correct time of the day in order for the automatic oven timing functions to work properly. -
Page 13: 3 Timer On/Off
TIMER ON/OFF The TIMER ON/OFF serves as an extra timer in the kitchen that will sound when the set time has run out. It does not start or stop cooking. The TIMER ON/OFF feature can be used during any of the oven control functions. -
Page 14: 4 Thermostat
FEATURES THERMOSTAT the one it replaced. Use your new oven for a few weeks to become more familiar with it before changing the temperature settings. If after familiarizing yourself with the new oven, and you still think that it is too hot or too cold, you can adjust the thermostat yourself. -
Page 15: 5 Lockout
LOCKOUT The Lockout feature automatically locks the oven door and prevents most oven and cooktop controls from being turned on. It does not disable the clock, timer or the inte- rior oven light. 1. Press and hold the START button for three seconds. 2. -
Page 16: 6 Cook Time
FEATURES COOK TIME (TIMED COOK) The TIMED COOK feature allows you to set the oven to be used with the BAKE, CONVECTION BAKE, CONVECTION ROAST and FAVORITE modes. Setting the TIMED COOK function (example, BAKE at 300 °F for 30 minutes): Make sure that the clock is set to the correct time of day. -
Page 17: Using The Cooktop
USING THE COOKTOP COOKING AREAS nent circles on the glass cooktop surface. For the most ef- Pans should not extend more than 1/2 to 1-inch be- yond the cooking area. When a control is turned on, a glow can be seen through the glass cooktop surface. - Page 18 USING THE COOKTOP To turn on a DUAL element (left and right front elements): The front two elements on the cooktop are dual elements. You are able to adjust the dual elements according to the pot/pan size that you are using. Inner element Outer element 1.
-
Page 19: Using The Proper Cookware
Recommended surface cooking settings Temp. Recommended Use Element 8.5-Hi • Bring liquid to a boil • Start cooking 5.5-8.0 • Hold a rapid boil, frying, deep fat fry • Quickly brown or sear food 3.5-5.0 • Maintain a slow boil Single or •... -
Page 20: Using The Oven
USING THE OVEN USING THE OVEN REMOVING AND REPLACING THE OVEN RACKS CAUTION • Replace oven racks before turning the oven on to prevent burns. • DO NOT cover the racks with aluminum foil, or any other material, or place anything on the bottom of the oven. -
Page 21: Bake
OVEN CONTROLS BAKE BAKE is used to prepare foods such as pastries, breads, casseroles. The oven can be programmed to bake at any temperature from 170°F (77°C) to 550°F (288°C). The default temperature is 350°F (177°C). Setting the BAKE function (example, 375 1. -
Page 22: Convection Roast
USING THE OVEN set rack). • Multiple oven rack cooking may slightly increase cook times for some foods. • when using multiple racks. CONVECTION ROAST The CONVECTION ROAST feature is designed to give op- timum roasting performance. CONVECTION ROAST com- bines cooking with the convection fan to roast meats and poultry. -
Page 23: Broil
BROIL The Broil function uses intense heat from the upper heat- ing element to cook food. BROIL works best for tender cuts Some models may feature a hybrid broiler consisting of an inner broiler that utilizes a carbon heating element which provides instantaneous heat, and a traditional outer broil- ing element. -
Page 24: Broiling Chart
USING THE OVEN Broiling chart Item Size/Thickness Beef Tenderloin/Filet 1" 1 1/2" 2" NY Strip Steak/ 3/4" - 1" Strip loin 1 1/2" Ribeye/Delmonico 3/4" - 1" 1 1/2" Bone-In Steaks 3/4" - 1" 1 1/2" *Speed broil should only be used for small amounts of food that can be easily concentrated to the center of the broiler pan. Speed broil works faster than the regular broil mode, so cook time should be reduced by approximately 20~25%. - Page 25 Broiling chart Item Size/Thickness Beef Skirt Steak 1/2"-3/4" Flank Steak 1" 1 1/2" Hamburgers 3/4" thick Lamb Bone-in Chops 6 - 8 oz., 2 bone Seafood Salmon portion/steak, 3/4" - 1" skin-on 1 1/2" Salmon portion/steak, 3/4" - 1" 1 1/2" 3/4"...
-
Page 26: Kids Meal
USING THE OVEN Broiling Tips Beef • Steaks and chops should always be allowed to rest for allows the heat to distribute evenly through the food and creates a more tender and juicy result. • Consider removing thick pieces of meat from the re- frigerator 30 minutes prior to cooking. -
Page 27: Warm
WARM This function will maintain an oven temperature of 170°F. The WARM function will keep cooked food warm for serv- function may be used without any other cooking op- TIMED BAKE or DELAYED TIMED BAKE. Setting the WARM function: 1. Press the WARM/PROOF button. 2. -
Page 28: Sabbath Mode
WARMING DRAWER SABBATH MODE Sabbath mode is typically used on the Jewish Sabbath and Holidays. When the SABBATH mode is activated, the tivated. In SABBATH mode, all function buttons, except for the CLEAR OFF is inactive. Sb will appear in both the cooktop and oven displays. - Page 29 Warming Drawer food/power level recommendations Setting Type of Food • Rolls (Soft) • Empty dinner plates • Gravies Medium • Casseroles Medium Medium • Eggs • Vegetables • Biscuits • Rolls( hard ) • Pastries • Roasts (Beef, Pork, Lamb) •...
-
Page 30: Care And Cleaning
CARE AND CLEANING CARE AND CLEANING CLEANING THE GLASS/CERAMIC COOKTOP CAUTION • DO NOT use scrub pads or abrasive cleaning pads. They may damage your cooktop surface. • For your safety, wear an oven mitt or potholder while cleaning the hot cooking surface. Use Ceramic Cooktop Cleaner on the glass cooktop. -
Page 31: Self Clean
IMPORTANT: If any sugar or food containing sugar (preserves, ketchup, tomato sauce, jellies, fudge, candy, syrups, chocolate,etc.), plastic or foil melts on the cooktop, remove the molten material IMMEDIATELY with a metal razor scraper (it will not damage the decorated cooking surface) while the cooking surface is still hot to avoid the risk of damage to the glass-ceramic surface. - Page 32 CARE AND CLEANING During the self clean cycle, the cooktop elements and warming drawer cannot be used. NOTE • Remove oven racks and accessories before starting the self clean cycle. • If oven racks are left in the oven cavity during the self clean cycle, they will discolor and become dif- •...
- Page 33 During Self Clean • The self clean cycle uses extremely hot temperatures to clean the oven cavity. While running the Self Clean cycle, you may notice smoking or an odor. This is nor- mal; especially if the oven is heavily soiled. •...
-
Page 34: Cleaning The Exterior
CARE AND CLEANING CLEANING THE EXTERIOR Painted and Decorative Trim For general cleaning, use a cloth with hot soapy water. For tergent directly onto the soil. Leave it on for 30 to 60 min- utes. Rinse with a damp cloth and dry. Do not use abrasive leaners. -
Page 35: Removing And Replacing The Oven Door And Warming Drawer
REMOVING AND REPLACING THE OVEN DOOR AND WARMING DRAWER CAUTION • Be careful when removing and lifting the door. • DO NOT lift the door by the handle. • DO NOT hit the glass with pots, pans, or any other object. - Page 36 CARE AND CLEANING Removing the Warming Drawer WARNING Disconnect the electrical power to the range at the main fuse or circuit breaker panel. Failure to do so can result in severe personal injury, death, or electri- cal shock. Most cleaning can be done with the drawer in place; how- ever, the drawer may be removed if further cleaning is needed.
-
Page 37: Faqs
FAQs What types of cookware are recommended to use with my cook top? • • Only use heavy- gauge pans. • The pan size must match the amount of food to be pre- pared and the size of the surface element. •... -
Page 38: Troubleshooting
TROUBLESHOOTING BEFORE REQUESTING SERVICE Problem • Range is not level. Poor installation. Place an oven rack in the center of the oven. Place a level on the oven rack. Adjust leveling legs at the base of the range until the oven rack is level. •... - Page 39 Problem • Oven will not work. Plug is not completely inserted in the electrical outlet. Make sure that the electrical plug is plugged into a live, properly grounded outlet. • A fuse in your home may be blown or the circuit breaker tripped. Replace the fuse or reset the circuit breaker.
- Page 40 TROUBLESHOOTING Problem • Oven temperature too hot or Oven Sensor needs to be adjusted. Refer to the "Using the oven" section. too cold. • Scratches or abrasions on Coarse particles such as salt or sand between cooktop and utensils can cause scratches. cooktop surface.
- Page 41 Problem • LOCKED appears in the The oven door is locked because the temperature inside the oven is too hot. Press the display. CLEAR OFF button. Allow the oven to cool • Burning or oily odor emitting This is normal in a new oven and will lessen in time. To speed the process, set a self from the vent.
-
Page 42: Warranty
WARRANTY WARRANTY (USA) LG Electronics Inc. will repair or replace your product, at LG’s option, if it proves to be defective in material or workmanship WARRANTY PERIOD One Year From the date of the original purchase. THIS WARRANTY IS IN LIEU OF ANY OTHER WARRANTIES, EXPRESS OR IMPLIED, INCLUDING WITHOUT LIMITATION, ANY WARRANTY OF MERCHANTABILITY OR FITNESS FOR A PARTICULAR PURPOSE. - Page 43 MEMO...
- Page 44 MEMO...
- Page 45 LG Customer Information Center For inquires or comments, visit www.lg.com or call; 1-800-243-0000 USA, Consumer User 1-888-865-3026 USA, Commercial User 1-888-542-2623 CANADA Register your product Online! www.lg.com...
Need help?
Do you have a question about the LRE3025ST and is the answer not in the manual?
Questions and answers