Advertisement
Advertisement
Table of Contents

Related Manuals for Nextech QM3842


Summary of Contents for Nextech QM3842
- Page 1 QM3842 Digital Wireless Reversing Camera Kit Instructional Manual...
-
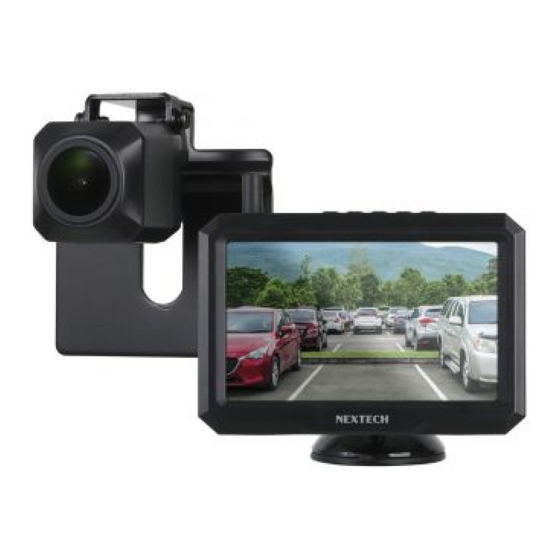
Page 2: Product Features
PRODUCT FEATURES: On-Screen Backup Guideline 2.4GHz Digital Wireless Technology 12/24VDC Operation 100m Line Of Sight Transmission Range IP68 Waterproof Camera Easy to install. -
Page 3: Specifications
SPECIFICATIONS: Specifications: Monitor Specifications: Camera LCD Size: 5” IP Rating: IP68, Waterproof Resolution: 800 x 480 pixels Resolution: 550 TV Line Brightness: 500cd/m Minimum Illumination: 0Lux [IRON] Power Supply: 9-30VDC View angle: 110° Dimensions: 132.5(W) x 89.5(H) x 22.5(D)mm Power Supply: 9-30VDC Dimensions: 27(W) x 25(H) x 25(D)mm... -
Page 4: Product Installation
PRODUCT INSTALLATION: CAMERA INSTALLATION Step 1: Connect the camera cable and camera power cable. Step 2: Find the channel hole of the camera power cord. Look for an opening/drilling near the license plate of the vehicle to insert the connector cable plug of the camera into the vehicle interior. Step 3: Find the positive and negative power supply of the reversing light. - Page 5 PRODUCT INSTALLATION: Step 4: Remove the license plate. Step 5: Align the mounting hole of the camera bracket with the mounting hole of the license plate, then assemble the license plate, and then tighten the screws to fix the license plate. Step 6: Use cable ties to fix the wires.
- Page 6 PRODUCT INSTALLATION: MONITOR INSTALLATION Step 1: Connect the antenna to the wireless monitor. Step 2: Open the locking screw and adjust the monitor to the desired viewing angle, then tighten the locking screw to fix the monitor. Step 3: Clean the area where the suction cup base is to be connected to the windshield or dashboard. Now press the suction cup base onto the windshield or dashboard and move the lock lever to the suction cup base.
- Page 7 OPERATING INSTRUCTIONS: MONITOR CONTROL SETTINGS Reversing guidelines (ON/OFF) Image display (Normal/Mirror) Menu Mode (Brightness/Contrast) Use the buttons to adjust settings. The Menu option will disappear after approx. 3 seconds. Press the button to enter next option or exit. Hold the button down for approx.
- Page 8 OPERATING INSTRUCTIONS: TURNING ON MONITOR After plugging the car charger into the car’s 12-volt power outlet, just start the car to turn on the display. When the camera is not turned on, the display will turn off automatically after 3 seconds, and the display indicator will light up red.
-
Page 9: Troubleshooting
OPERATING INSTRUCTIONS: PAIRING STEPS Step 1: Power on the monitor and camera. Step 2: Press the (M) key for 3 seconds to enter pairing mode. The display will show “pairing” and it will automatically complete the pairing process with the camera. After the pairing is successful, the monitor will display real-time footage from the camera. - Page 10 NOTES:...
- Page 11 NOTES:...
- Page 12 Distributed by: Electus Distribution Pty. Ltd. 320 Victoria Rd, Rydalmere NSW 2116 Australia www.electusdistribution.com.au Made in China...
Need help?
Do you have a question about the QM3842 and is the answer not in the manual?
Questions and answers
How do you mount the monitor camers
To mount the Nextech QM3842 monitor camera:
1. Connect the antenna to the wireless monitor.
2. Open the locking screw, adjust the monitor to the desired angle, then tighten the screw.
3. Clean the surface where the suction cup will attach (windshield or dashboard).
4. Press the suction cup base onto the chosen surface and lock it in place using the lever.
5. Connect the monitor to the car charger.
6. Plug the charger into the car’s 12V socket and route the cable neatly around the edge of the windscreen.
Ensure the monitor does not block the driver's view and follow vehicle safety laws.
This answer is automatically generated