Advertisement
Quick Links
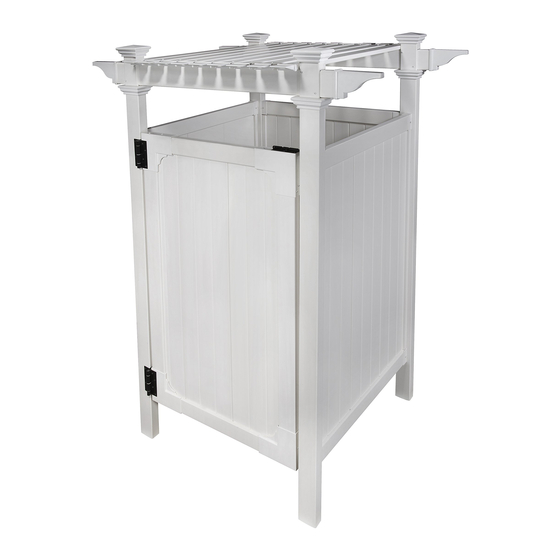
ASSEMBLY INSTRUCTIONS
HAMPTON
OUTDOOR VINYL
SHOWER KIT
(62"W X 47"L X 89"H)
Approximate assembly and installation time
Want to see a video on how to
assemble this product?
WWW.ZIPPITY-OUTDOOR.COM
WWW.ZIPPITY-OUTDOOR.COM
6 HOURS
Scan the QR code
ASSEMBLY
INSTRUCTIONS
ZP19009
ZP19009
1
VER. 051121
Advertisement

Related Manuals for Zippity HAMPTON ZP19009

Summary of Contents for Zippity HAMPTON ZP19009
- Page 1 ASSEMBLY INSTRUCTIONS HAMPTON ASSEMBLY INSTRUCTIONS OUTDOOR VINYL SHOWER KIT ZP19009 (62”W X 47"L X 89”H) 6 HOURS Approximate assembly and installation time Want to see a video on how to assemble this product? Scan the QR code WWW.ZIPPITY-OUTDOOR.COM WWW.ZIPPITY-OUTDOOR.COM VER. 051121...
- Page 2 If you experience any further trouble with your product, please contact our customer service department. parts.nychbrands.com support@zippity-outdoor.com 704-892-5222 877-234-6196 Customer service agents are available to take calls weekdays from 9am- 5pm EST. If you call outside of business hours, please leave a voicemail.
- Page 3 ZP19009 ASSEMBLY INSTRUCTIONS 37 in 1 in 62 1/4 in 46 1/2 in 1/2 in 1/2 in 35 in 35 in 42 in 39 in WWW.ZIPPITY-OUTDOOR.COM...
- Page 4 3/4" Self-Drilling Stainless Steel Screw (80) Privacy Horizontal Board (11) U-Channel (6) Beam (2) Rail (6) ½" x 12" x 563/8" 1½" x 4½" x 48" 1½" x 3½" x 347/8" 7/8" x 1½" x 53" Vinyl Weld Glue WWW.ZIPPITY-OUTDOOR.COM...
- Page 5 1½" x 3½" x 53" Door Brace (1) Hinge (2) Steel Screws (1) NOT INCLUDED WITH PURCHASE Sold Separately Sold Separately (ZP19011) (ZP19012) Zippity 1/4" x 3" 1/4" x 4" Hex Zippity Surface Post Extension Concrete Wedge Head Bolt w/Nut 80 lb Concrete...
- Page 6 4 posts. The post mount will be secured in the next step. extensions will be secured in the next step. Note: Surface mounts sold separately Note: Post extensions sold separately Preview Preview ZP19011 ZP19012 WWW.ZIPPITY-OUTDOOR.COM...
- Page 7 B and post D. Align the brackets with the pre-drilled holes in the sides of these posts and secure the brackets with (16) 3/4" self-drilling stainless steel screws. Preview WWW.ZIPPITY-OUTDOOR.COM...
- Page 8 U-channel. STEP 4.2 Install the U-channels between the brackets on the remaining 3 posts in the same manner as step 4.1. Post B and post D will each have (2) U-channels on each post. WWW.ZIPPITY-OUTDOOR.COM...
- Page 9 Angling the board, insert it into the U-channel as shown. Insert (1) privacy board on the other end of the rail as shown. Slide (1) privacy board down the middle of the boards vertically as shown. Preview WWW.ZIPPITY-OUTDOOR.COM...
- Page 10 Preview STEP 5.4 Orient post C and post D as shown below. Repeat steps 5.1 - 5.3 for these posts to create the second shower wall. Top View Preview WWW.ZIPPITY-OUTDOOR.COM...
- Page 11 Insert (1) privacy board into the bottom rail. Angling the board, insert it into the U-channel as shown. Insert (1) privacy board on the other end of the rail as shown. Slide (1) privacy board down the middle of the boards vertically as shown. Preview WWW.ZIPPITY-OUTDOOR.COM...
- Page 12 Preview INSTALL BEAMS AND TRIM PIECES STEP 7: STEP 7.1 Slide (4) Post Trim Caps over the top of the posts. Slide the trim caps until they are just below the routed holes in the posts as shown. Preview WWW.ZIPPITY-OUTDOOR.COM...
- Page 13 STEP 7.3 Apply a small amount of Vinyl Glue to the inside rim of the Decorative End Caps (F). Attach the decorative end caps to the ends of the beams. Pressure fit (4) Post Caps over the post. Preview WWW.ZIPPITY-OUTDOOR.COM...
- Page 14 Note: If your concrete is not level, insert galvanized steel washers under the lower side of the surface mount until it is level. Next, secure the surface mounts with wedge anchors. A hammer drill will be needed for this step. WWW.ZIPPITY-OUTDOOR.COM...
- Page 15 C as shown. The top of the privacy strip should be roughly 11/2" below the horizontal rail. Drive (6) 11/4" white self-drilling stainless steel screws through the pre-drilled holes in the privacy strip. Repeat this process for post A. Preview WWW.ZIPPITY-OUTDOOR.COM...
- Page 16 Insert (1) privacy board into the vertical door rail down into the groove of the door horizontal rail. Insert the Privacy Board-Narrow into the opposite vertical door rail. Slide the final privacy board between the two boards as shown. Preview WWW.ZIPPITY-OUTDOOR.COM...
- Page 17 Ensure that the door is square as shown below. Screw the brace into place using the (4) screws packaged with the brace. Top of door Preview Hinge side (no screws) Note: Ensure measurements 1 and 2 are equal WWW.ZIPPITY-OUTDOOR.COM...
- Page 18 Secure the hinges to the outside of post A with (8) 11/4" black self- drilling stainless steel screws. Open the door and secure (16) 11/4" black self-drilling stainless steel screws through the pre-drilled holes on the inside of the hinges. Preview WWW.ZIPPITY-OUTDOOR.COM...
- Page 19 Shade Slat (H). Place the screws in the shade slat on the top of the beams and fasten them into the pre-drilled holes on top of the beams. Repeat this process with the remaining shade slats. Preview WWW.ZIPPITY-OUTDOOR.COM...
- Page 20 ZP19009 ASSEMBLY INSTRUCTIONS 6935 Reames Rd. Ste. K. Charlotte, NC 28216 support@zippity-outdoor.com 704-892-5222 877-234-6196 WWW.ZIPPITY-OUTDOOR.COM WWW.ZIPPITY-OUTDOOR.COM...
Need help?
Do you have a question about the HAMPTON ZP19009 and is the answer not in the manual?
Questions and answers
Can I put the hinges on the opposite side to have the door open the opposite direction as long as I put the brace on the opposite side?
Yes, the hinges on the Zippity HAMPTON ZP19009 can be installed on the opposite side. The instructions indicate to leave screws off both sides of the door frame for future hinge installation, allowing flexibility in hinge placement and door swing direction.
This answer is automatically generated